Connecting to GitLab
If you authorize Appcircle to access your repositories on GitLab, you can select the repository that you want to connect in the next screen.
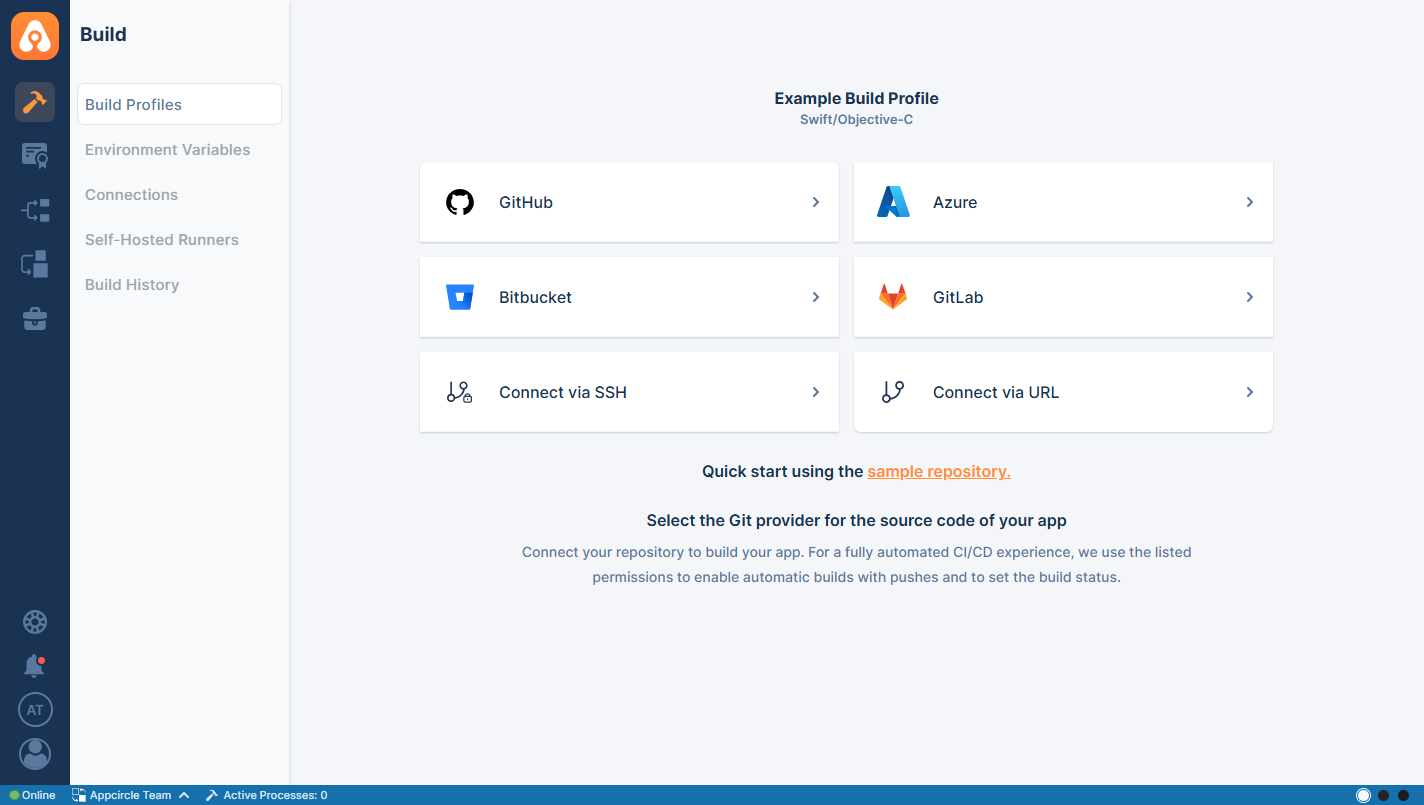
After you click on GitLab, the following screen will appear. This will let you choose between selecting a repository that you are already authorized to do with Appcircle or asking your consent about authorizing more repositories.

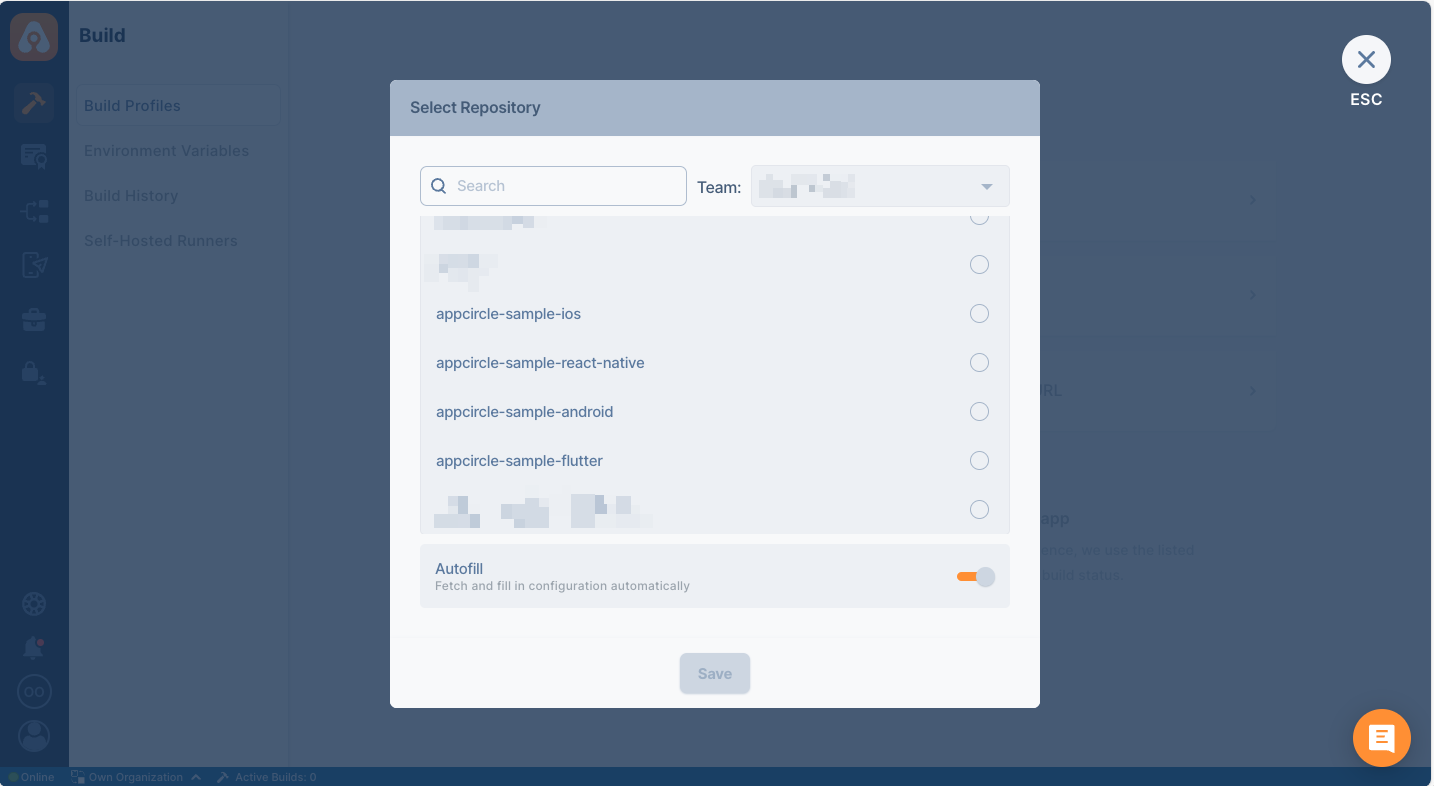
When you successfully authorize your account, the following screen will appear to let you select one for connection:
After the connection is successful, you can view your newly created profile and start building!
Connecting to GitLab Cloud Repository
Appcircle allows connecting to GitLab Cloud repositories using two different authentication methods:
-
OAuth2 Connection
Click Get Repositories from GitLab Cloud (OAuth2) to authorize Appcircle via your GitLab account. You will be redirected to GitLab to approve repository access. -
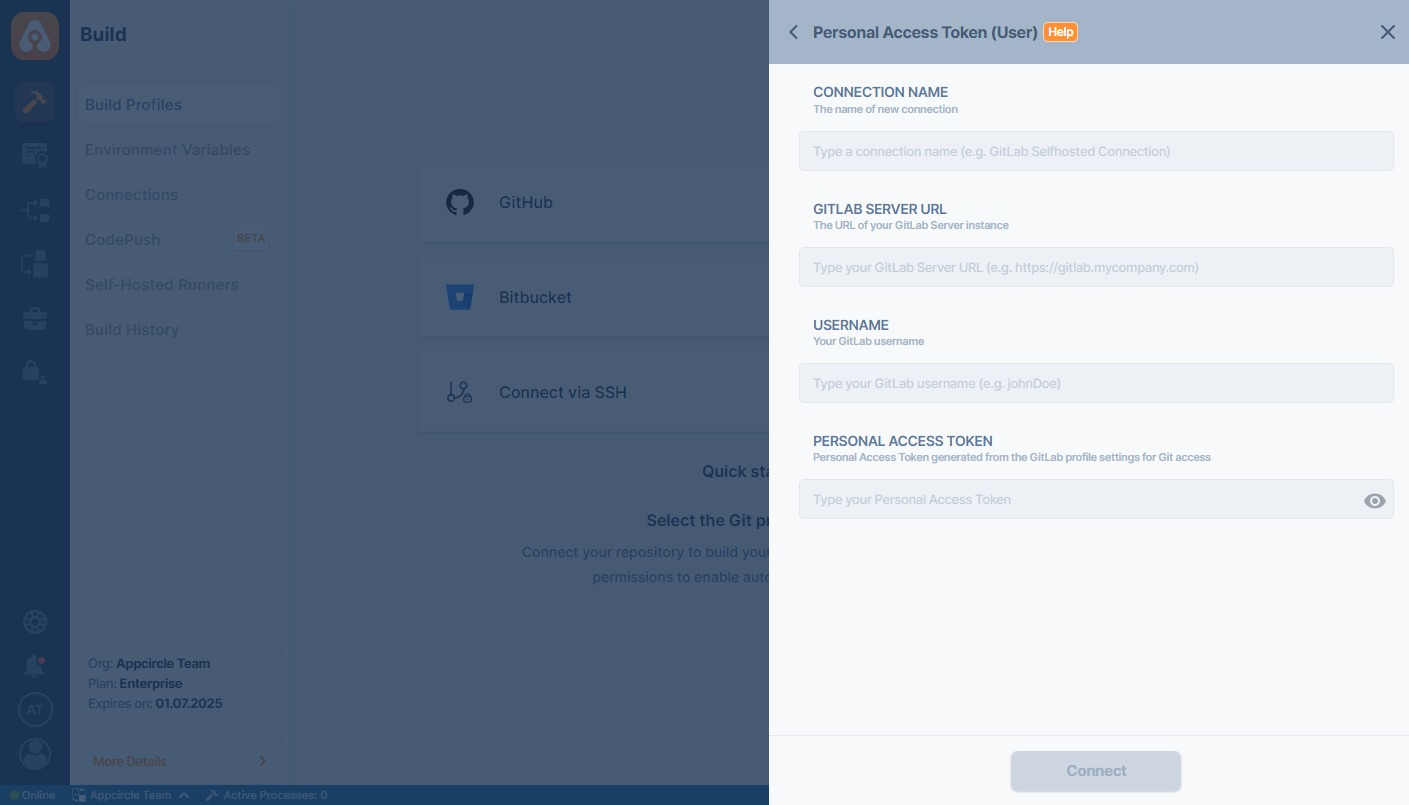
Personal Access Token (User-Level)
Use this method to manually connect using a GitLab Personal Access Token (PAT). You will be required to fill out:- Connection Name
- GitLab Server URL (e.g.,
https://gitlab.com) - Username
- Personal Access Token

OAuth2 and Personal Access Token Permissions for GitLab Integration
The following table details the OAuth permissions required for Appcircle to connect with GitLab. These permissions grant read access to projects, repositories, pull requests, and webhooks, ensuring proper functionality when integrating with GitLab via OAuth2 and Personal Access Token.
| Scope | Description |
|---|---|
| api | Grants complete read and write access to the scoped project API, including the container registry, the dependency proxy, and the package registry. |
Connecting to GitLab Self Hosted Repository
The overall process is similar to a private repository connection through SSH, but Appcircle allows you to directly connect through GitLab Self Hosted URL.
GitLab's version must be 13.12.9 or higher.
First, select GitLab and then Personal Access Token (User-Level) under Create a New Gitlab Server Connection through the menu:
To connect to a self-hosted GitLab instance, use the following fields when selecting the Personal Access Token (User) option:
- Connection Name: A custom name to identify this connection.
- GitLab Server URL: Your GitLab instance URL (e.g.,
https://gitlab.company.com) - Username: The GitLab username of the account owning the token.
- Personal Access Token: The token generated in your GitLab profile for API or repository access.
If you are not sure what those are, contact your system administrator.
Outbound Requests
When you connect to a GitLab repository by creating a profile on Appcircle, Appcircle tries to create webhooks on the GitLab repository.
If your Appcircle server has a local IP address like 10.10.140.20, you may get an error while connecting to the repository.
To solve this issue, the IP or the Appcircle API subdomain name should be allowed for outbound requests on the GitLab admin panel.
You can follow the steps below to update outbound requests:
- You must get access to the Admin Area of the GitLab server.
- Expand the "Settings" button at the bottom left.
- Click on the "Network" button to access network settings.
- Expand the "Outbound" requests.
- Add the IP address or the
apisubdomain of the Appcircle server.
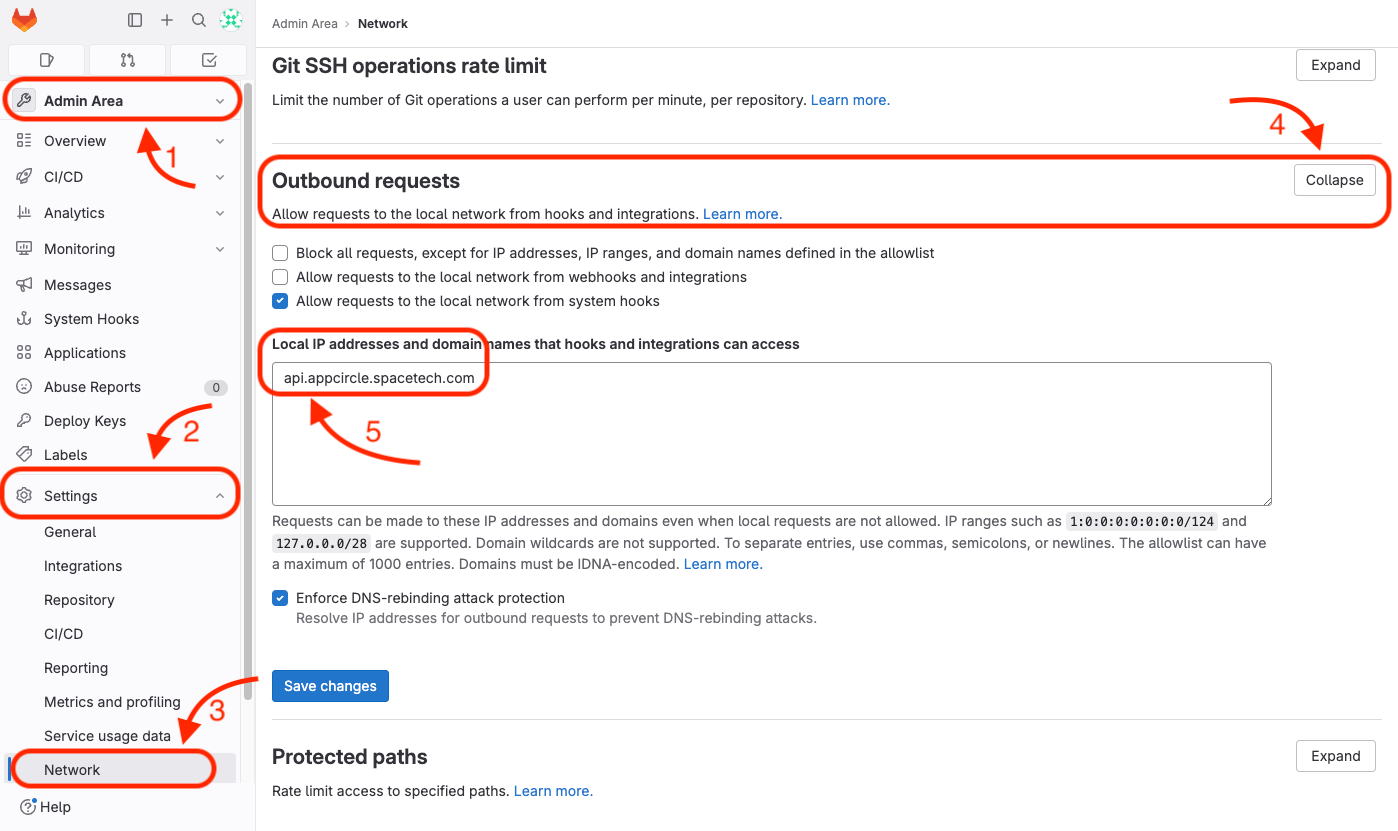
For example, if you are accessing to the Appcircle server dashboard via
my.appcircle.spacetech.com
then, for default server configuration, the api domain should be
api.appcircle.spacetech.com
For Appcircle to connect to the Self Hosted GitLab Instance, your connection must be reachable over the network.
Is your self-hosted GitLab instance under enterprise firewall? Learn which IP addresses and ports Appcircle uses to function under the whitelist documentation:
Accessing Repositories in Internal Networks (Firewalls)
Token Creation
Personal Access Token from user works to connect your repository through Appcircle. That being said, Personal Access Token is used to authorize every repository the user has access to.
Check Token
You can follow the steps below to check if your token is valid.
- Open the terminal and issue the following command
curl "http://YOUR_GITLAB_HOST/api/v4/projects?private_token=YOUR_TOKEN"
Above command should print out your projects. If you don't see an output, please check your token and GitLab address.
Please also make sure that the output doesn't show any reference to localhost. If you see localhost, you need to configure GitLab and put the correct address of your GitLab instance.
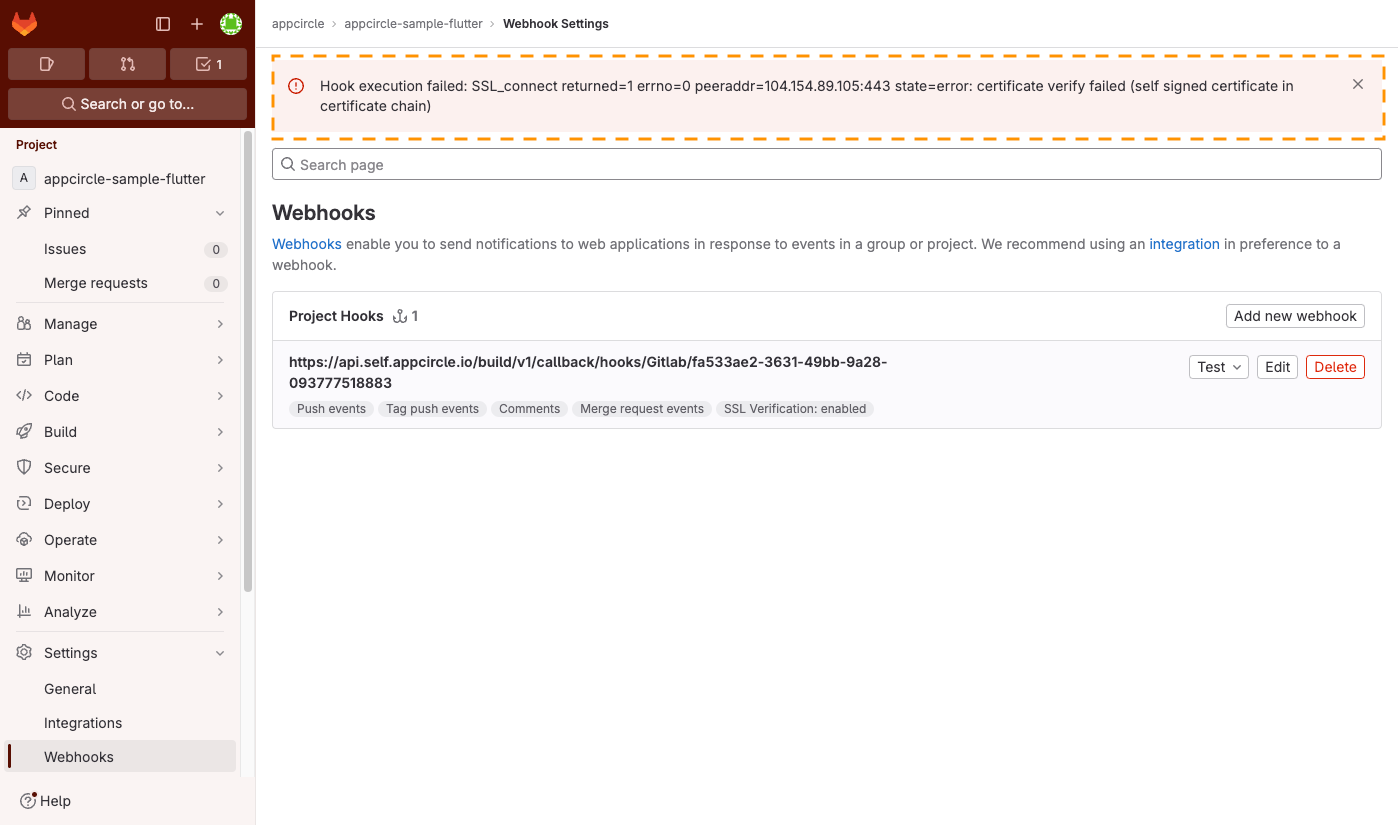
Webhook SSL Verification
When integrating GitLab with your self-hosted Appcircle server using HTTPS, webhooks are sent securely over an encrypted connection (HTTPS). To establish this connection, GitLab must trust the SSL certificate of your Appcircle server. This requires the GitLab to trust the SSL certificate of the Appcircle server.
If you encounter a "self-signed certificate in certificate chain" error during integration, you have two options to resolve the issue:
1. Trust the SSL Certificate (recommended)
To establish a secure connection between your self-hosted Appcircle server and the GitLab server, you need to trust either the SSL certificate of the Appcircle server or the issuer certificate of the server's certificate in your GitLab configuration.
For detailed instructions on how to install custom public certificates and configure trust in GitLab, refer to GitLab's documentation: Install Certificates.
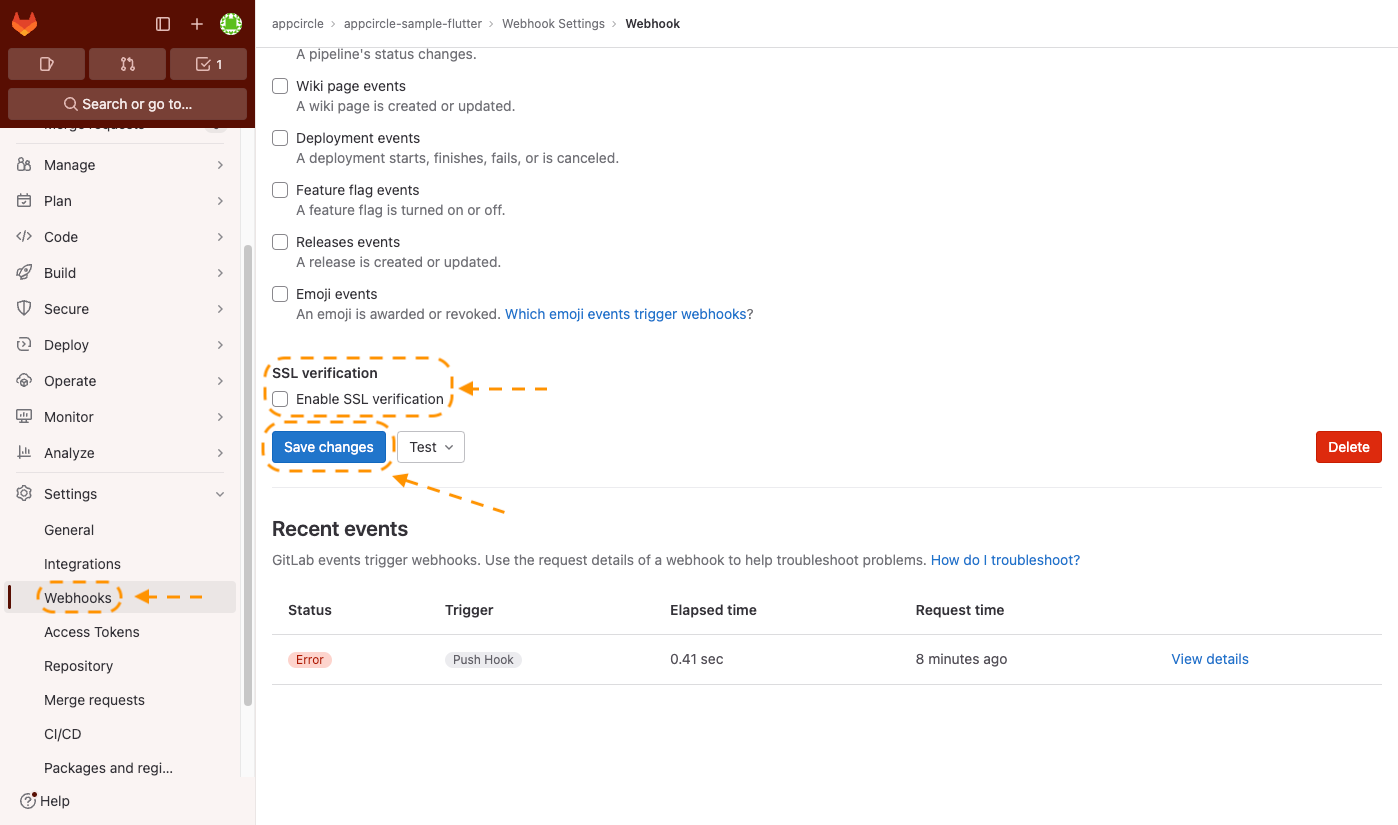
2. Disable the SSL verification (not recommended)
Alternatively, you can choose to disable SSL verification for your AppCircle server's webhook connection in GitLab. While this means that GitLab will not attempt to validate the certificate, it is important to note that webhooks will still be sent over an encrypted HTTPS connection but in an insecure way.
This approach can create security vulnerabilities such as man-in-the-middle (MITM) attacks.
Take the following steps to disable the SSL verification of the webhook:
- Go to the Git repository that you have connected to the Appcircle.
- Open the webhook settings of that Git repository.
- Click on the Edit button next to the webhook.
- Scroll down to see the SSL verification setting.
- Deselect the Enable SSL verification checkbox.
Need help?
Get help from Appcircle's support team, or see how others are using Appcircle by joining our Slack Channel.