Overview
Following sections give you detailed information about system requirements, installation and configuration steps. After following directives successfully, you will get a running Appcircle instance on your infrastructure.
Prerequisites
Below are the hardware and OS requirements for self-hosted Appcircle installation.
Supported Linux Distributions
Self-hosted Appcircle server utilizing Podman, can only be installed on Linux operating system.
- CentOS Stream 8 or later
- RHEL 8 or later
We are working on Ubuntu and Debian support. It will be available soon.
Hardware Requirements
Minimum hardware requirements for self-hosted Appcircle can be:
- 100GB or more free disk space
- 4 or more cores CPU
- 8 or more gigabytes (GB) RAM
☝ These hardware specs are minimum requirements for basic execution and it can be used only for quick evaluation or development purposes.
CPU architecture must be AMD or Intel 64-bit arch (x86_64).
If you have enough RAM and a recent CPU, performance of Appcircle server can be limited by hard drive seek times. So, having a fast drive like a solid state drive (SSD) improves runtime.
Higher numbers will be better especially for increased number of users.
For an enterprise installation, minimum hardware requirements are
- 500GB SSD
- 8 CPU
- 16GB RAM
For production environments, recommended hardware requirements are
- 1TB SSD
- 32 CPU
- 64GB RAM
Swap
Using swap file lets self-hosted Appcircle server exceed the size of available physical memory. On memory pressure system will go on its operations with minimal degradation, when SSD used as hardware.
So, we are recommending swap file usage on Linux.
Its size should be minimum half of the RAM size. For example if you have 64 GB RAM, then you should choose minimum 32 GB swap file size. 64 GB will be better.
Swappiness
The swappiness parameter configures how often your system swaps data out of RAM to the swap space. So, it's an important setting for swap usage and affects performance.
10 is recommended value for swappiness.
📚 For details on how to configure swap and swappiness parameter, follow guide in here.
Podman Requirements
The Appcircle server supports Podman as the container runtime. The minimum required version of Podman is 4.3.0 or higher.
Based on the Appcircle server version, you should use a compatible version of Podman Compose as detailed below.
3.29.6 or later
Podman Compose version must be 1.5.0 or later since older versions have a known issue affecting CMD health checks that breaks container runtime.
3.29.4 or older
Podman Compose version 1.3.0 contains a known issue affecting relative path handling. To avoid this bug, use version 1.2.0 or earlier, or version 1.4.0 or later.
Podman Compose version 1.4.0 and later require Python 3.7 or higher.
RHEL 8 systems may have an older Python version by default. Before installing or upgrading Podman Compose to 1.4.0 or newer, ensure Python 3.7+ is installed and set as the default python3 interpreter.
Enabling the Linger Option
To ensure uninterrupted operation of the Appcircle server's background processes, you must enable the linger option on the host system.
Enabling this option allows the podman containers to persist even after user logouts, ensuring continuous functionality.
Check if the linger option is enabled for the current user with the below command.
loginctl show-user "$USER" --property=Linger
If you see Linger=yes, it means that the option is enabled and you do not need extra configuration.
If the output is Linger=no, this means that the option is disabled and you cannot run the Appcircle server in the background.
If the linger option is set to no, you must enable it to run the Appcircle server in the background.
To enable the linger option, you can use the command below:
loginctl enable-linger
You can run the Appcircle server in the background now.
Overcoming Privileged Port Limitations
When using Podman rootless to install the Appcircle server, please note that privileged ports (ports below 1024) cannot be utilized in rootless mode. By default, the Appcircle server listens on ports 8080 and 8443 for Podman installations.
You must use a port-forwarding tool like socat. This way, you can forward traffic from port 80 to 8080 and from port 443 to 8443.
You should install socat from official repositories and create two systemd services so port forwarding stays even after the server reboot. This can be done by running the following steps:
You must create the socat services below, even if you are using Podman with the root user.
sudo dnf install -y socat
Save the file below as port-redirect-80.service in /etc/systemd/system/ directory.
sudo vi /etc/systemd/system/port-redirect-80.service
[Unit]
Description=Port Redirect Service - Port 80
After=network.target

[Service]
ExecStart=/usr/bin/socat TCP-LISTEN:80,fork,reuseaddr TCP:127.0.0.1:8080

[Install]
WantedBy=multi-user.target
Save the file below as port-redirect-443.service in /etc/systemd/system/ directory.
sudo vi /etc/systemd/system/port-redirect-443.service
[Unit]
Description=Port Redirect Service - Port 443
After=network.target

[Service]
ExecStart=/usr/bin/socat TCP-LISTEN:443,fork,reuseaddr TCP:127.0.0.1:8443

[Install]
WantedBy=multi-user.target
Then, execute the below commands to activate port redirections.
sudo systemctl daemon-reload && \
sudo systemctl enable --now port-redirect-80.service && \
sudo systemctl enable --now port-redirect-443.service
Firewalld Requirements
If you are using Firewalld, you need to open the ports below according to your server configuration.
- If you plan to run the Appcircle server with HTTPS:
sudo firewall-cmd --add-port=80/tcp --permanent
sudo firewall-cmd --add-port=443/tcp --permanent
sudo firewall-cmd --reload
- If you plan to run the Appcircle server with HTTP:
sudo firewall-cmd --add-port=80/tcp --permanent
sudo firewall-cmd --add-port=6379/tcp --permanent
sudo firewall-cmd --reload
To check if the ports are open, you can run the following command:
sudo firewall-cmd --list-ports
Installation
1. Download
You need to have the following tools installed on your system:
- curl
- unzip
To download the licensed Appcircle Server package for your organization, you must copy the cred.json file to the directory where you want to install the package.
Without the cred.json file, you will not be able to access the licensed Appcircle Server package.
If you have not yet obtained the cred.json file, please contact us for assistance.
Download the latest self-hosted Appcircle package.
curl -fsSL https://cdn.appcircle.io/self-hosted/download-server.sh | bash
Extract self-hosted Appcircle package into folder.
unzip -o -u appcircle-server-linux-x64-${version}-${build}.zip -d appcircle-server
You should use the downloaded zip archive while extracting so that the actual ${version} and ${build} will come from there. You can find the relevant data in the previously executed download command output.
Change directory into extracted appcircle-server folder for following steps.
cd appcircle-server
2. Packages
You need to have the following tool(s) installed on your system.
- podman
The good news is that the ac-self-hosted.sh script installs all the necessary tools if they are not already installed on your system.
You need to have root access on your system for this step. Being able to run sudo is sufficient for the following step. (sudoer)
To do this, execute the script using the -i argument as shown below.
sudo ./ac-self-hosted.sh -i
You can also use the long option --install-package for the same purpose.
Make sure the script was executed without any error. Script will print installed and required packages when executed. Some packages may need manual installation on some linux distributions. Check command output for warnings and follow directives given in the output.
Podman is one of our major dependencies. So, its version is also important for Appcircle server runtime.
Older podman versions may be incompatible for our operations. Podman versions above 4.3.0 should be preferred to eliminate any compatibility issues.
Podman Network Stack
To ensure successful operation of the Appcircle server, it is required to switch from the CNI network stack to Netavark if Podman is bundled with CNI. You can see your network stack by running:
podman info | grep -i networkBackend
You can switch to Netavark network stack by simply installing Netavark and configure podman to use Netavark.
sudo dnf install -y netavark
Once the installation is complete, please follow these steps to configure Podman:
- Edit the /etc/containers/containers.conf file.
sudo vi /etc/containers/containers.conf
- Add the following content to the [network] section:
network_backend="netavark"
-
Save the file.
-
Reset Podman:
podman system reset
- Reboot the system:
sudo reboot
If you skip the step about podman network stack above, you will encounter network related issues. Please make sure you have completed this step.
Change the Podman Data Location
In certain scenarios, you may encounter situations where the available free space on the root directory (/) is limited. However, you might have ample free space in a different directory, such as $HOME or /opt.
In such cases, you can modify the Podman data location path to utilize the available space in the desired directory.
These are the steps to change podman data location path:
If you have selinux enabled, you should disable it temporarily before changing podman data location.
sudo setenforce 0
Podman data path may vary according to users.
- If you will use podman with the root user, the data path is
/var/lib/containers. - If you will use podman with regular user, the data path is
$HOME/.local/share/containers.
Please be sure about your podman data path.
The commands below are shown for the root user. Please change it according to your data path.
- Stop the podman service.
sudo systemctl stop podman
- Move the existing Podman data directory to the new location.
sudo mv /var/lib/containers $HOME/podman
- Create a softlink from default location to the new location.
sudo ln -s $HOME/podman /var/lib/containers
- Restart the podman service.
sudo systemctl start podman
If you disabled selinux and want to enable it again, you can run the following command.
sudo setenforce 1
3. Configure
First we need to find a name to our self-hosted Appcircle installation. It will be the unique project name.
./ac-self-hosted.sh -n "${YOUR_PROJECT}" export
Let's assume we have company named as Space Tech. Then our project name can be "spacetech". For following steps, we will give examples based on this fictive company for better understanding.
Then our command to execute will be:
./ac-self-hosted.sh -n "spacetech" export
On ac-self-hosted.sh execution complete, the folder contains global.yaml, user-secret files and export folder.
projects
└── spacetech
    ├── export
    ├── generated-secret.yaml
    ├── global.yaml
    └── user-secret
At this point, the compose.yaml file is generated in projects/${YOUR_PROJECT}/export path. But some custom environment variables are not configured for your environment. So we need to configure them.
global.yaml and user-secret files are standard yaml files to configure custom variables for your environment.
global.yaml file is in human-readable form but user-secret is in base64 encoded form.
You can keep all your environment variables in global.yaml but if you don't want to keep some secrets visible in global.yaml, you should keep them in user-secret.
user-secret is a complementary file for global.yaml. Although it's usage is optional, it's used actively when it has defined values.
So, keep in mind that values kept in user-secret always overrides same values in global.yaml.
If you want a secret used from global.yaml, then it should not be in user-secret. You should remove its definition from user-secret.
Configuring global.yaml
global.yaml has some initial and example values preset when it's generated.
---
environment: Production
enableErrorHandling: "true"
external:
  scheme: http
  mainDomain: ".example.com"

smtpServer: # Optional
  user:
  from:
  host:
  fromDisplayName:
  port:
  ssl:
  auth:
  starttls:
keycloak:
  initialUsername: admin@example.com
  enabledRegistration: true
storeWeb:
  external:
    subdomain: store
  customDomain:
    enabled: true
    domain: store.example.com
In later steps, other system subdomains will be concatted to main domain. For this reason, external.mainDomain in configuration file must always begin with . character as prefix.
You can see a list of these subdomains in here.
As an example, we can change some variables like below according to our fictive company setup.
---
environment: Production
enableErrorHandling: "true"
external:
  scheme: http
  mainDomain: ".appcircle.spacetech.com"

smtpServer: # Optional
  user: o***y*****@v******.net
  from: o***y*****@v******.net
  host: smtp.v******.net
  fromDisplayName: Space Tech
  port: "587"
  ssl: "false"
  auth: "true"
  starttls: "true"
keycloak:
  initialUsername: admin@spacetech.com
  enabledRegistration: true
storeWeb:
  external:
    subdomain: store
  customDomain:
    enabled: true
    domain: store.spacetech.com
For our example, we configured below values:
external.schemeis configured ashttpfor our case. When we set ashttpswe also need to configure other SSL options. See related section in online docs for SSL configuration details.external.mainDomainis set as a subdomain of our example company's main domain. See DNS Settings for more details.smtpServersettings are set for e-mail notifications. We choose not to set SMTP password as plain text in here. Recommended methods will be explained in the next section. But if it's acceptable for you, then you can setsmtpServer.passwordvariable in here.keycloak.initialUsernamewill be appcircle's default organization's admin user. Its username is set toinitialUsername. We choose not to set its password as plain text in here. We will put it touser-secreton next steps. But if it's acceptable for you, then you can setkeycloak.initialPasswordvariable in here.storeWeb.customDomain.domainis set with our example company's store domain. It's used for enterprise app store URL.
Beginning from version 3.29.3 some of the Appcircle server features are not supported for http configuration.
Below is the list of features that can only be used when https is enabled:
- Account Management
- SAML-based SSO Authentications
For full functionality and better security, it's recommended to install and operate all Appcircle services with https configuration, especially for production environments.
Starting from the version 3.28.2, SMTP settings can be configured directly from the Appcircle Dashboard. This is the recommended approach for managing SMTP settings. To use this method, you can remove the smtpServer part from your global.yaml file, and configure SMTP settings on the Dashboard after installation.
See Email Integration docs for more details.
Initial Password
keycloak.initialPassword value can not be empty since default organization's admin user will login with that password.
Same as in cloud, it must be compatible with Appcircle password policy;
- minimum character length must be at least 6
- must contain at least one lower case character
- must contain at least one upper case character
- must contain at least one numerical digit
Troubleshooting
If keycloak.initialPassword value is not compatible with password policy, you will get below error on service start while running Appcircle server.
service "keycloak_migration" didn't completed successfully: exit 1
In this case, before updating initial password in global.yaml, you need to stop partially started podman services with below command. See reset configuration section for more details.
./ac-self-hosted.sh -n "spacetech" reset
After updating initial password, to activate changes, you need to do fresh export.
./ac-self-hosted.sh -n "spacetech" export
Then, make sure you initialize the vault again.
./ac-self-hosted.sh -n "spacetech" init
Now you can run services again. It should complete without any error.
./ac-self-hosted.sh -n "spacetech" up
Configuring Secrets
As seen in previous section, we left some secrets out of the global.yaml to set them in user-secret file. So we need to take additional steps to complete configuration. If you set them as plain text in global.yaml then you don't need to take user-secret steps.
As described in the previous section, SMTP settings can now be configured directly from the Appcircle Dashboard. With this method SMTP password will be stored as an encrypted secret which is secure unlike a plain text or base64 encoding. To use this method:
- Remove the
smtpServer.passwordpart from thesecret.yamlfile in the next steps here. Therefore, it will not be included in theuser-secretfile that you will generate, and won't effect the Appcircle server configuration. - Configure SMTP settings on the Dashboard after installation. See Email Integration docs for more details.
First create your secret.yaml configuration as plain text like below.
smtpServer:
  password: 4NZ**********
keycloak:
  initialPassword: ZP6***********
For example, let's assume our secret yaml file is located in projects/spacetech/secret.yaml path.
In order to convert it to base64 encoded user-secret run following command.
base64 projects/spacetech/secret.yaml > projects/spacetech/user-secret
You can check user-secret file content in human-readable form with below command if required.
base64 -d projects/spacetech/user-secret
We have user-secret filled in successfully and don't need projects/spacetech/secret.yaml anymore. So we should delete it.
rm projects/spacetech/secret.yaml
On your first export, which makes global.yaml template for you, also creates an empty template file for user-secret as seen below:
base64 -d projects/spacetech/user-secret
smtpServer:
  password:
keycloak:
  initialPassword:
If you prefer defining above variables in global.yaml, then they should not be in user-secret.
If you defined all of them in global.yaml,simply remove user-secret before next steps.
Note that after changes made to yaml files, you must execute the script again for the changes to take effect as shown below.
./ac-self-hosted.sh -n "spacetech" export
4. DNS Settings
Appcircle server has some subdomains for different services. So, you need to add them to DNS in your network before running server.
- api
- auth
- dist
- hook
- my
- resource
- store
- monitor
- redis
- (optional) Enterprise App Store's Custom Domain
If your configuration (global.yaml) has setting storeWeb.customDomain.enabled:true, it means that you will use a custom domain for Enterprise App Store. So, its value (storeWeb.customDomain.domain) must be configured on DNS along with other system subdomains.
Below is an example DNS configuration that is compatible with our sample scenario.
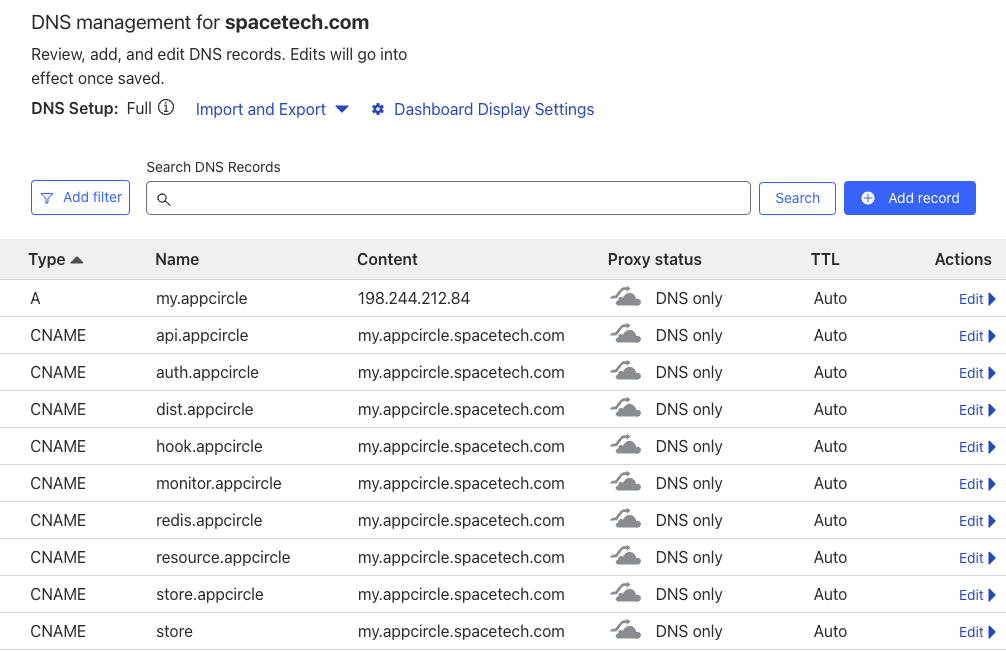
If you have a dedicated DNS, adding subdomains will be enough to run self-hosted Appcircle server in an easy and quick way.
You can also make DNS settings later, when you complete all configuration and testing.
Until you're satisfied with your setup, you can use /etc/hosts file for both self-hosted Appcircle server and connected clients. You can run whole system, test all functionality and your configuration with using the /etc/hosts file.
Following section will give you the details for this use case.
Using hosts file for DNS Settings
The hosts file contains the Internet Protocol (IP) host names and addresses for the local host and other hosts in the network. This file is used to resolve a name into an address (that is, to translate a host name into its IP).
So, you can use hosts file like DNS by adding all required subdomains with their mapped IP address.
Hosts file is located at:
/etc/hostson Linux and MacOSC:\Windows\System32\drivers\etc\hostson Windows
Entries in the hosts file have the following format:
Address HostName
On self-hosted Appcircle server, you should add below entries to the /etc/hosts file.
0.0.0.0  api.appcircle.spacetech.com
0.0.0.0  auth.appcircle.spacetech.com
0.0.0.0  dist.appcircle.spacetech.com
0.0.0.0  hook.appcircle.spacetech.com
0.0.0.0  my.appcircle.spacetech.com
0.0.0.0  resource.appcircle.spacetech.com
0.0.0.0  store.appcircle.spacetech.com
0.0.0.0  monitor.appcircle.spacetech.com
0.0.0.0  redis.appcircle.spacetech.com
0.0.0.0  store.spacetech.com
For clients that will connect to self-hosted Appcircle server, either self-hosted runners or end-users using their browsers for web UI, should add external IP of the server to their /etc/hosts files. External IP is the address of self-hosted Appcircle server that other hosts in the network can reach to server using that address.
You can get external IP of self-hosted Appcircle server with below command.
hostname -I | awk '{print $1}'
Let's assume we got value 35.241.181.2 as an example.
Other clients that connect to the server should add below entries to their /etc/hosts files.
35.241.181.2  api.appcircle.spacetech.com
35.241.181.2  auth.appcircle.spacetech.com
35.241.181.2  dist.appcircle.spacetech.com
35.241.181.2  hook.appcircle.spacetech.com
35.241.181.2  my.appcircle.spacetech.com
35.241.181.2  resource.appcircle.spacetech.com
35.241.181.2  store.appcircle.spacetech.com
35.241.181.2  monitor.appcircle.spacetech.com
35.241.181.2  redis.appcircle.spacetech.com
35.241.181.2  store.spacetech.com
With this network setup, you can run and test both self-hosted Appcircle server and connected self-hosted runners with all functionality.
5. Initialize Vault
Initialize vault before starting the Appcircle server.
./ac-self-hosted.sh -n "spacetech" init
You should initialize the server only once while installing it or after data cleanup is done with the reset command.
It must not be used on upgrades in any way.
6. Run Server
Appcircle server's modules are run on Podman as a container application on your system. All containers are run using a compose.yaml file which is generated after ac-self-hosted.sh is executed successfully explained in above steps.
projects/${YOUR_PROJECT}/export path will have all exported environment for self-hosted Appcircle services along with compose.yaml.
projects/
└── spacetech
    ├── export
    │   ├── agent-cache
    │   ├── api-gateway
    │   ├── build
    │   ├── common.env
    │   ├── compose.yaml
    │   ├── distribution
    │   ├── keycloak
    │   ├── keycloak-migration
    │   ├── license
    │   ├── minio
    │   ├── mongo
    │   ├── nginx
    │   ├── notification
    │   ├── postgres
    │   ├── report
    │   ├── rijndael
    │   ├── signing-identity
    │   ├── store
    │   ├── store-submit
    │   ├── tester-web
    │   ├── vault
    │   ├── webApp
    │   └── webhook
    ├── generated-secret.yaml
    ├── global.yaml
    └── user-secret
Run Appcircle server services.
./ac-self-hosted.sh -n "spacetech" up
Artifact Registry Credentials: Cred.json
Before we run self-hosted appcircle, we need to set artifact registry credentials. Using credentials JSON key file, we will pull container images for Appcircle server services.
Although it's not required immediately at configuration steps, it's required while we're starting Appcircle server. Otherwise it can not pull container images from our artifact registry.
For this reason, it's a part of the configuration. ac-self-hosted.sh bash script configures podman with appropriate credentials. If you don't have the key file, bash script gives error with a detailed message about the requirement.
When you buy an enterprise license for self-hosted appcircle, you will get a credentials JSON key file which enables you to login our artifact registry. For example, assume our fictive company is Space Tech.
You've got space-tech-cred.json key file and downloaded it into ~/Downloads folder.
First you need to copy that key file into self-hosted Appcircle root directory.
cp ~/Downloads/space-tech-cred.json cred.json
After that you can execute below command.
./ac-self-hosted.sh -n "spacetech" up
You should see
"Podman login cred not found. Trying to login now..."
in command output and then
"Login Succeeded"
which shows us successful artifact registry login.
If you get any error for some reason at this step, you can remove ${XDG_RUNTIME_DIR}/containers/auth.json file to reset and execute same command again to retake same steps.
At first run, it will pull once all container images needed from artifact registry. Also there are some migration steps taken for once which prepares system for other operations.
So it may need up to ~20 min to system be up according to your internet connection speed and CPU power. But recurrent boots will take a couple of minutes and will have shorter durations.
Now you can check system health and gain an overview of the status.
./ac-self-hosted.sh -n "spacetech" check
It will give a quick health summary. You should see below message on success.
All services are running successfully. Project name is spacetech
If you want to get details about podman services, you may run the following commands.
cd projects/spacetech/export
podman-compose ps
If everything is okay, then you should see service statuses as "up", "up (healthy)" or "exited (0)".
Vault
All secret data, including the API keys, signing identities, environment variables, and secrets are stored in an HashiCorp Vault. OAuth tokens and SSH keys, used in build pipeline, are also stored securely in HashiCorp Vault.
Vault is a tool for securely accessing secrets. It's an important and required service for whole self-hosted Appcircle server. If it's status is unhealthy, secrets will be inaccessible and most CI/CD functions won't work properly.
For this reason, before starting to use self-hosted Appcircle server within your organization, make sure you check vault service status in container list above. Its status must be healthy.
While you're working on configuration back and forth, it's status may become unhealthy in some way.
In this case, stop all services with data cleanup.
./ac-self-hosted.sh -n "spacetech" reset
Then make a new export, initialize the vault and start services. Refer to reset configuration section for more details.
Self-hosted Appcircle server uses some ports for communication.
Below ports must be unused on system and dedicated to only Appcircle server usage.
8044380808443
If the self-hosted server is configured as HTTP, the below port must also be unused. (For HTTPS configuration, that's not required.)
6379
Appcircle server will listen on 8080 and 8443 ports by default for HTTP and HTTPS connections.
You can get a list of up-to-date ports used by podman with below command.
sudo netstat -tulpn | grep LISTEN | grep -E 'rootlessport|socat'
- Filter "rootlessport" to see ports used by podman.
- Filter "socat" to see ports used by port forwarder tool socket.
Rebooting the Server
By default, the Appcircle server containers do not start automatically upon rebooting the host when podman is used as the container engine.
To enable automatic startup of the Appcircle server containers, additional steps are required.
For detailed instructions on configuring the automatic startup of the server containers upon server reboot, please refer to the Restarting Host page.
Using 3rd Party or Self-hosted Artifact Registry
If your organization uses another registry (harbor, nexus, etc.), in order to use the Appcircle registry, you can head to the External Image Registries document for detailed usage and configuration examples.
🎉 Ready
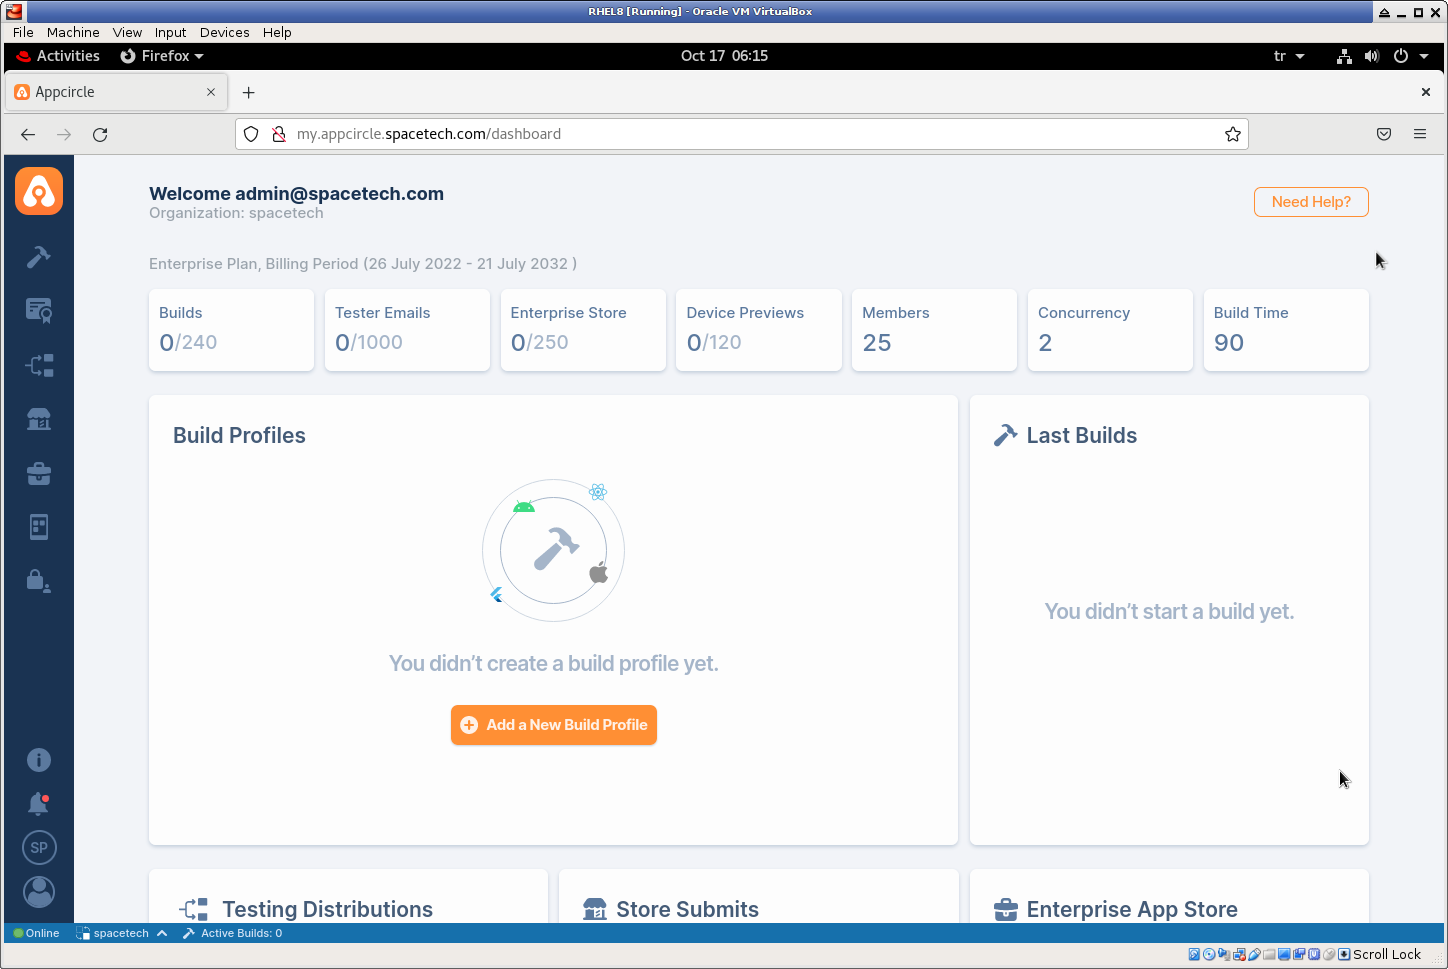
Open your browser and go to URL http://my.appcircle.spacetech.com. You should see login page.
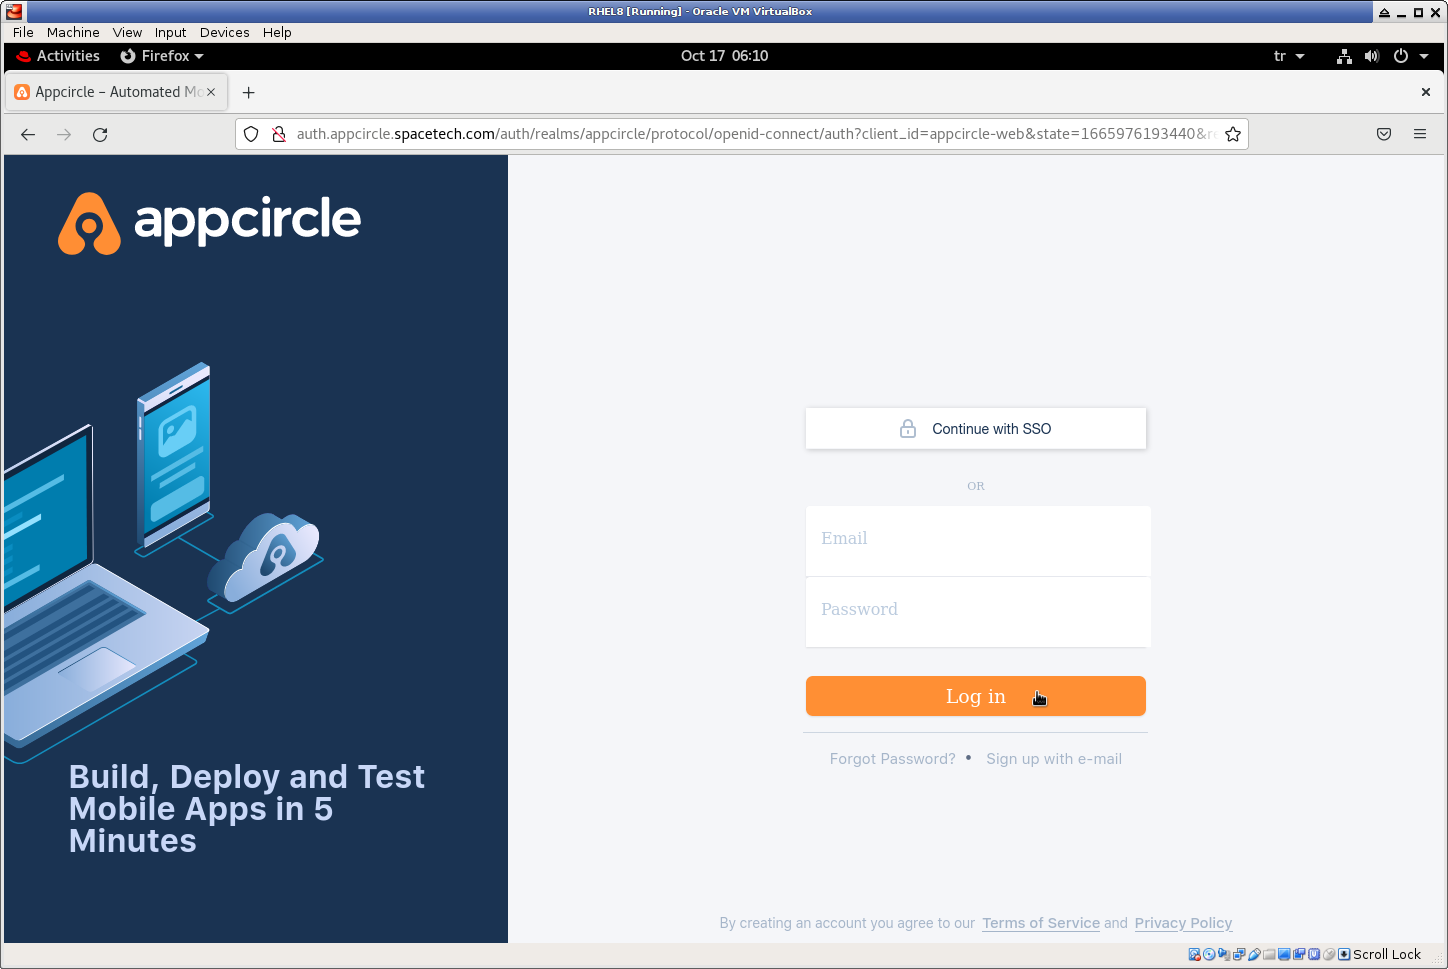
Login to self-hosted Appcircle with initialUsername and initialPassword that we have configured in above steps. For our example, user name is admin@spacetech.com.
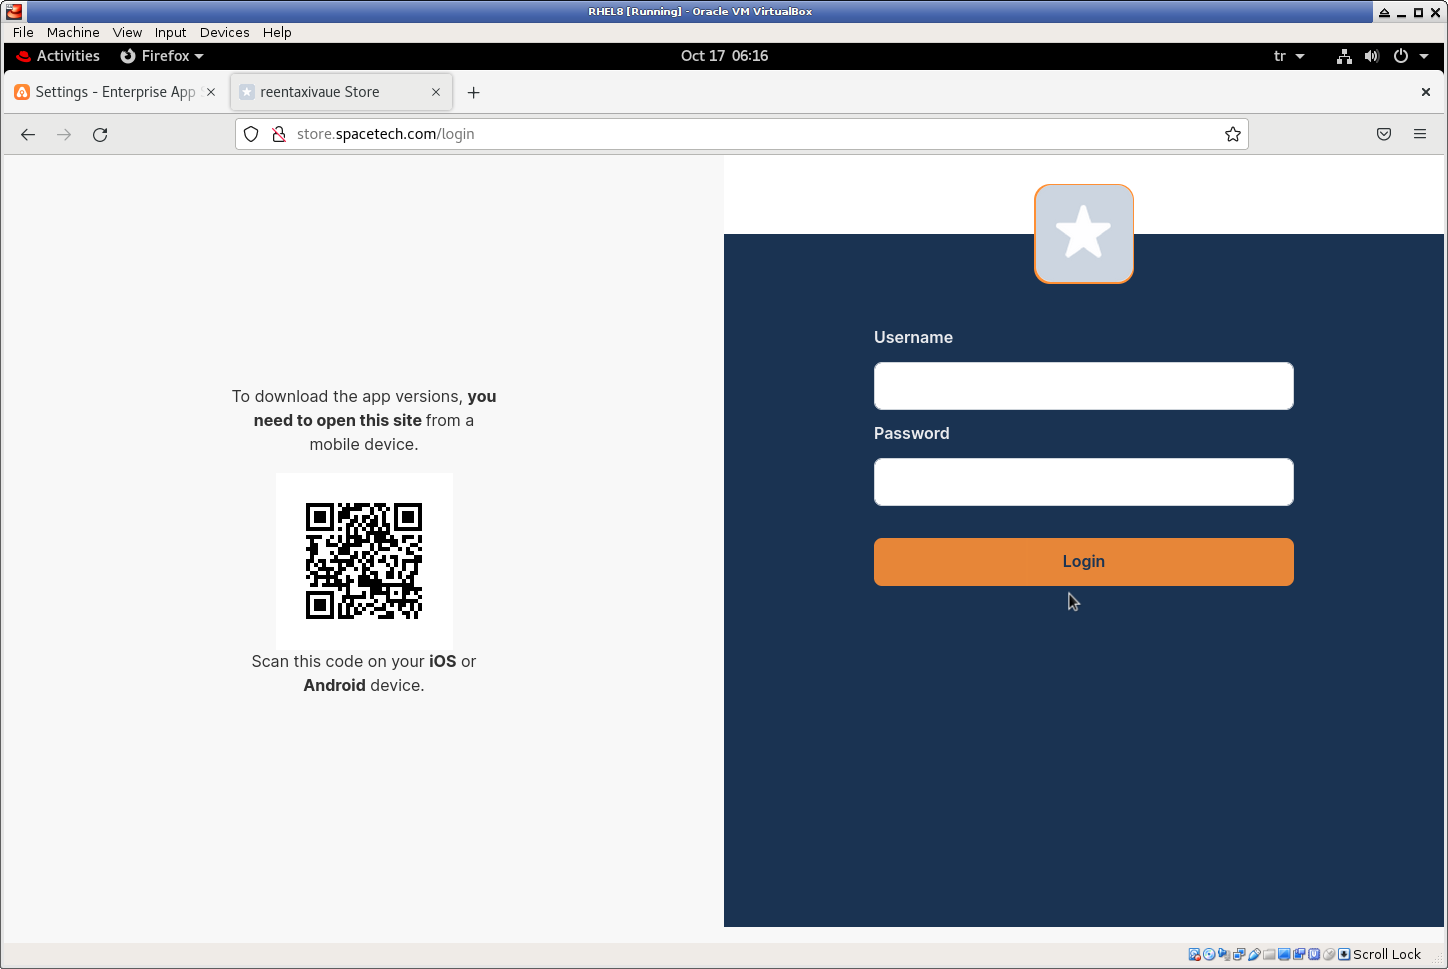
You can also login to enterprise app store with configured custom URL store.spacetech.com.
Although you can run export multiple times with different project names, you can run only one of them as an Appcircle server instance.
With default installation steps, reserved ports are the same for all exports. For this reason, when you run ./ac-self-hosted.sh -n spacetech up first instance will reserve open ports to itself. And later ./ac-self-hosted.sh -n spacetech up commands for other projects will get errors like "port is already allocated".
For now, self-hosted Appcircle server is a single node solution. You can not scale it by adding more nodes with other bare-metals or VMs.
Because it has a self-contained architecture with all its data side-by-side its podman services. Every node can only use its internal volumes and data on host.
Reset Configuration
If you have made a mistake at installation steps, especially at configuration, you can reconfigure your server after installation.
All configuration updates requires Appcircle server restart. So resetting configuration should start with stopping Appcircle server.
Stop Appcircle server services.
./ac-self-hosted.sh -n "spacetech" down
On complete, you can check list of running services with command below.
./ac-self-hosted.sh -n "spacetech" check
Its response should be something like below.
WARNING:Services are not started. Project name is spacetech
Some configuration changes may require data cleanup with extra steps which means data loss if you use Appcircle server for some time.
For example, you can add other git providers with above steps any time you want without any data loss. But changing external.scheme from "http" to "https" or changing smtpServer.* settings requires podman volume prune which results with data cleanup.
So, we suggest you to be sure with your configuration before using it in production environment. You can try different settings back and forth until you're satisfied.
SMTP Configuration
Starting from version 3.28.2, SMTP settings can be configured and updated directly from the Appcircle Dashboard without a server reset or data cleanup.
This is the recommended method if you do not have any specific reason to do it in the global.yaml.
See Email Integration docs for more details.
To begin reconfiguration with data cleanup (for settings like external.scheme), use below command while stopping Appcircle server.
./ac-self-hosted.sh -n "spacetech" reset
It will remove all unused local volumes which is useful for a clean start.
Then go back to your configuration and change settings as done previously at configure step.
When you're ready for a new export, in root directory execute below command again as done previously.
For our example scenario, root directory is appcircle-server as seen here. And project name is "spacetech".
./ac-self-hosted.sh -n "spacetech" export
Now you are ready to restart self-hosted appcircle.
Before that, make sure you initialize the vault again.
./ac-self-hosted.sh -n "spacetech" init
Run Appcircle server services.
./ac-self-hosted.sh -n "spacetech" up
Connecting Runners
When you complete installation successfully by following above steps, you're ready for your first build. 🎉
But in order to run build pipelines, you need to install and connect self-hosted runners. We have dedicated section for installation and configuration of self-hosted runners.
Follow and apply related guidelines in here.
Self-hosted runner section in docs, has all details about runners and their configuration.
By default, self-hosted runner package has pre-configured ASPNETCORE_REDIS_STREAM_ENDPOINT and ASPNETCORE_BASE_API_URL for Appcircle-hosted cloud.
webeventredis.appcircle.io:6379,ssl=truehttps://api.appcircle.io/build/v1
☝ You need to change these values with your self-hosted Appcircle server's Redis and API URL.
Assuming our sample scenario explained above, these values should be:
redis.appcircle.spacetech.com:6379,ssl=falsehttp://api.appcircle.spacetech.com/build/v1
for our example configuration.
If your Appcircle server is configured as HTTPS, then the Redis and API URL should be like this:
redis.appcircle.spacetech.com:443,ssl=truehttps://api.appcircle.spacetech.com/build/v1
🎗 After download, open appsettings.json with a text editor and change the ASPNETCORE_REDIS_STREAM_ENDPOINT and the ASPNETCORE_BASE_API_URL values according to your configuration.
Please note that, you should do this before register.
Considering system performance, it will be good to install self-hosted runners to other machines. Self-hosted Appcircle server should run on a dedicated machine itself.
You can install any number of runners regarding to your needs and connect them to self-hosted Appcircle server.