Flutter Mobile Applications
You can build your Flutter applications in Appcircle for iOS or Android platforms.
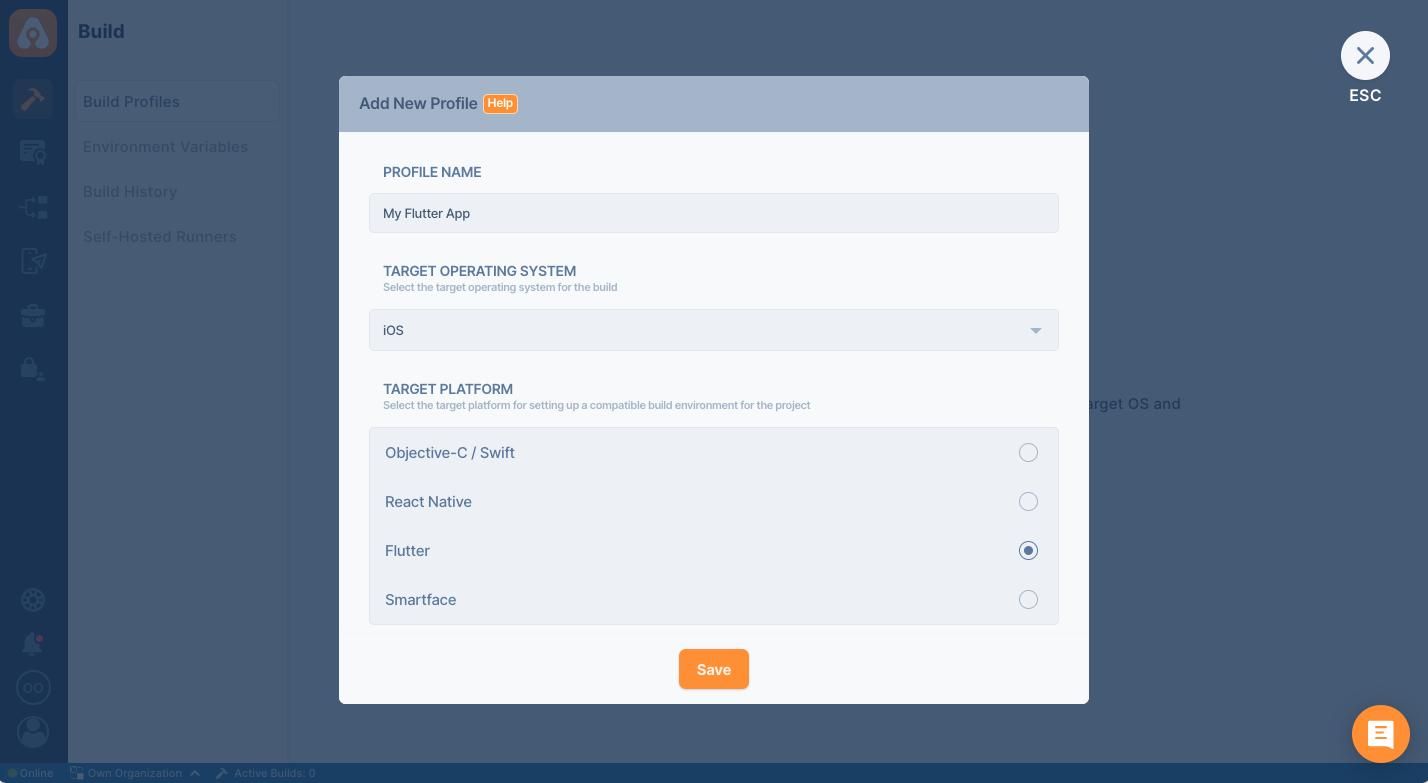
Creating a Flutter Build Profile
Simply create a new build profile as usual and select your target operating system as iOS or Android. Select **Flutter **for Target Platform.
Once your build profile is created, click on it and connect your Git repository. For details on this step, please follow the directions on the following page:
Connection GuidesTo test drive the Appcircle platform for Flutter app builds, you can also use our sample Flutter App by forking it or adding it as a public repository:
Build Configuration for Flutter Applications
Build configuration options are very similar to native iOS or Android applications. You can select configuration details, build triggers, signing identities and distribution options.
Private Modules
If your project uses private modules, don't forget to add the necessary SSH keys to your workflow steps. You can use Activate SSH Private Key step to add your private SSH keys.
You may also use Authenticate with netrc step to access your private modules.
Build Configuration for Flutter iOS applications
First, we need to set up a build configuration. Select the configuration from the Configuration section. The first step will be to enter project details. You can enter details manually or click on the "Autofill" button to retrieve them from your project.
Your iOS project needs to have an Xcode project or an Xcode workspace and a shared scheme to complete the build configuration successfully. Appcircle can fetch these workspaces and shared schemes from your branch automatically.
You can also select a specific Xcode version if you have certain dependencies or if you want to test your build on a specific version.

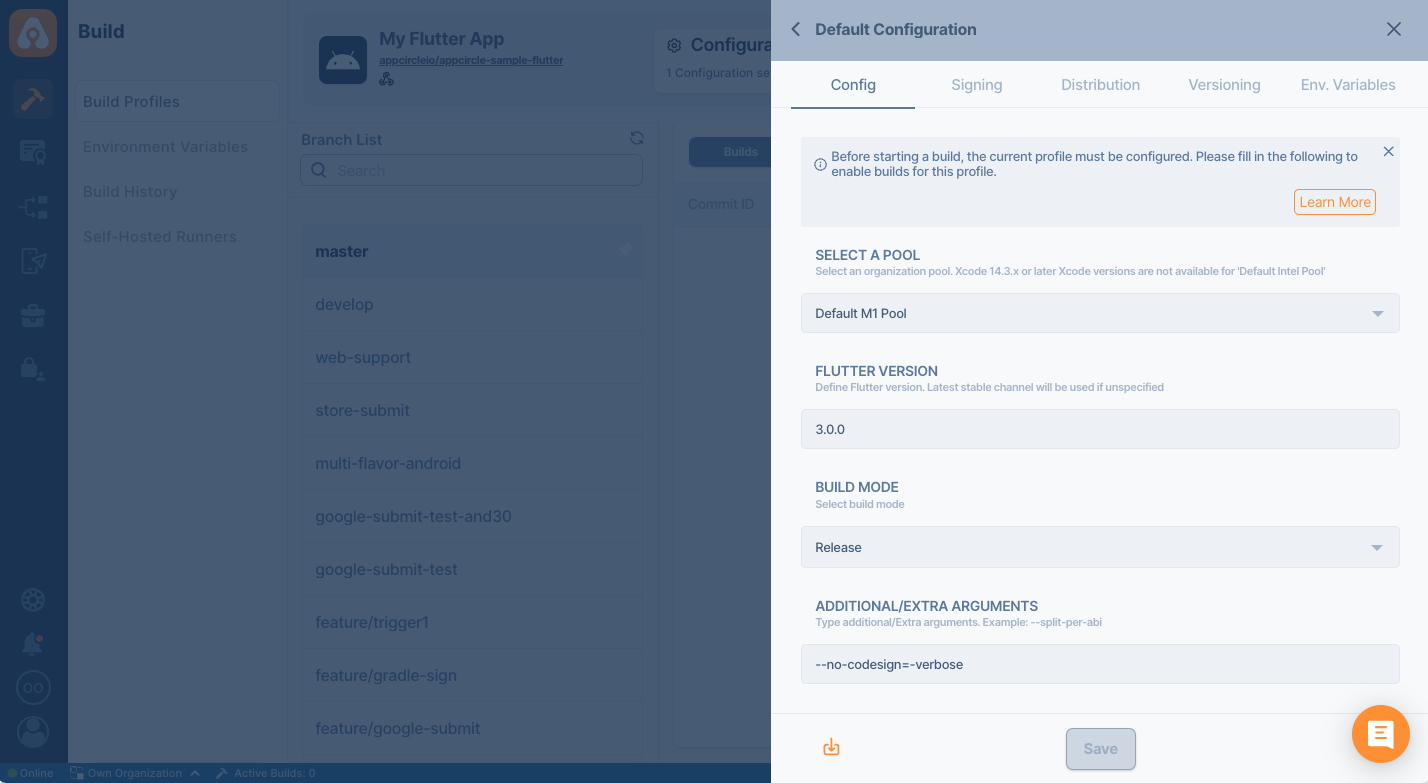
Build Configuration for Flutter Android applications
First, we need to set up a build configuration. Select the configuration from the Configuration section. The first step will be to enter project details. For Flutter Android apps, the fetch operation is not required. You can simply select the build mode (e.g. debug or release) and the output type (APK or Splik APK as AAB).
Build Configuration for Flutter Web applications
Flutter Web apps are built alongside iOS or Android Flutter apps. For more information, please refer to the following guide:
Building Flutter Web ApplicationsSending the Build Status to the Repository Providers
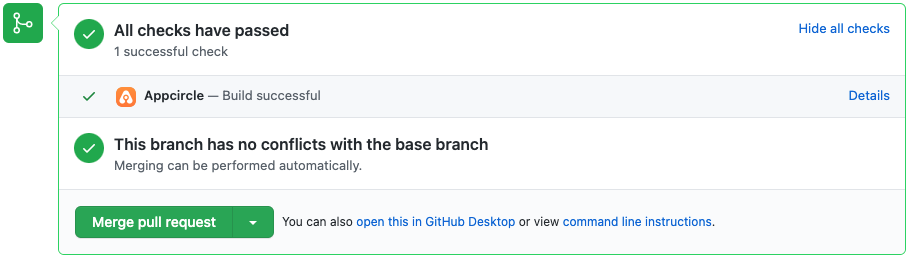
At the bottom of the config tab, you will see the **Set Commit Build Status **option.
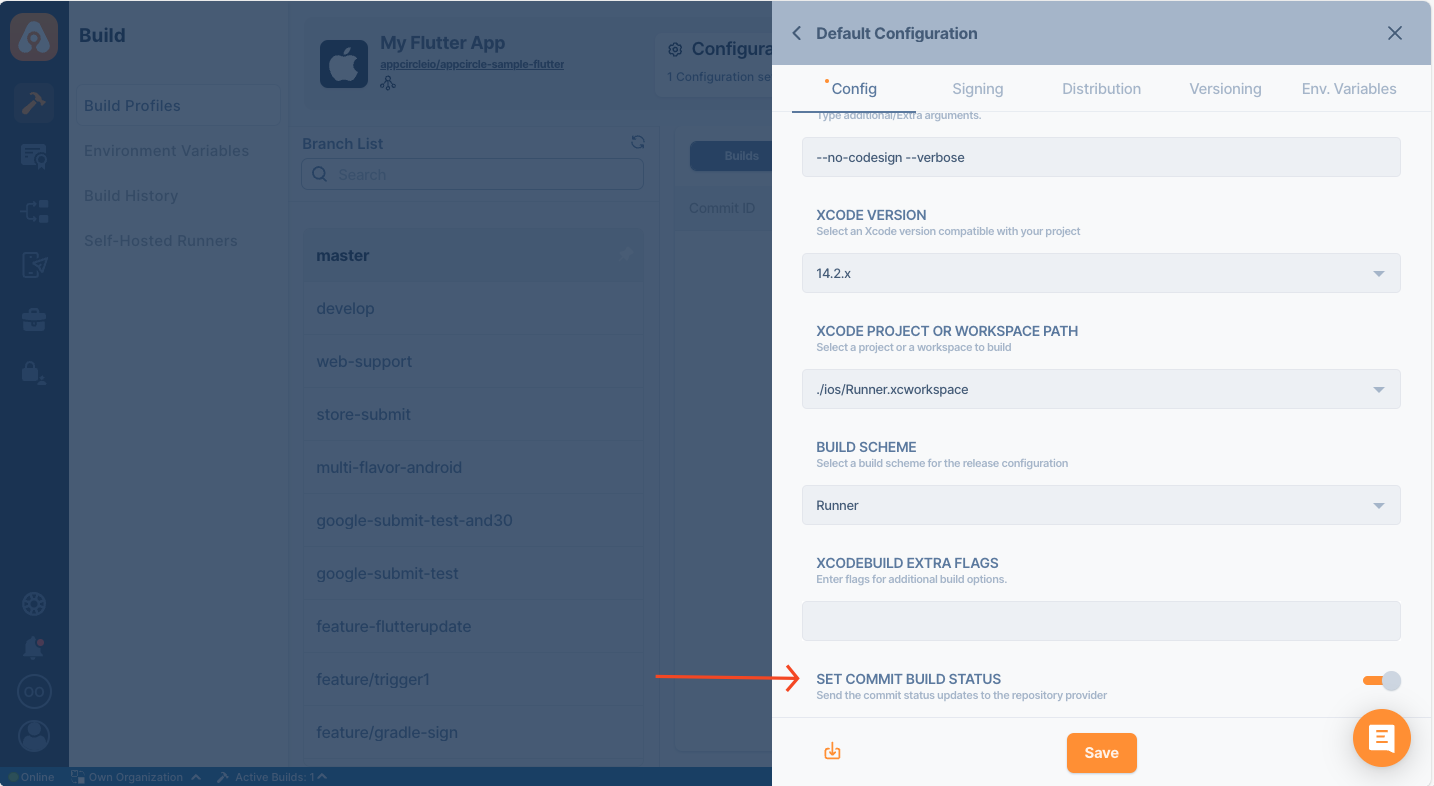
When this option is enabled, the build status for that commit is shared with the repository provider.
.png)
Build Triggers
The next section, Triggers, is common for both iOS and Android.
Appcircle allows you to trigger builds manually or automatically using build triggers.
- On push: Whenever code is pushed to a configured branch, the build is triggered.
- On a tagged push: Whenever a tagged commit is pushed, the build is triggered for that commit. Commits without any tags are ignored.
- On push with selective tags: Whenever a commit includes one of the typed in tags, the build is triggered. You can specify tags with Unix shell-style wildcards to trigger builds.
Build Manually or Automatically with Webhooks and Triggers
Signing Flutter iOS Applications
The next step in the build configuration is Signing. Here, please select the provisioning profile you added in the Apple Certificates & Provisioning Profiles section.
For signing iOS apps, press add, select the bundle ID from the first dropdown and then select a compatible provisioning profile (added from the signing identities module) from the second dropdown.
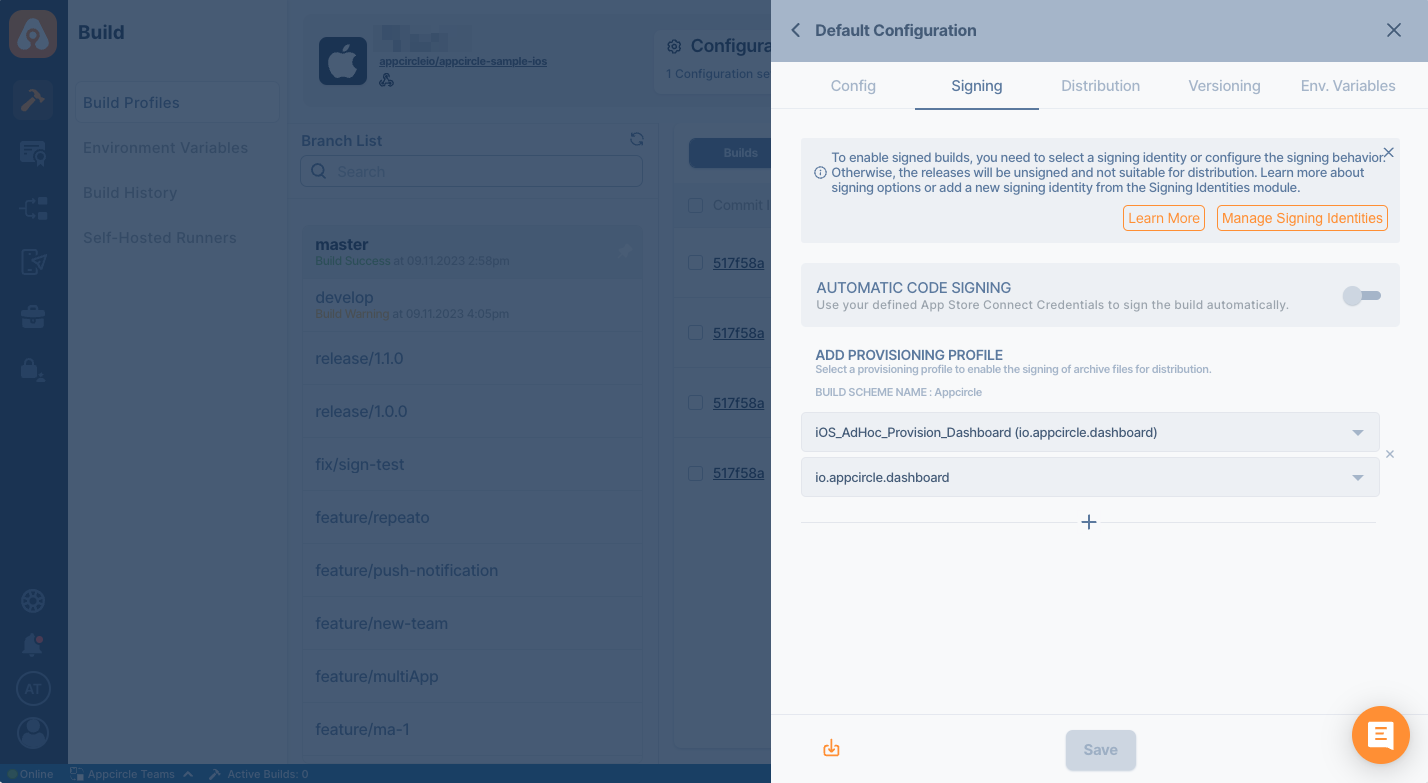
Signing Flutter Android Applications
Here, please select the Android Keystore you added in the Android Keystores section. For signing Android apps, simply select a keystore (added from the signing identities module).

Distribution (Deployment) Configuration
The next step on build configuration is Distribution.
You can select a previously created distribution profile or create a new one in this window. Use the top input box to enter a name for the new distribution profile you want to create. Press enter or click on the green + icon on the right to create the distribution profile.
Finally, check Auto Distribute if you want your build to be deployed to the Testing Distribution automatically and Auto Deployment if you want the build to be deployed to Store Submission automatically.
Create a Distribution Profile and Sharing with Testers
Any previous build can be deployed to the Testing Distribution without the need for rebuilding.
Environment Variables
The final tab is to add environment variables to the build. For advanced use cases, you can define variables and secrets to be incorporated during the build in the Environment Variables submodule so that you don’t need to store certain keys and configurations within the repository.
Please refer to the following document for more information on environment variables:
Why Use Environment Variables and Secrets?
Build Workflows for Flutter Applications
Once you complete your build configuration, you can edit your build workflow. Flutter builds have additional steps for Flutter commands. You can also arrange, add or remove workflow steps using Appcircle's workflow editor and Workflow Marketplace.
.png)
To learn more about Appcircle's Workflow editor, see the corresponding page below:
What are Workflows and How to Use Them?How to Set a Specific Flutter Version for the Build
To change the Flutter version, open the Flutter Install workflow step from the workflow editor and set the version under the "Selected Flutter Version" field.
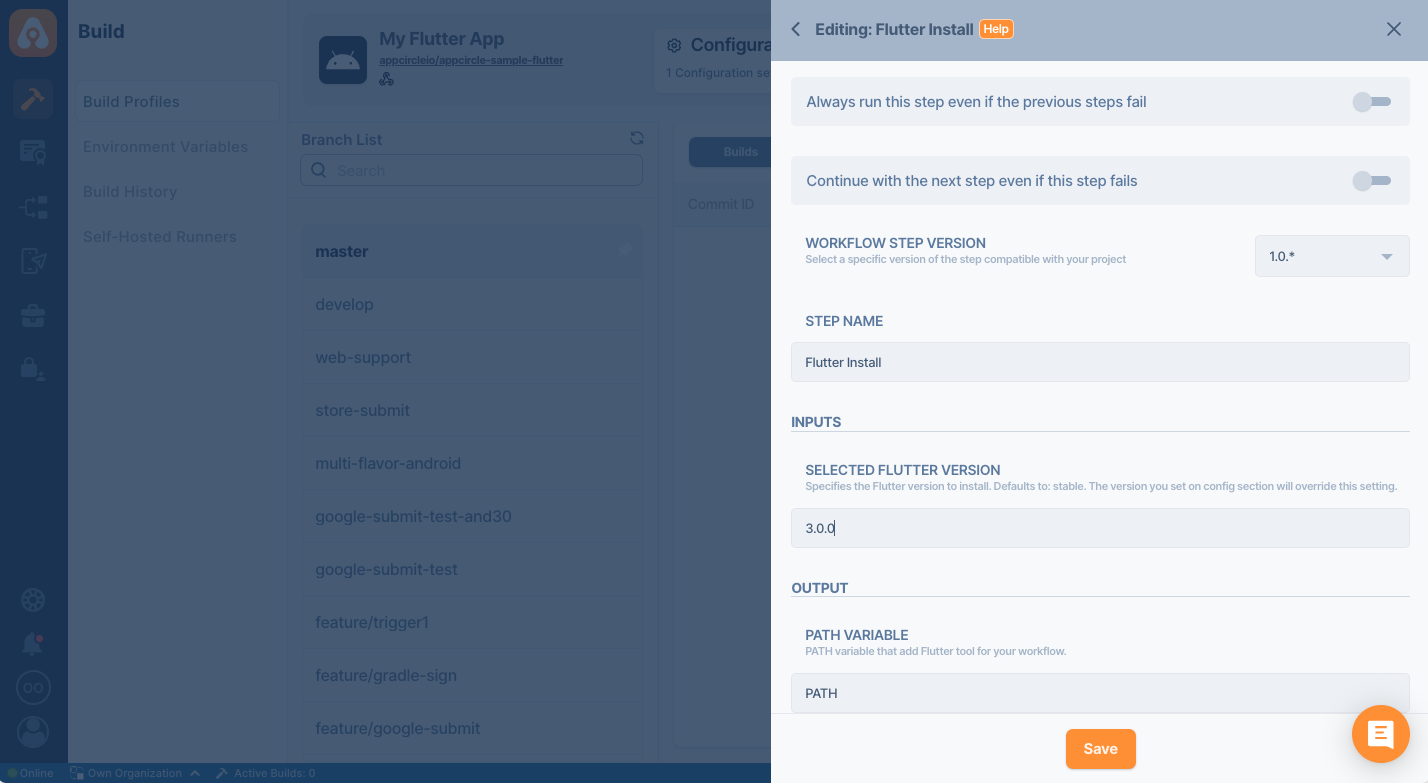
You can also set the preferred Flutter version on the config screen. If you don't set any version, stable version will be used.
Starting a Flutter Build and After a Build
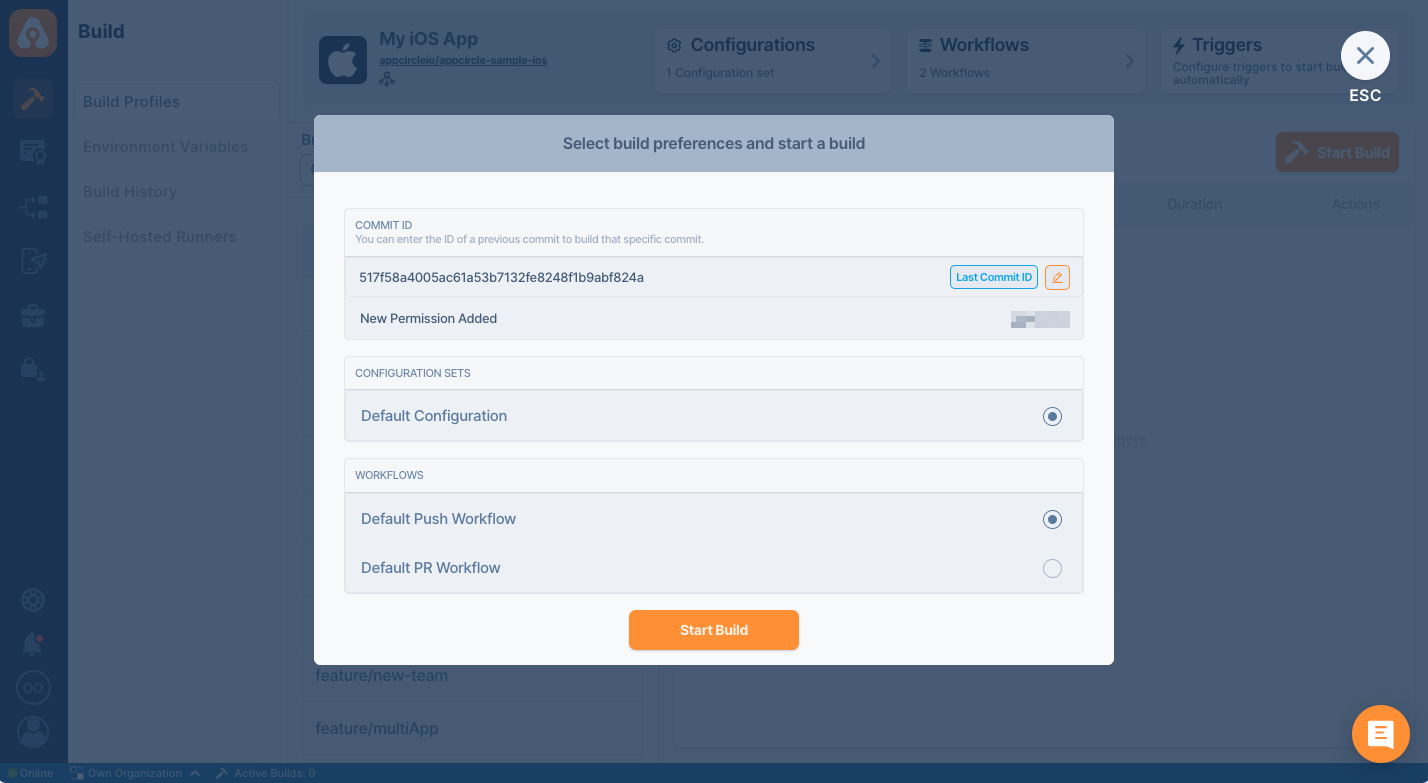
You are now ready to start your first build. Select the branch from the left side and click on the Start Build button.
Select a configuration, workflow, and commit ID and click on Start Build button
As of Flutter 1.21, the Flutter SDK includes the full Dart SDK. So if you have Flutter installed, you might not need to explicitly download the Dart SDK. If you need to use a different Dart version than the bundled one, you can install it using the below commands.
- iOS
- Android
brew tap dart-lang/dart
brew install dart
 sudo apt-get update
 sudo apt-get install apt-transport-https
 sudo sh -c 'wget -qO- https://dl-ssl.google.com/linux/linux_signing_key.pub | apt-key add -'
 sudo sh -c 'wget -qO- https://storage.googleapis.com/download.dartlang.org/linux/debian/dart_stable.list > /etc/apt/sources.list.d/dart_stable.list'
 sudo apt-get install dart
FAQ
Flutter release mode binaries do not work on the Android emulator
To run a Flutter release mode APK in an emulator, please make sure that the emulator runs with the x86_64 ABI type and the app is configured accordingly. Emulators with x86 ABI type are not supported by Flutter . (Please refer to the following GitHub issue on the Flutter repository for more information: ![]()
No pubspec.yaml file found error
If the pubspec.yaml file is not present in the default project path, it cannot be detected automatically by the fetch process. In such cases, the file path must be manually defined in the Flutter Build workflow step as the value of the $AC_FLUTTER_PROJECT_DIR environment variable.
For reference, please refer to the Android Flutter Build and iOS Flutter Build components.
File not found error
You may get an error like the one below when you're building an Android project.
lib/src/core/dependency/myservice.dart:12:8: Error: Error when reading ‘lib/src/data/repositories/CustomerRepository.dart’: No such file or directory
This error usually indicates that you didn't name your files according to Dart convention. Linux file system is case sensitive whereas Windows and macOS are not. So if your repository has customerrepository.dart but you're importing as CustomerRepository.dart, it will not work on Linux machines. To prevent this error, please rename your files and make them all lower case. Please read the following documentation related to styling and naming your files.
Firebase Version
Your build may fail with following error
[!] `GoogleAppMeasurement` requires CocoaPods version `>= 1.10.2`, which is not satisfied by your current version, `1.10.1`.
Please edit your workflow and add Cocoapods Install step and change the Cocoapods version. You may also set the Cocoapods version if you commit your Podfile.lock to your repository.
CocoaPods could not find compatible versions for pod "Amplify"
When does this occur?
On the first iOS build after upgrading the version of the Amplify packages in your pubspec.yaml. Example
Below is an example of what the error will look like:
[!] CocoaPods could not find compatible versions for pod "Amplify":
  In snapshot (Podfile.lock):
    Amplify (= 1.6.0)
  In Podfile:
    amplify_auth_cognito (from `.symlinks/plugins/amplify_auth_cognito/ios`) was resolved to 0.0.1, which depends on
      Amplify (> 1.9.2)
You have either:
 * out-of-date source repos which you can update with `pod repo update` or with `pod install --repo-update`.
 * changed the constraints of dependency `Amplify` inside your development pod `amplify_auth_cognito`.
   You should run `pod update Amplify` to apply changes you've made.
Suggested resolution
- Option 1 (recommended): Run
pod update Amplify AWSPluginsCore AmplifyPluginsfrom the iOS dir. This will update the pods that are used by the amplify flutter packages. - Option 2: Delete the
Podfile.lock(in the iOS dir) and rebuild. A new Podfile.lock will be generated. Please note, this may cause other non amplify related dependencies to be updated as well. - Option 3: Run pod update from the iOS dir. This should update your
Podfile.lockfile. Please note, this may cause other non amplify related dependencies to be updated as well.
Cocoapods Error
Signing for "MyPod" requires a development team. Select a development team in the Signing & Capabilities editor
If you are using Xcode 14 and your Flutter version is less than 3.3, your build may fail with the above message. You should modify your Podfile according to the below snippet. Flutter 3.3 fixes this bug. Related Flutter Issue
post_install do |installer|
 installer.pods_project.targets.each do |target|
   flutter_additional_macos_build_settings(target)

   target_is_resource_bundle = target.respond_to?(:product_type) && target.product_type == 'com.apple.product-type.bundle'
   target.build_configurations.each do |build_configuration|
     if target_is_resource_bundle
       build_configuration.build_settings['CODE_SIGNING_ALLOWED'] = 'NO'
       build_configuration.build_settings['CODE_SIGNING_REQUIRED'] = 'NO'
       build_configuration.build_settings['CODE_SIGNING_IDENTITY'] = '-'
       build_configuration.build_settings['EXPANDED_CODE_SIGN_IDENTITY'] = '-'
     end
   end
  end
end
Need help?
Get help from Appcircle's support team, or see how others are using Appcircle by joining our Slack Channel.