Apple Certificates Overview
Certificate files can be in .p12 file format as a private-public key pair. There are 2 main types of iOS certificates:
1. Apple Development: Used for development and testing.
The development certificates allow deploying apps to the developer devices (connected physically for testing and debugging) during the actual development process on Xcode.
The common practice is to generate this certificate automatically on Xcode, although manual generation is also available. Binaries built with a development certificate cannot be distributed.
2. Apple Distribution: Used for submitting applications to the App Store, or for Ad Hoc and Enterprise distribution. (Refer to the provisioning profiles section for the differences between these distribution types.)
In most cases, you will be using a distribution certificate with the combination of a provisioning profile to build and distribute apps in Appcircle.
There is a one-to-many relationship between certificates and provisioning profiles, so you may have multiple provisioning profiles associated with a single certificate.
For app builds, signing identities are not mandatory. For example, you can use unsigned apps to run on the simulator or on third-party platforms that resign your app, such as AWS Device Farm.
However, unsigned binaries cannot be installed on actual devices; therefore they cannot be used in the Appcircle Testing Distribution.
You can obtain your developer certificates and provisioning profiles from the Apple Developer Portal:
![]()
Using Appcircle Signing Identity module for Apple Certificates
Creating an Apple Certificate
With Appcircle’s advanced Signing Identity module, you can easily generate certificates without logging into your Apple Developer account and securely store these certificates in .P12 format within the Appcircle.
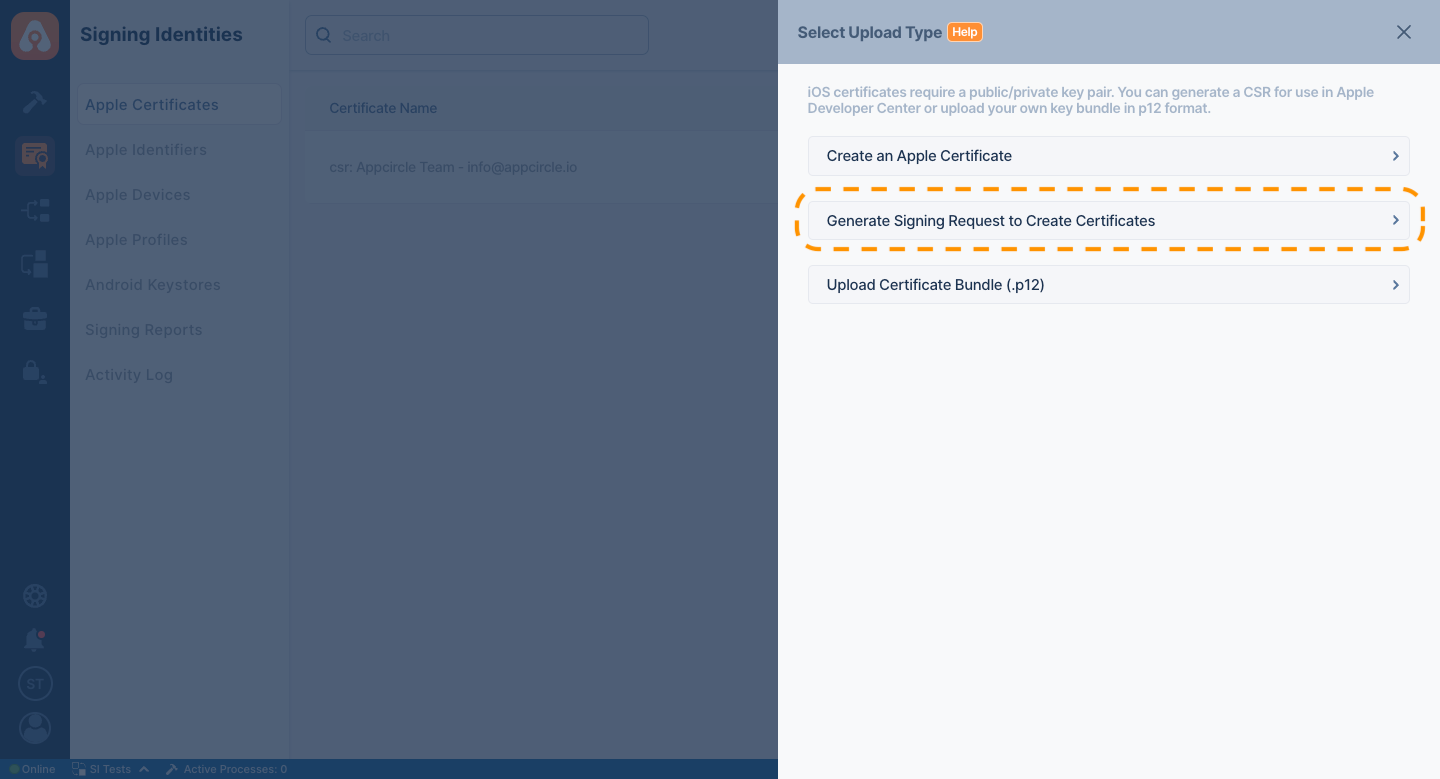
- To do this, navigate to the Apple Certificates section within the Signing Identity module. Then, using the Add New button, you can create a certificate.
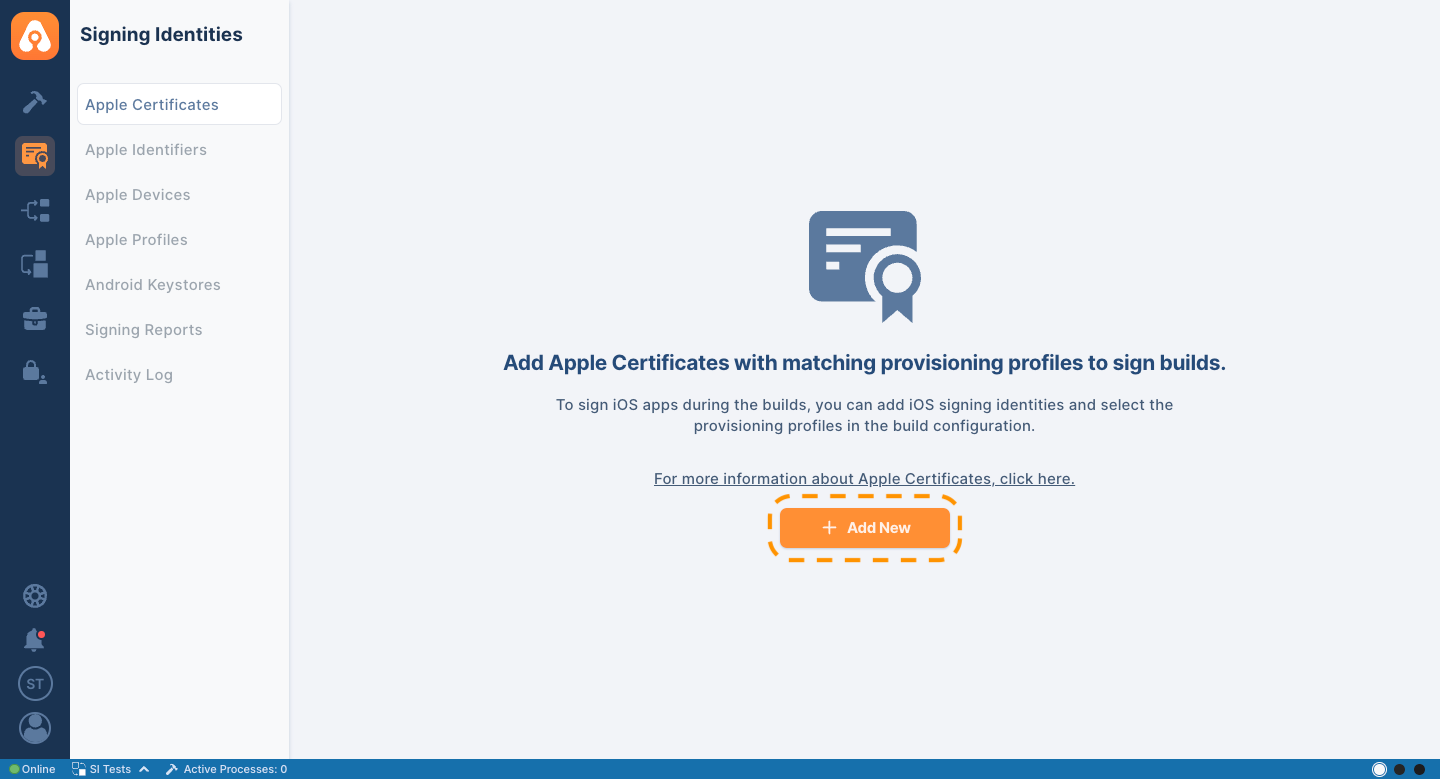
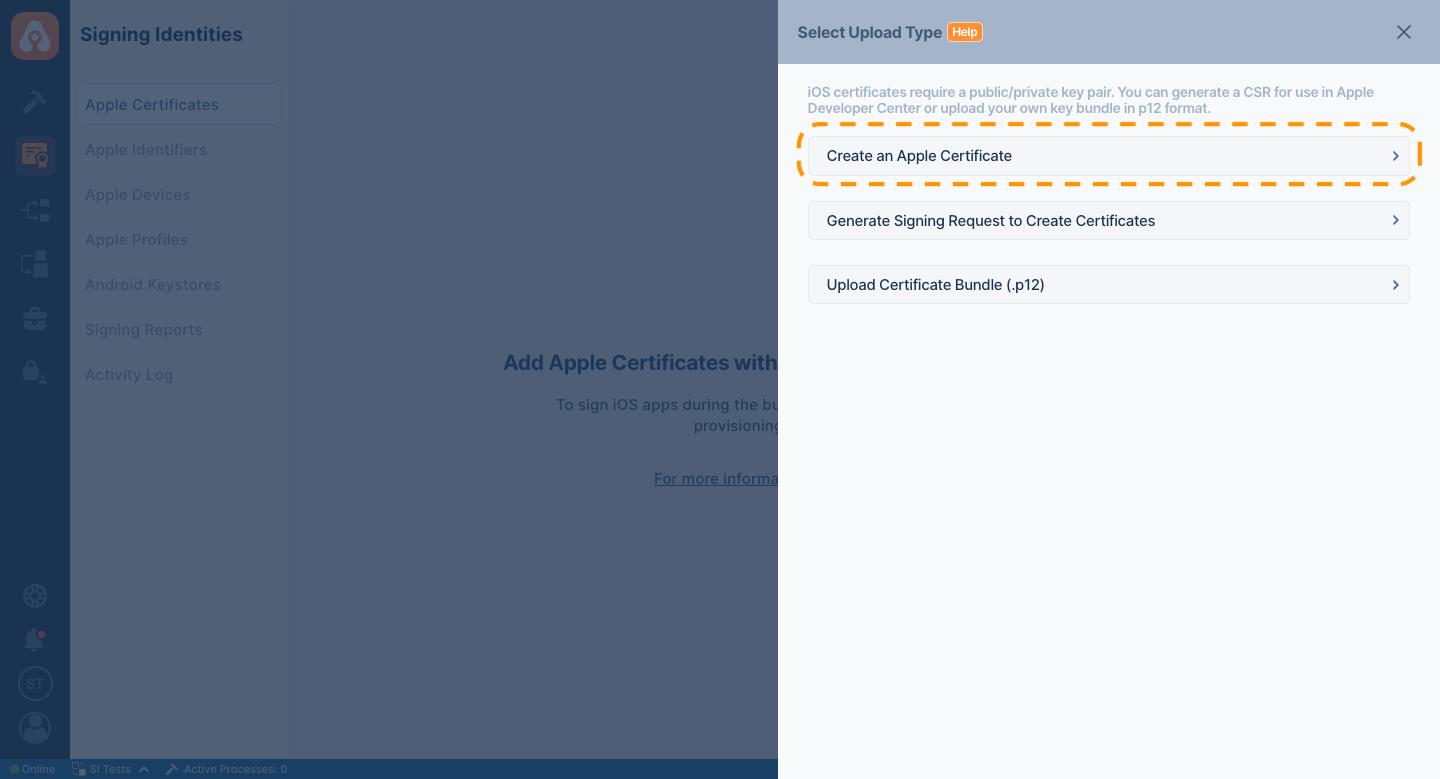
- In the opened window, continue by selecting the “Create an Apple Certificate” step.
- Appcircle requires an App Store Connect API Key associated with your account to create a certificate. If the API Key is not added to your Appcircle organization, you cannot proceed with the certificate creation process. For more information, please refer to the App Store Connect API Key documentation.
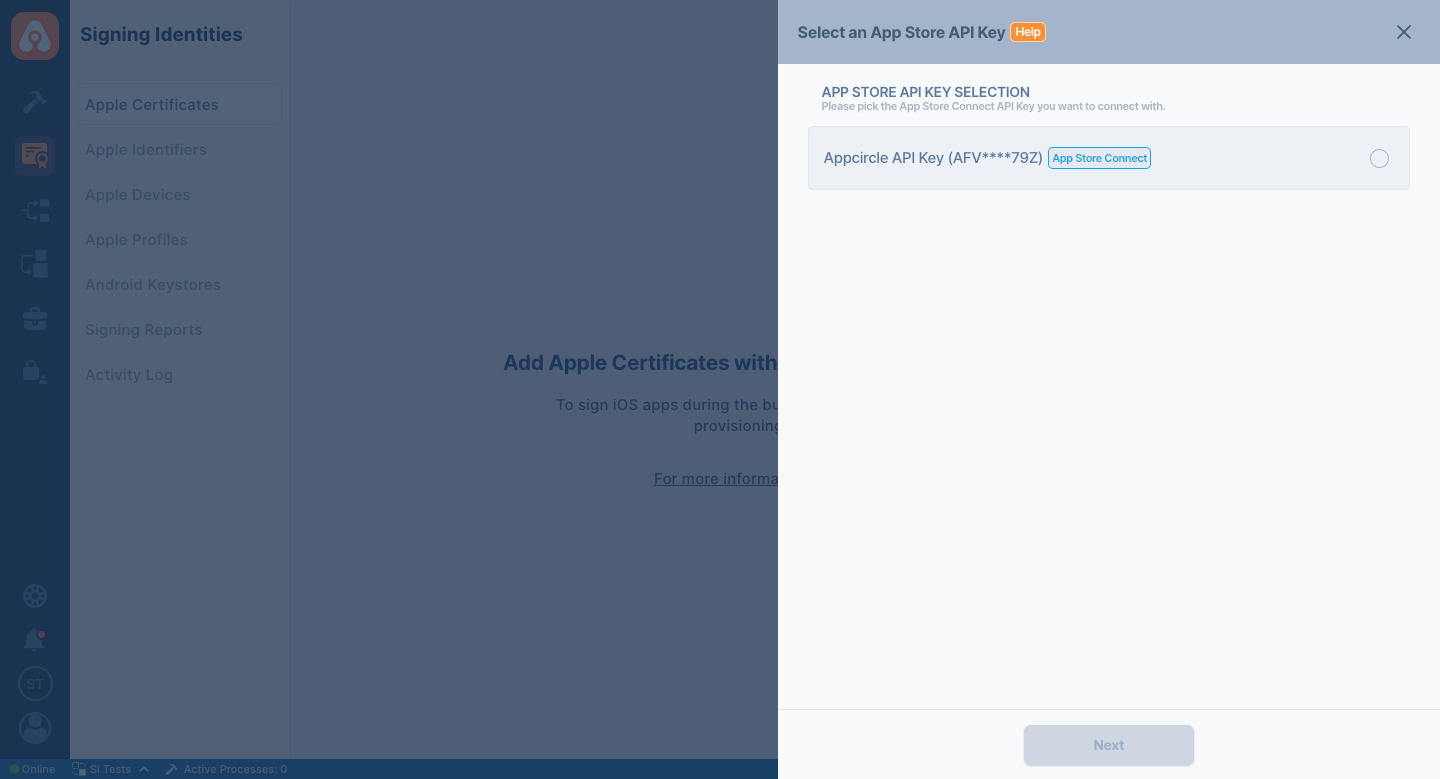
- After selecting the appropriate API Key, Appcircle requires a
CSR(Certificate Signing Request) file to create an Apple certificate. With the option provided by Appcircle, you can select one created on Appcircle from the list. For more detailed information about theCSRcreation process, please refer to the Generate Signing Request to Create Certificate section.
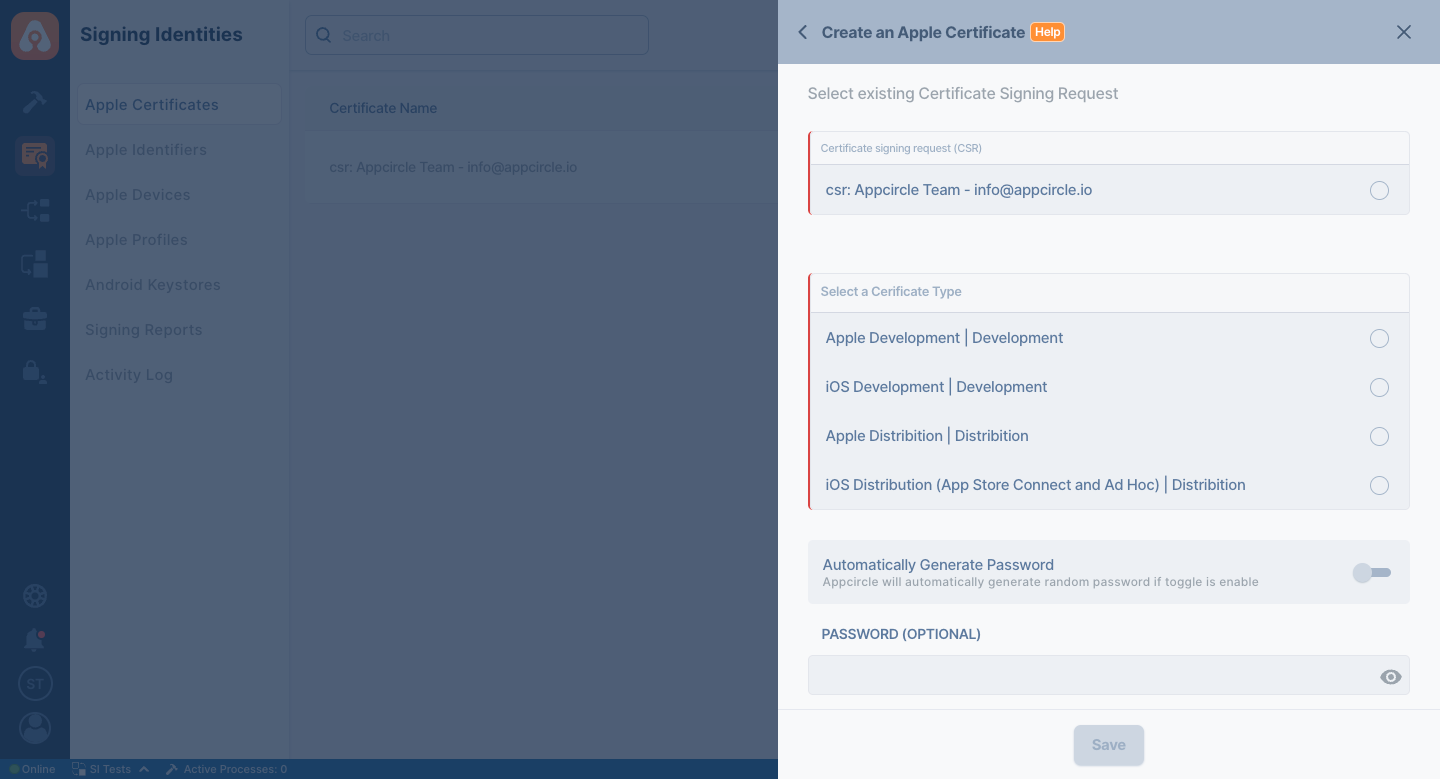
Create Certificate with CSR File
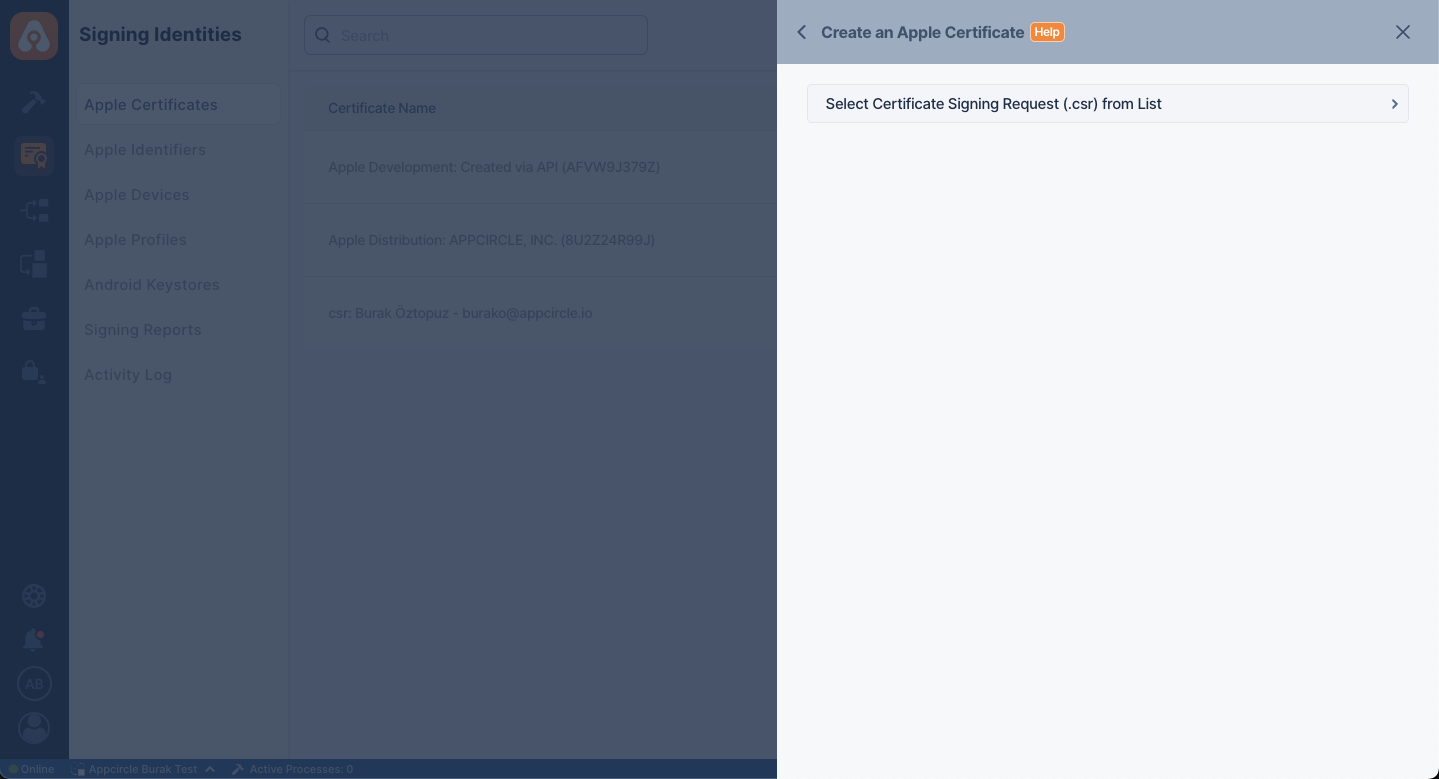
If you want to create a certificate, you can proceed by using the Select Certificate Signing Request from List option.
When this option is selected, all existing CSR files in Appcircle will be listed, prompting you to choose one. After selecting the relevant CSR file, the desired certificate type must be chosen. Optionally, a password can be specified, or the Auto Generate Password feature can be used to generate one automatically. If you do not have CSR file, please refer to the Generate Signing Request to Create Certificate section.
Adding a password during P12 export is completely optional. If you do not specify a password, the P12 file will be created without one. However, if you prefer for automatic password generation, be sure to record the password generated by Appcircle. Otherwise, you may encounter issues when using the provisioning file.
Creating Certificate Signing Request File
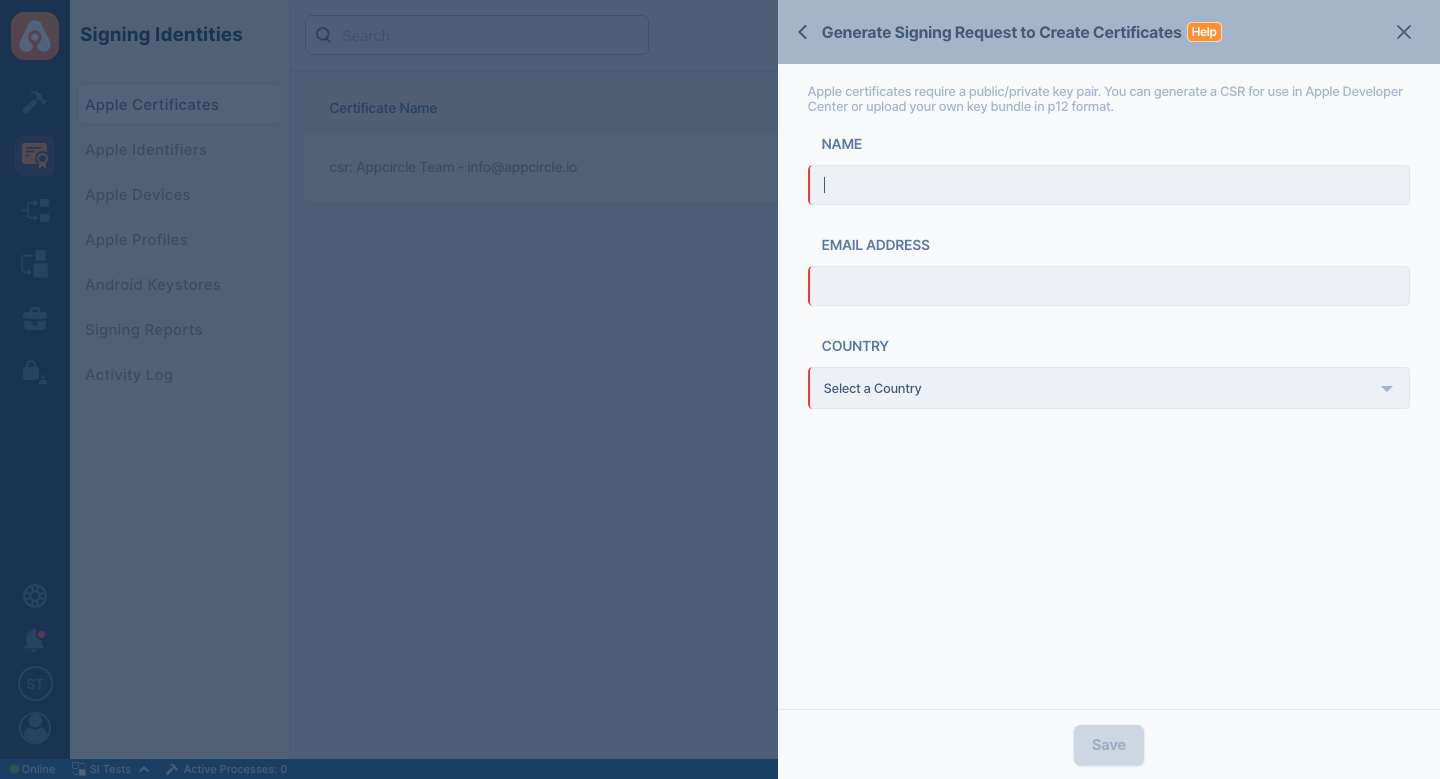
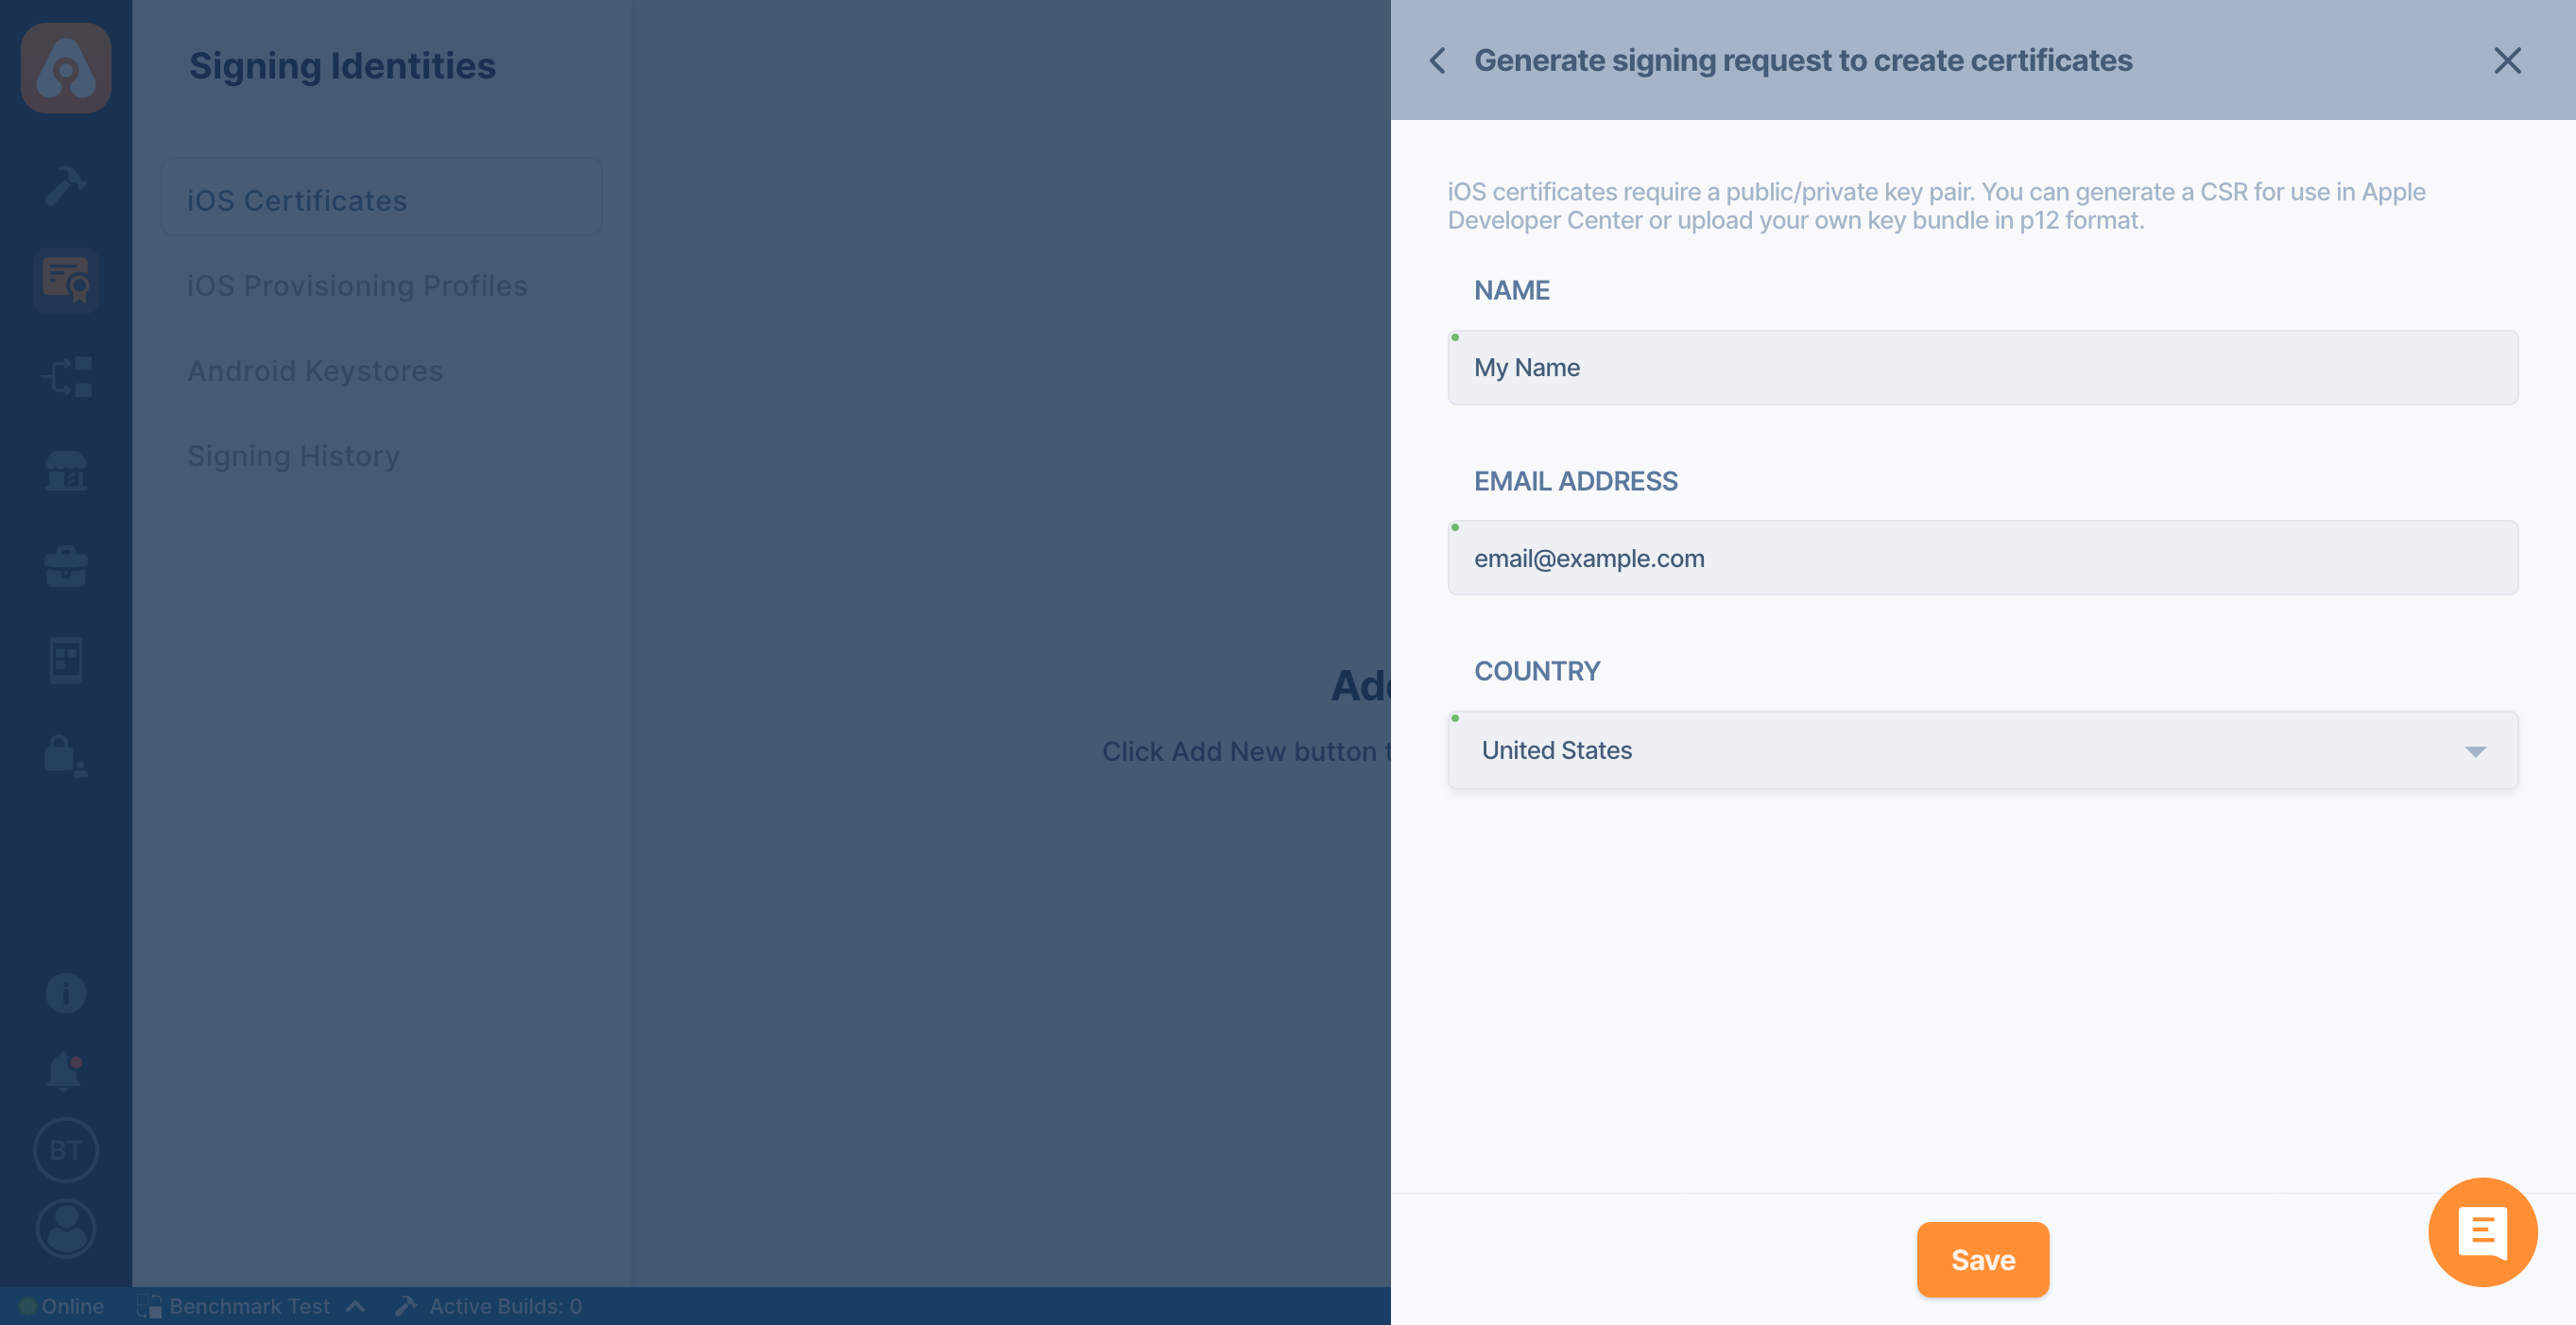
The Certificate Signing Request (CSR) file is required by Apple when creating a certificate. This file allows the user to generate a certificate, so it must be created in advance and provided as needed. Since this file can only be generated on a macOS operating system, it is unlikely to be created on other systems. Therefore, you can easily generate a CSR file using Appcircle’s Generate Signing Request to Create Certificates feature.
By correctly filling in the required parameters such as name, email, and country you can generate this file without needing a macOS operating system.
It is important that the information provided is accurate. Any errors in these details may prevent Apple from allowing the certificate generation process.
Creating P12 File Without Mac
To generate your iOS certificates, simply fill in your details and Appcircle will provide a CSR (certificate signing request) which you can use on Apple Developer Portal to generate your signing certificate.
- Create a CSR File
-
Download your CSR file
-
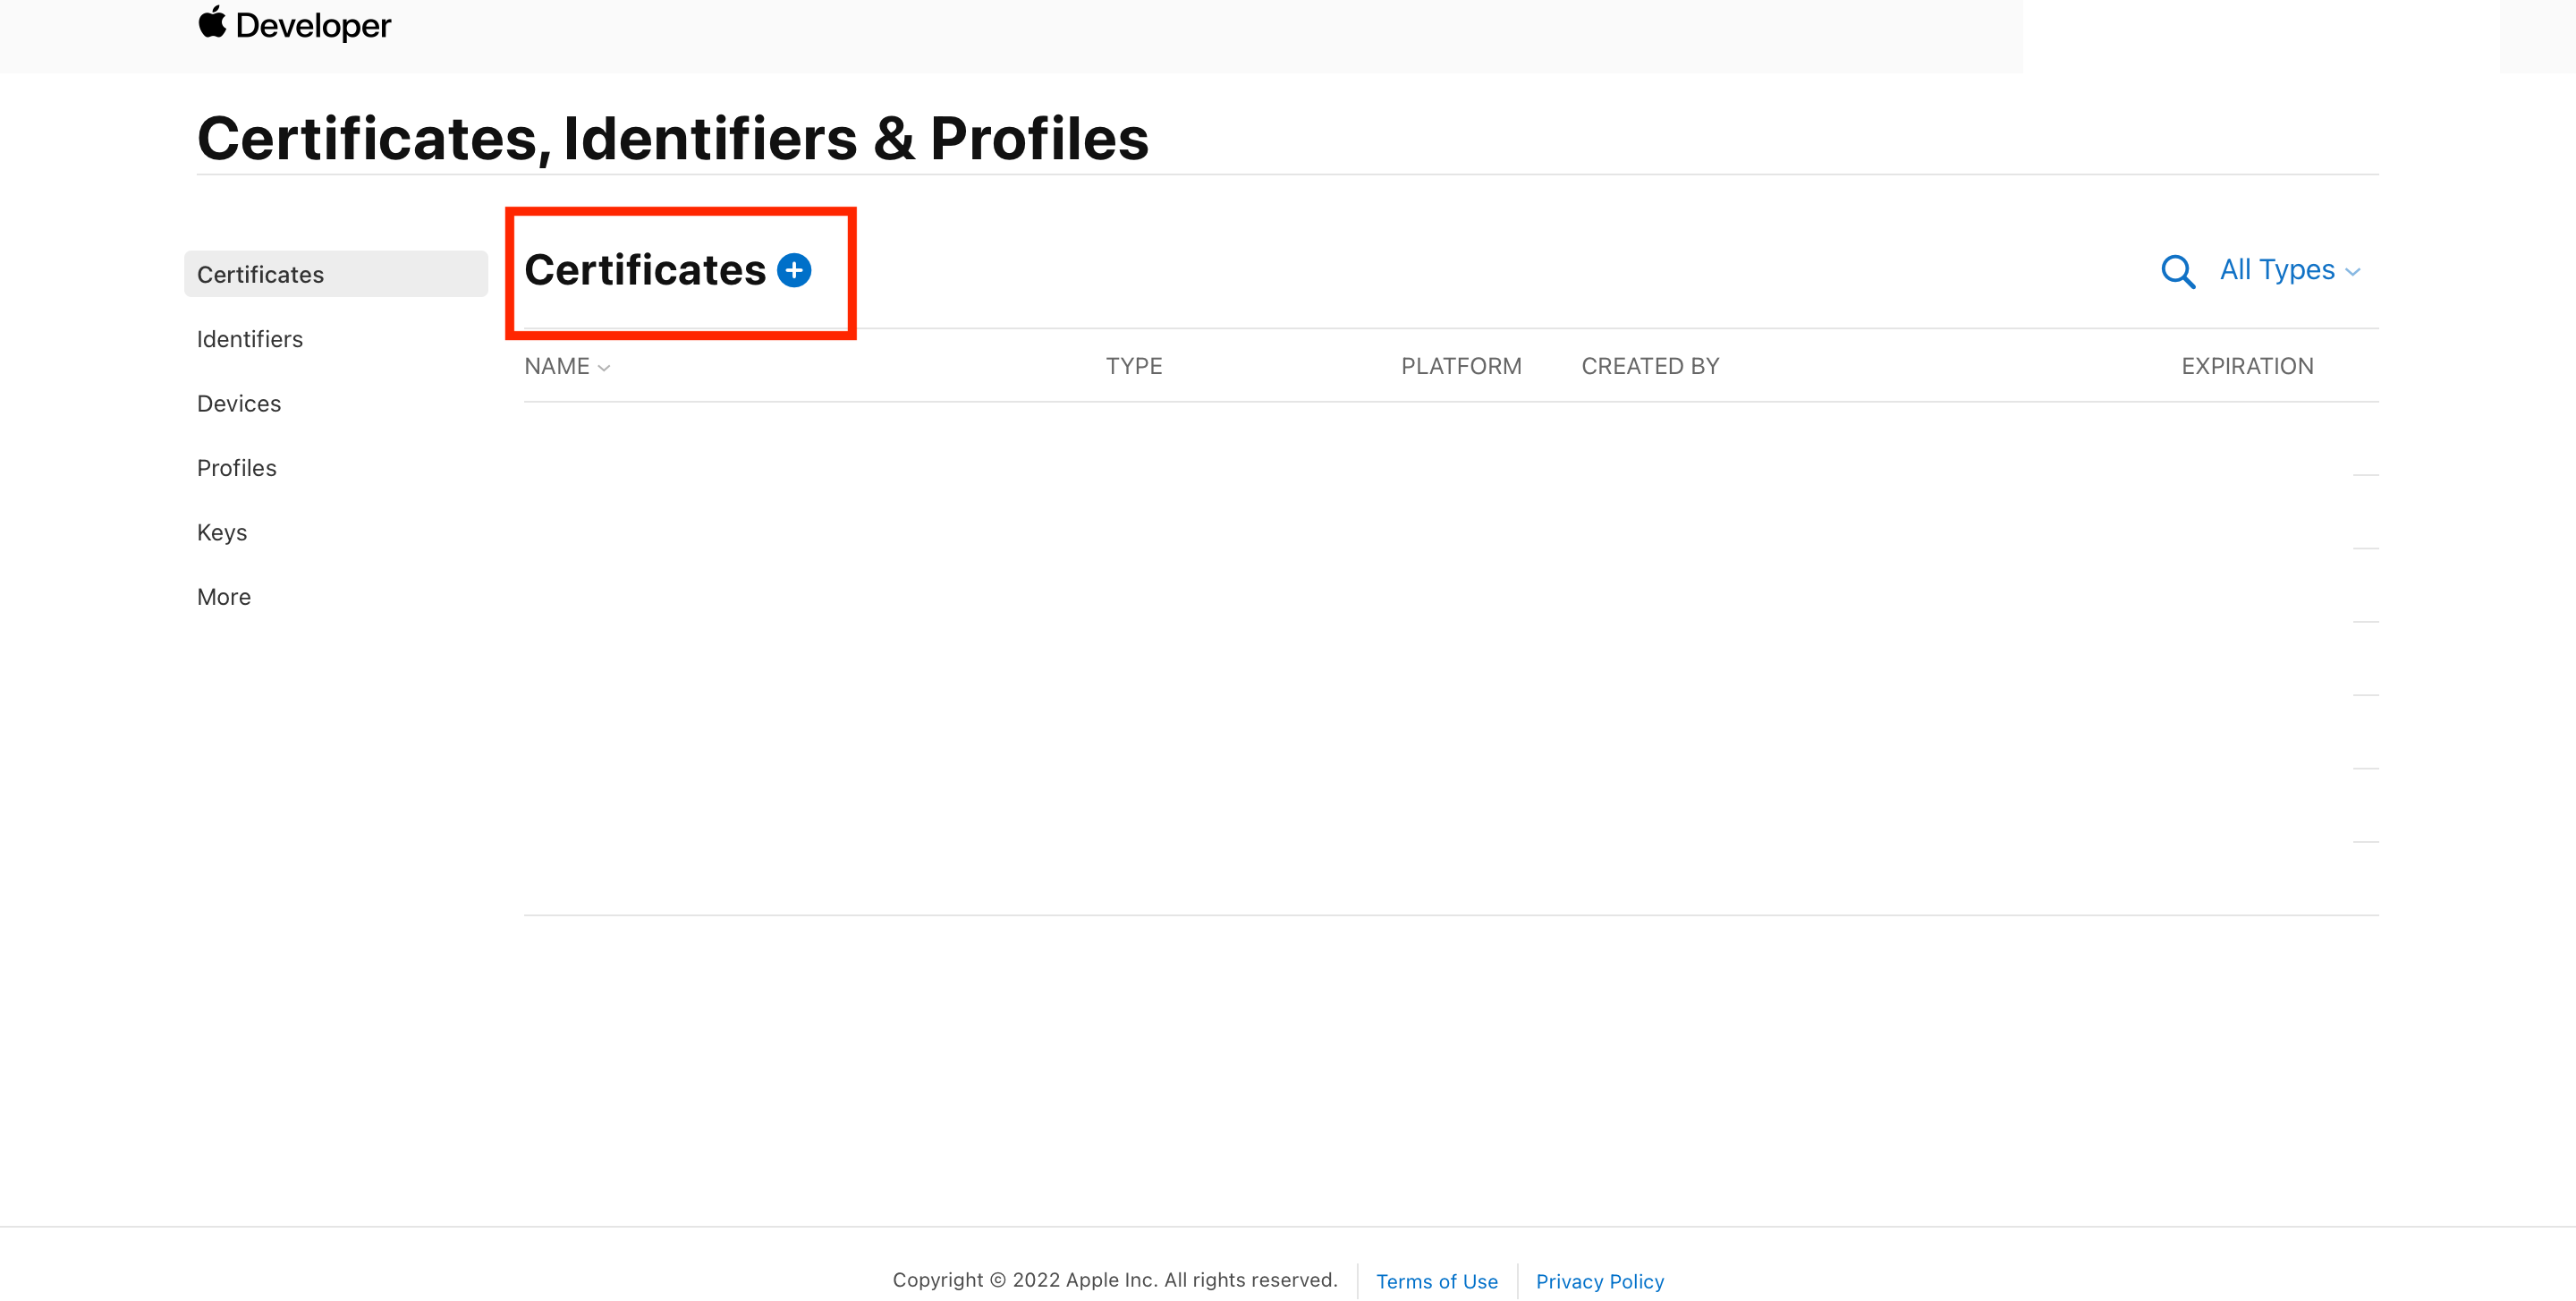
Go to the Apple Developer Portal and select "Certificates, IDs & Profiles" from the left menu, then click on "Certificates."
-
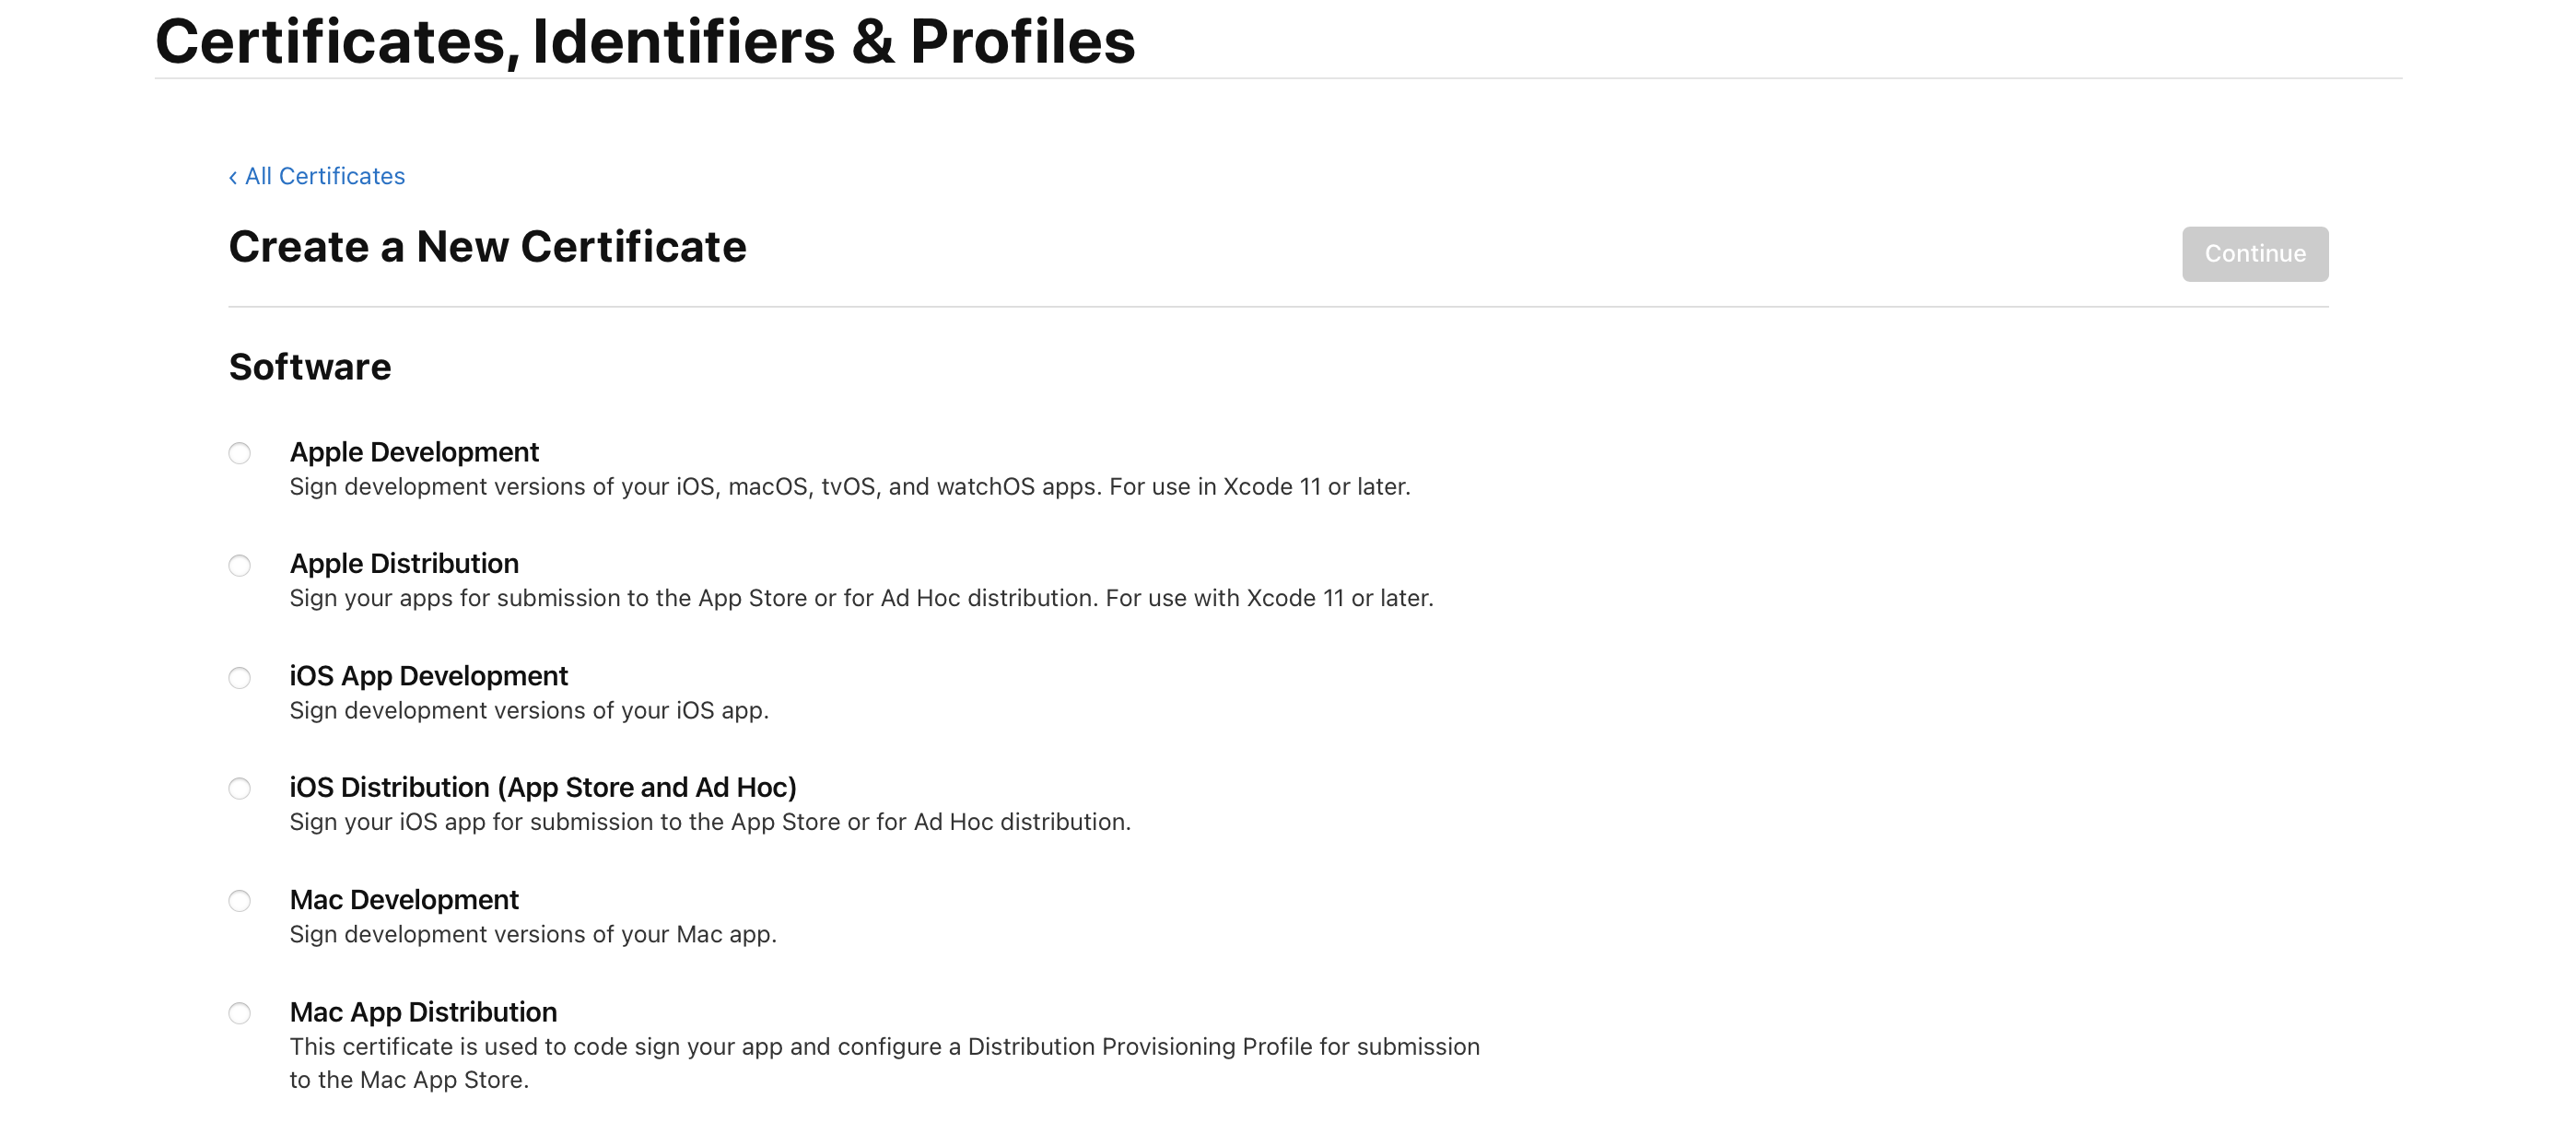
Select the type of certificate you want to create. If you want to distribute to TestFlight, Ad-hoc or AppStore, you should select Apple Distribution. If you're creating a certificate for local development environment, you should select Apple Development.
- Upload the CSR file you have created on Appcircle
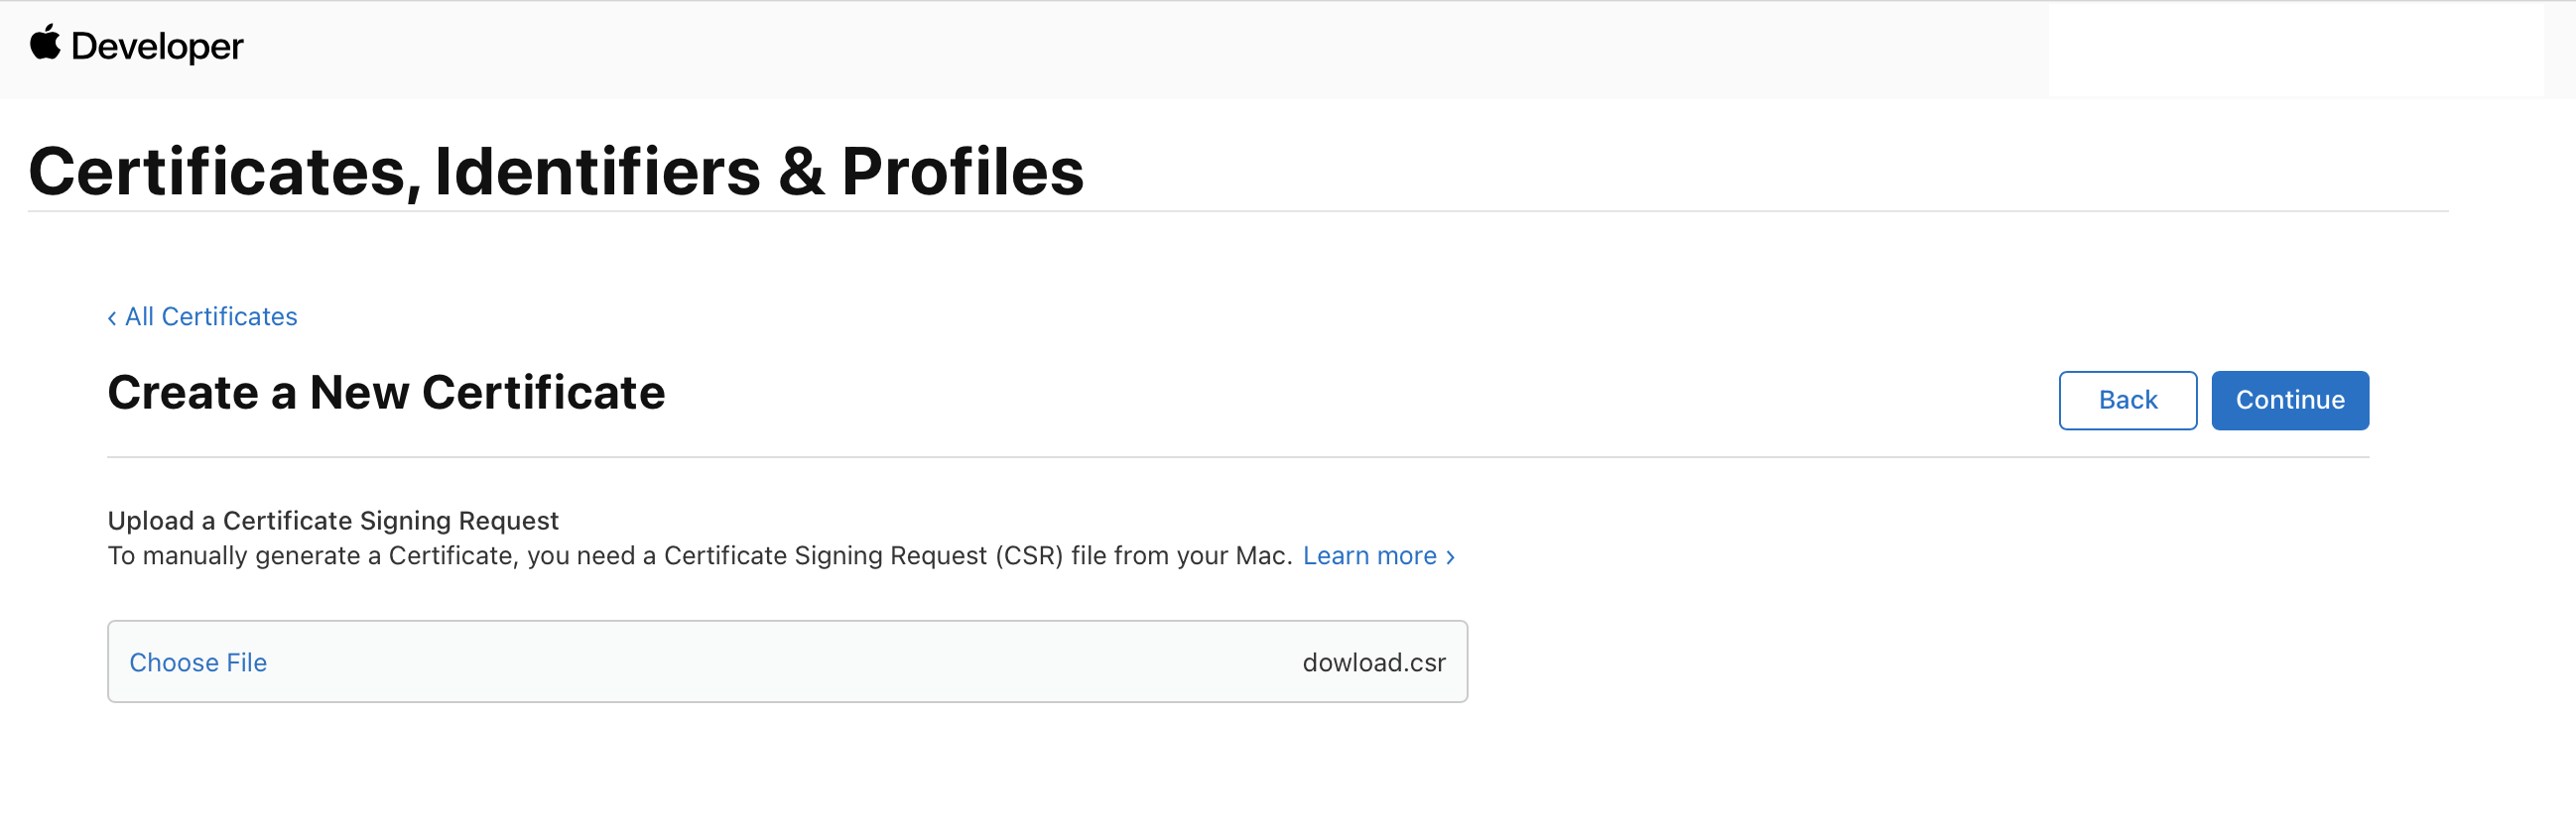
-
Download your generated CER file from the Apple Developer portal
-
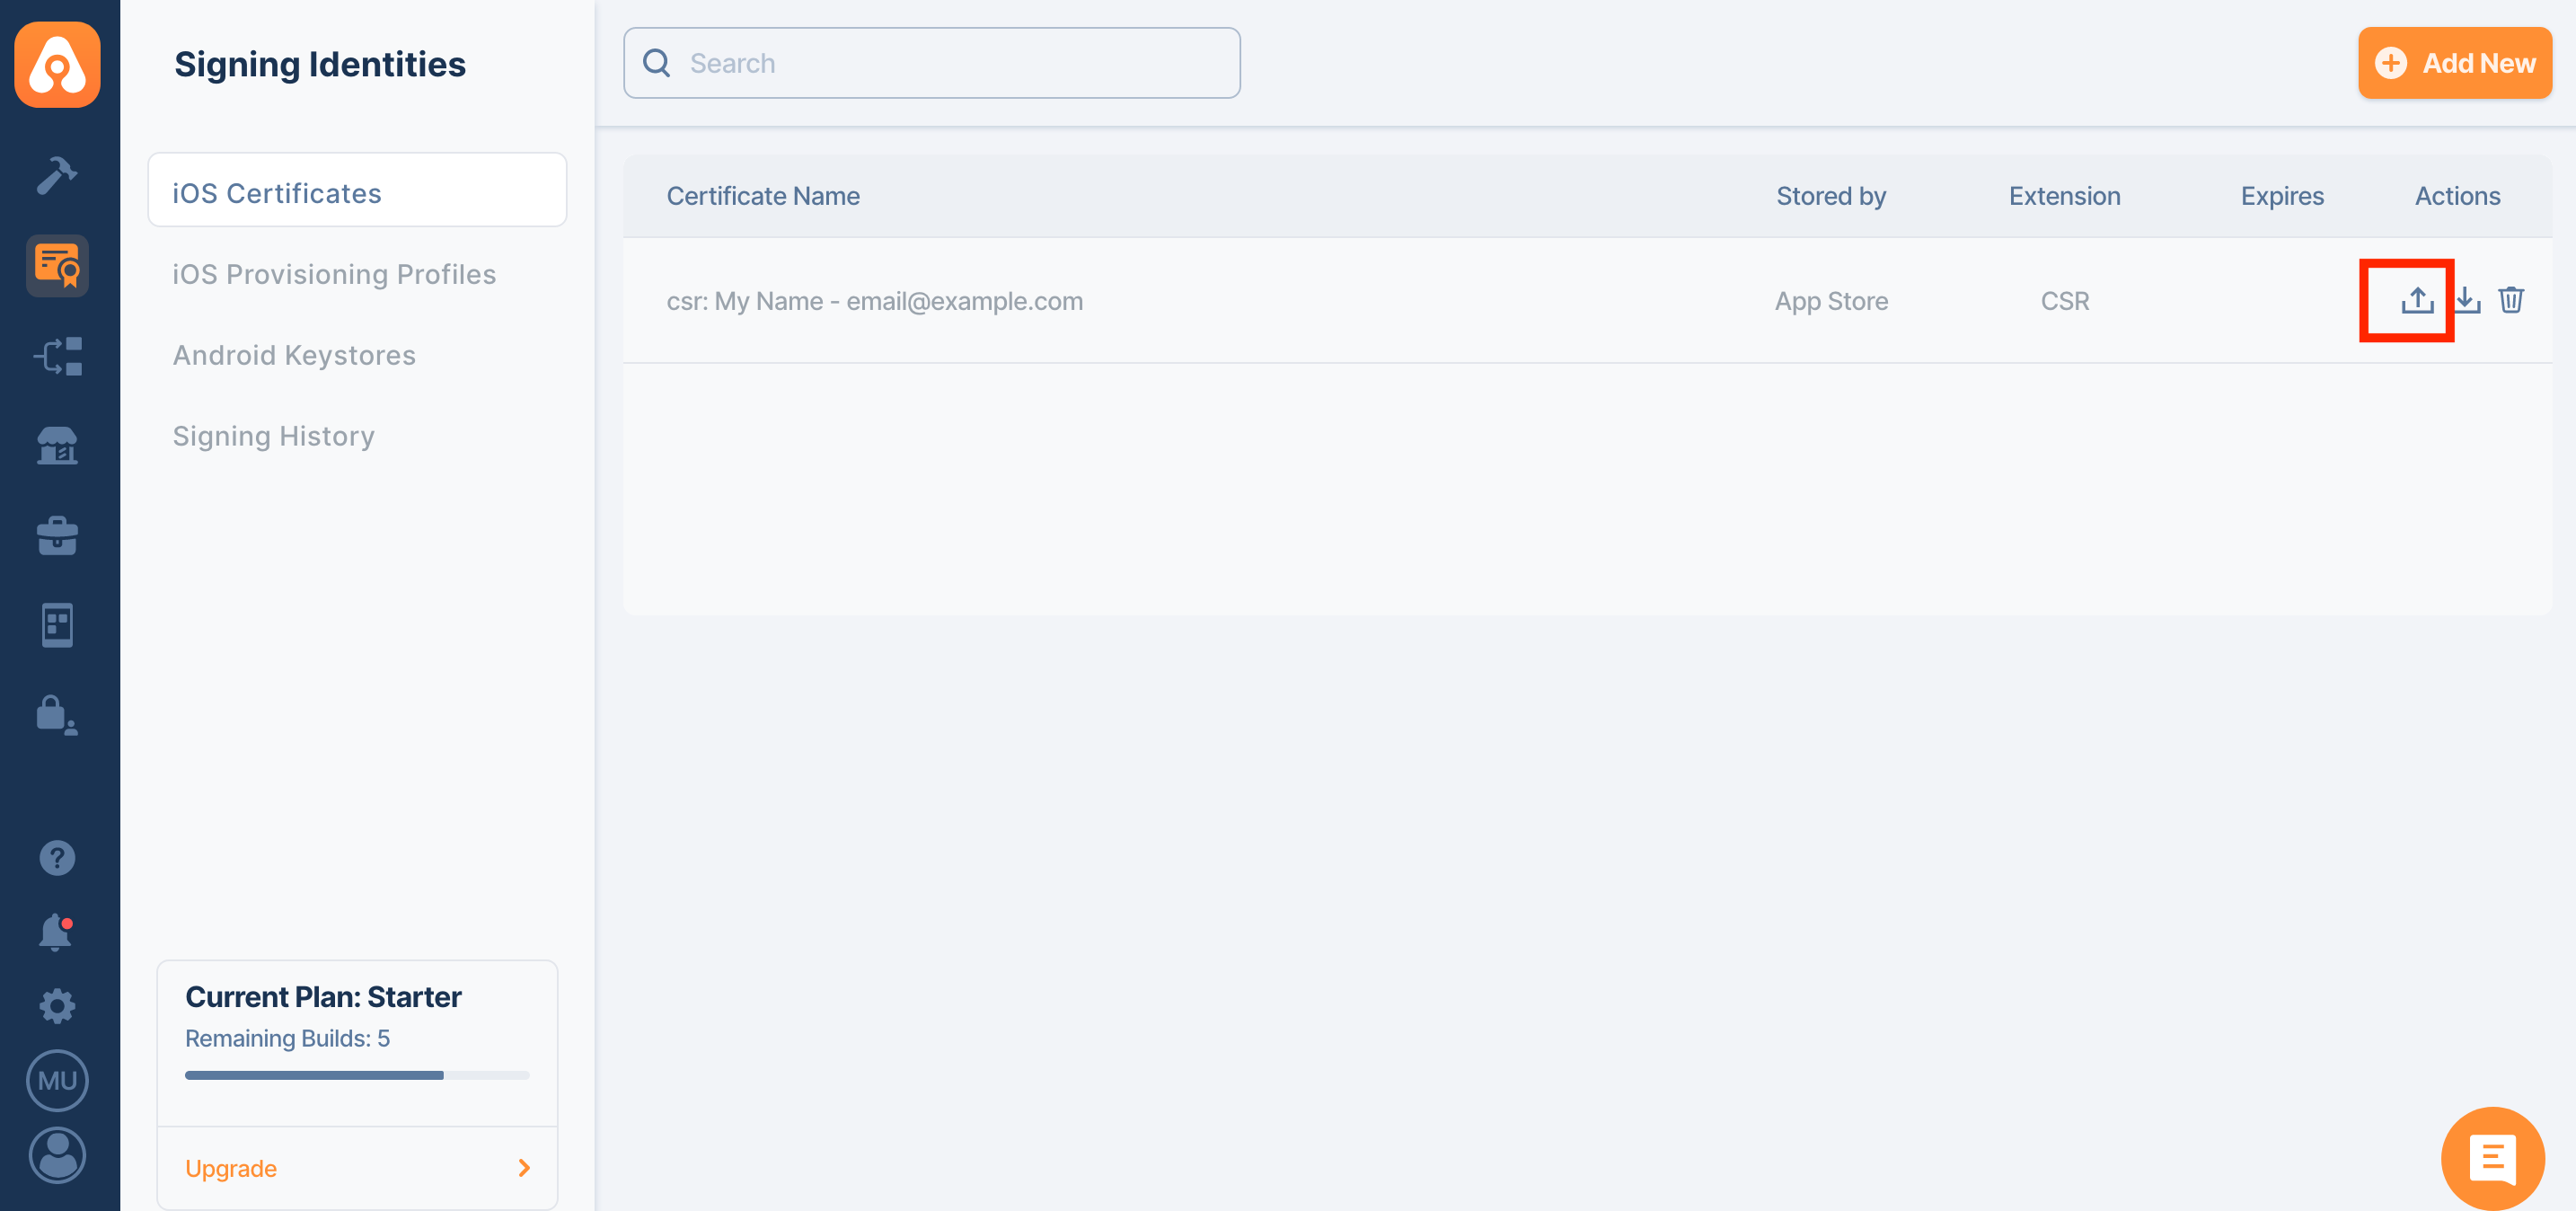
Upload the CER file to the signing identities module by clicking on the upload button next to the CSR file.
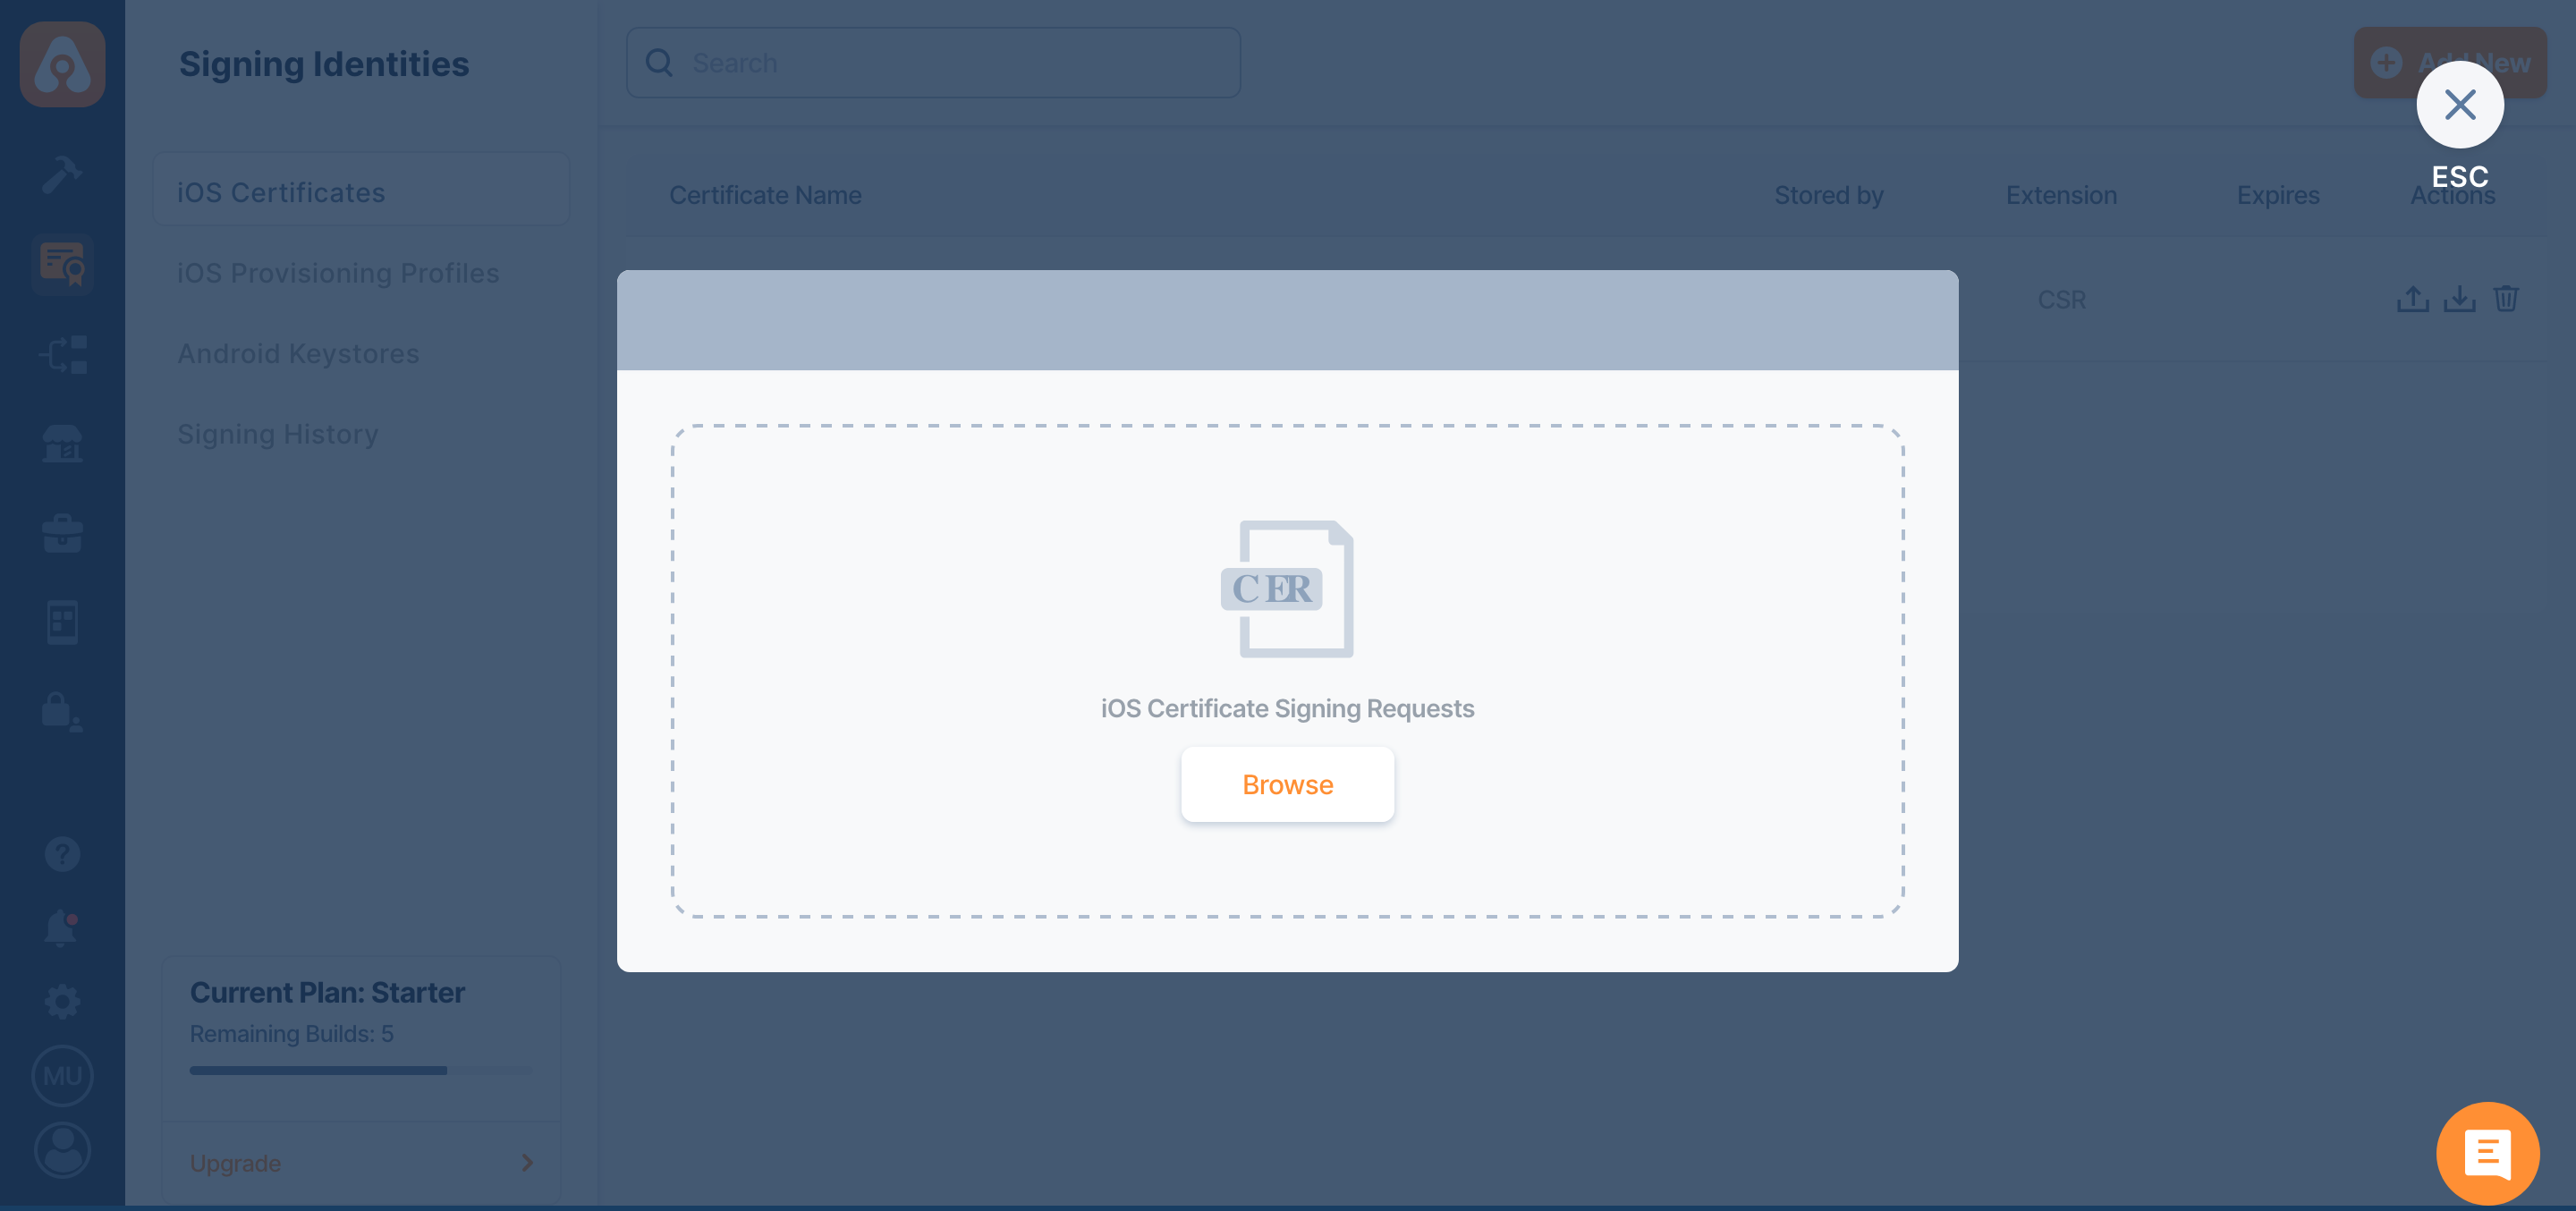
- Your CSR will now be converted to a P12 file as an iOS signing certificate. (Please note that the P12 file comes with an empty password.)
Uploading P12 Certificate
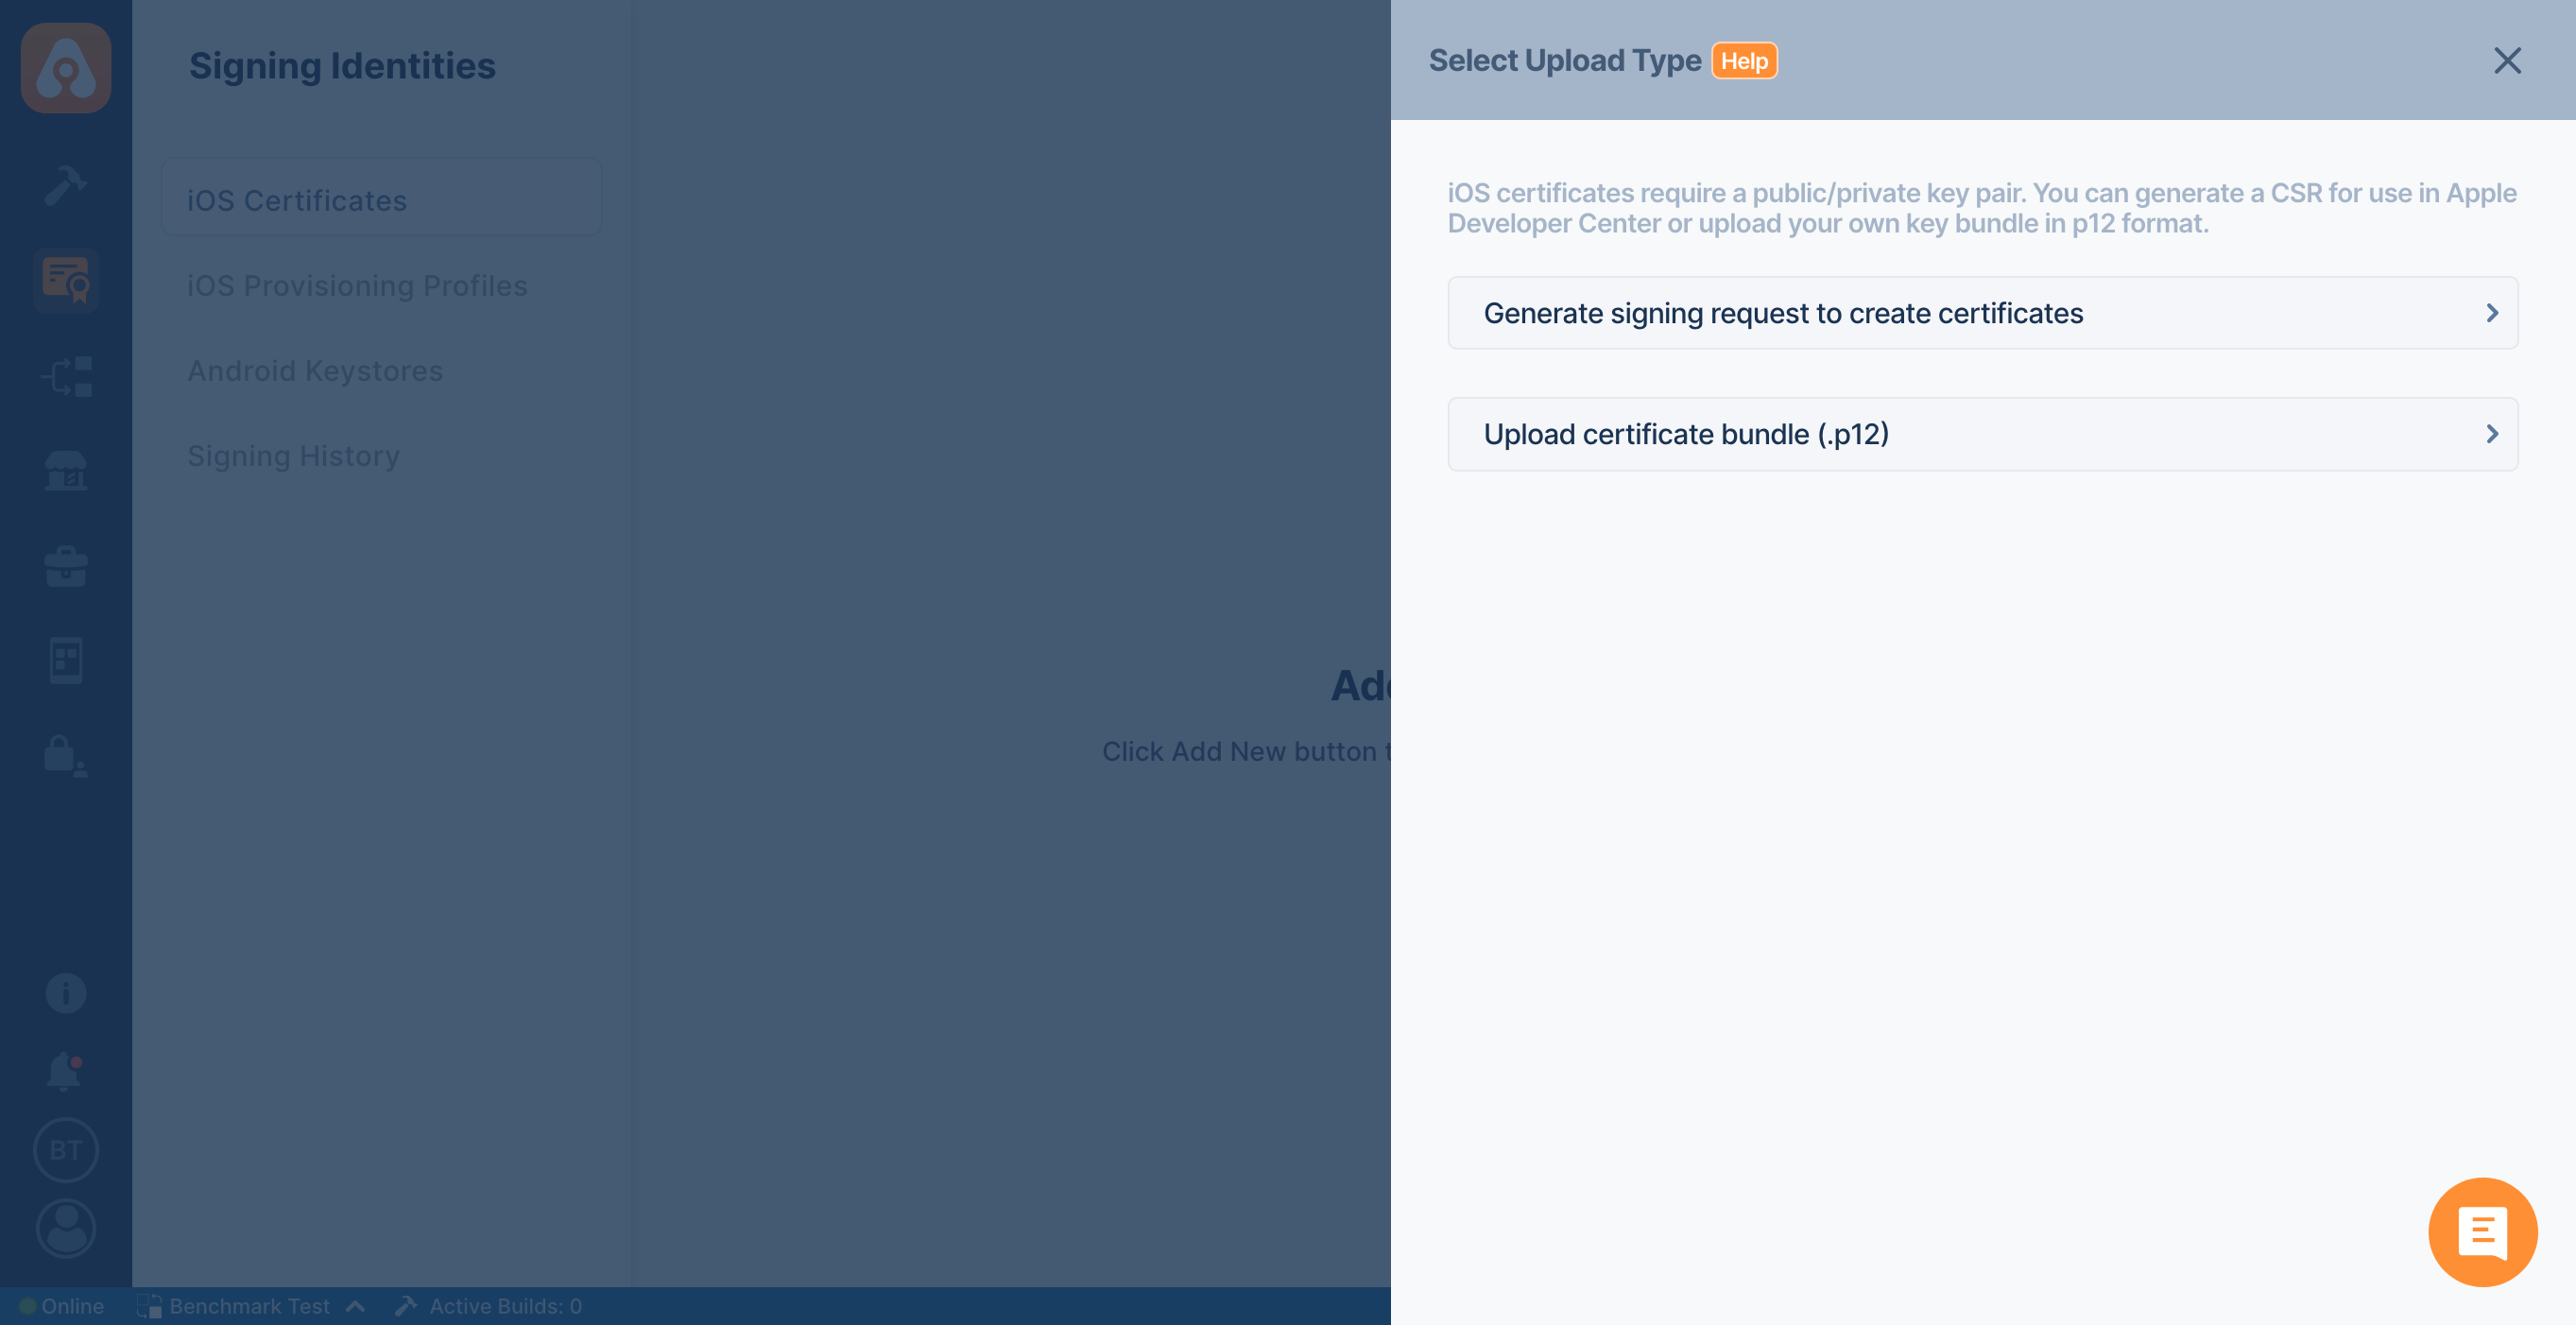
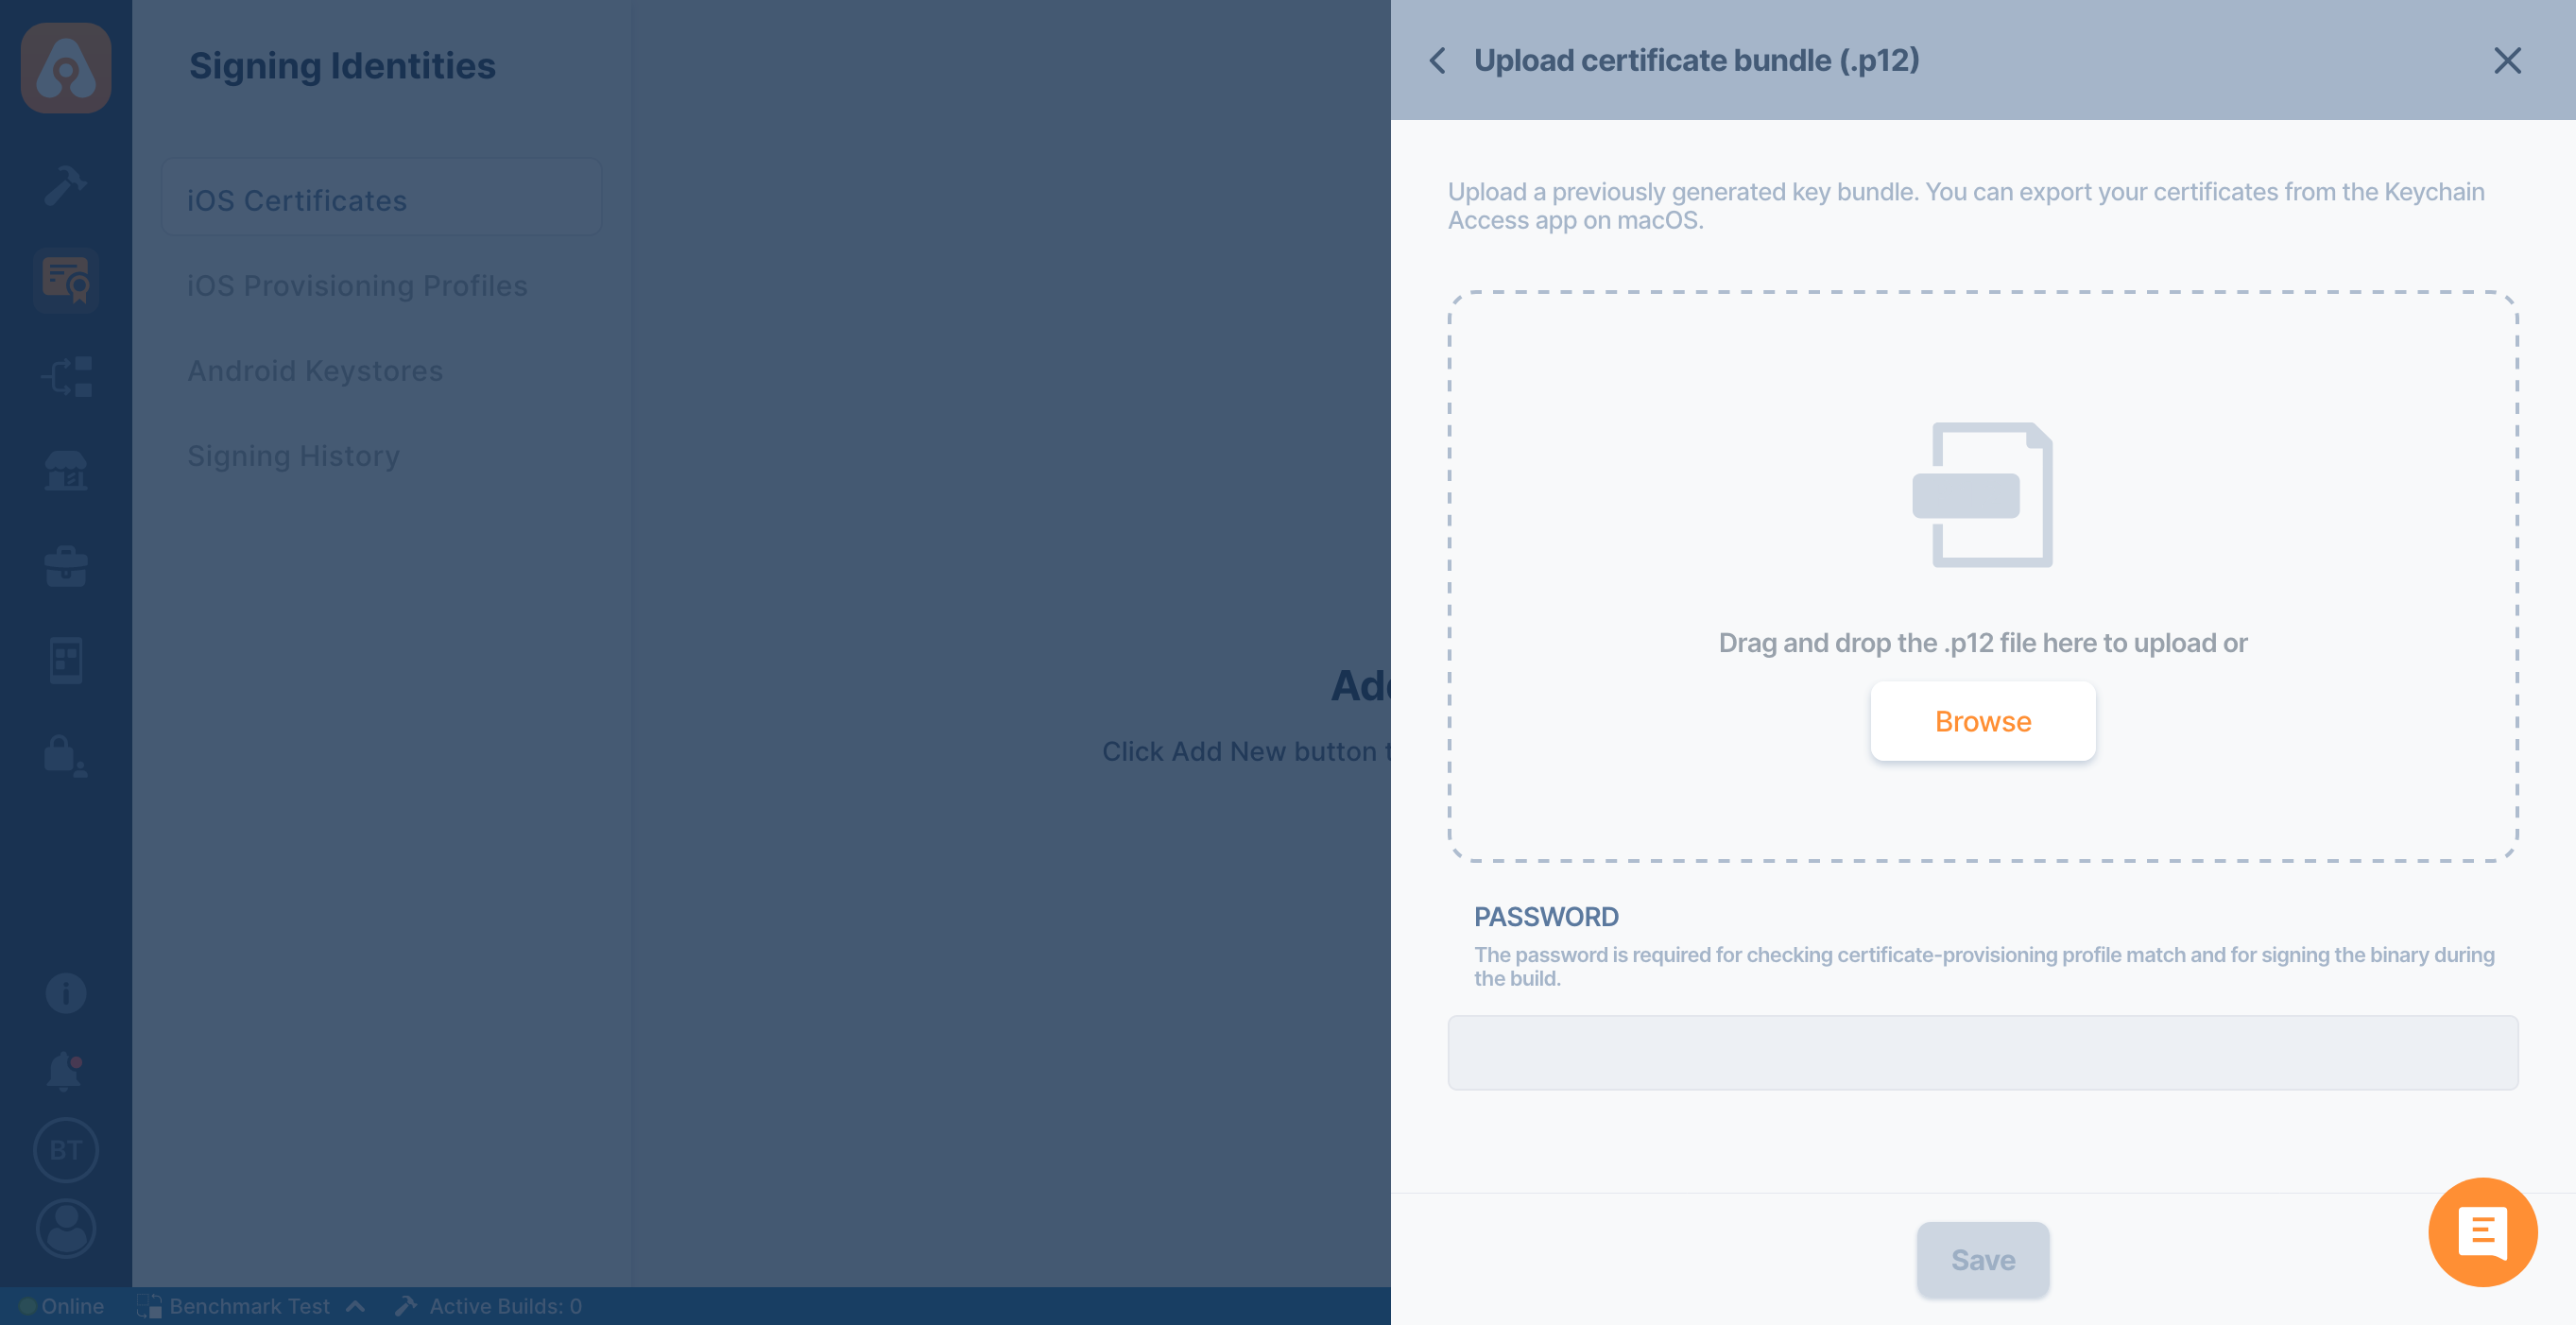
To upload your Apple Certificate, select "Upload Certificate Bundle (.p12)" button and upload your pre-obtained Apple Certificate file.
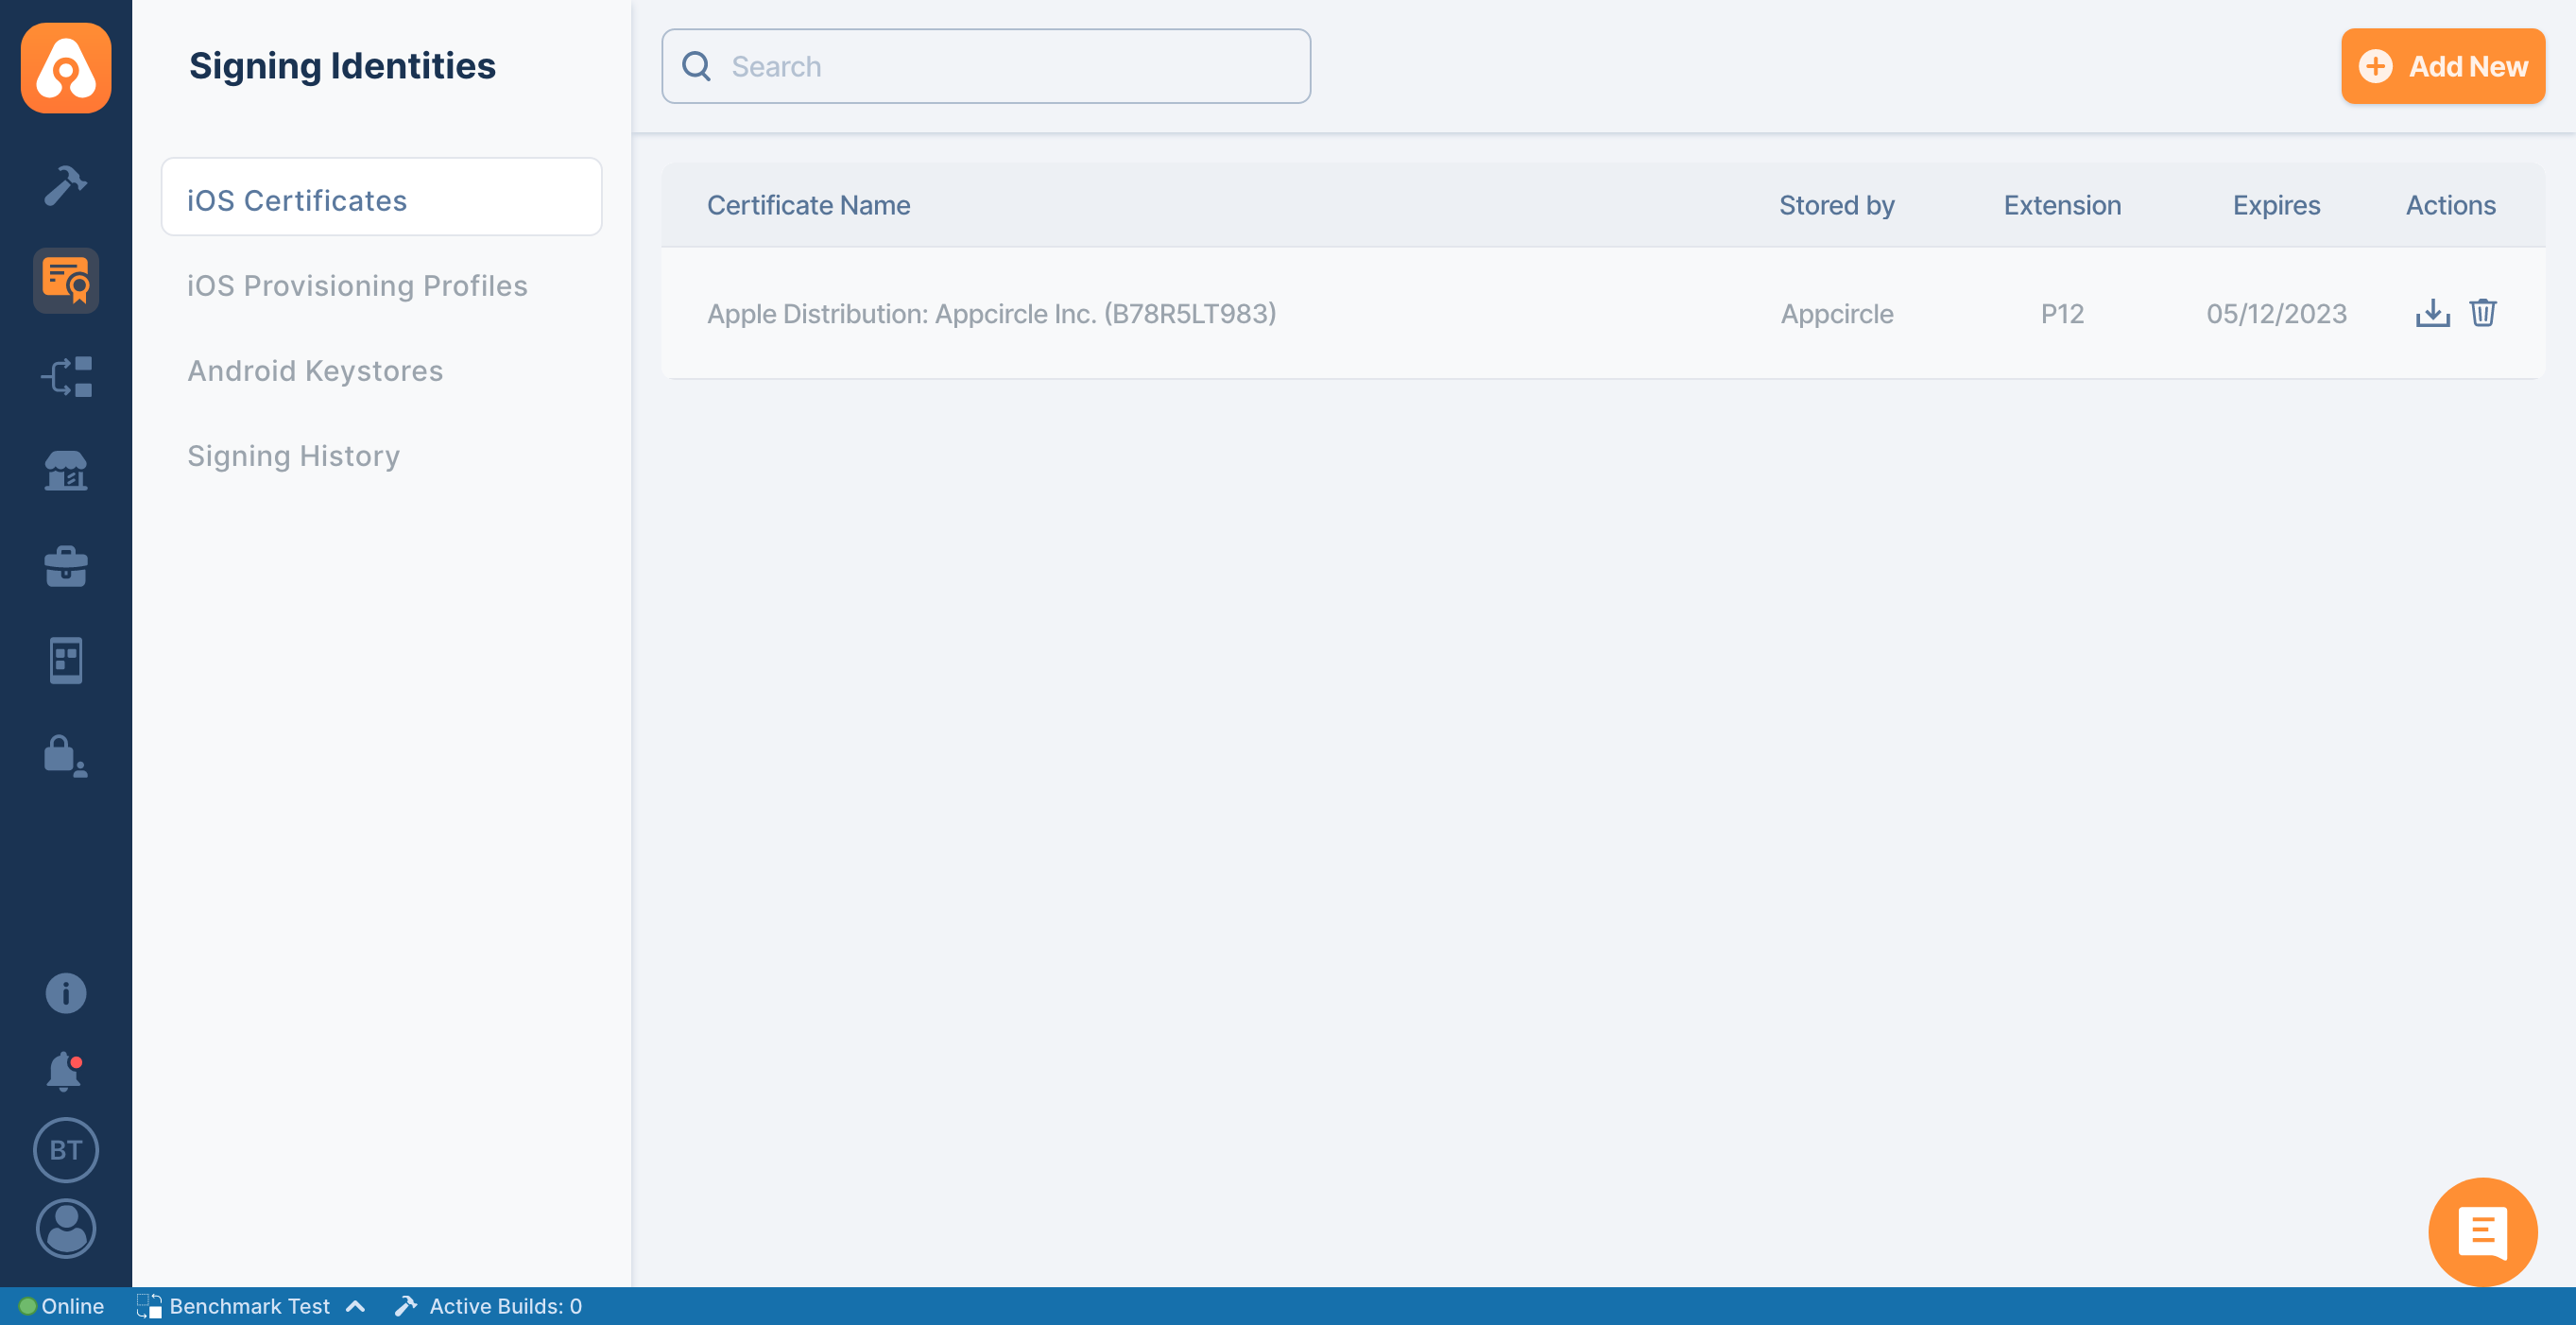
You can see a list of your created or uploaded certificates. Each certificate will display the certificate name, certificate type (development, ad-hoc, in-house, or app store distribution) along with expiration dates.
If your password contains special characters such as $ and #, your workflow may fail with MAC verification failed during PKCS12 import message. If you receive such an error, please export your P12 file by removing that symbol.
You will be notified when an Apple Certificate is about to expire. You can see the expiration notification in the in-app notification window and optionally enable expiration notifications for Email, Slack, Microsoft Teams, etc.
Standard Schedule: Certificates already in the system 30+ days before expiration receive notifications at 30, 15, 7, 3, 1 days before expiration, plus expiring today.
Late Upload: Certificates uploaded with less than 30 days remaining before expiration get notifications starting from upload day, then continuing with the next applicable intervals from the standard schedule.
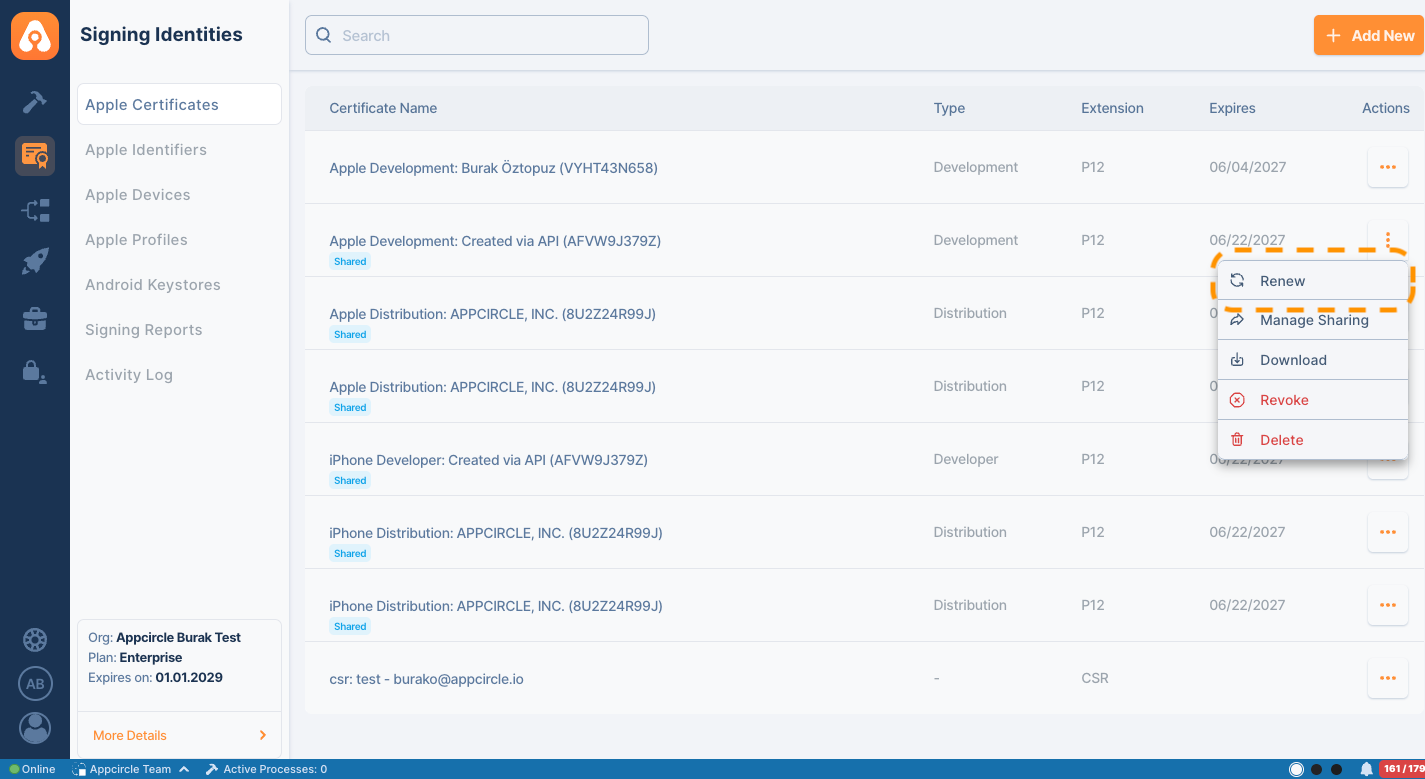
Manual Renew Certificate
Apple Certificates have a limited validity period and must be renewed before they expire to avoid interruptions in your build and distribution workflows. Appcircle allows you to manually renew an existing Apple Certificate directly from the Signing Identities module, so you can generate an up-to-date certificate without having to remove and reconfigure your current one.
- In order to manually renew Apple Certificate, navigate to the action button of related certificate and click the renew button.
Renewing an Apple Certificate requires a valid App Store Connect API Key associated with your organization, just like creating a new certificate. If no API Key has been added to your Appcircle organization, the renewal process cannot be completed. For more information, please refer to the App Store Connect API Key documentation.
Please remember that the CSR file must be generated on Appcircle in order to successfully renew the certificate. You can find detailed instructions on how to generate the CSR file in this document.
There are limits on the number of certificates that can be generated on Apple. These limits are restricted to 3 for Distribution and 2 for Development types. However, these limits may vary for create operations performed via the API. If Apple does not allow a create or renew operation via the API, a notification will appear on Appcircle.
-
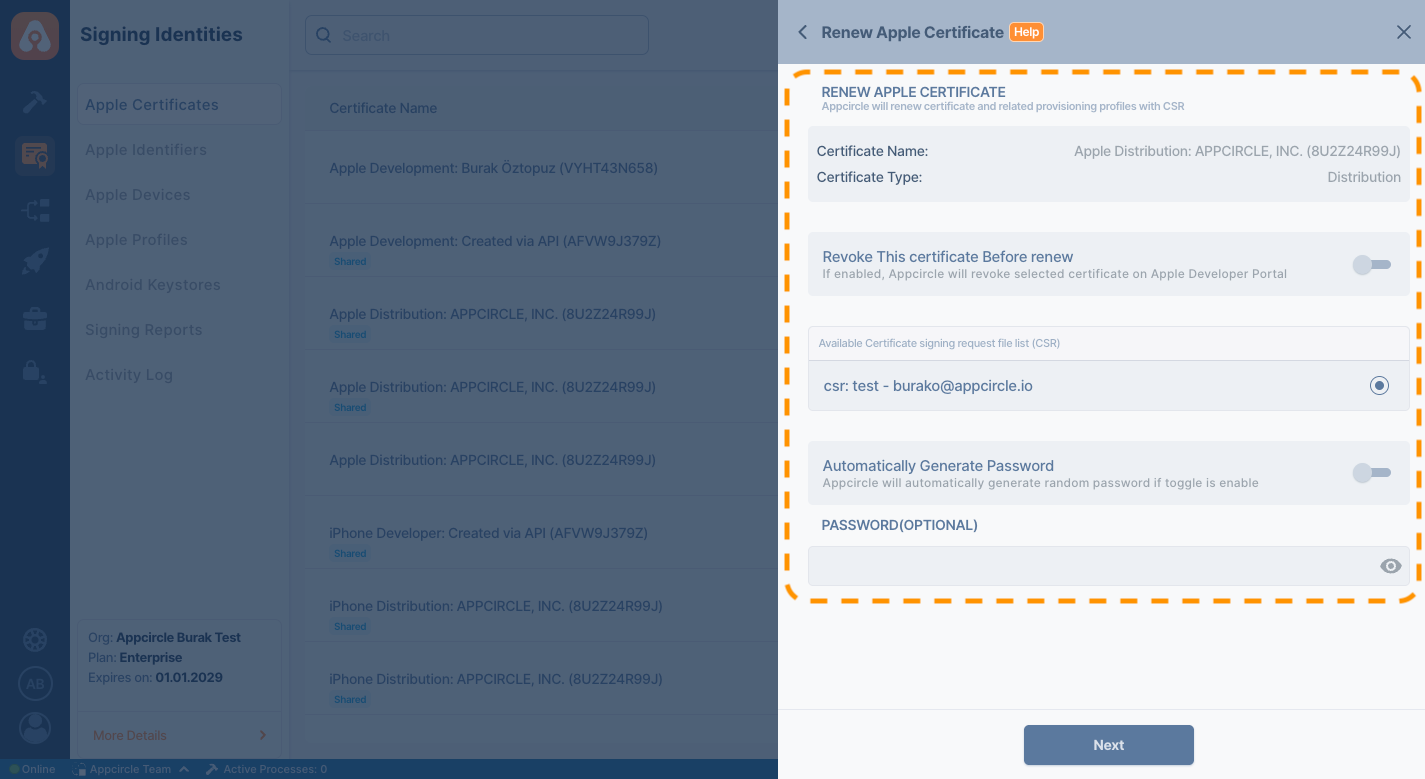
Appcircle requires certain inputs for the certificate you wish to renew. The purposes of these inputs are explained below.
- Revoke This Certificate Before Renew: If you want to revoke the certificate you wish to renew on the Apple Developer Portal first, and then create a new certificate, you will need to enable this toggle.
- CSR File: Apple will not allow a certificate to be generated without a CSR file. Therefore, a CSR file must be selected.
- Automatically Generate Password: Appcircle will automatically generate a random password if this toggle is enabled.
- Password(Optional): When generating a certificate, you are prompted to set a password. This password is entirely optional, and the certificate will be generated without any issues even if you do not set one.
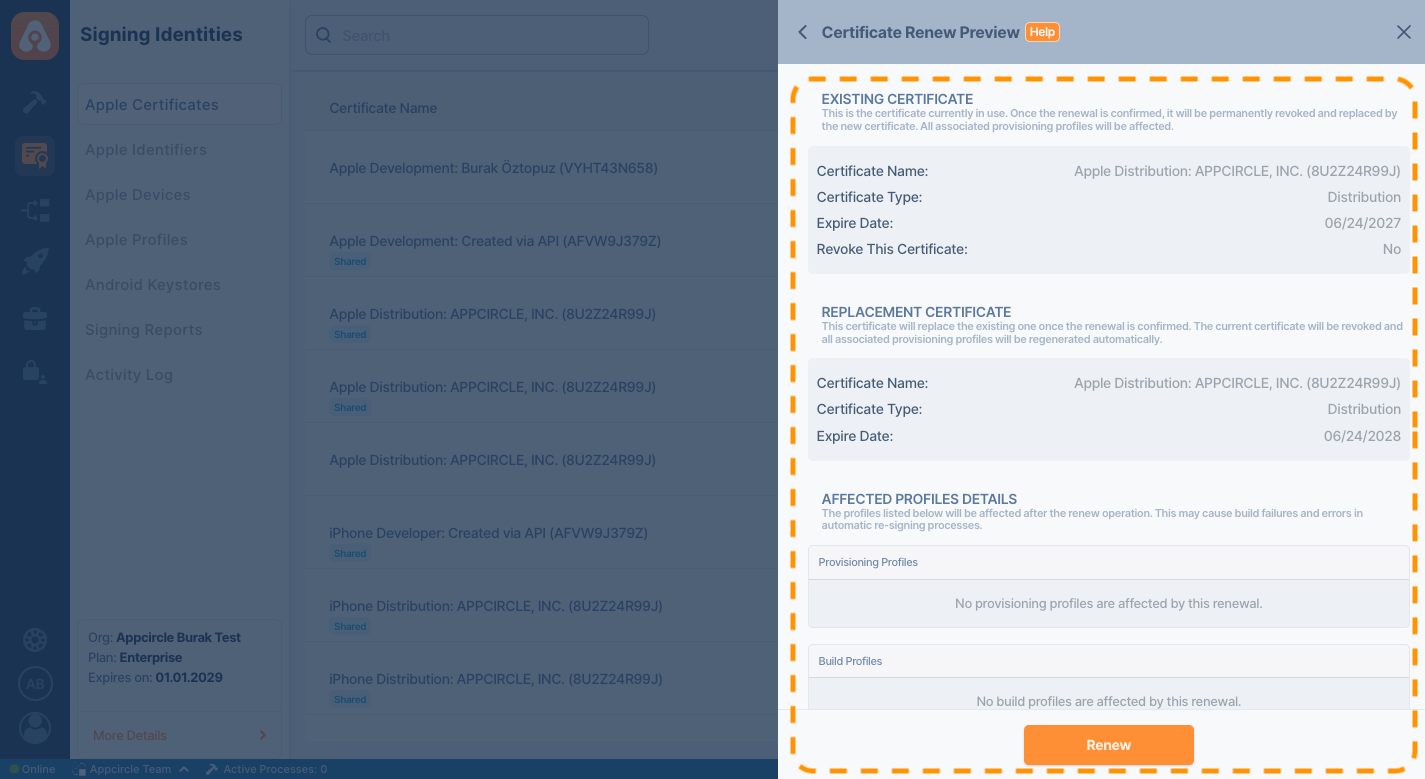
Renew Preview
Before performing the Appcircle renewal process, this panel provides the user with a preview and displays all the necessary information.
- Existing Certificate: This is the certificate currently in use. Once the renewal is confirmed, it will be permanently revoked and replaced by the new certificate. All associated provisioning profiles will be affected.
- Replacement Certificate: This certificate will replace the existing one once the renewal is confirmed. The current certificate will be revoked and all associated provisioning profiles will be regenerated automatically.
- Affected Profiles Details: The profiles listed below will be affected after the renew operation. This may cause build failures and errors in automatic re-sign processes.
During the Appcircle certificate renewal process, it recreates all provisioning profiles associated with the certificates. Additionally, it directly replaces the old certificates used in the re-sign and build profiles with the new ones.
Revoke Certificate
On Appcircle, you can revoke your certificates directly without having to go to the Apple Developer Portal. To do this, use the “Revoke” action found under the certificate's “Action” button.
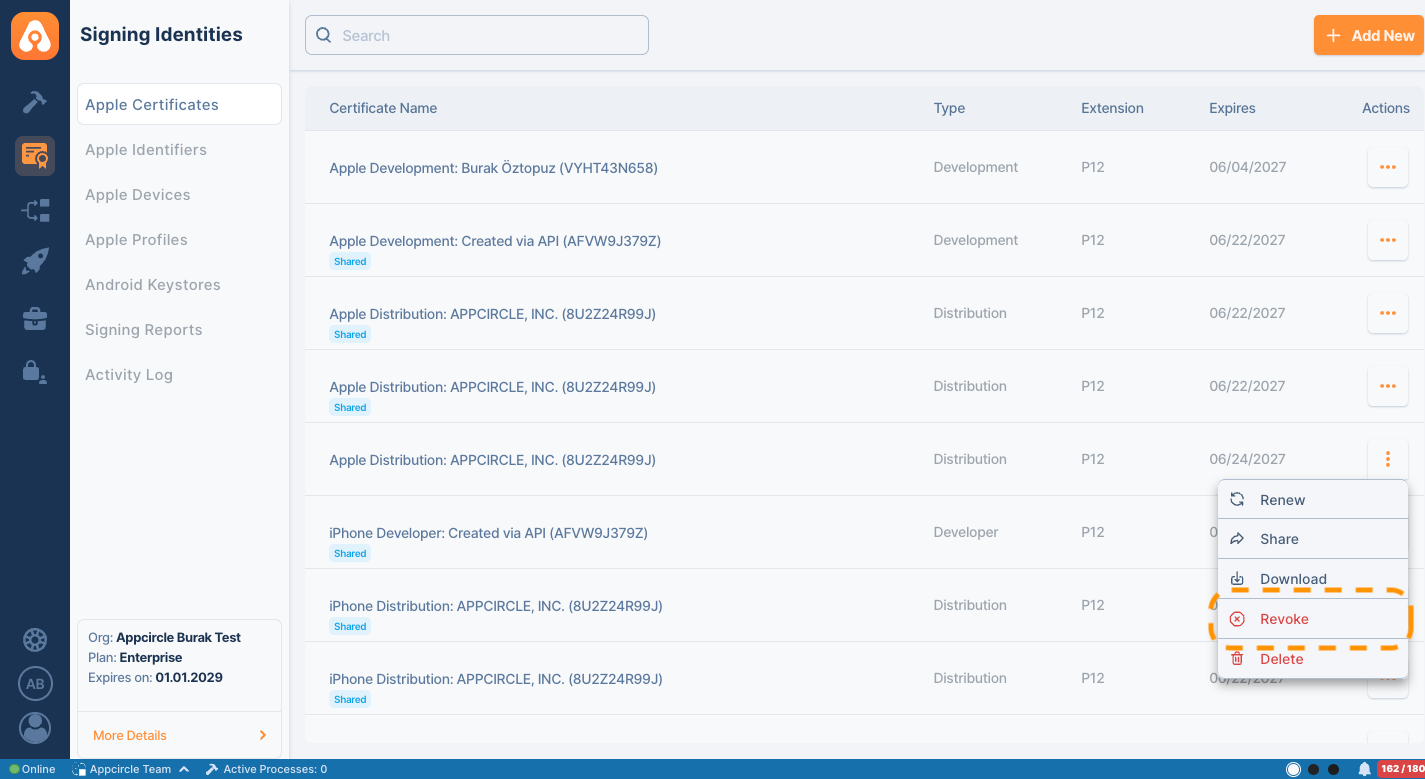
Please keep in mind that if a certificate is revoked, this does not mean it will be automatically renewed. The revocation process is irreversible and permanently deletes the existing certificate from your Apple Developer account. Binaries signed with the revoked certificate will no longer be valid and will need to be signed with a new certificate. Before revoking your certificates, make absolutely sure that this will not affect your workflows.
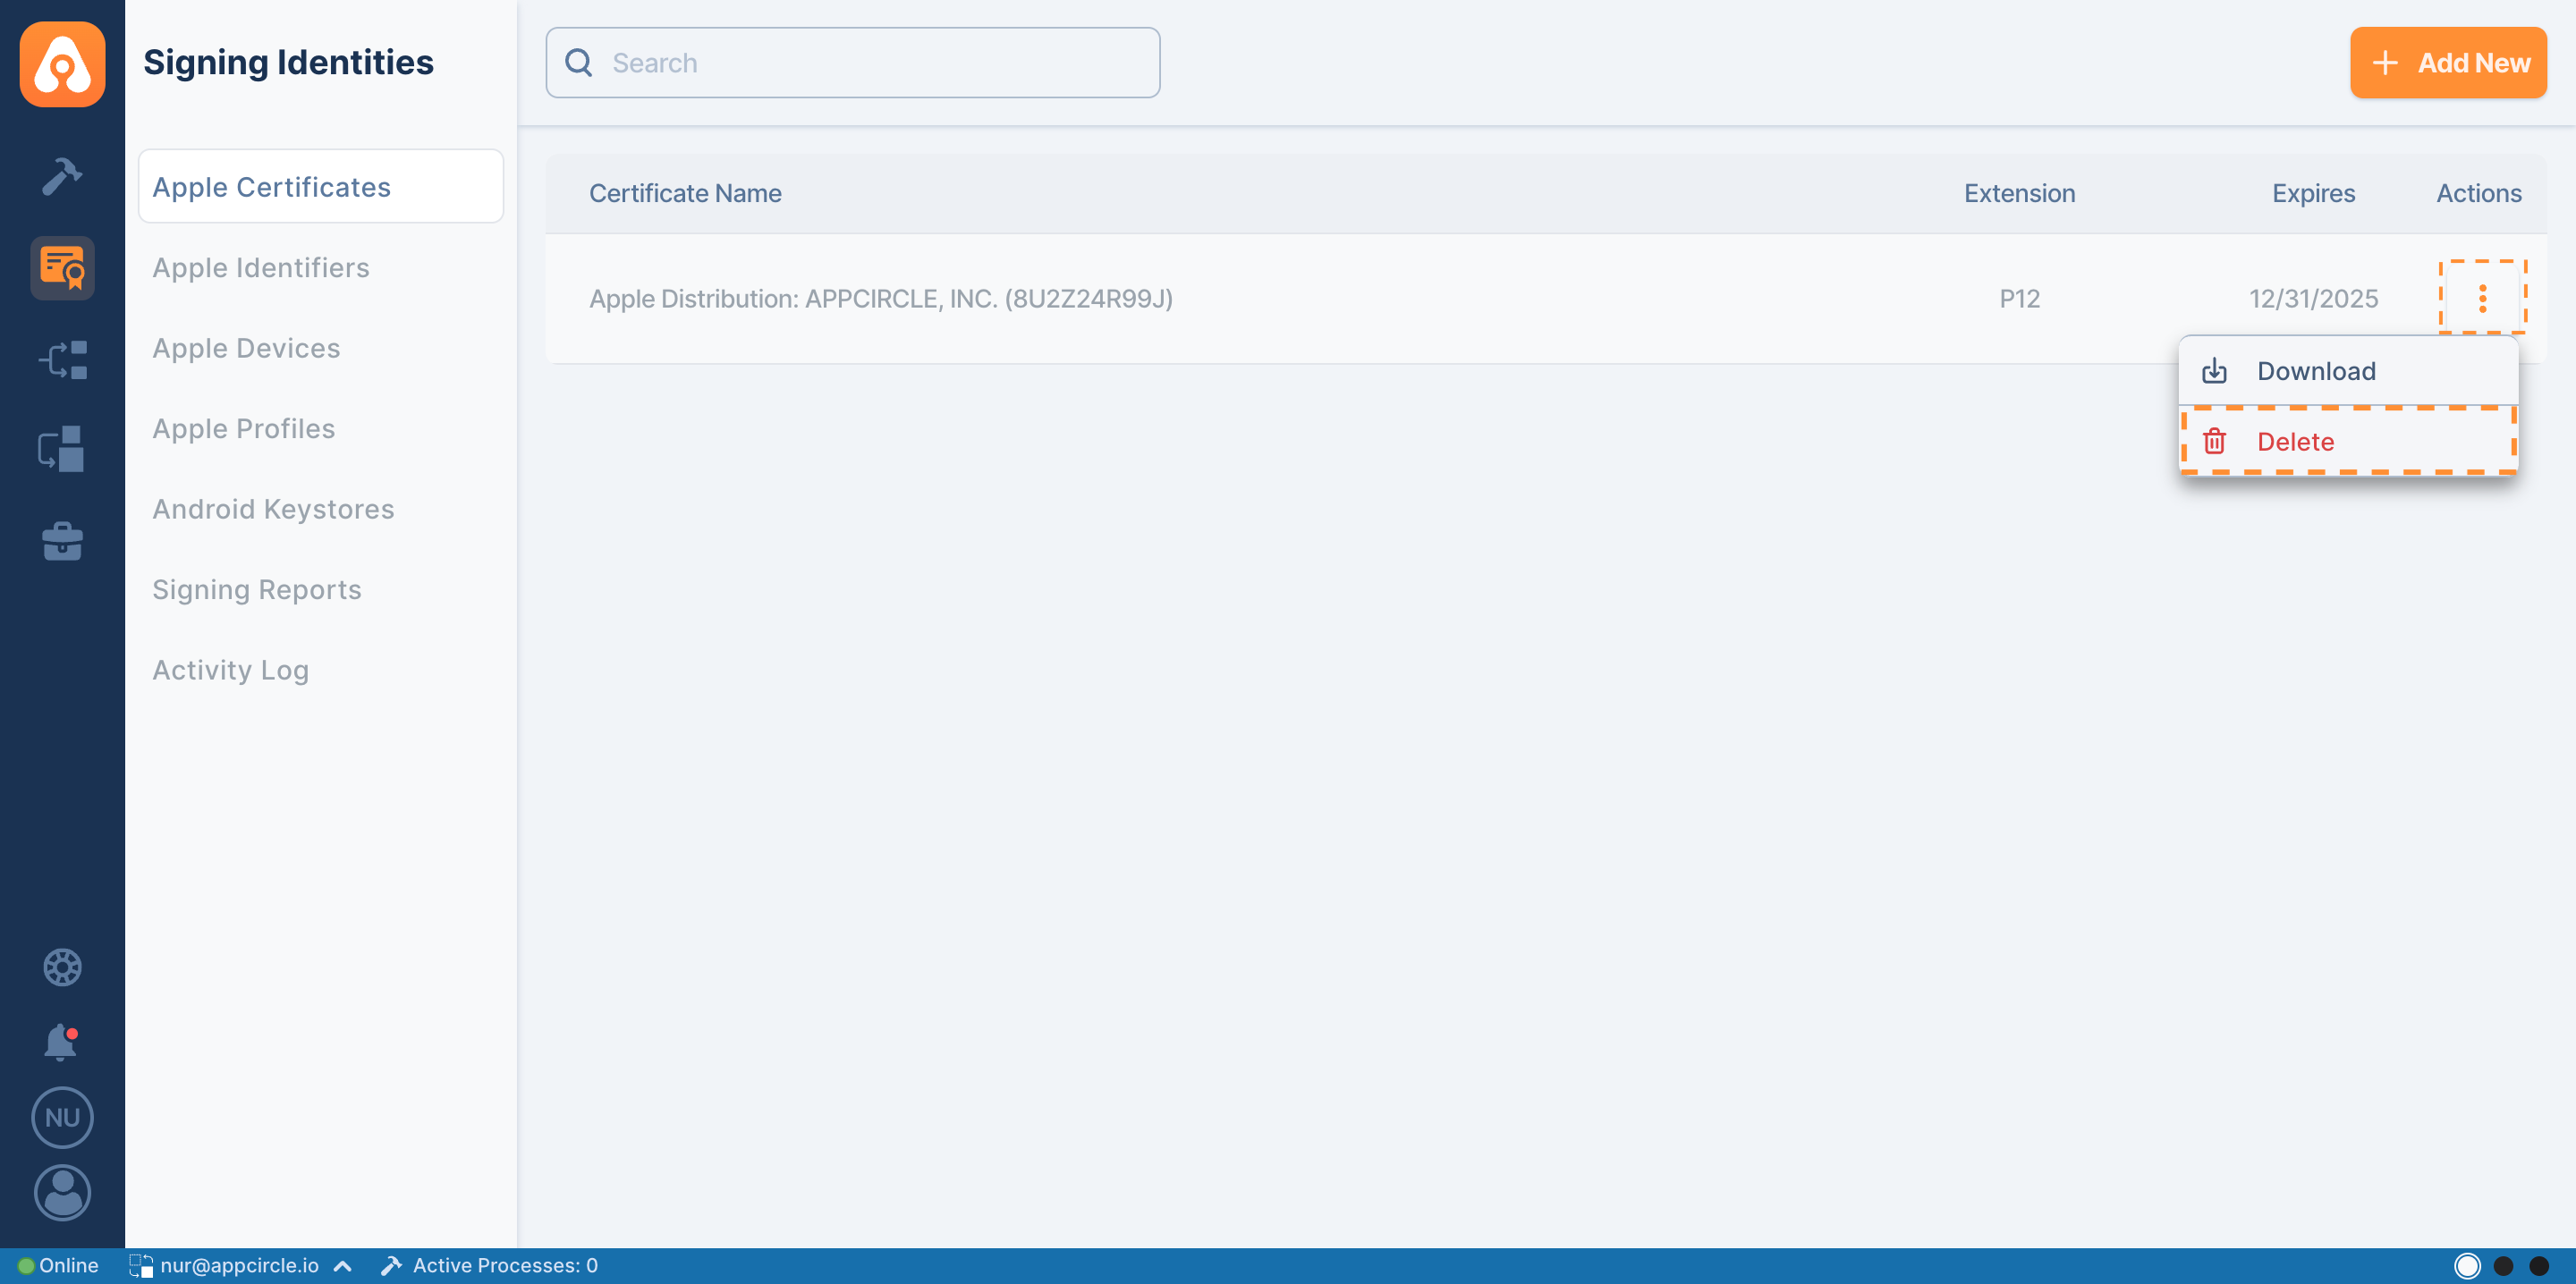
Deleting a Certificate
To delete an Apple Certificate, click the ... button and select the Delete option.
Certificates deleted on Appcircle will only be removed from Appcircle and will not affect those on Apple Developer account.
Sharing Apple Certificates
Root Organization users have the ability to share their Apple Certificates with Sub-Organization users.
Shared certificates can be used in Sub-Organizations just like locally created or uploaded certificates.
How to Share Apple Certificates
-
Navigate to the Apple Certificates Section
Go to the Signing Identity module and open the Apple Certificates section. -
Open Certificate List
Locate the certificate you want to share from the list. -
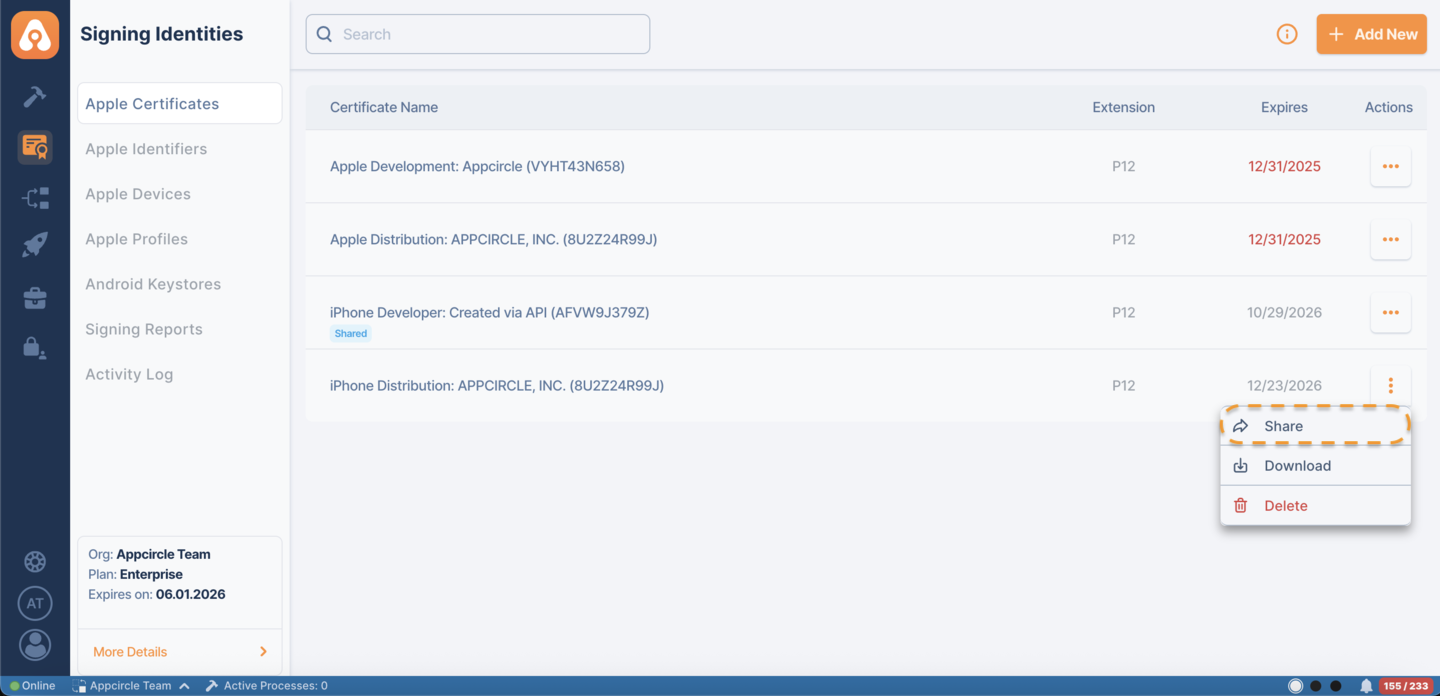
Select the Certificate
Click the Share icon under the Actions column for the selected certificate. -
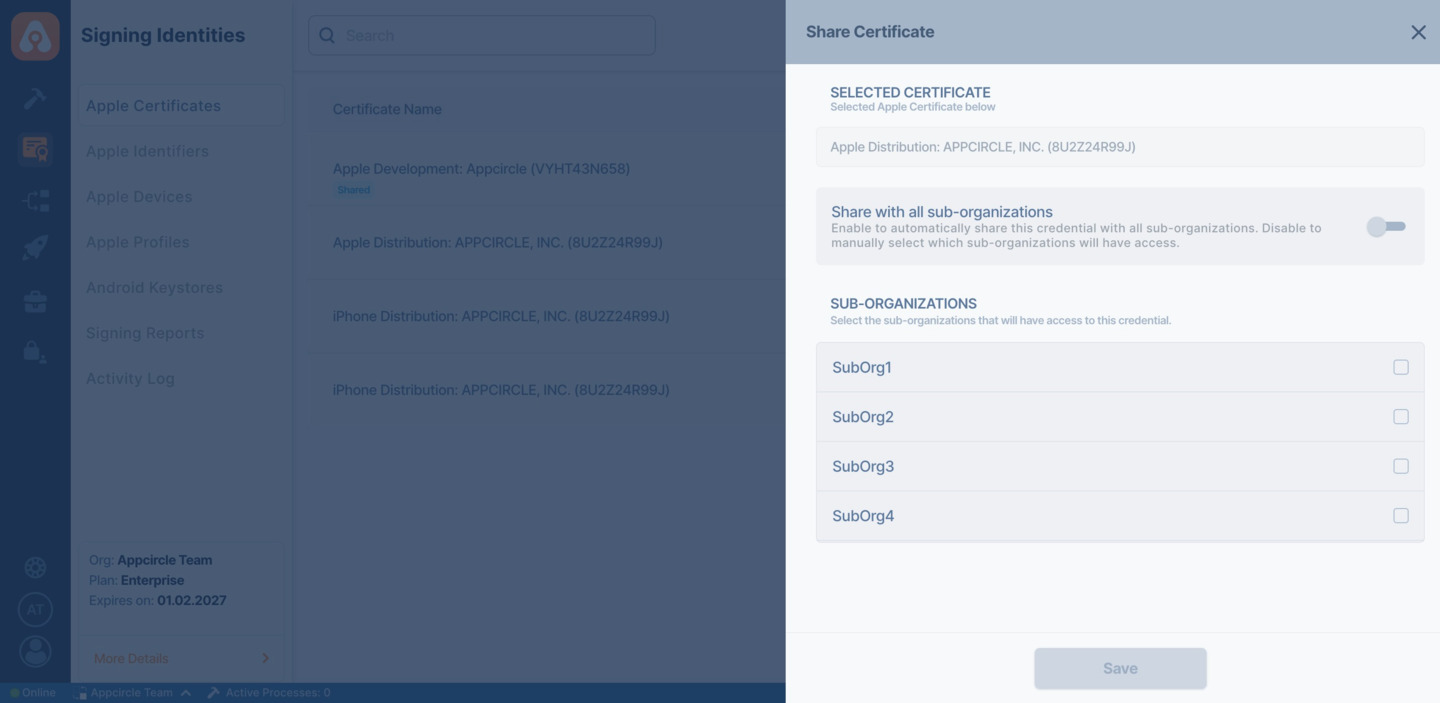
Configure Sharing Settings
In the Share panel:
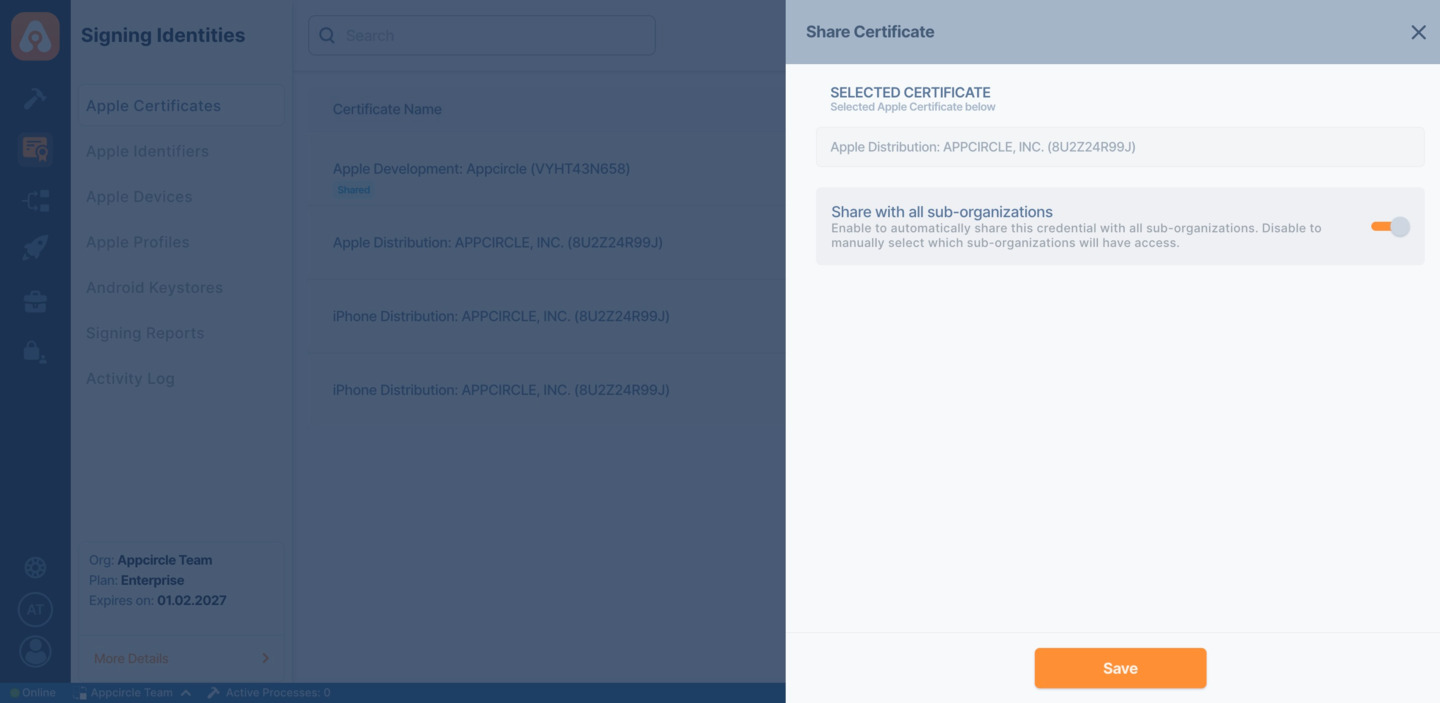
- Enable Share with all sub-organizations to automatically share the certificate with all existing and newly created sub-organizations.
- Alternatively, manually select specific sub-organizations that should have access.
- Save Sharing Configuration
Click Share to apply the configuration.
Behavior in Sub-Organizations
- Shared certificates will be visible and selectable in Sub-Organizations as if they were their own.
- These certificates will be marked with a Shared tag on Root Organization and Inherited tag on Sub Organizations' certificate list.
- Sub-Organization users cannot edit, rename, or delete shared certificates.

- When Share with all sub-organizations is enabled, the certificate will automatically be available in newly created sub-organizations as well.
- Any updates or deletions made in the Root Organization will directly affect all Sub-Organizations using the shared certificate.