Apple Devices
When it comes to developing and testing iOS apps, one of the most important tasks is registering your devices with the Apple Developer portal. This is necessary so that you can install your app on those devices for testing purposes. However, this process can be a bit tedious, especially if you need to register a large number of devices. That's where Appcircle comes in.
Ad-hoc distribution is a method of distributing iOS apps outside the App Store. To use Ad-hoc distribution, devices must be registered with the Apple Developer portal and included in your app's provisioning profile. Appcircle streamlines and simplifies this process, making it more efficient.
Please note that Ad Hoc provisioning is intended solely for internal distribution and testing, and cannot be used for App Store submission or external distribution. The number of devices that can be registered in an Apple Developer account is limited to 100 iOS devices, which can only be reset once a year.
For more information, please visit Apple Developer documentations.
Adding Device
Appcircle's advanced Apple Devices feature simplifies device management. It allows you to fetch existing registered devices and add or register a device manually or via email.
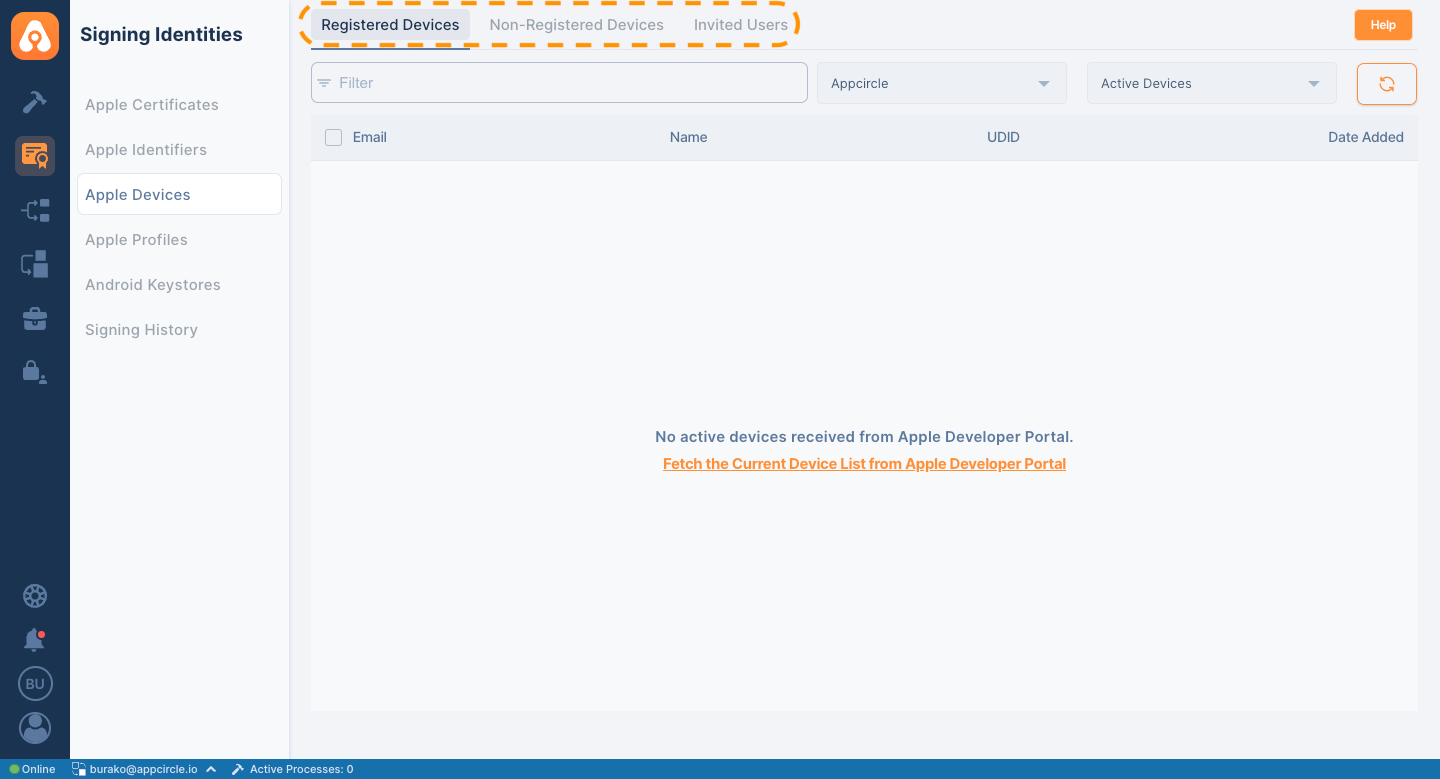
To manage your devices, simply visit the relevant sections in the Apple Devices feature.
- Registered Devices: This section lists the devices registered to your Apple Developer Account using an API key.
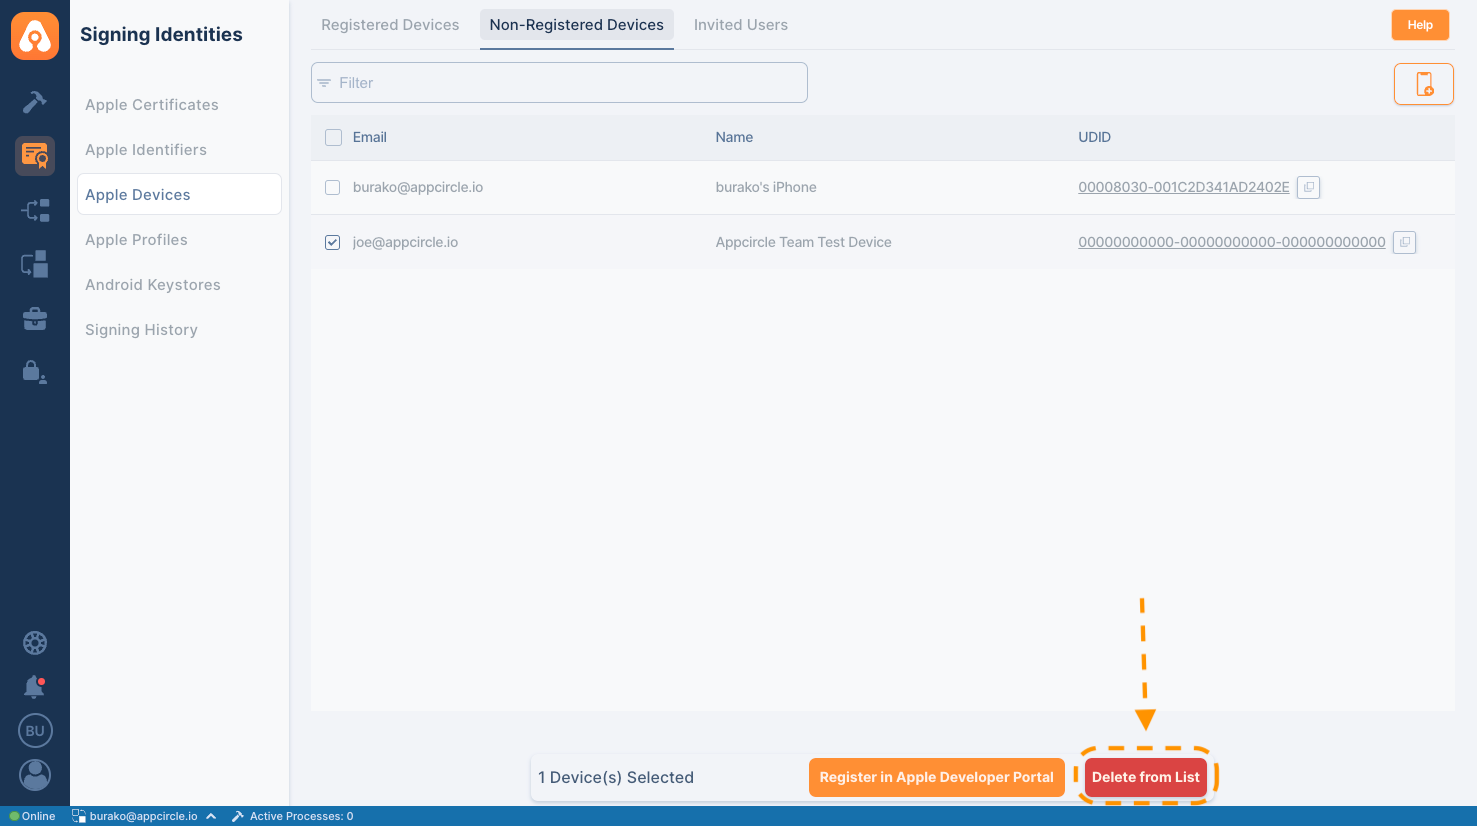
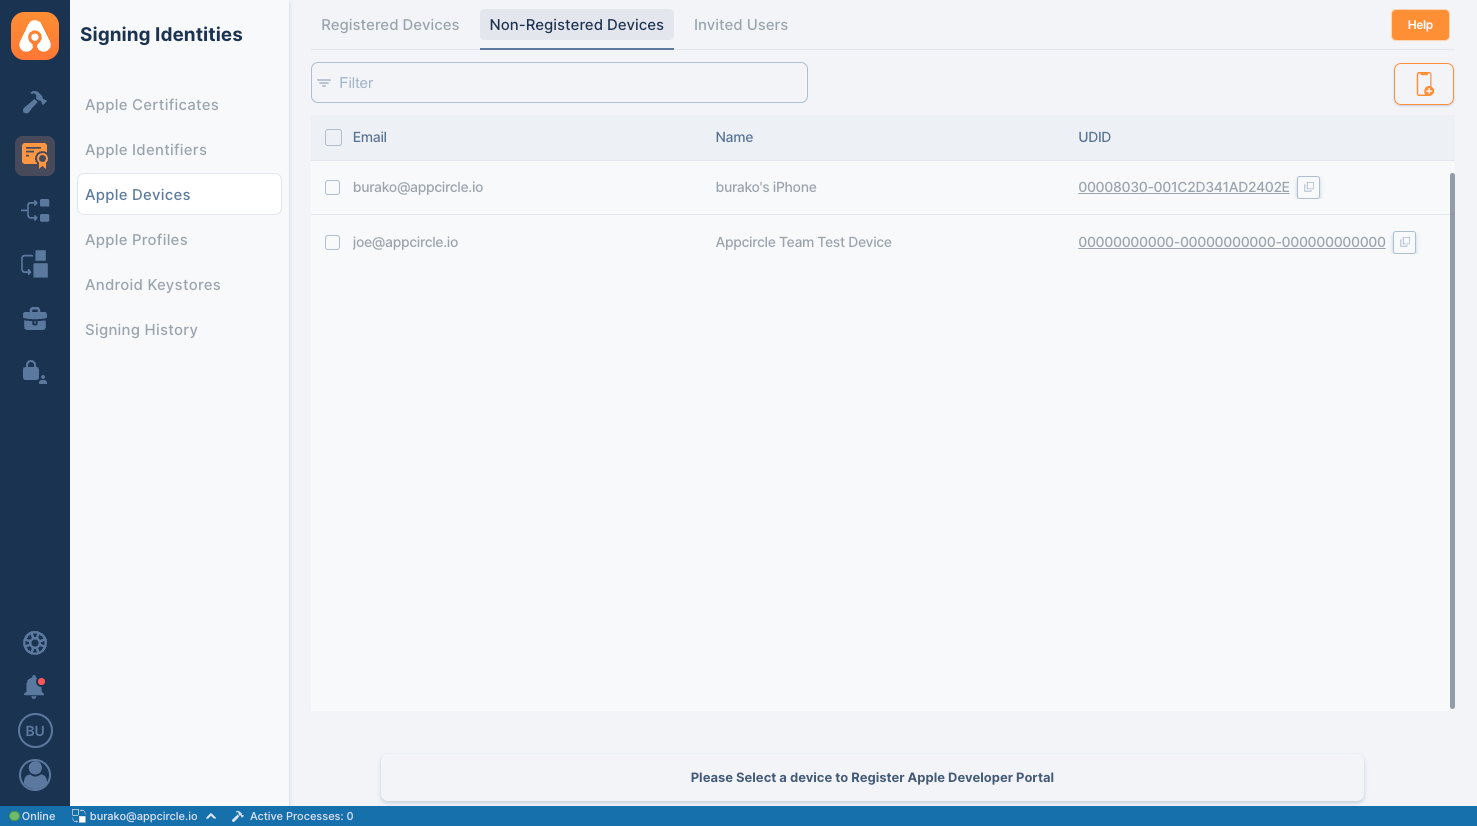
- Non-Registered Devices: This section shows devices registered on Appcircle but not yet registered in your Apple Developer account. You can manually add a new device in this section.
- Invited Users: This section lists users who have received email invitations to provide device information. You can collect new device details via email.
In Appcircle's Apple Devices feature, when an invited user successfully completes the device UDID journey, the user's device UDID will be listed in the Non-Registered device list. However, if this user's UDID value is already registered in the App Store Connect account, it will not appear in the Non-Registered Devices list.
Follow this document for detailed usage and purpose of all sections.
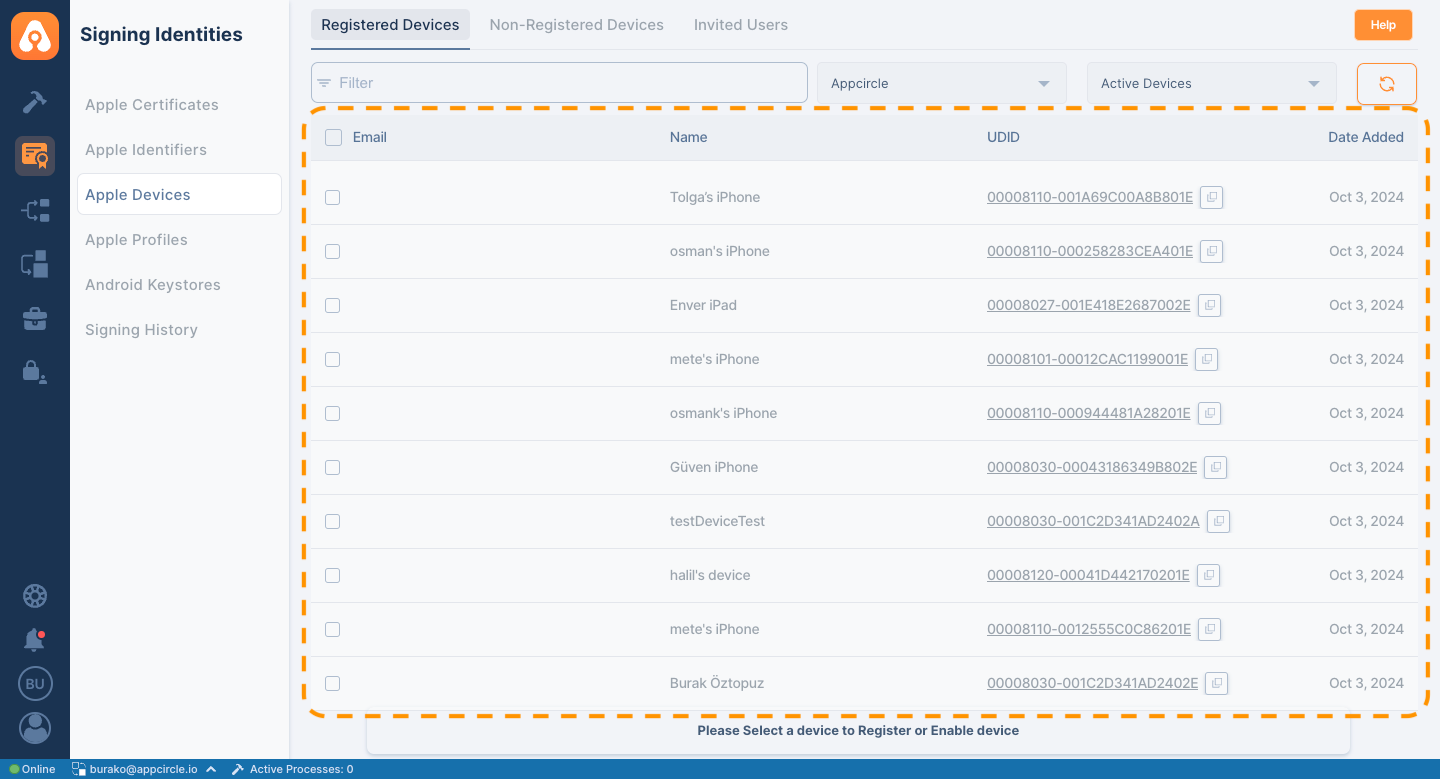
Registered Device
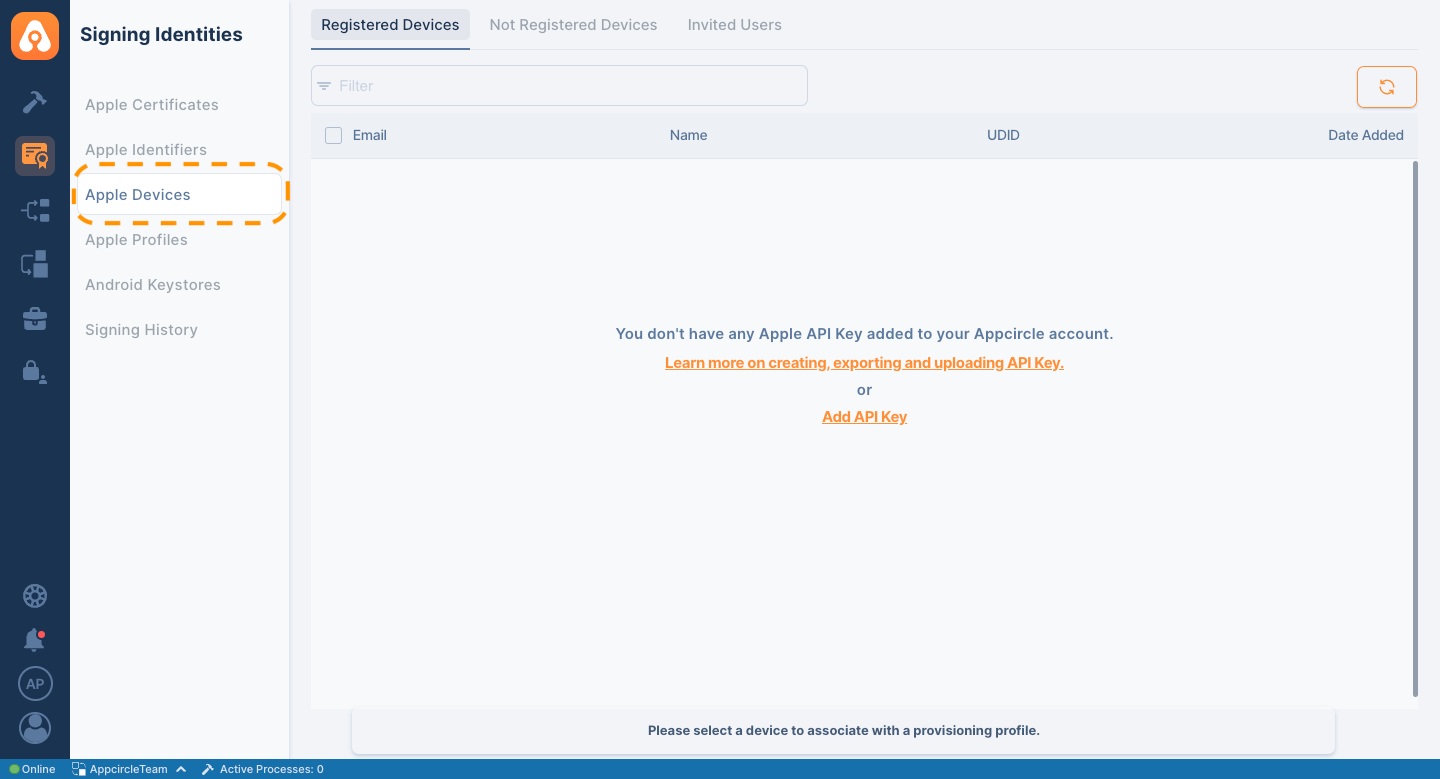
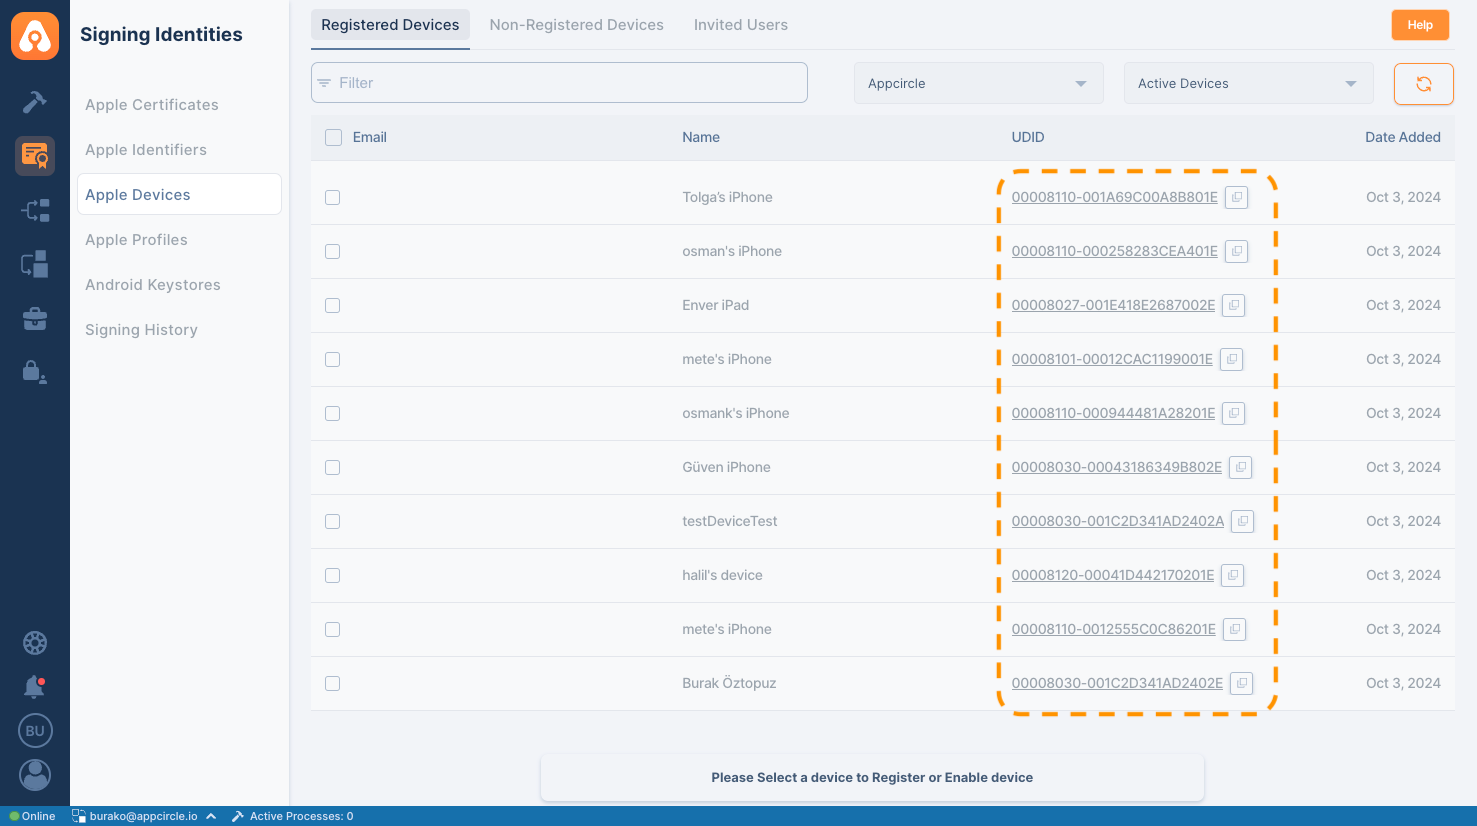
In the Registered Devices section of Apple Devices, you can view the devices already registered in your Apple Developer account and synchronize them as needed.
In order to list your registered devices, the App Store Connect API key must be added to Appcircle. Please follow the related document to add App Store Connect API key.
Fetching Registered Devices
In order to be able to list the registered devices, you must first fetch these devices using the API key. For this, you can use the ‘Get Devices from Apple Developer Portal’ button to fetch the devices with the relevant API key.
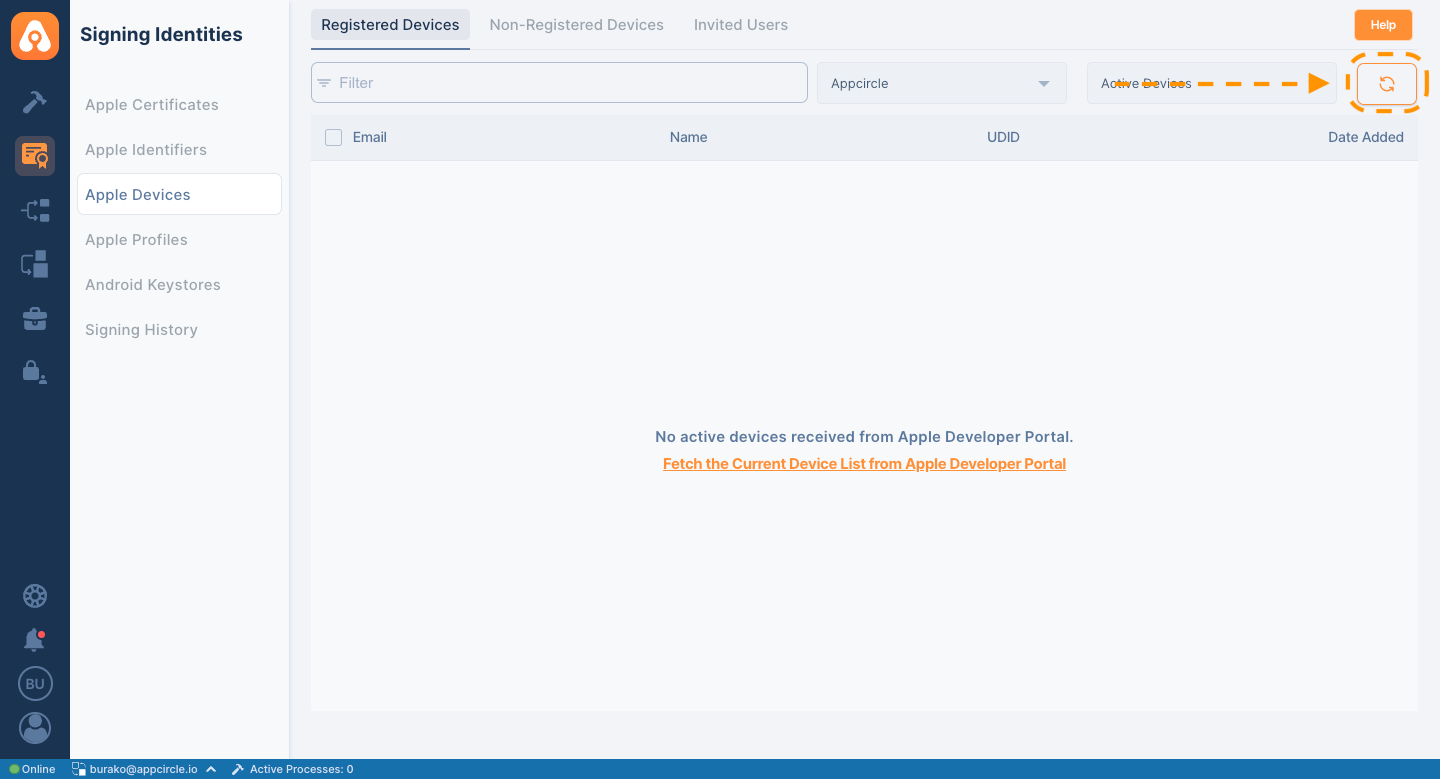
Once the fetch process is completed successfully, the entire list of registered devices will be displayed below.
Filtering Devices by Apple Developer Accounts
Since Appcircle's credential structure allows multiple API key connections at the same time, you can list your devices in different accounts with the account filtering feature on the registerd devices page.

Filtering Devices by Device Status
Apple offers Disable and Enable options for registered devices. Disabling a device removes it from provisioning profiles and excludes it from the development process. Appcircle provides filtering options that allow you to filter devices based on their status, making it easier to manage enabled and disabled devices.

Disable Device
Apple provides a disable option to exclude registered devices from development processes. To disable a registered device on Apple, select the relevant device, and use the Disable button at the bottom. This process will simultaneously change the status for the relevant device registered in your Apple Developer account.
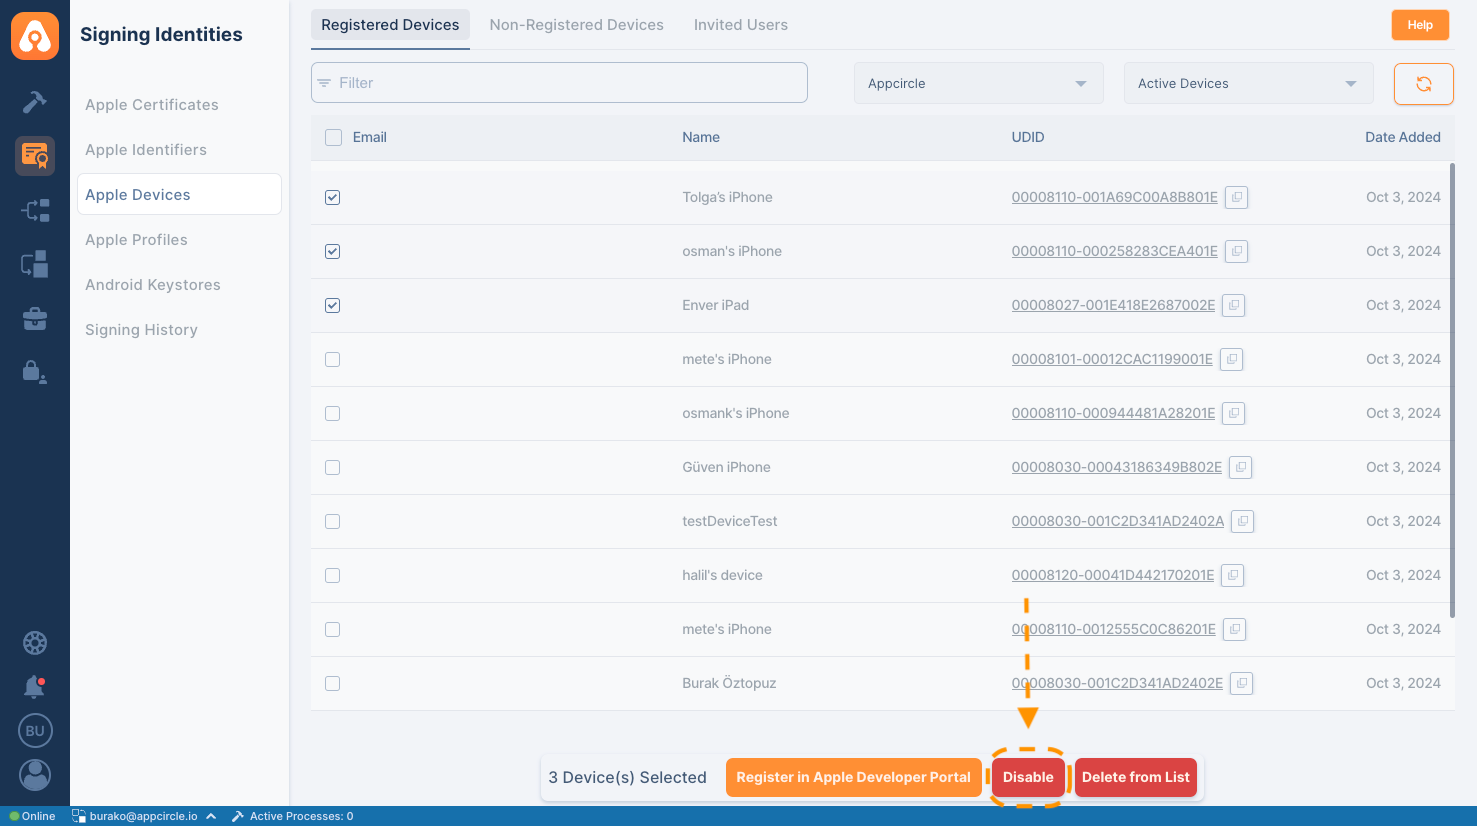
Disabling this device will invalidate all associated provisioning profiles. You can remove this device from your account at the start of your new membership year.
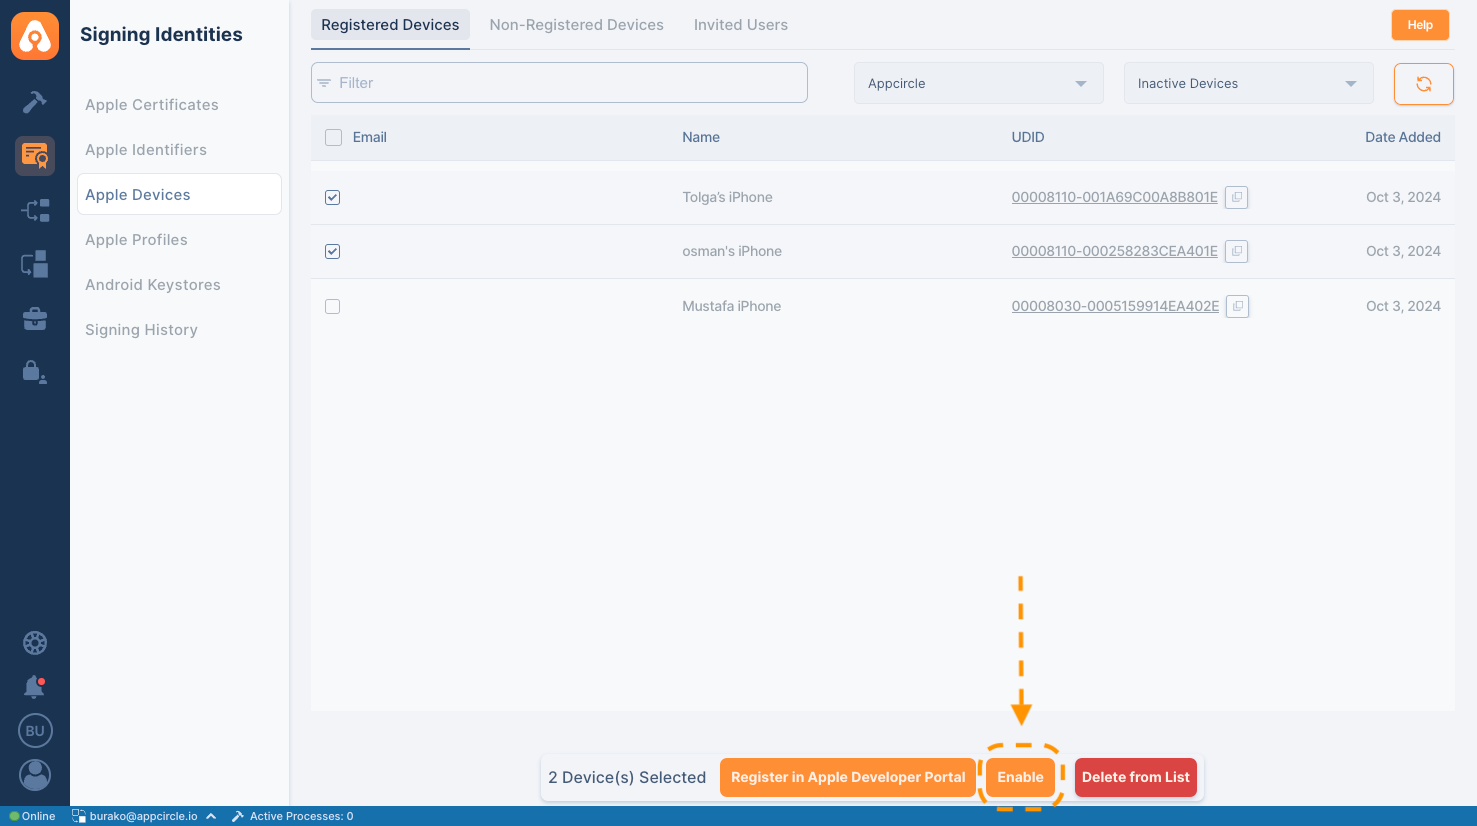
Enable Device
Apple provides an enable option to include registered devices from development processes. To enable a registered device on Apple, select the relevant device, and use the Enable button at the bottom. This process will simultaneously change the status for the relevant device registered in your Apple Developer account.
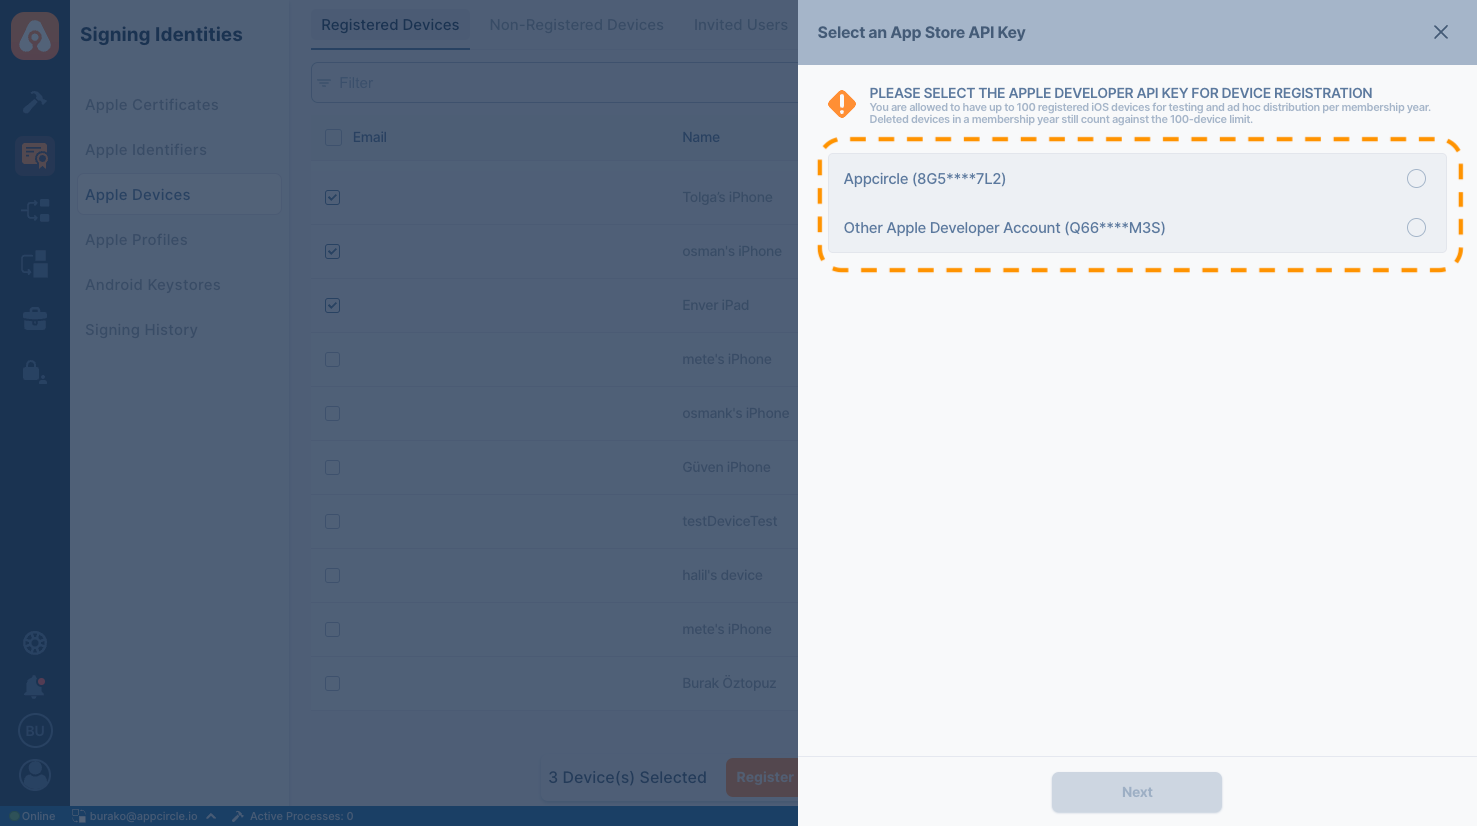
Registering Device to different Apple Developer Portal
A device that is already registered to any Apple Developer Account can be added to different Apple accounts if desired. To do this, select the device and then register it by choosing a different API key using the Register Device to Apple Developer button in the menu that appears at the bottom.
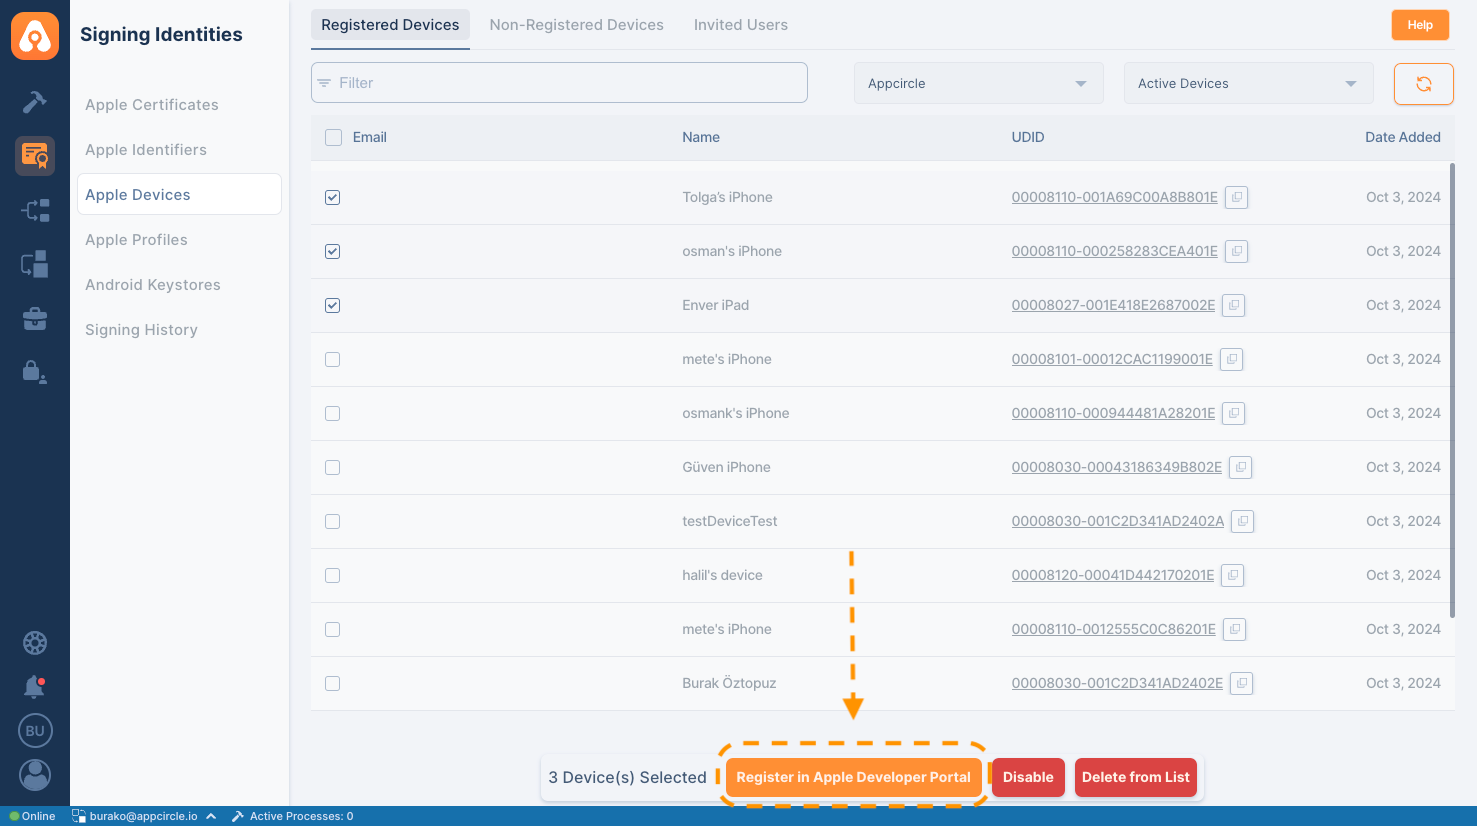
When you select different API key in the list, Appcircle will automatically register your device to selected Apple Developer Account.
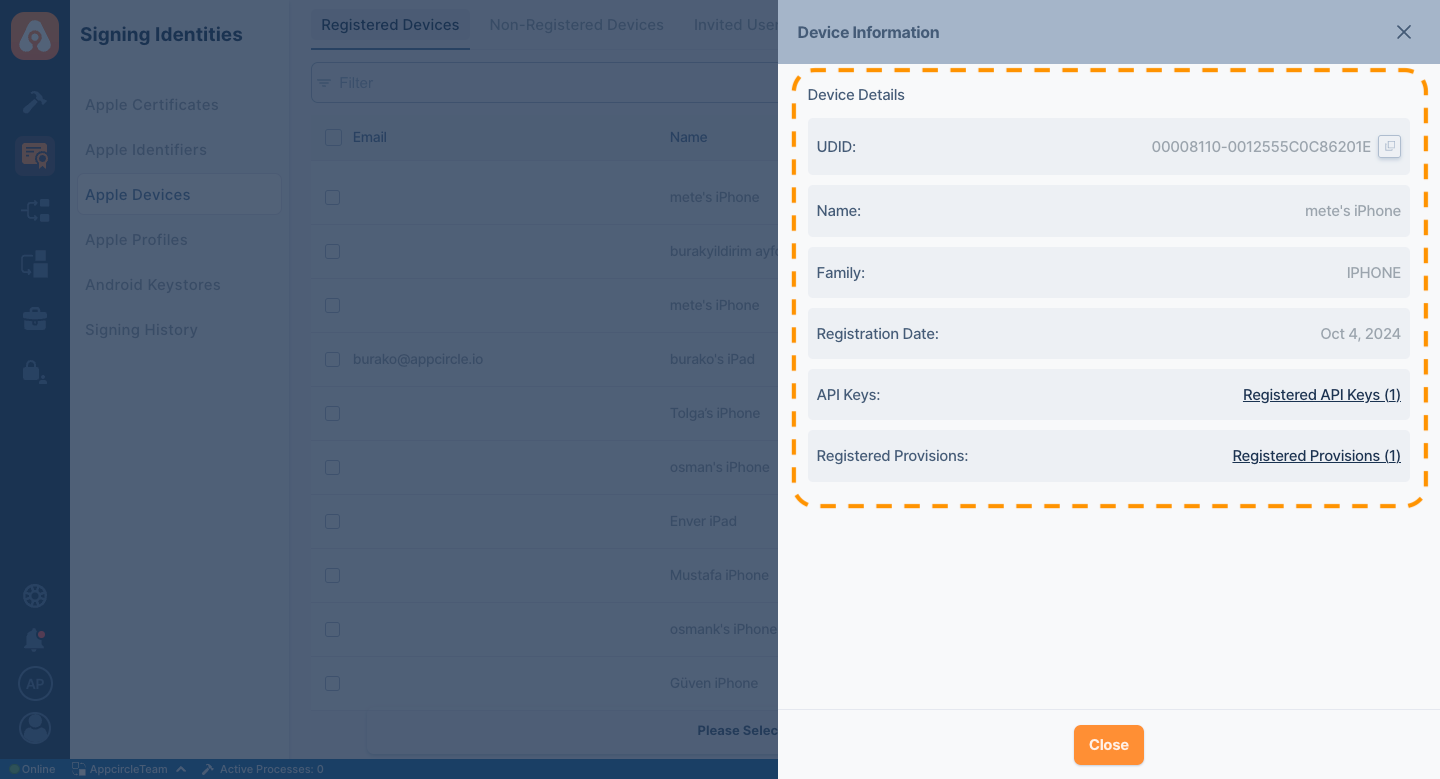
Device Information
When you click on any device UDID in the Registered Device list, you can find detailed information about that device. This information includes:
- The API keys to which the device is registered
- The available Provision Profiles associated with the device
- The device type
- The date the device was recorded
You can see it in detail.
Not Registered Devices
With Appcircle's advanced Apple Devices feature, you can also add user devices manually.
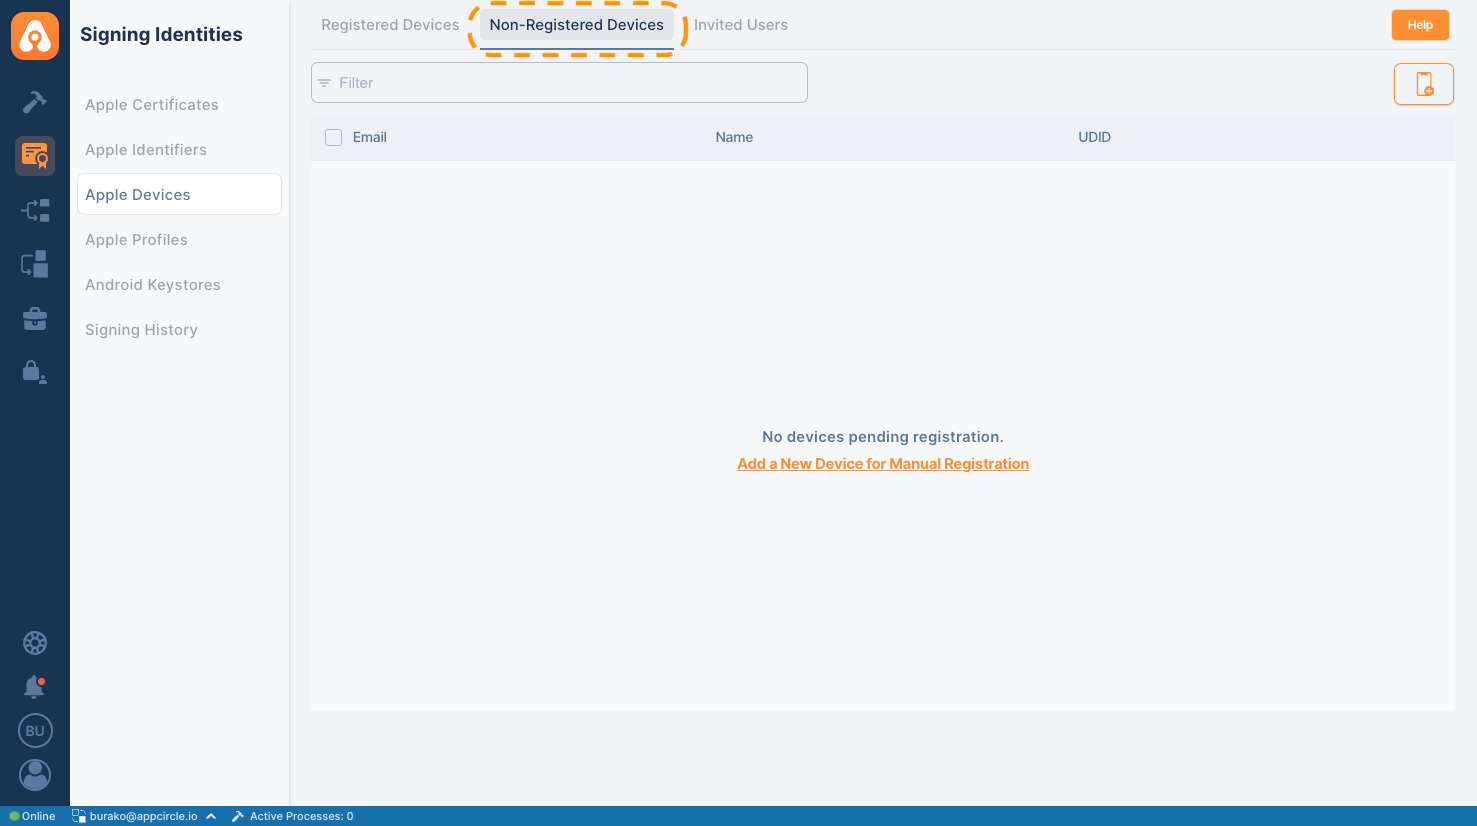
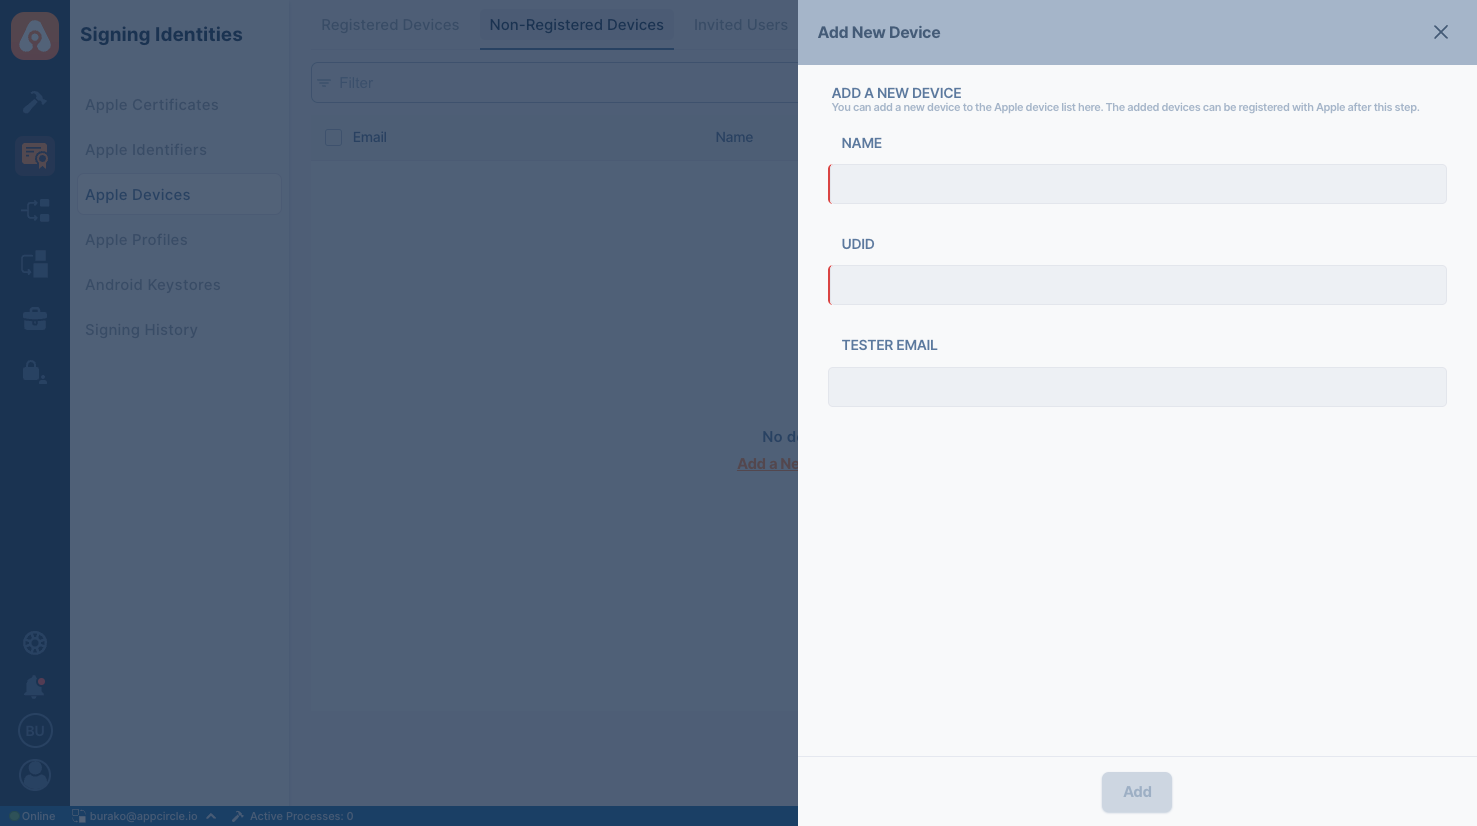
Adding Device Manually
With this feature, you can manually enter the UDID of the device you want to register and register it to your Appcircle Account. To do this, navigate to the Non-Registered tab and click the Add Manually button.
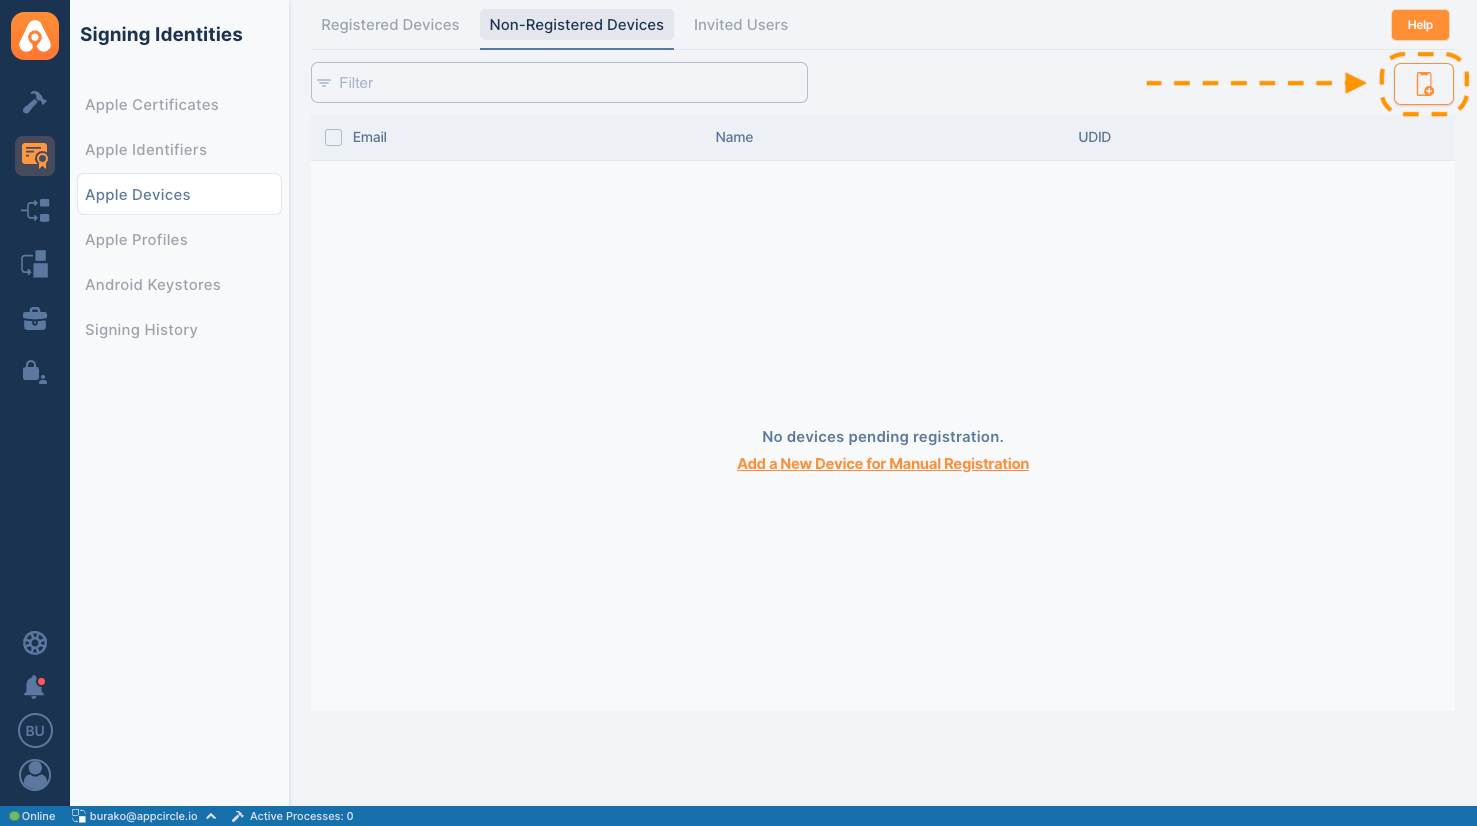
Please remember that manually added devices are not automatically registered to your Apple Developer Portal account.
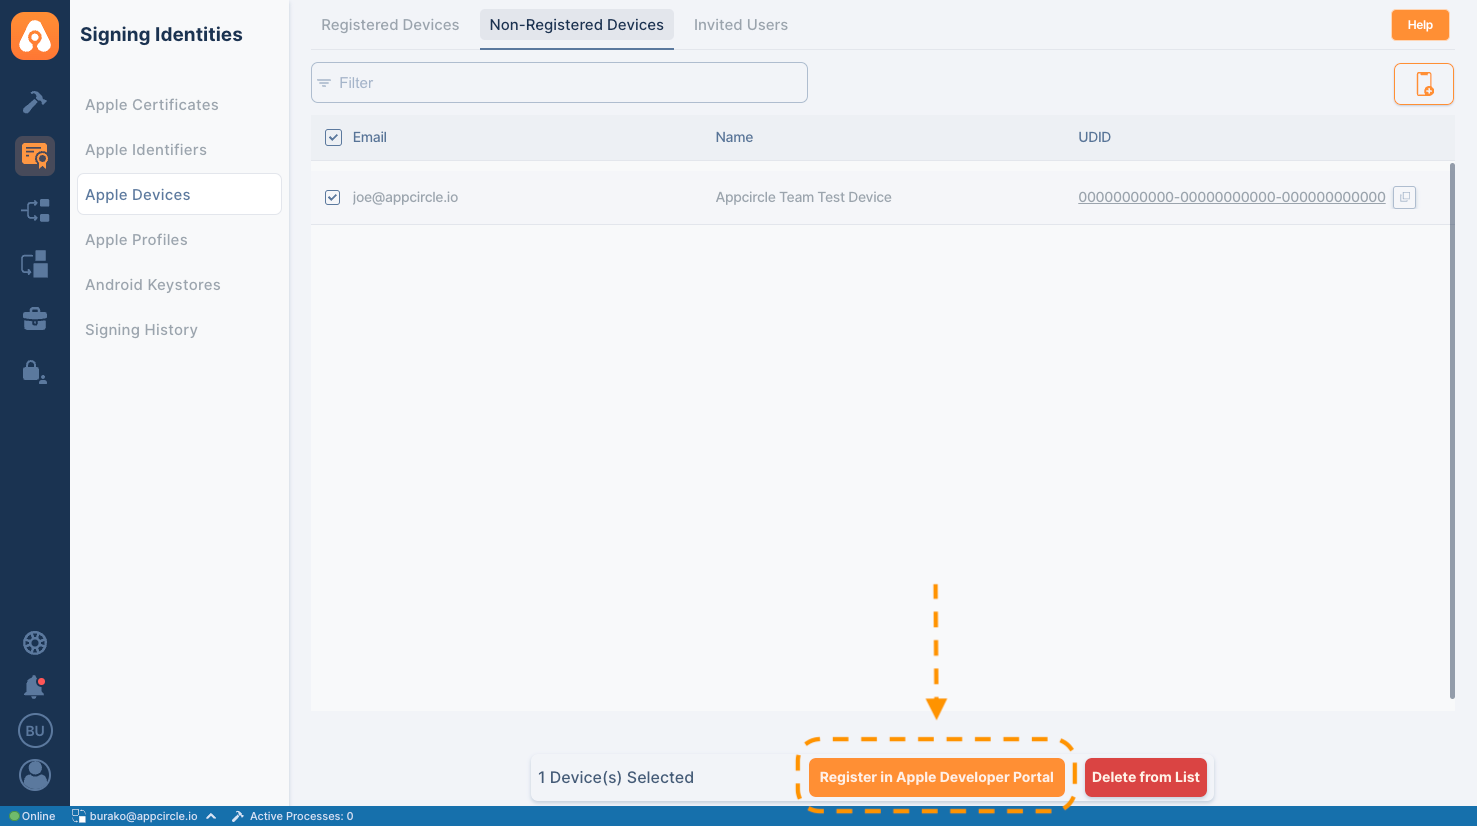
Registering Device to Apple Developer Portal
After selecting a Non-Registered device, you can register it to your Apple account with the Register to Apple Developer Portal button at the bottom.
Invited Users
In addition to manually adding devices to your Appcircle account, you can also invite users via email to share their device information. If a device is registered through the invitation sent, its UDID will appear in the Non-Registered Devices tab during the registration process.

Multiple devices can be registered using the link provided in the email invitation, and this process does not require any authentication method.
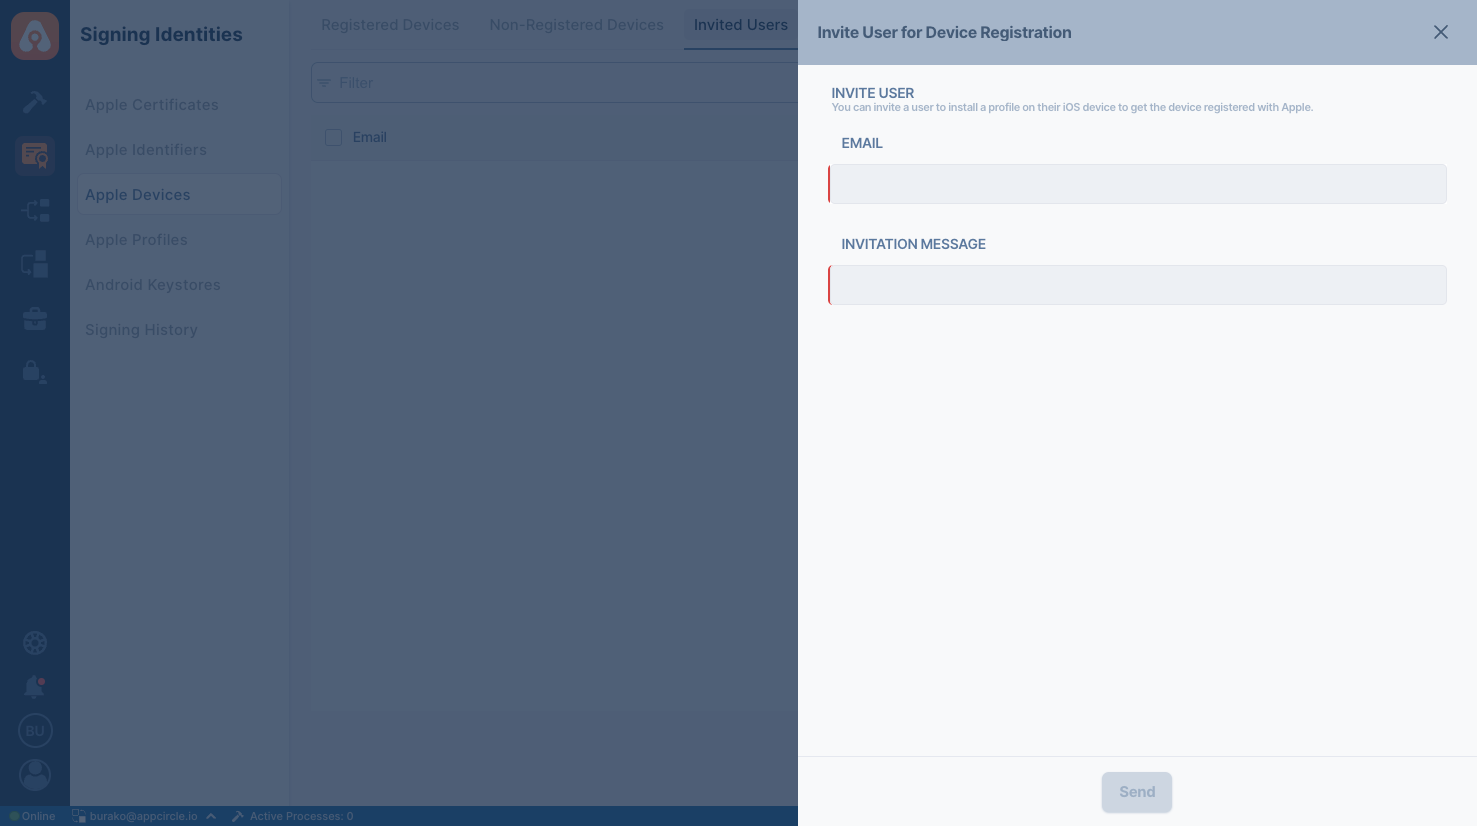
To invite a user by e-mail, click Invite User by Email button, and specify the email address and invitation message.

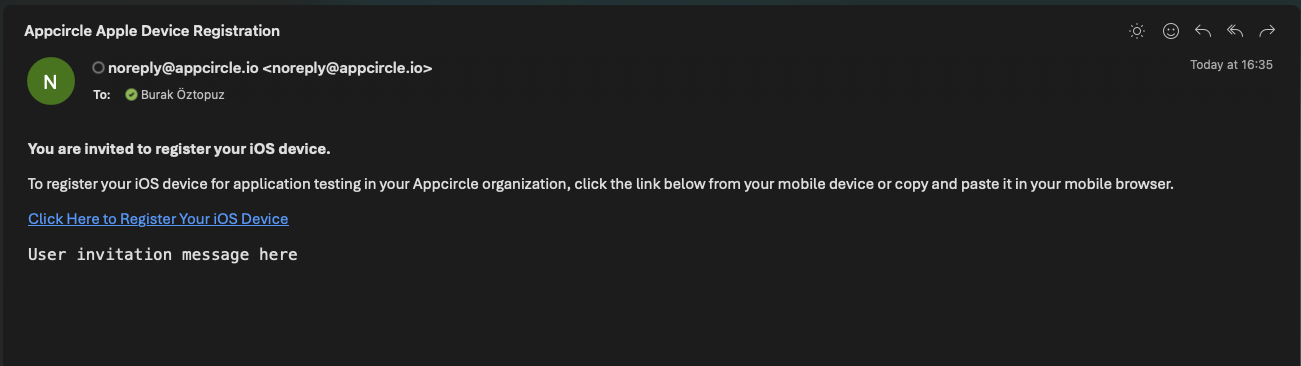
The mail containing the e-mail invitation will look like this.
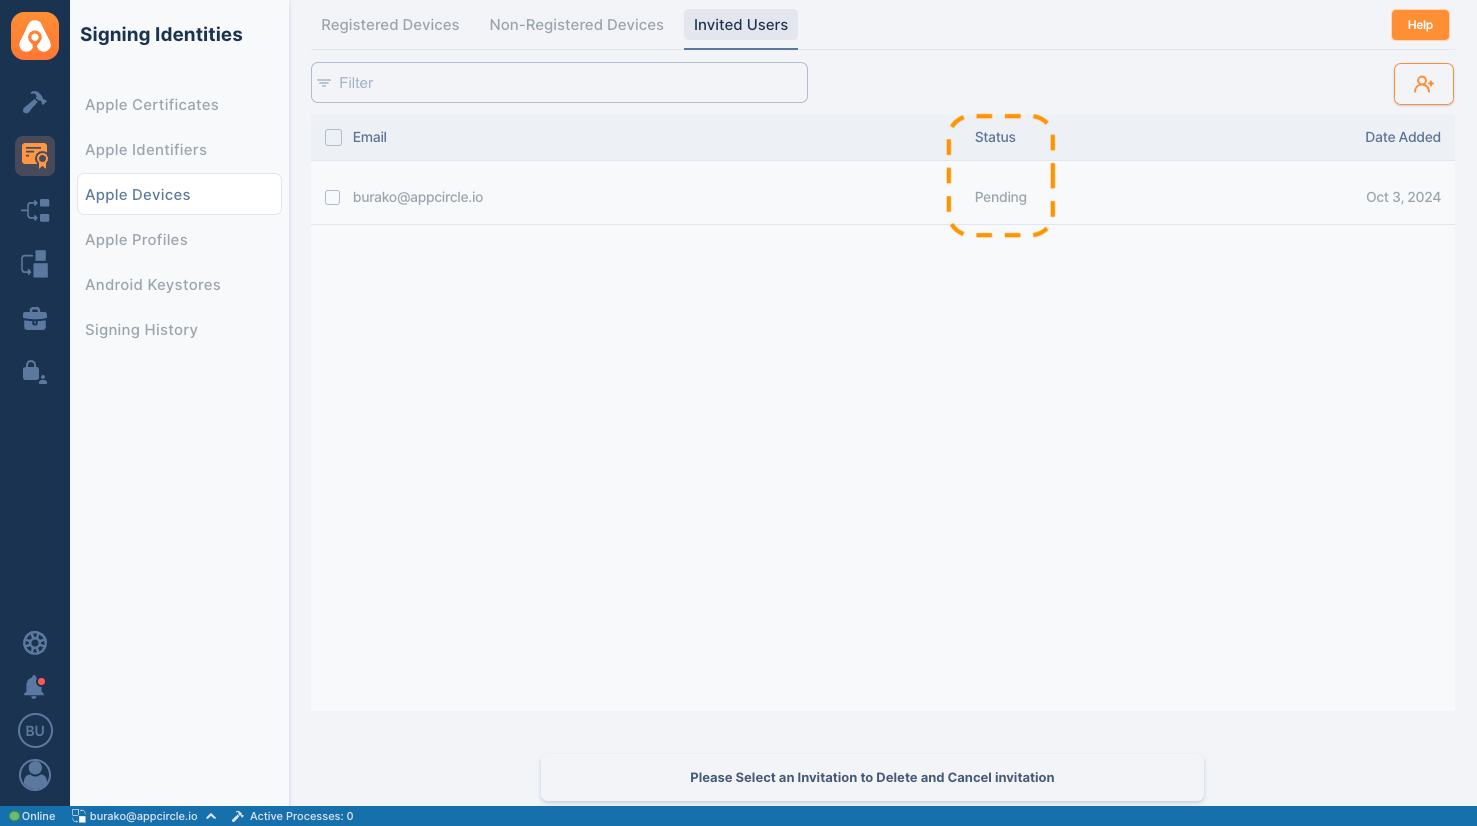
When you send an invitation to a user, the invitation will be listed in the Invited Users section. If the user has not taken any action, their status will appear as Pending. Once the user registers the device UDID, this status will change to Registered.
Adding Device by Email
Appcircle temporarily installs a verified profile on the device in order to get the UDID of the device via email. Thanks to this profile, the UDID value of the relevant device is saved in your Appcircle account.
Apple does not directly and officially support Edge Browser. Therefore, if you are using Edge Browser, this feature will not work as expected. Please use Safari instead.
- When the link in the e-mail invitation is clicked, you will see a screen like below.
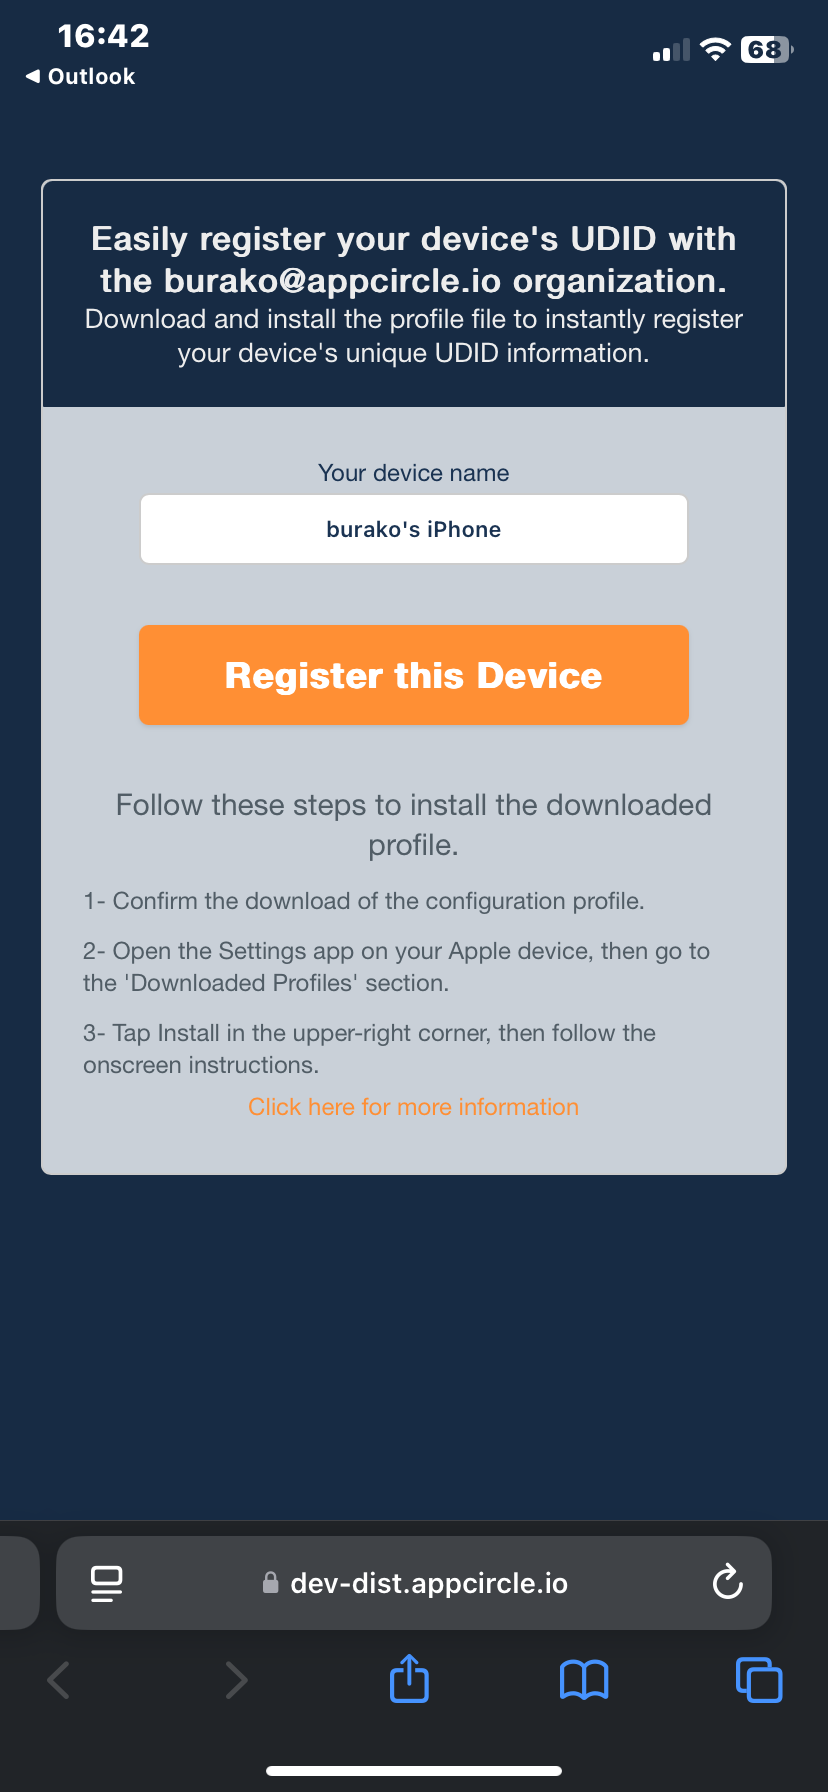
- Specify the device name and press the Register this Device button.
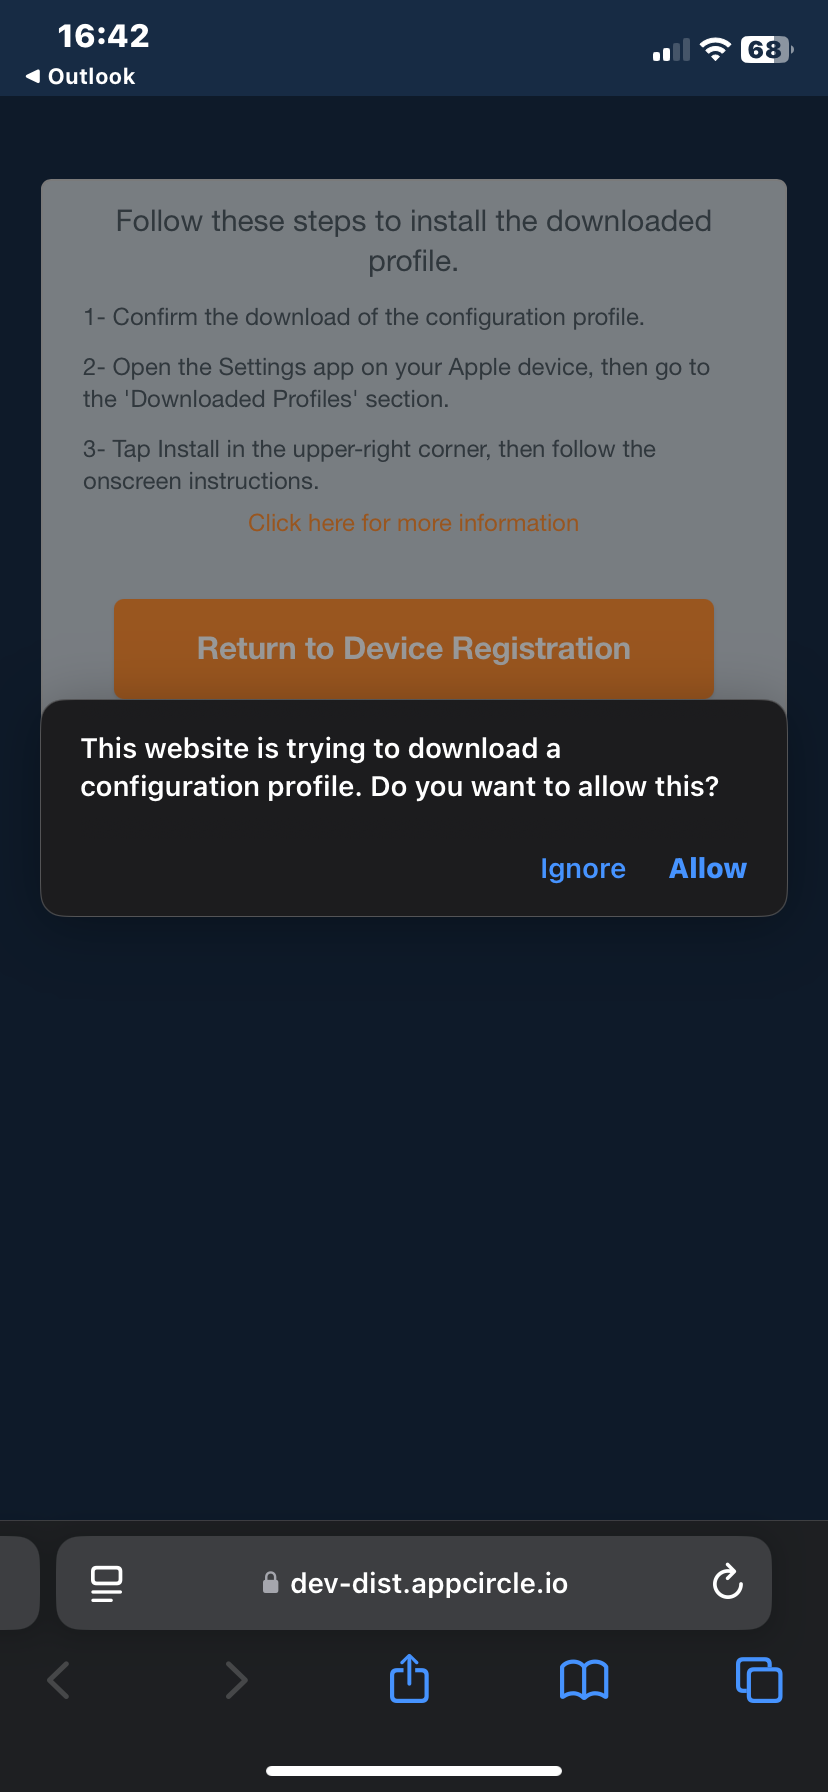
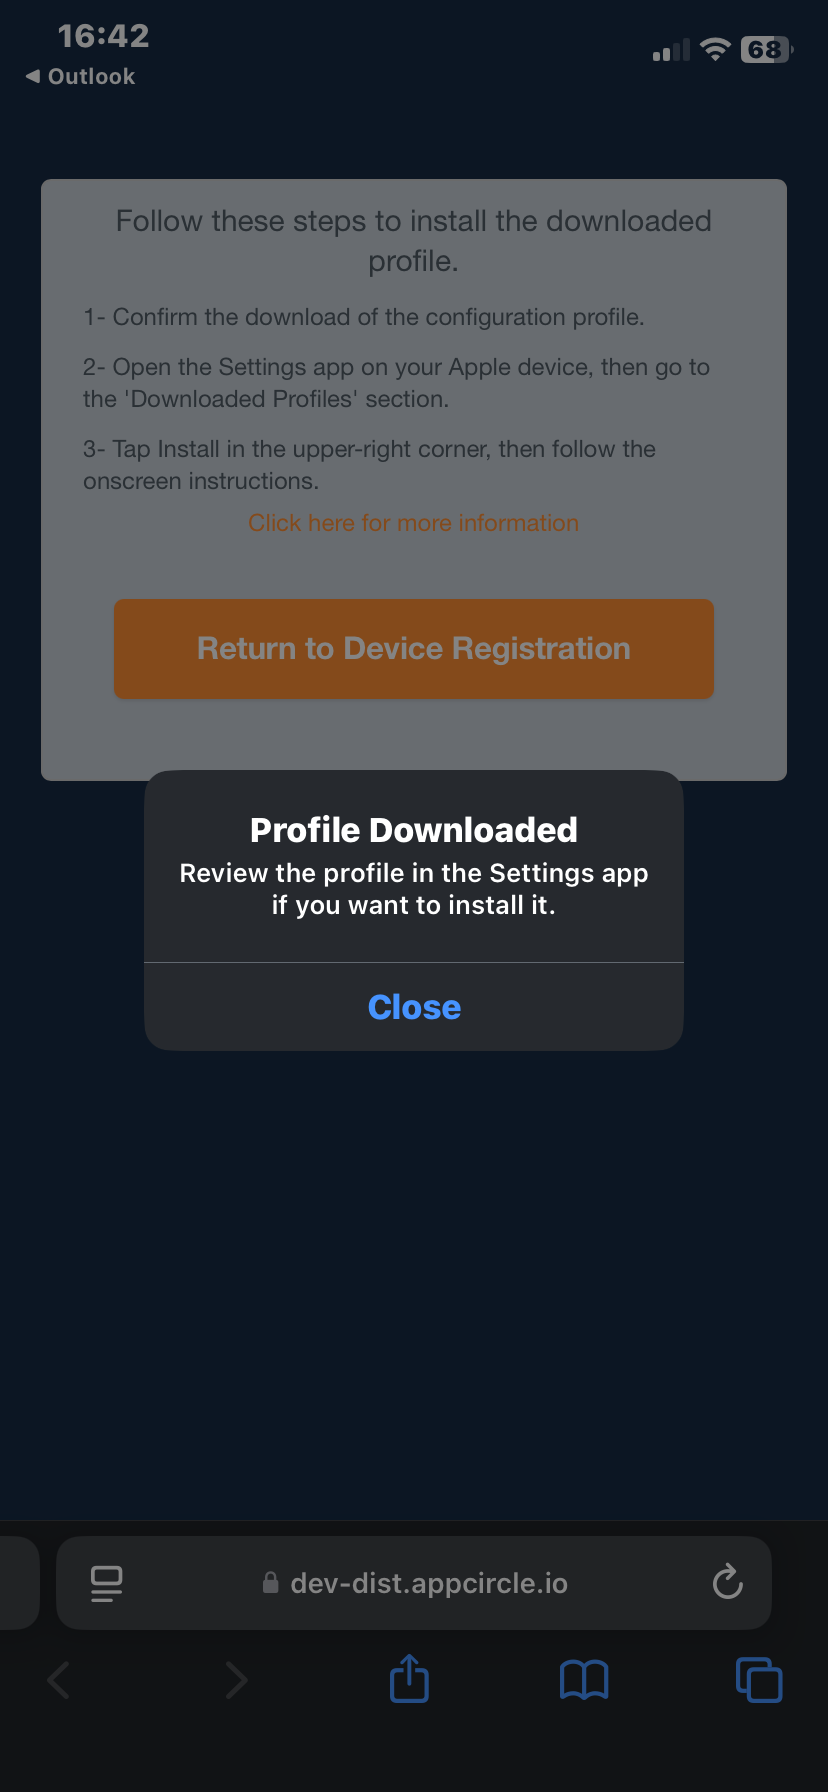
- Appcircle will prompt you to download a temporary profile to retrieve the device UDID. You must allow this action to proceed.
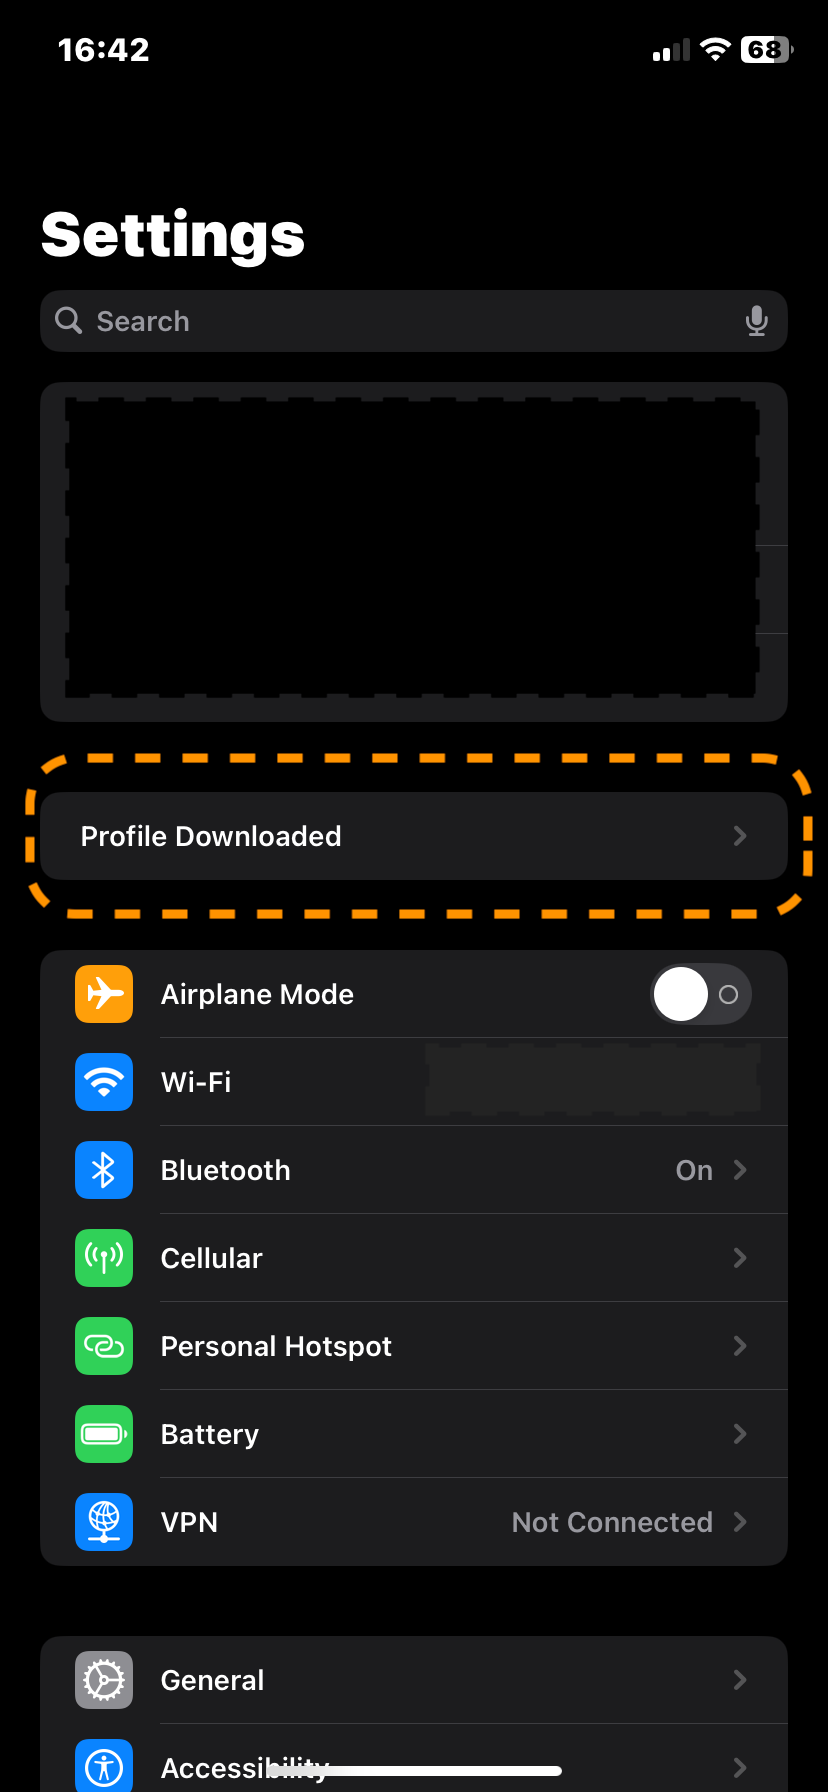
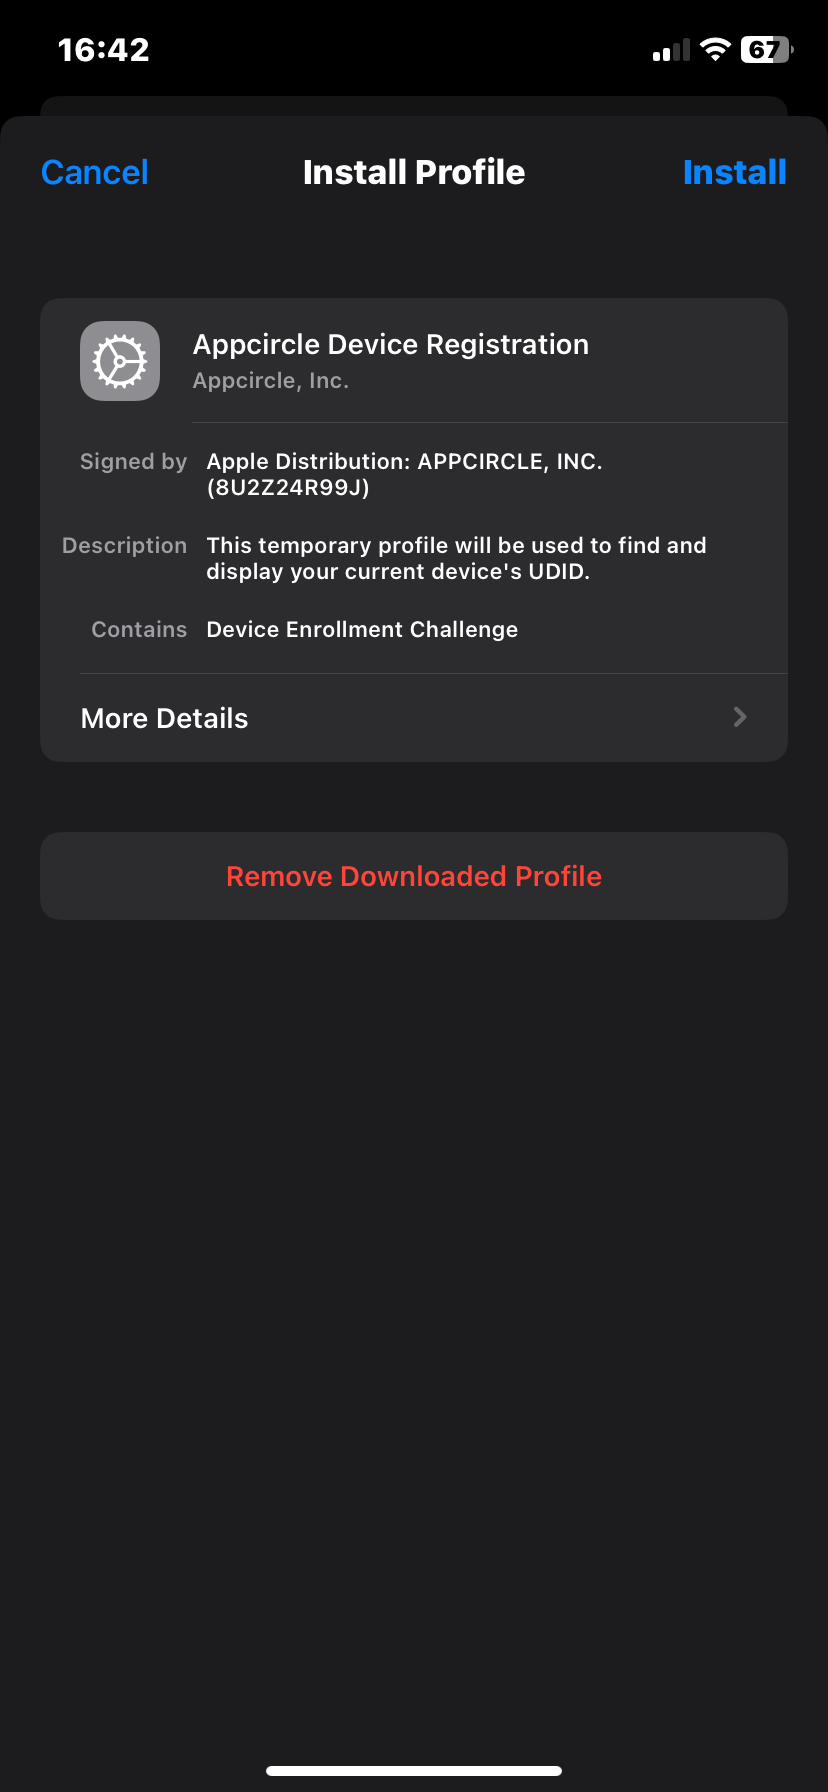
- Once this profile has been downloaded, go to the iPhone settings and install the downloaded profile.
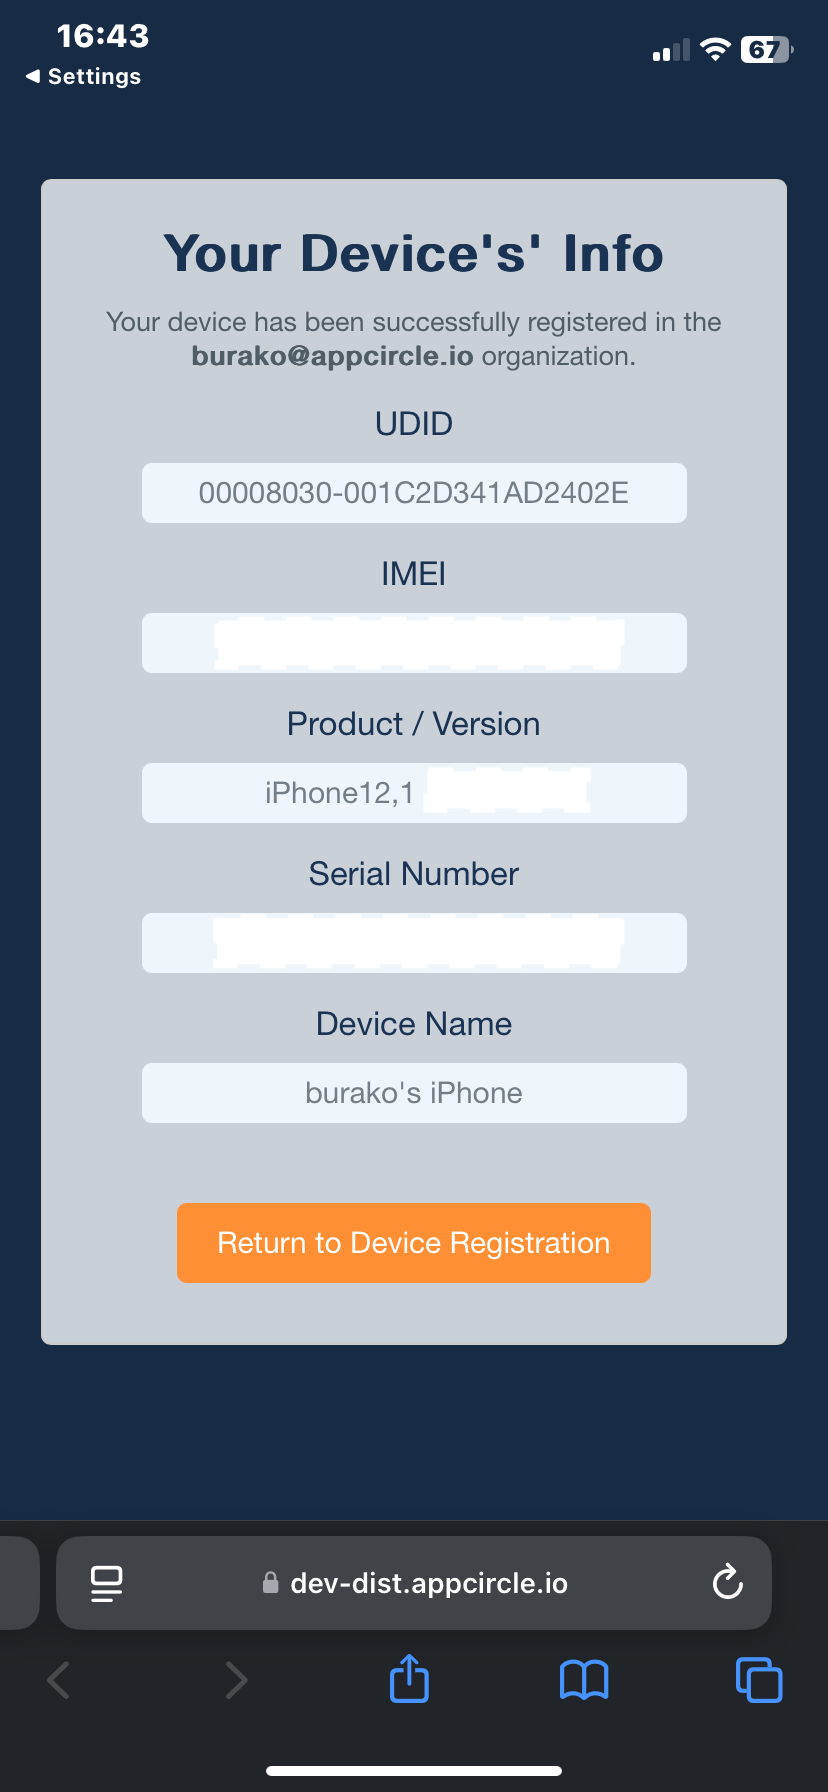
- After the installation process is completed, you will be automatically redirected to the web portal containing your device information. When this screen comes up, you can see all the information about the device.
Please note that if the relevant device has the "Lost/Stolen Device Protection” feature enabled, which is available on Apple's iOS 17 and later devices, profile install may only be possible after a 1-hour security delay.
For more information regarding the feature, please visit the Apple documentation.
- After this step, the device UDID has been successfully registered in Appcircle. You can go to the Appcircle interface and see the relevant device in the Non-Registered Devices tab.
Cancel Invitation
When an invitation is selected, you can delete this invitation by clicking the Delete button from the menu below. When the invitation is deleted, the link in the e-mail will become inactive and cannot be used again.