Android Applications
Before starting your first Android app build, please make sure you first create a build profile and connect your Git repository to your build profile. You can refer to the page below for this step:
Adding a Build ProfileAfter connecting your repository, please add or create your Android Keystore. You can refer to the page below for this step:
Android KeystoresWhen you are done with the steps above, you can now start building your Android application.
Build Configuration
First, we need to set up a build configuration. Select the configuration from the Configuration section. The first step will be to enter project details. You can enter details manually or click on the "Autofill" button to retrieve them from your project.
Private Modules
If your project uses private modules, don't forget to add the necessary SSH keys to your workflow steps. You can use Activate SSH Private Key step to add your private SSH keys.
You may also use Authenticate with netrc step to access your private modules.
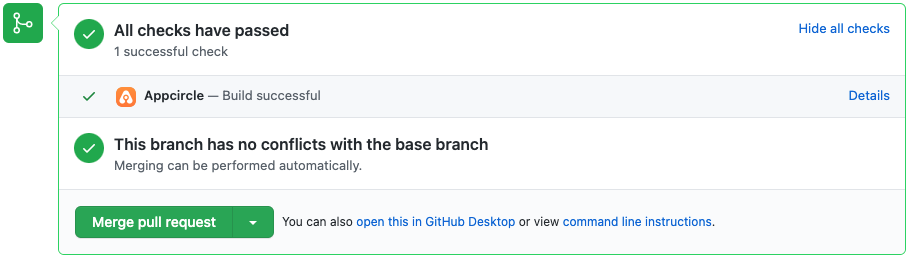
Sending the Build Status to the Repository Providers
At the bottom of the config tab, you will see the Set Commit Build Status option.
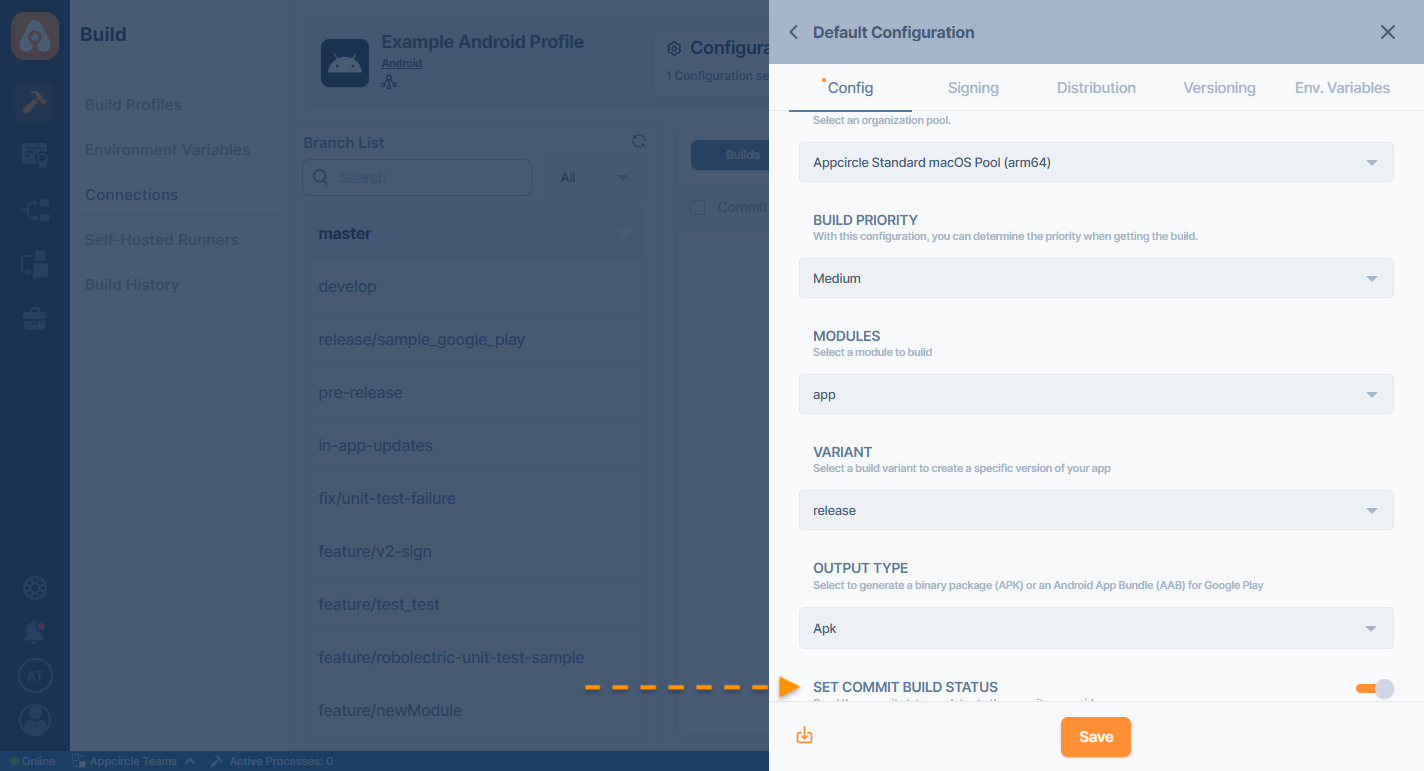
When this option is enabled, the build status for that commit is shared with the repository provider.
.png)
Build Triggers
Appcircle allows you to trigger builds manually or automatically using build triggers.
- On push: Whenever code is pushed to a configured branch, the build is triggered.
- On a tagged push: Whenever a tagged commit is pushed, the build is triggered for that commit. Commits without any tags are ignored.
- On push with selective tags: Whenever a commit includes one of the typed in tags, the build is triggered. You can specify tags with Unix shell-style wildcards to trigger builds.
You can visit the following page for details on build triggers:
Build Manually or Automatically with Webhooks and Triggers
Signing
The next step on build configuration is Signing. Here, please select the Android Keystore you added at Android Keystores page.
You can get both unsigned and signed build artifacts based on your configuration. Please note that unsigned builds will not be distributed by email.

Distribution
The next step on build configuration is Distribution. You can create a new distribution profile at this screen or select a previous profile you created earlier. You can also enable auto deployment features if you need to.
Create a Distribution Profile and Sharing with Testers
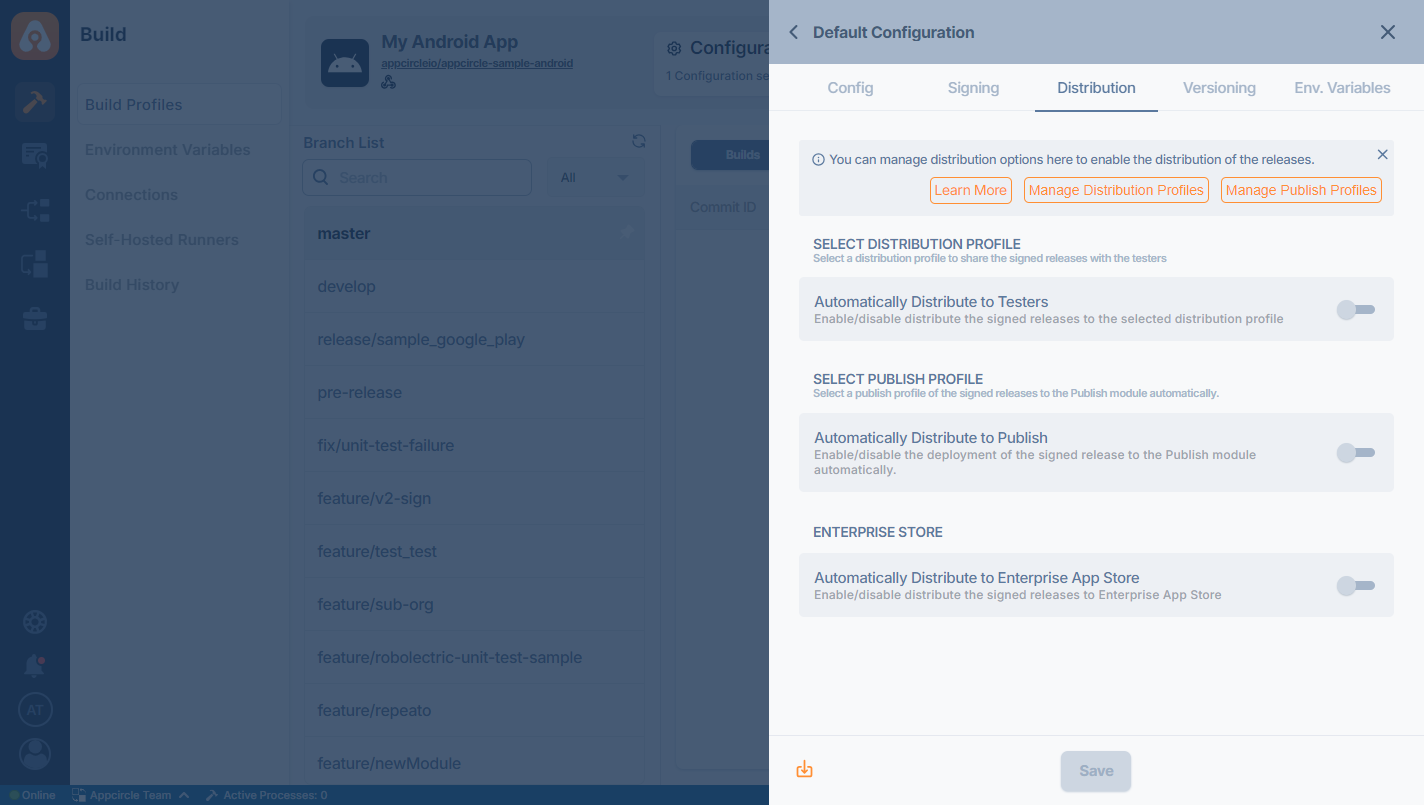
Any previous build can be deployed to the Testing Distribution without the need for rebuilding.
Environment Variables
The final step on build configuration is Environment Variables.
Appcircle Build module is simple and powerful. You can get your builds instantly just with a few clicks, advanced management of builds is also possible with the environment variables and workflows.
You can define variables and secrets to be incorporated during the build in the Environment Variables submodule so that you don't need to store certain keys and configurations within the repository.
Please see the following page for more information about environment variables:
Why Use Environment Variables and Secrets?

Please click on the Save button and close this modal.
Workflow Editor
You can use the workflow editor for in-depth configuration of all build steps. Please click on the workflow icon to open and use the workflow editor.
Any custom operation during the build can be executed through the Custom Script step in the workflow.
For details on using Appcircle's workflow editor, please see the related page below:
What are Workflows and How to Use Them?Start Build
You are now ready to start your first build. Select the branch from the left side and click on the Start Build button.

Select a configuration, workflow, commit ID and click on Start Build button
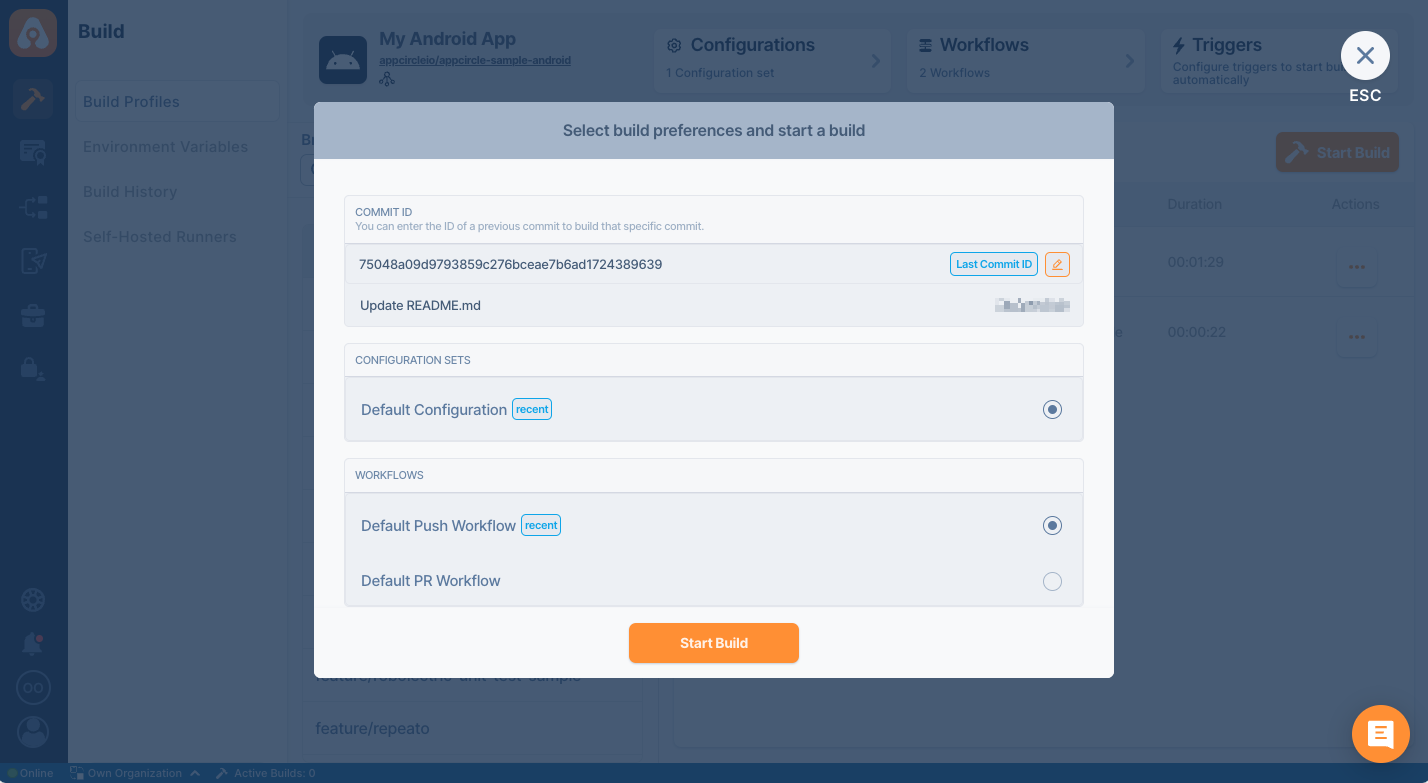
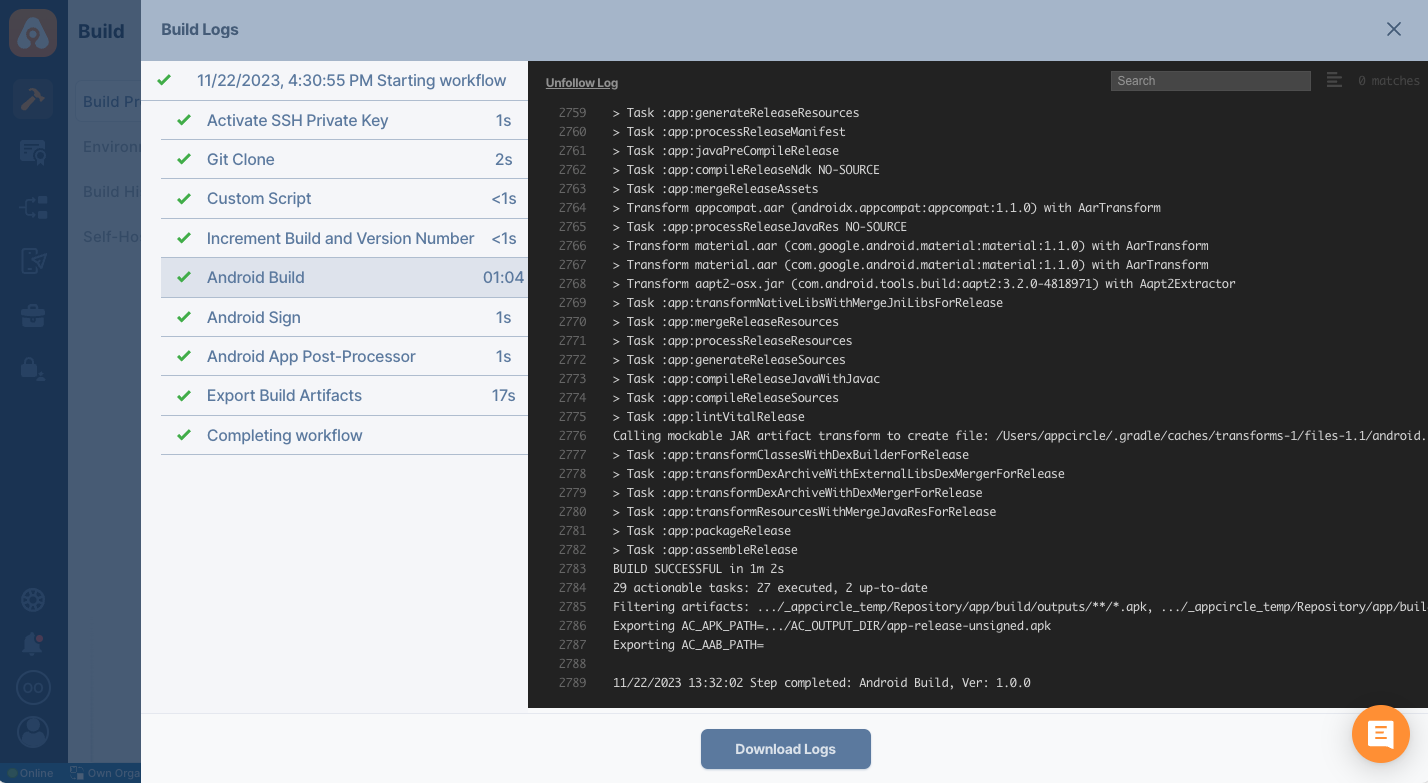
Appcircle will start building your application. The build log window will open, and you can follow the build process in real time.
You can safely close the build log window; it won't affect the status of your build. You can come back and click on the build to track the status of your build.
Distribute Your Build
Your build will be distributed automatically if you had set up Auto Distribute earlier. You can also manually distribute builds at any time you like.
FAQ
chmod: cannot access './gradlew': No such file or directory
Every Android project has a gradlew file in the main repository directory. If the Android Build step can't find this file, you need to edit your workflow, find the Android Build Step, and edit the PROJECT PATH. If your gradlew file is in the android folder, you need to write, ./android in the edit box.
How can I change the JDK version for autofill?
Appcircle currently has OpenJDK 17 (default), OpenJDK 8, OpenJDK 11 and OpenJDK 21. If you want to use a different Java version for your build pipeline, you can add the Select Java Version step to your workflow.
But unfortunately, you cannot use custom scripts for autofill operations, which make it easy to fill in configuration details while adding a new build profile.
For the autofill, we have two options to choose from.
1. Change JAVA_HOME using gradle.properties
You can add the org.gradle.java.home entry to the gradle.properties file in your Android project.
For example, the below entry can be used to change the default Java version to 17 for the "Appcircle Standard macOS Pool (arm64)".
org.gradle.java.home=/Users/appcircle/.sdkman/candidates/java/17.0.9-zulu
You can get the JDK home paths for each build pool from Android's build infrastructure Java section.
2. Change JAVA_HOME using environment variables
You can use the environment variables to enable the JDK version your project requires.
For example, you can take the following steps to change the default Java version to 17.
- Create a variable group that has a variable with the properties below.
- The key should be
JAVA_HOME. - Value should be
/Users/appcircle/.sdkman/candidates/java/17.0.9-zulu.
- The key should be
- Go to the configuration section of the build profile that you want to autofill.
- Go to the 'Env. Variables' tab in configuration.
- You should see the variable group that you created in the list.
- Select the variable group that has
JAVA_HOMEand 'Save' settings. - Go back to the config tab and start autofilling there.
You can get the JDK home paths for each build pool from Android's build infrastructure Java section.
Gradle build after Bintray shutdown
  > Could not resolve com.google.protobuf:protobuf-java-util:3.09.0.
      > Could not get resource 'https://jcenter.bintray.com/com/google/protobuf/protobuf-java-util/3.09.0/protobuf-java-util-3.09.0.pom'.
        > Could not GET 'https://jcenter.bintray.com/com/google/protobuf/protobuf-java-util/3.09.0/protobuf-java-util-3.09.0.pom'. Received status code 502 from server: Bad Gateway
You may experience Gradle build errors if your project uses Bintray resources. Since JFrog has shut down Bintray on May 1, 2021. You should update your Gradle file and move to Maven Central. Replace jcenter() with mavenCentral() in all your build.gradle files. Please be aware that some of your dependencies may not exist on Maven.
Gradle build daemon disappeared unexpectedly
If you receive a Gradle error similar to the following, it can happen due to 2 reasons:
org.gradle.launcher.daemon.client.DaemonDisappearedException: Gradle build daemon disappeared unexpectedly (it may have been killed or may have crashed)
    at org.gradle.launcher.daemon.client.DaemonClient.handleDaemonDisappearance(DaemonClient.java:222)
    at org.gradle.launcher.daemon.client.DaemonClient.monitorBuild(DaemonClient.java:198)
    at org.gradle.launcher.daemon.client.DaemonClient.executeBuild(DaemonClient.java:162)
    at org.gradle.launcher.daemon.client.DaemonClient.execute(DaemonClient.java:125)
Unexpected error while writing dex file using d8: Java heap space
java.lang.OutOfMemoryError: Java heap space
java.lang.RuntimeException: java.lang.OutOfMemoryError: Java heap space
- Problem with UTF-8 characters in your project or environment variable. Please edit your gradle.properties file and add
-Dfile.encoding=UTF-8argument toorg.gradle.jvmargssection. - You have edited gradle.properties and put some arguments to the
org.gradle.jvmargssection. When you modify default JVM arguments, it resets the defaultMaxMetaspaceSizeproperty. You should always add-XX:MaxMetaspaceSize=256mto this section to prevent unlimited memory allocation.
If you're using DexGuard, you may need to make the above modifications to your DexGuard configuration as well.
I received a google-services.json Error but I don't want to push this file to the repository
Secret files such as the google-services.json can be added as a secret environment variable and then selected in the build configuration.
Then, you can add a custom script step before the Android build step and move the file to the expected path during the build with a code like the following (where the secret environment variable is named as GOOGLE_SERVICES_JSON) :
cd $AC_REPOSITORY_DIR/
mv $GOOGLE_SERVICES_JSON $AC_REPOSITORY_DIR/app
Android Keystore Errors
Missing keystore path error on Android builds
You may want to build unsigned Android applications. The most common mistake done with this is Appcircle users usually forget to disable the Sign Application step in the workflow.;
If you do not select a keystore in the build configuration, you need to disable the Sign Application step, or your build will fail.
Keystore was tampered with or password was incorrect
You may get this error message when the provided password doesn't match the keystore file.
If you are using a debug keystore, simply re-generate it. Otherwise, please make sure you have the correct keystore/password combination.
After a BuildNeed help?
Get help from Appcircle's support team, or see how others are using Appcircle by joining our Slack Channel.