Okta SAML
Appcircle supports Okta as OpenID or SAML provider.
Only Enterprise accounts support SSO.
Enable SSO
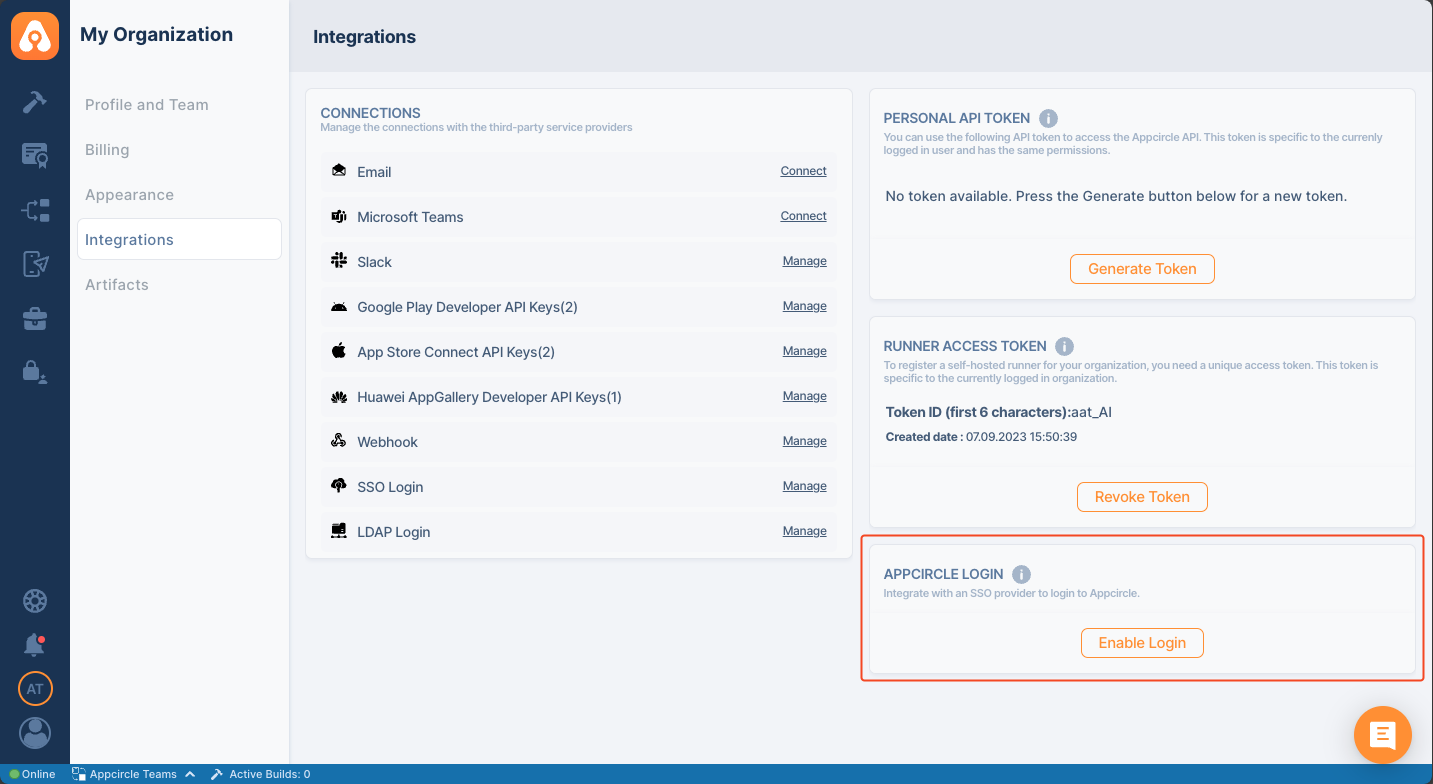
SSO can only be enabled by the organization's administrator. To start, go to My Organization screen and click the Enable Login button under the APPCIRCLE LOGIN section.
Configure Appcircle and Okta
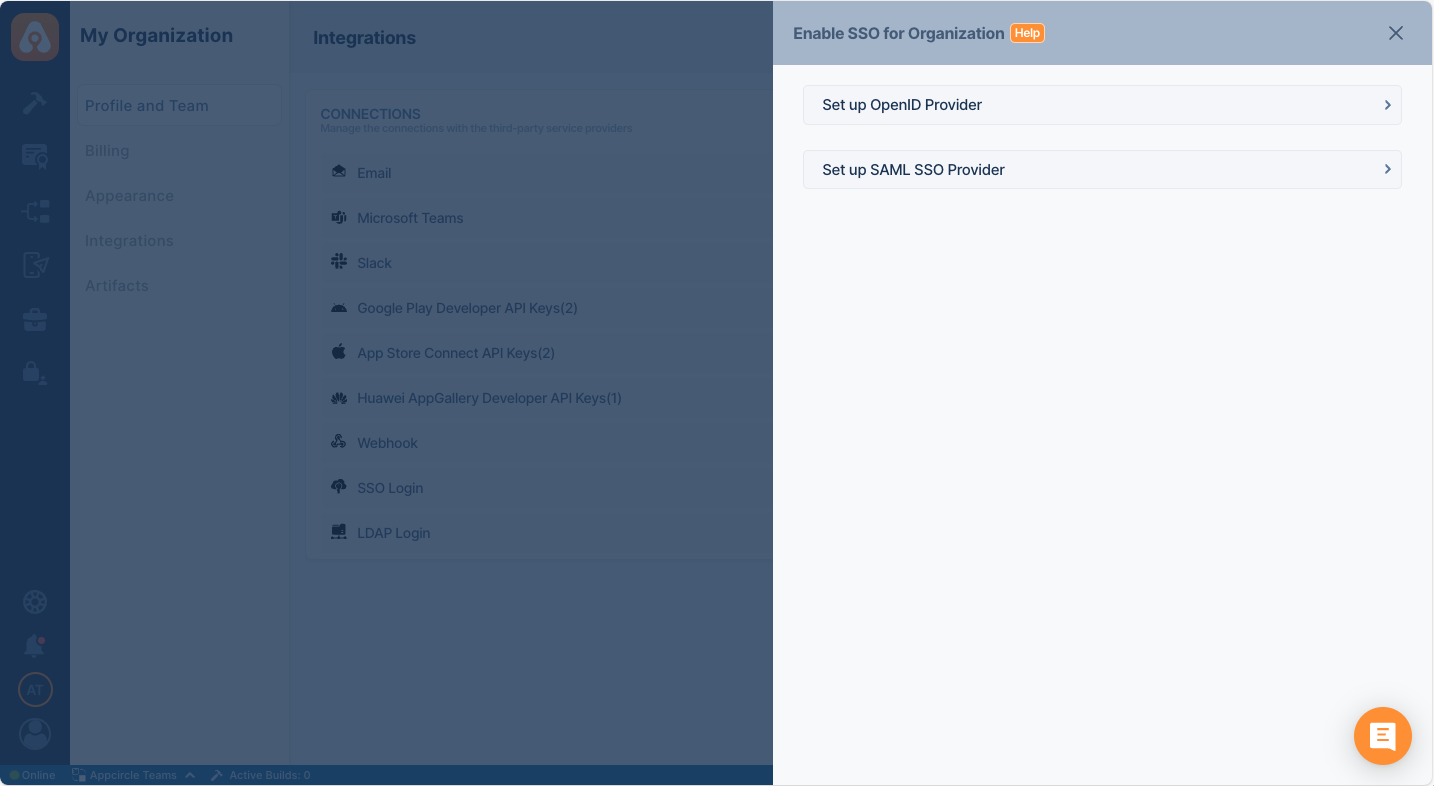
- Select Setup SAML SSO Provider
-
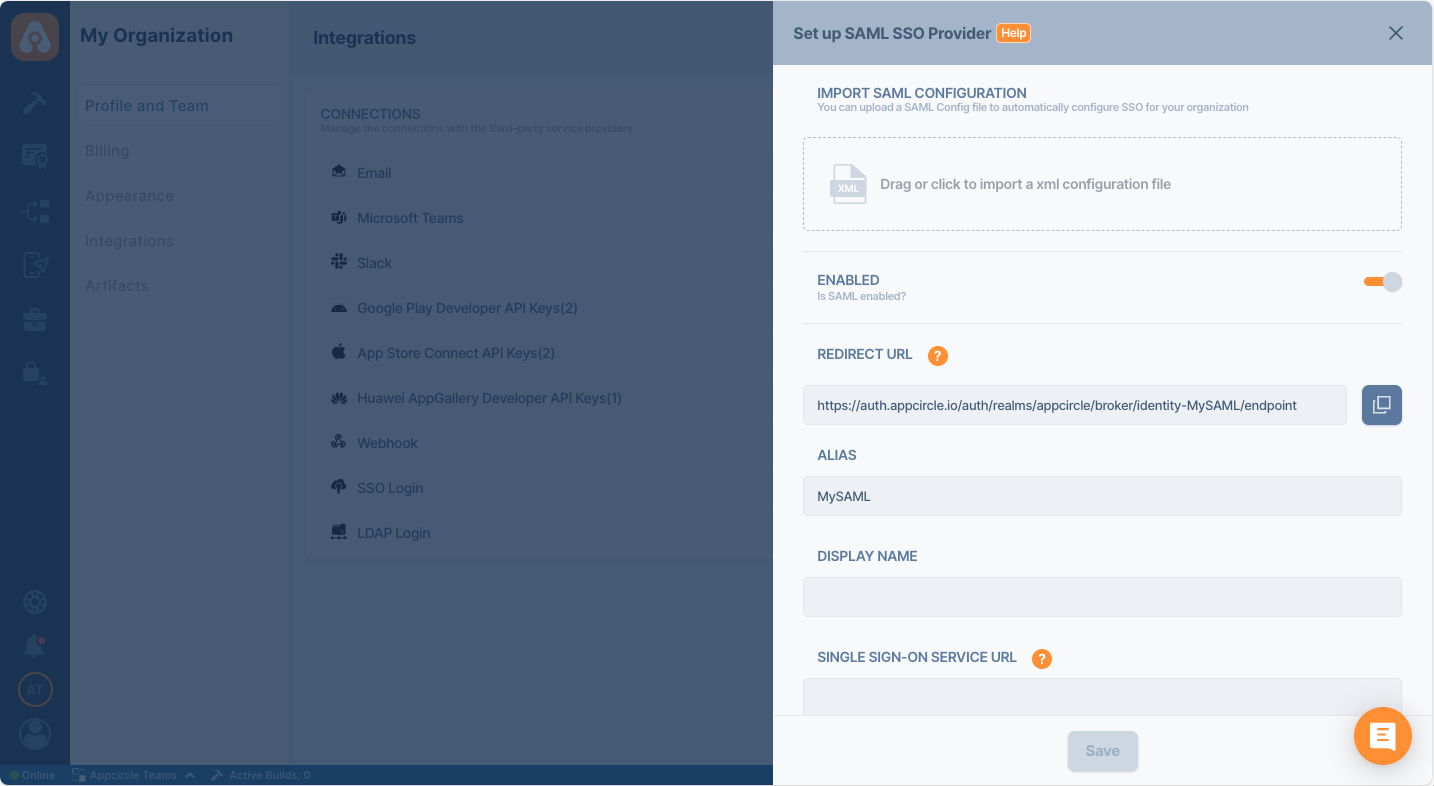
Pick an alias and display name for your organization. Please pick a short and rememberable alias.
-
This screen will auto-generate an URL for the next step
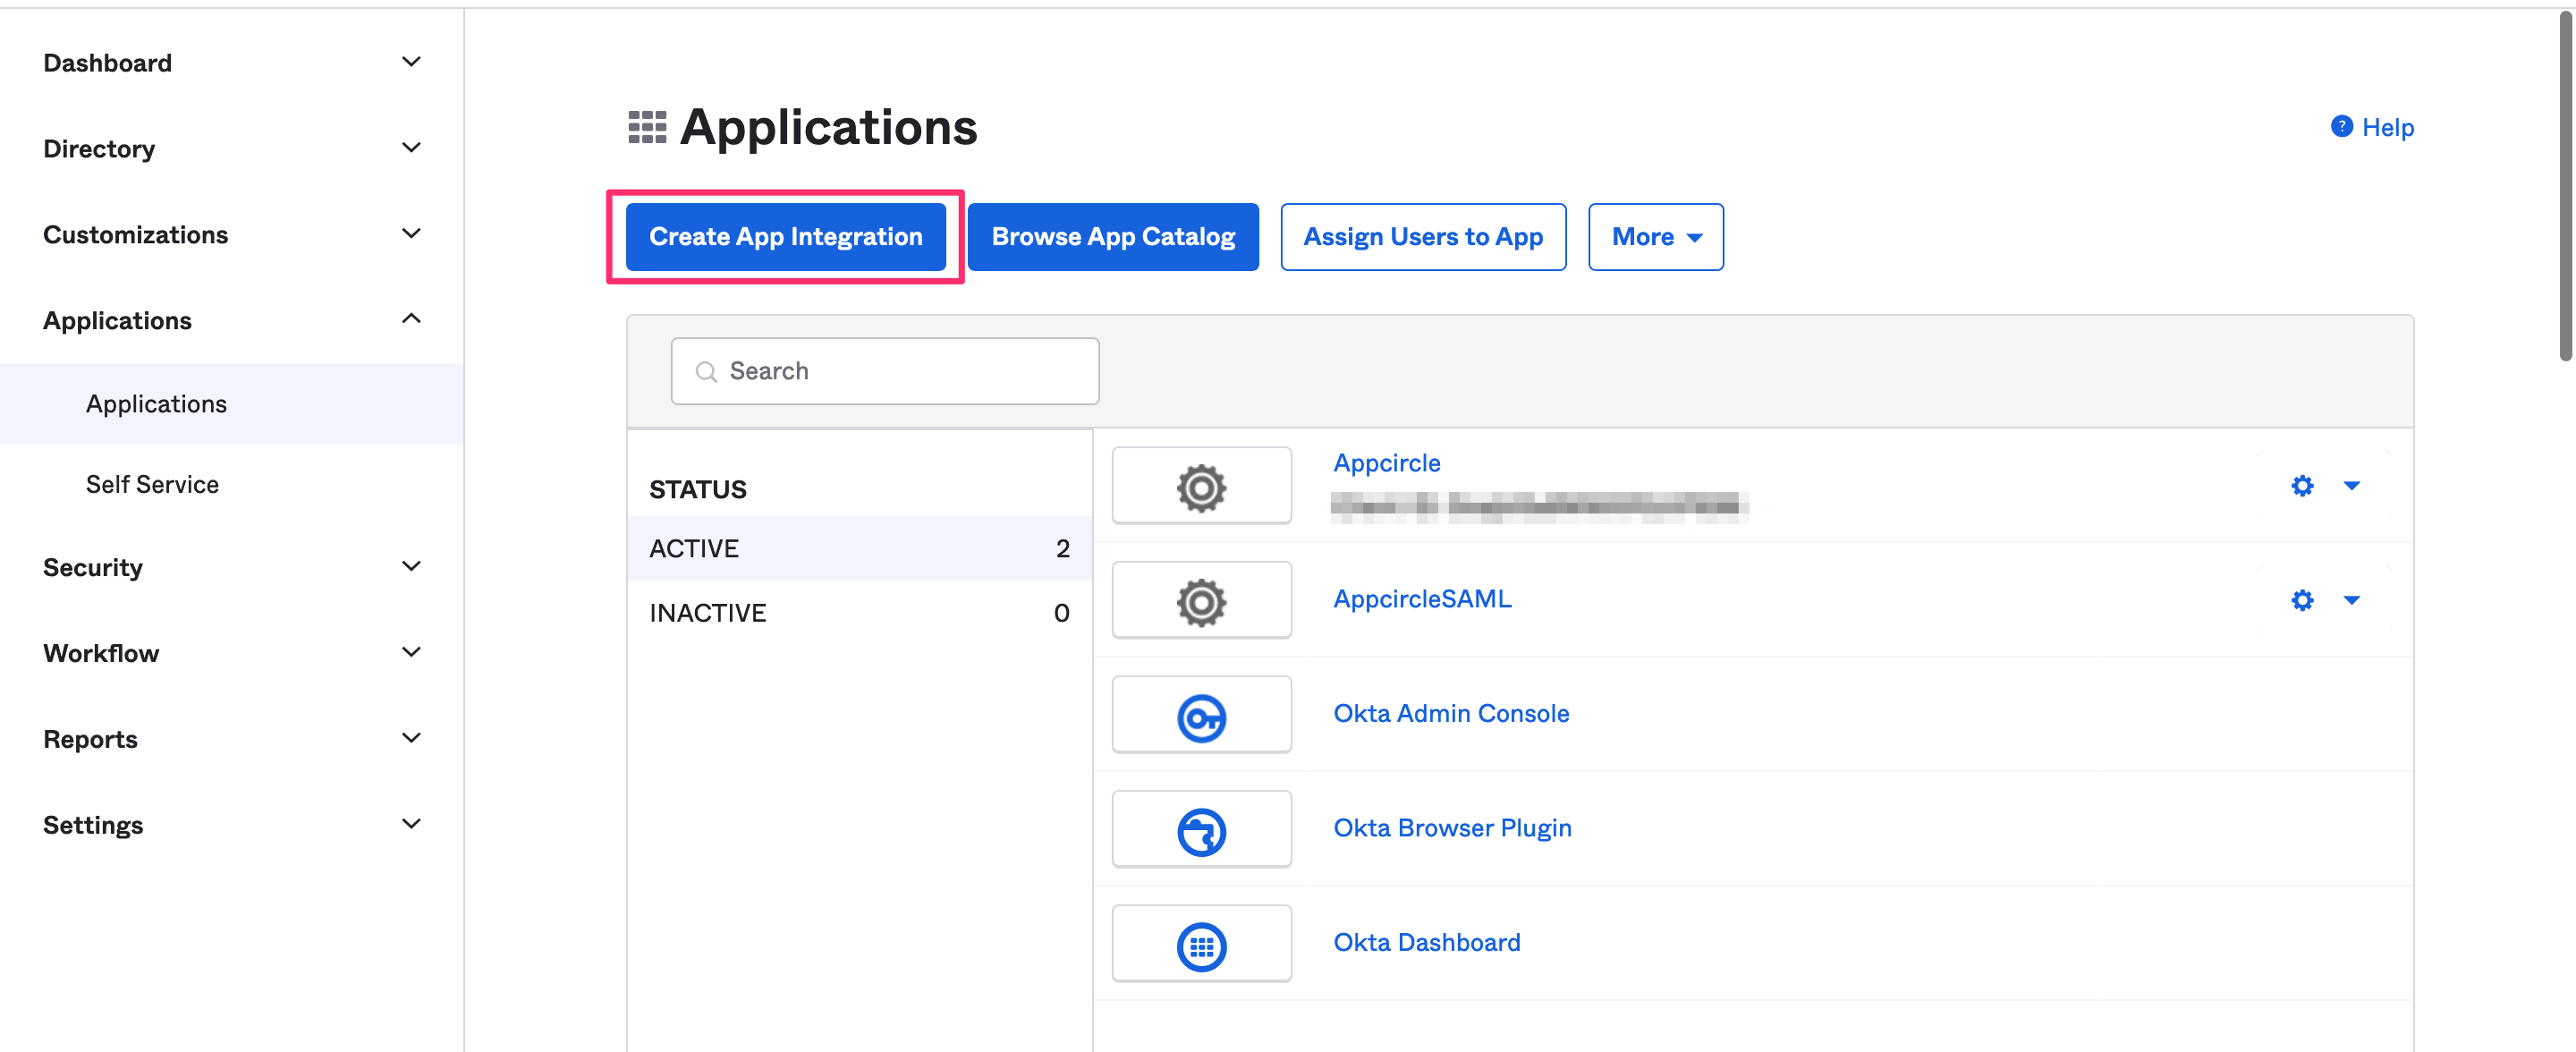
- Login to your Okta account and navigate to Applications and then click Create App Integration.
- Select SAML 2.0 as Sign In Method
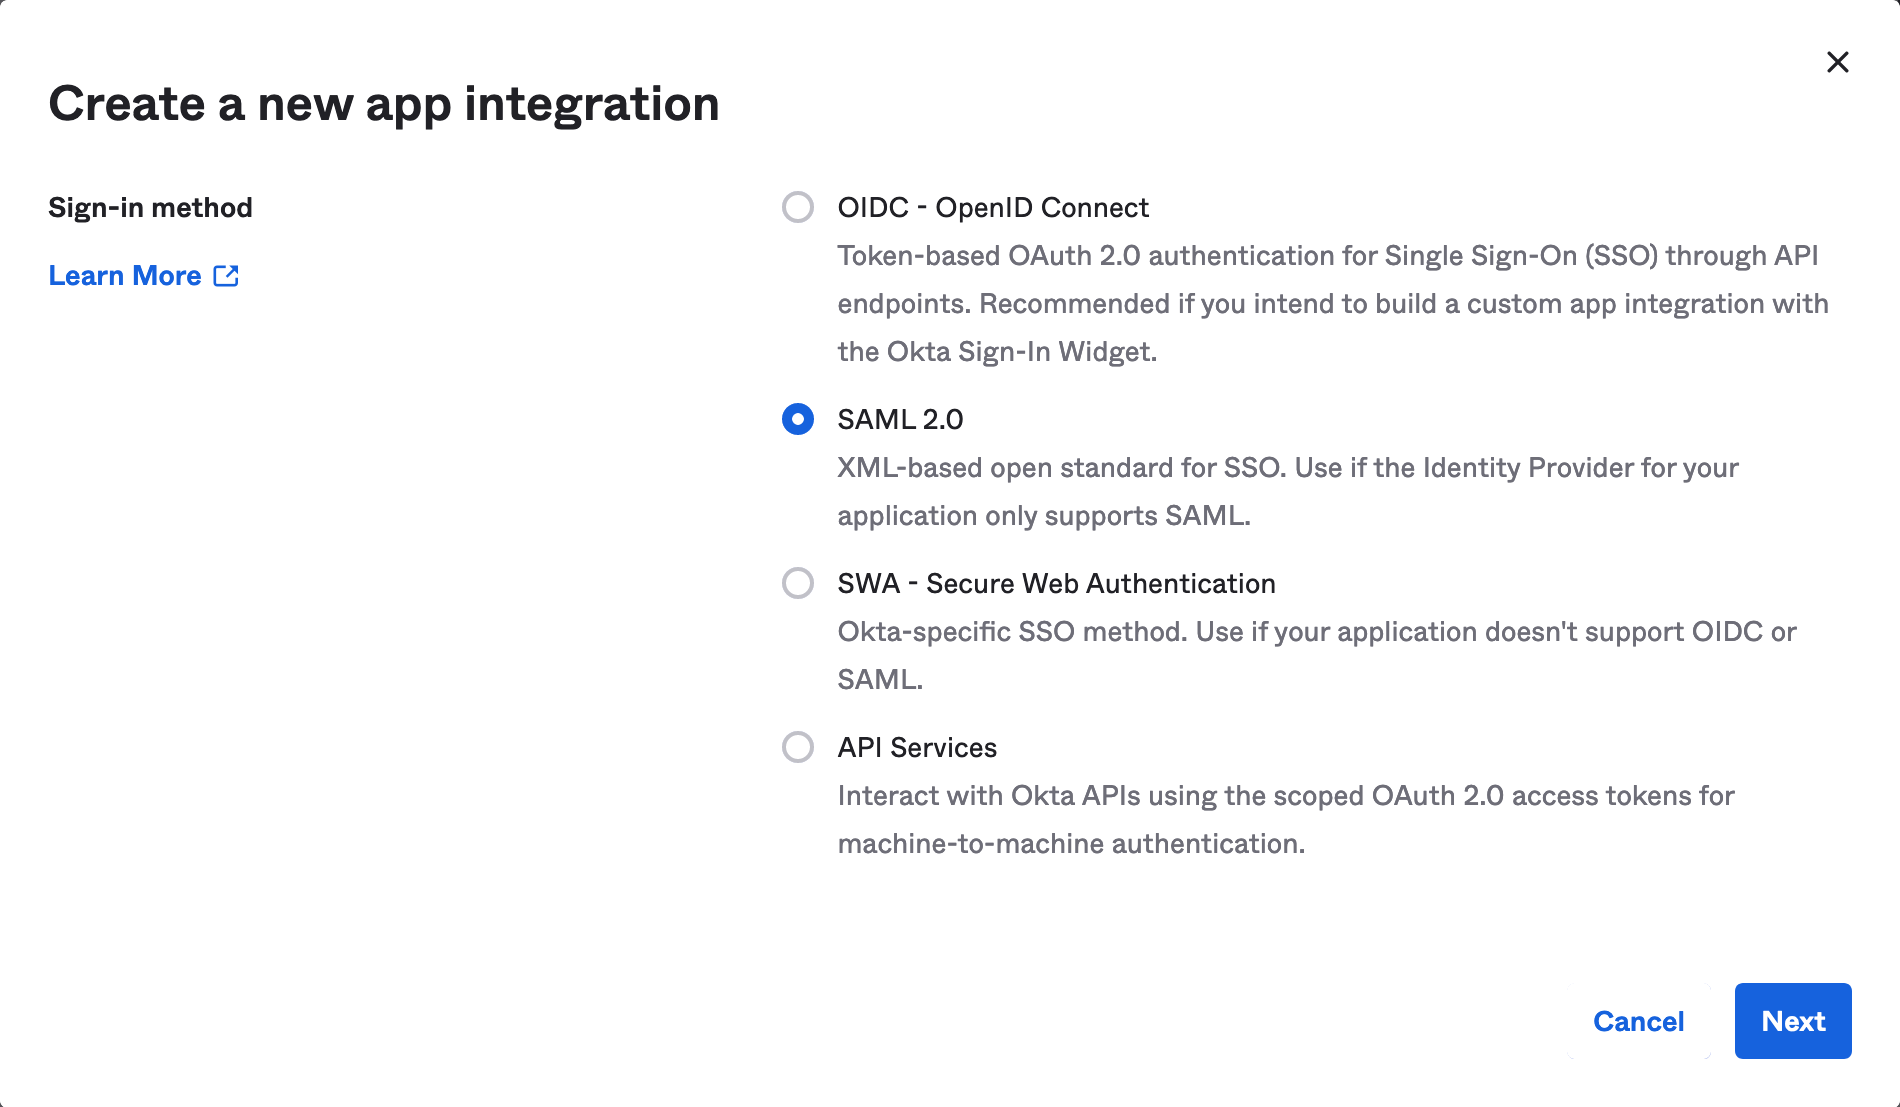
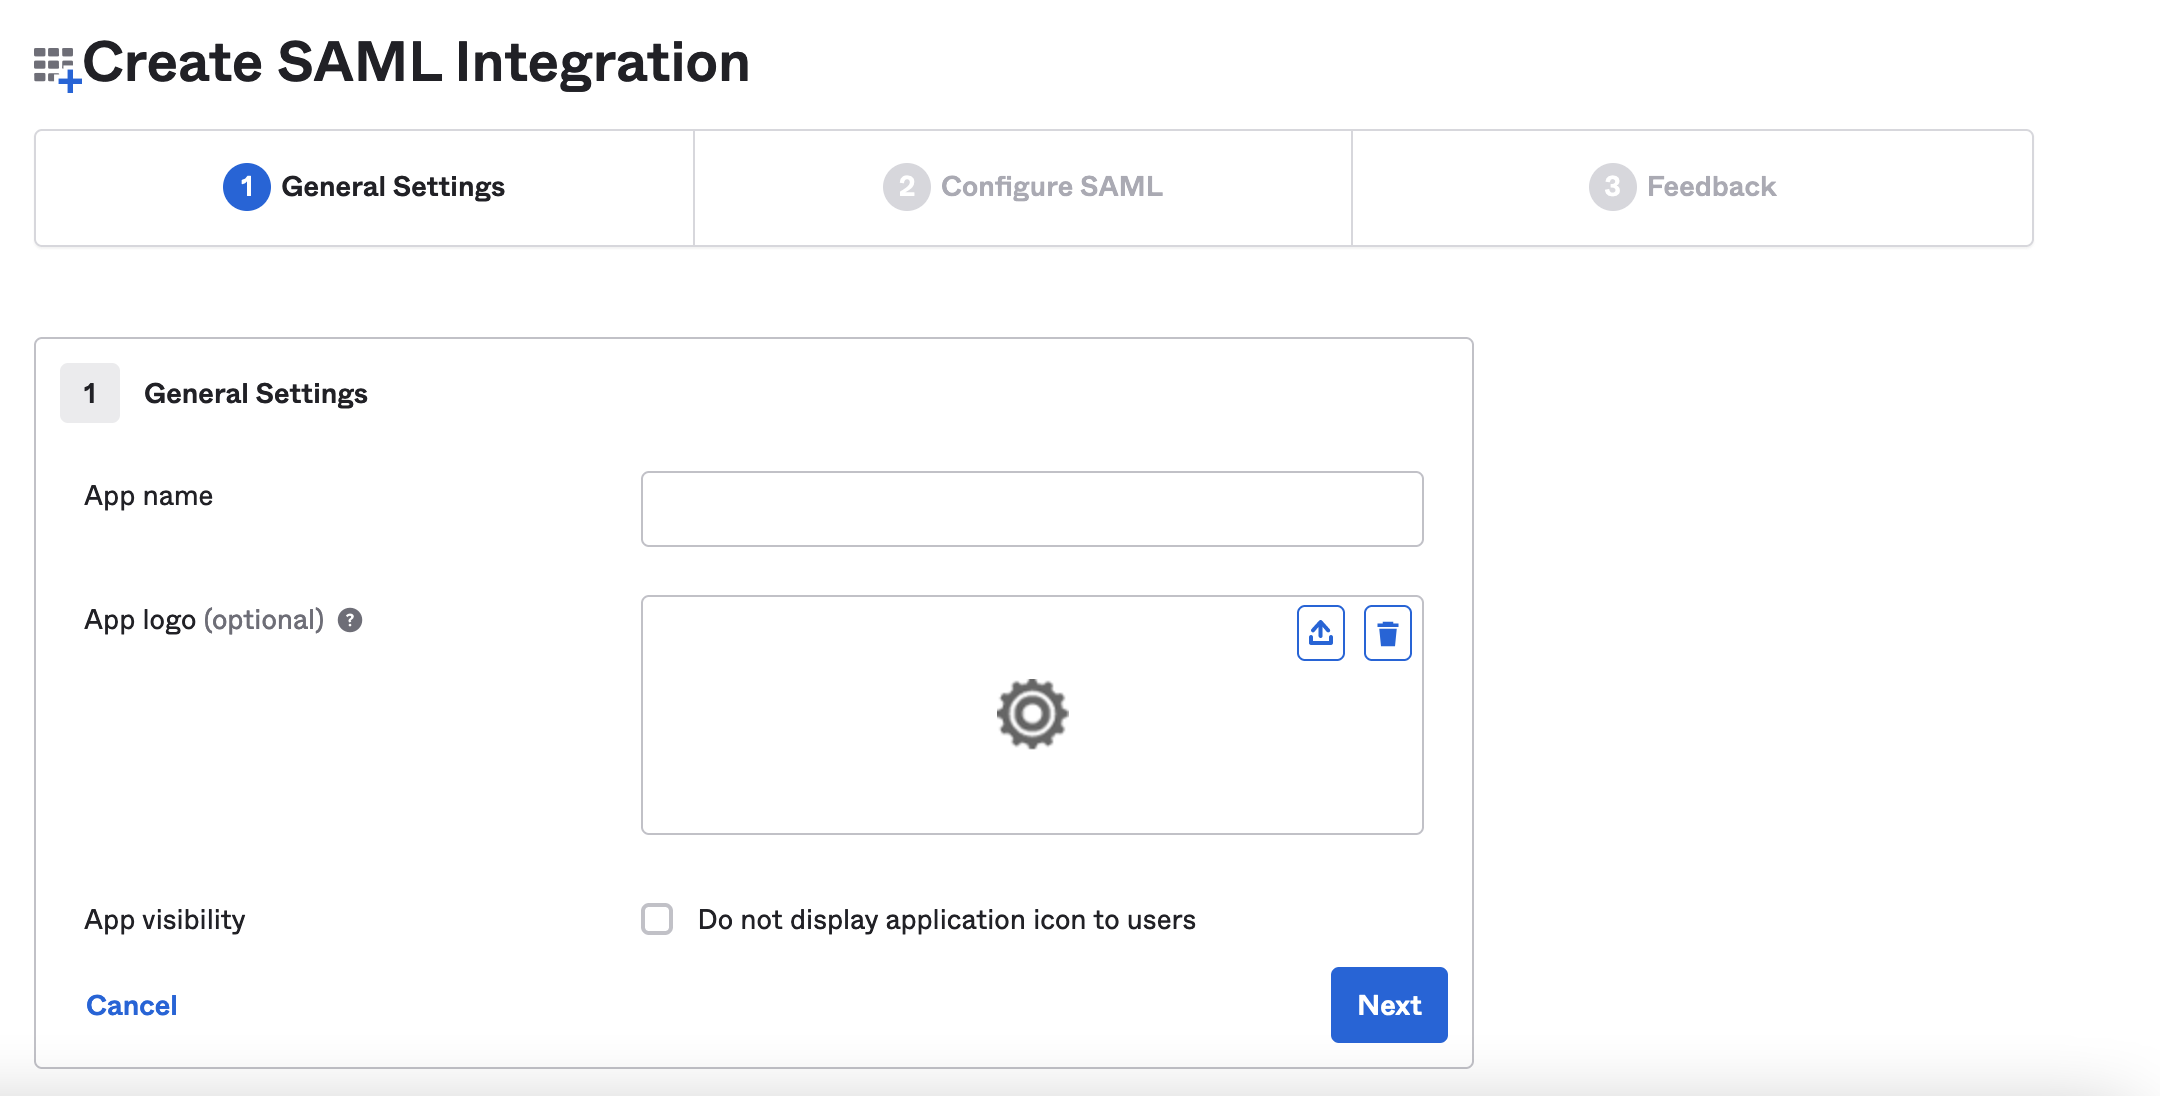
- Pick a name and optional logo for the app.
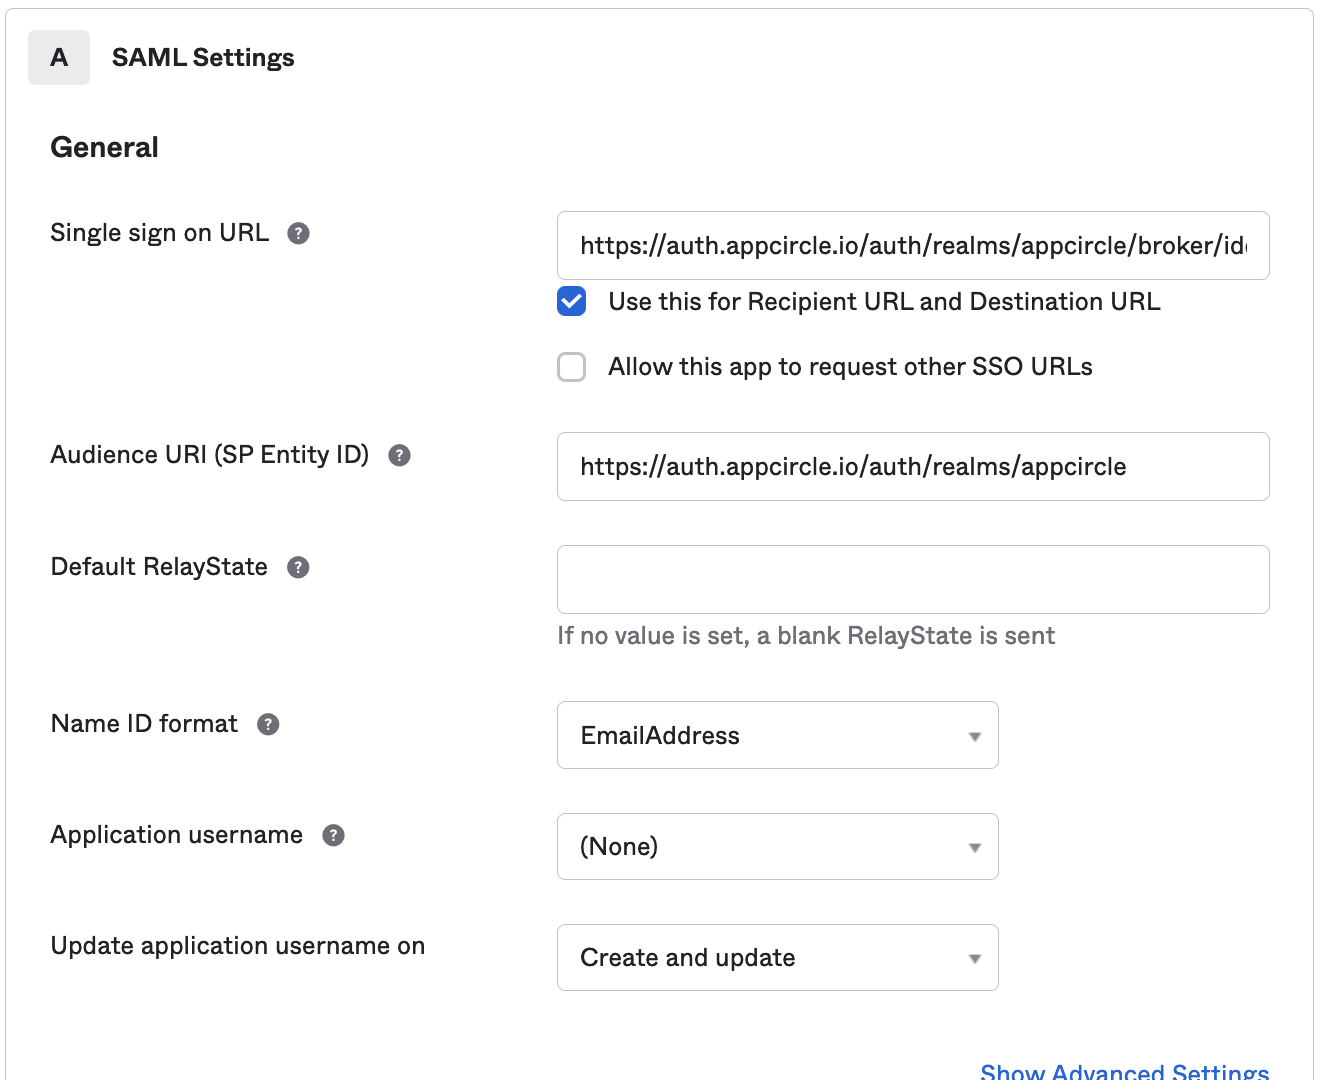
- Add the Appcircle Redirect URL to Single sign on URL write
https://auth.appcircle.io/auth/realms/appcirclefor the Audience URI (SP Entity ID) and selectEmailAddressfor the Name ID format.
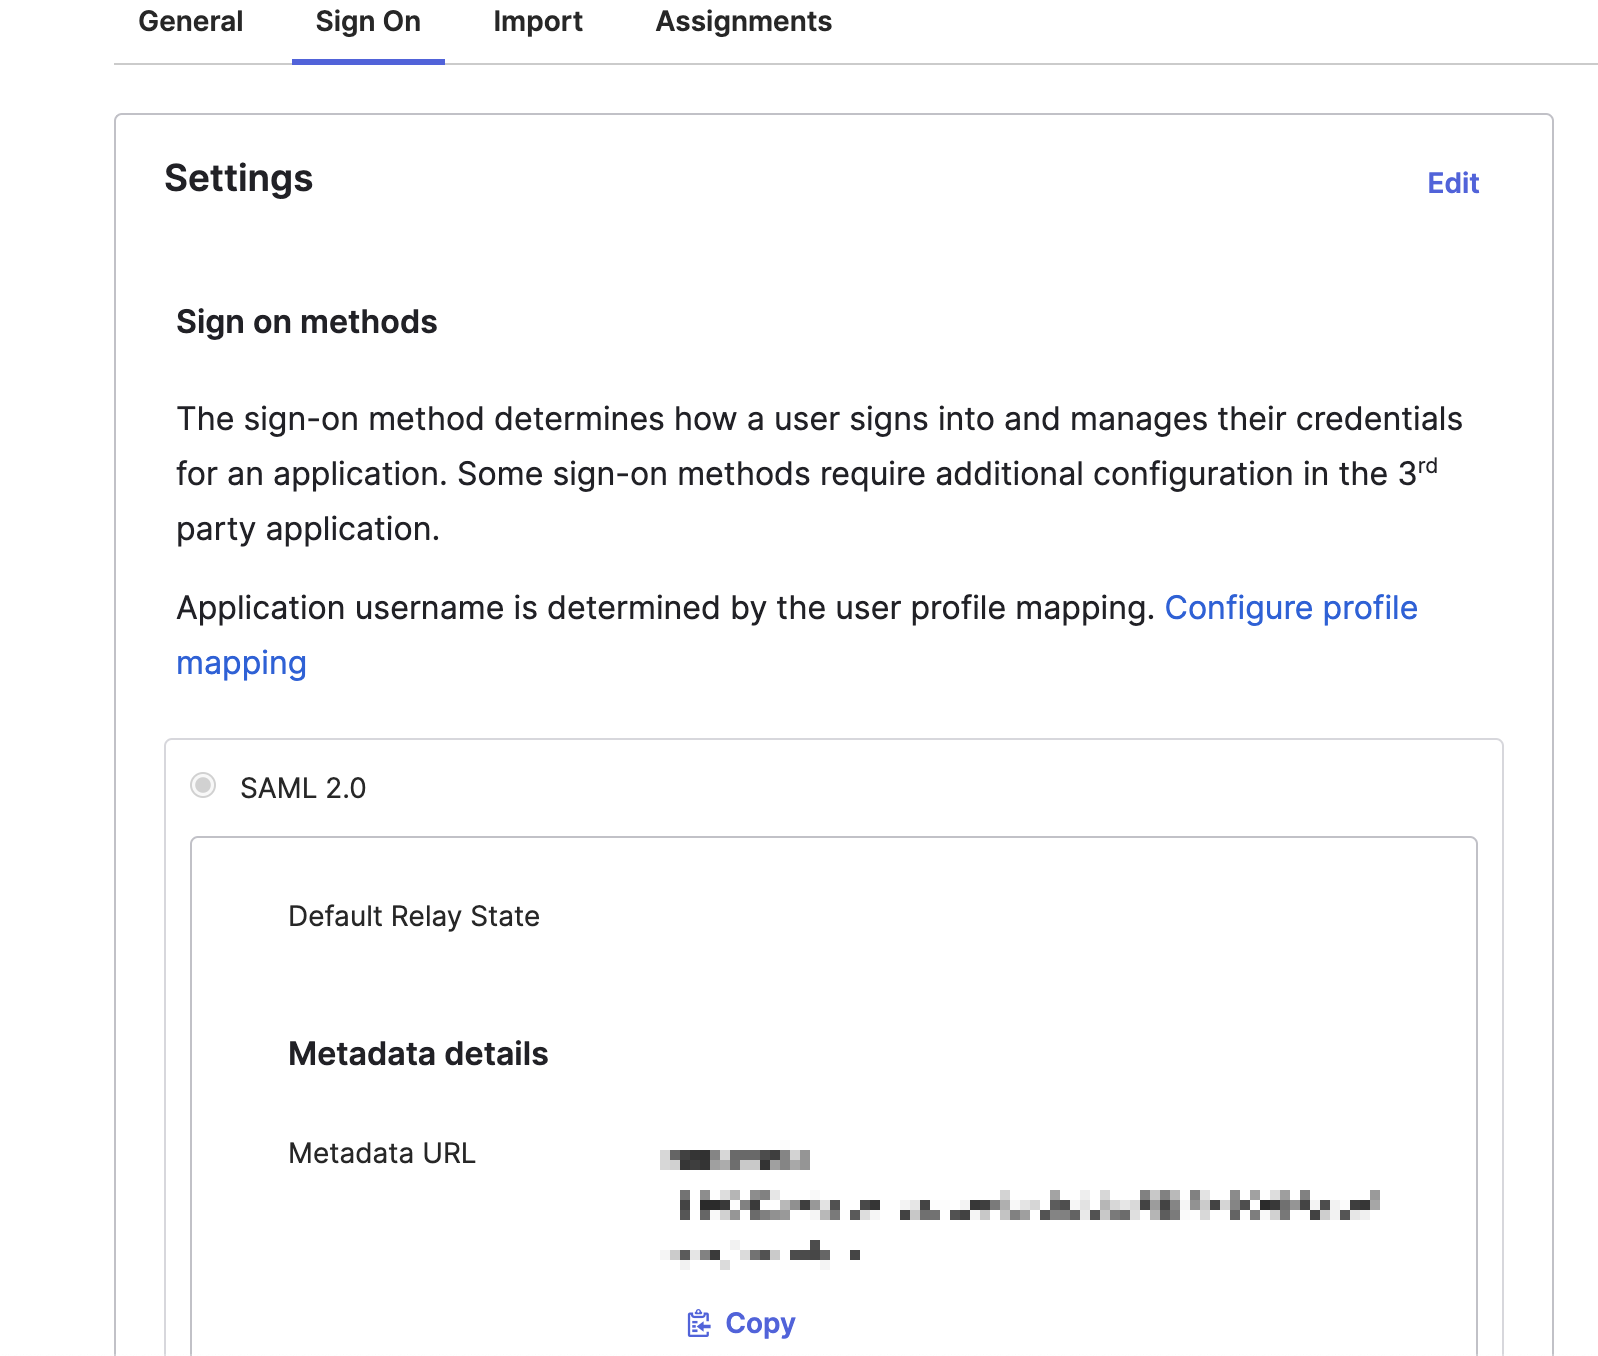
- Instead of writing all the settings of SAML, you can download the settings file from Okta and upload it. Click the "Copy" button of Metadata URL and open it another tab then save the XML file.
- Go back to Appcircle, upload this XML file by clicking the button under Import SAML Configuration
-
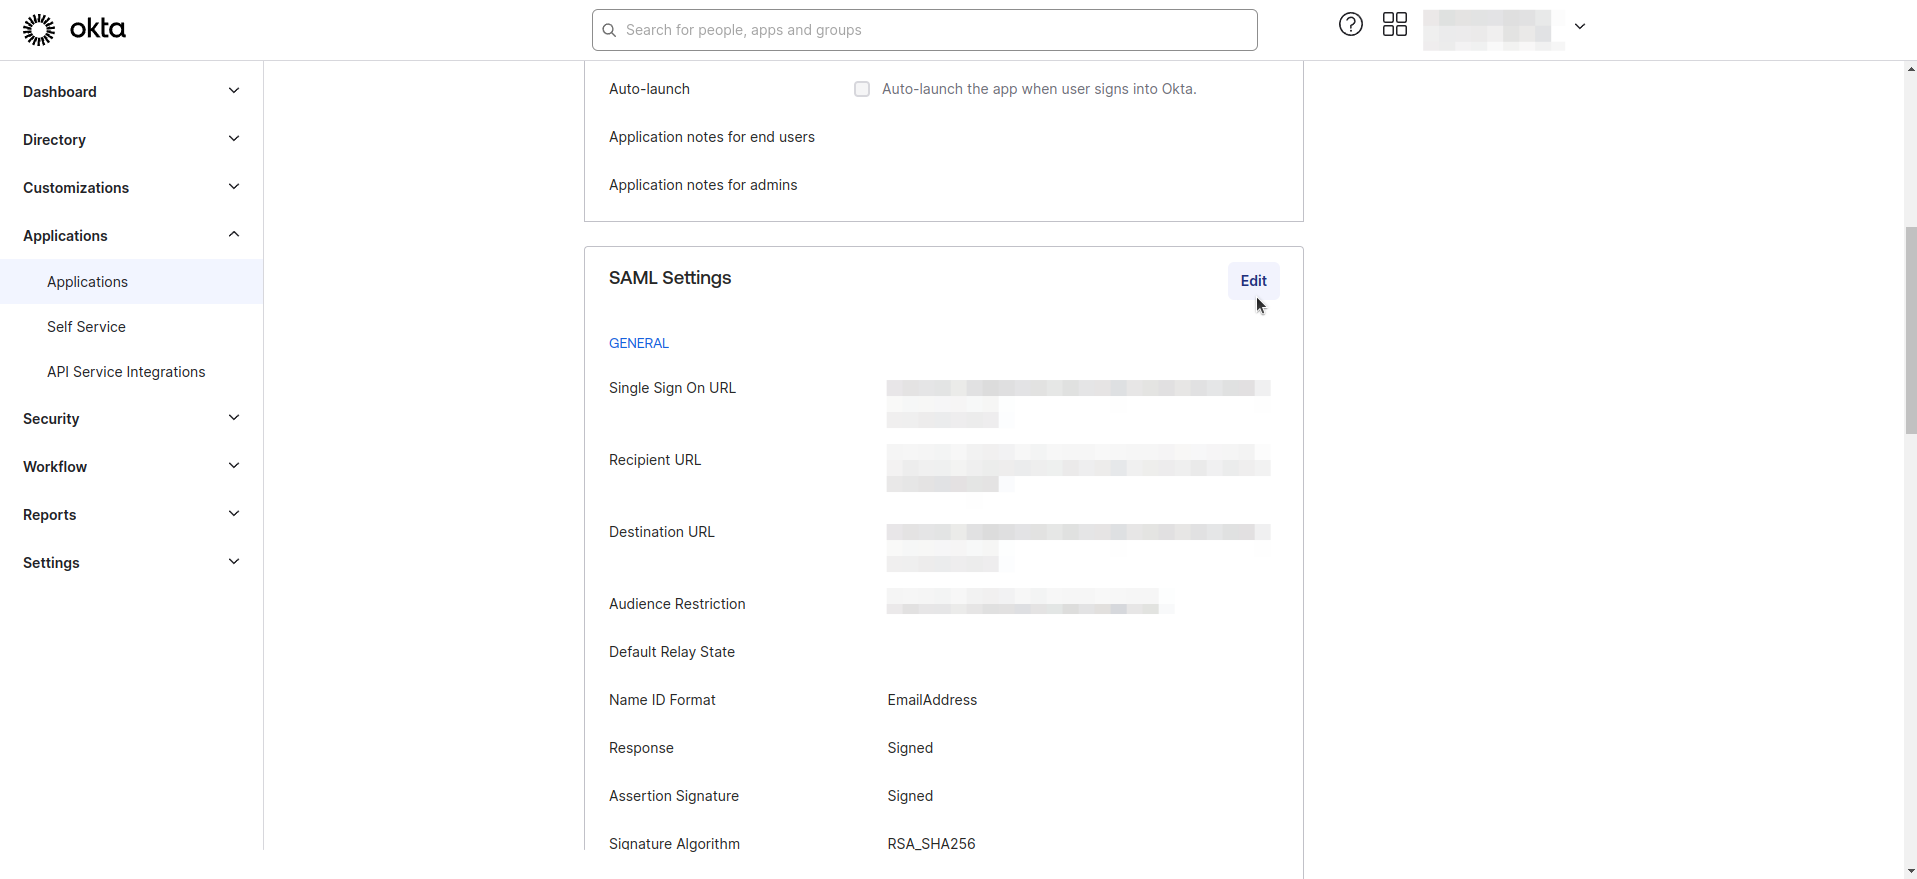
Check all the settings on this page and confirm that Redirect and SSO URLs are imported correctly. You can check if the X509 Certificate is imported correctly as well. If you want to enter multiple certificates you can separate them by using a comma between them. Please be aware that you need to remove any new lines or file headers from this edit box. This edit box only accepts a long base64 encoded string.
-
The Group Attribute Name and Role Attribute Name fields are optional. Please refer to the SSO Mapping Documentation.
Testing SSO
- When you connect your Identity Provider, please open a new incognito window and test the SSO integration.
- Click the Continue with SSO button.
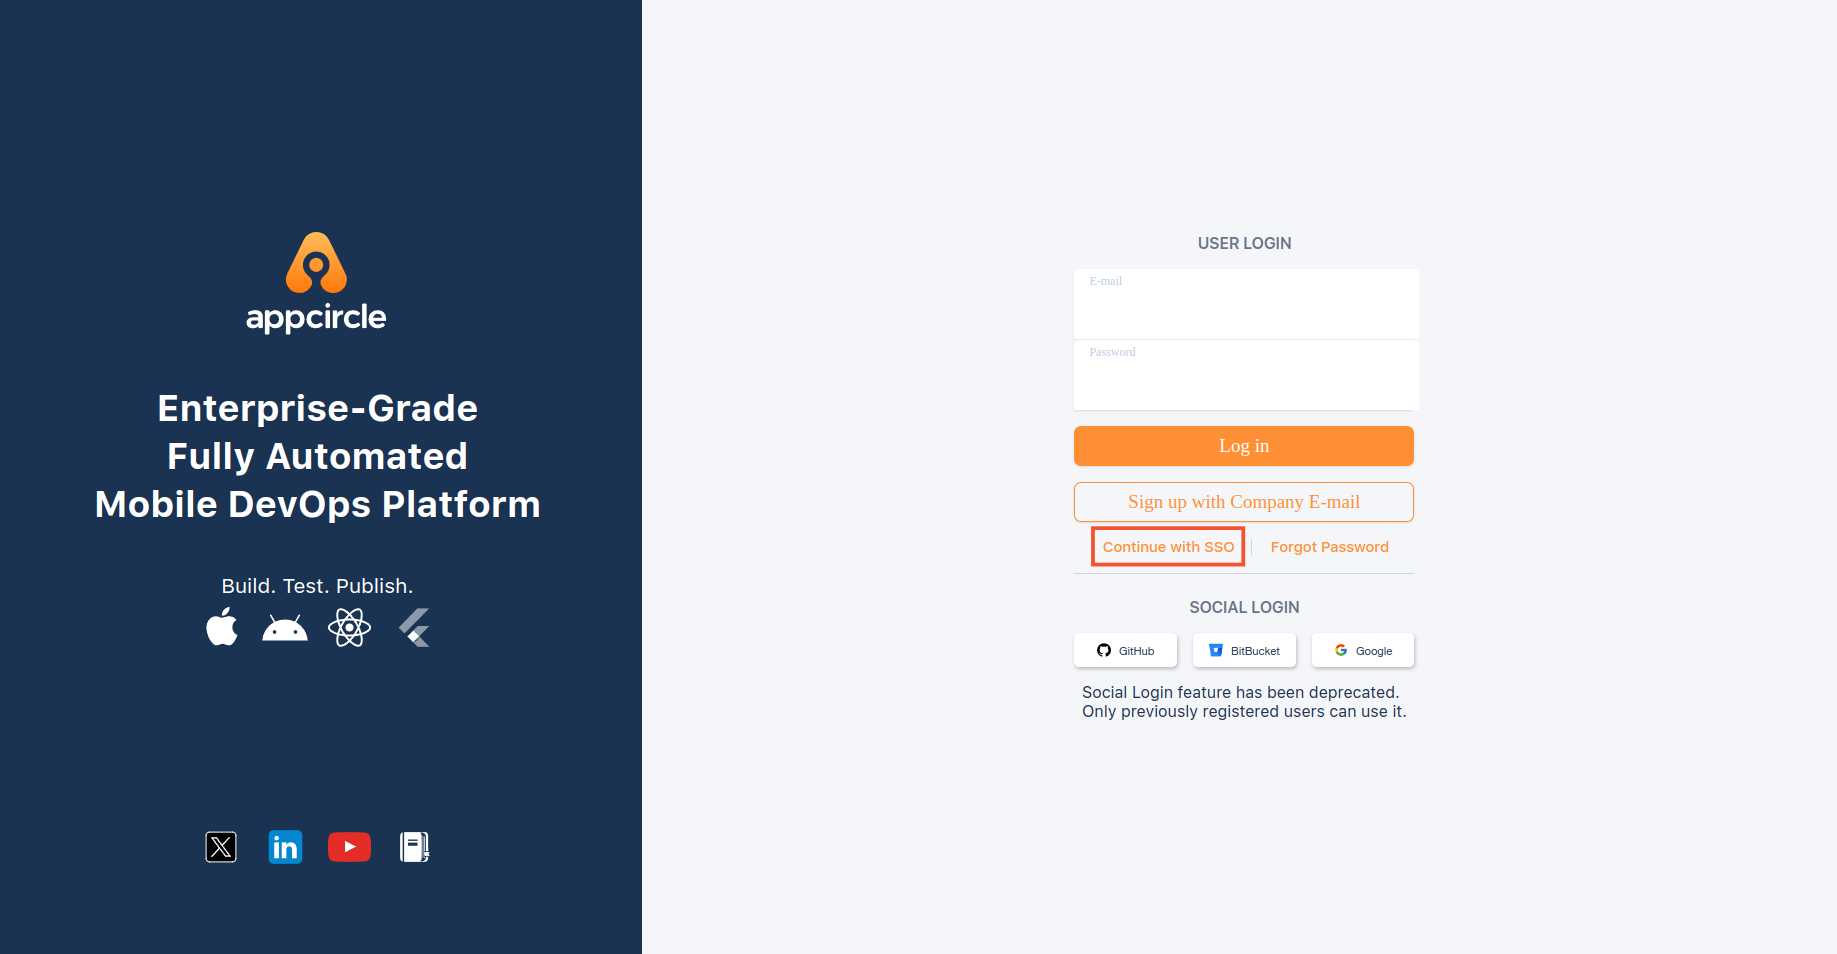
- Enter the alias you picked.

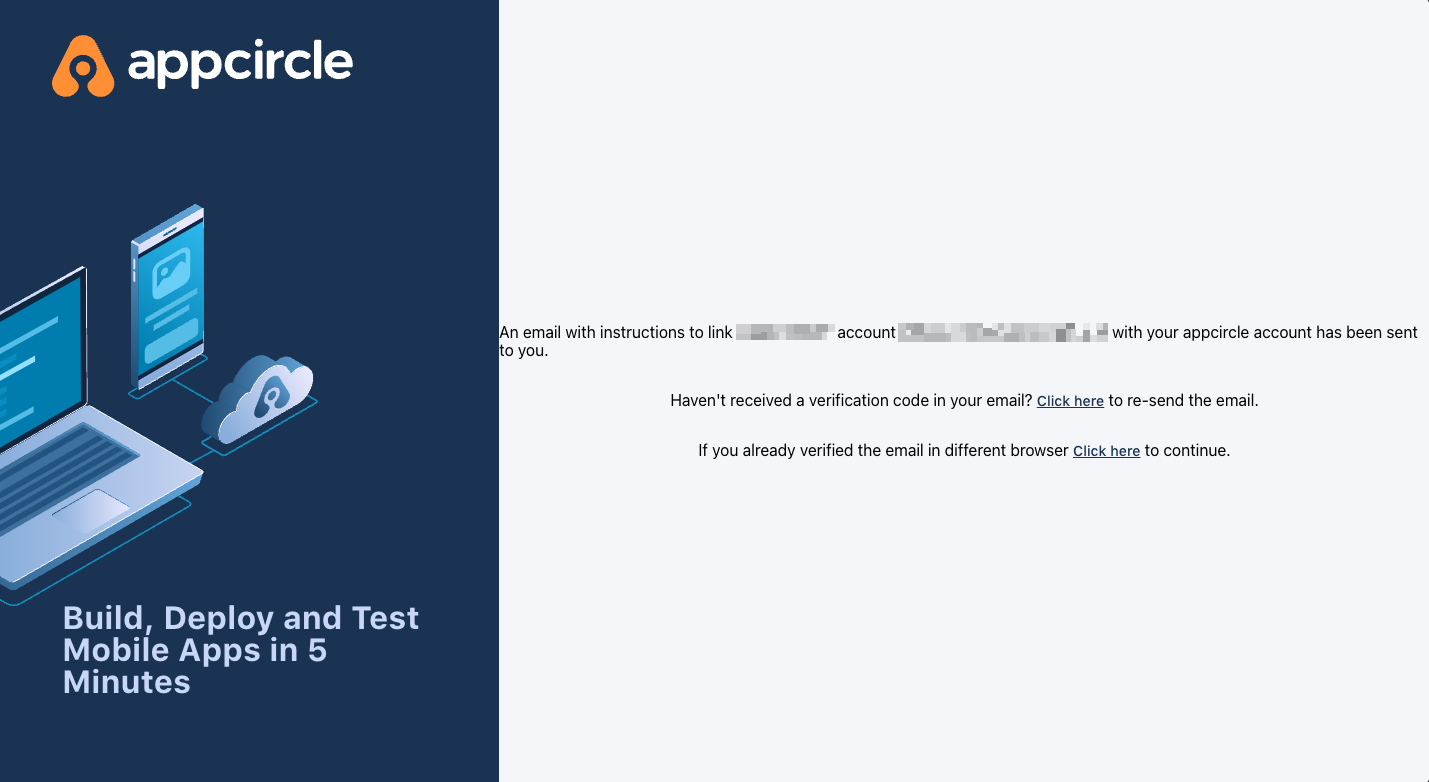
- You should first see the below confirmation screen.

- After you confirmed account linking, you will get an email.
- You can now access your account with SSO integration when you confirm the email.
- After you enable the SSO, you can only log in to your account with the SSO link. Your old credentials won't work anymore.
When you connect your Identity Provider, please open a new incognito window and test the SSO integration. Please only log off when you can log in with SSO credentials. If the connection doesn't work, you need to review your settings.
SSO Mapping
This step is optional and can be skipped if you do not plan to use SSO Mapping.
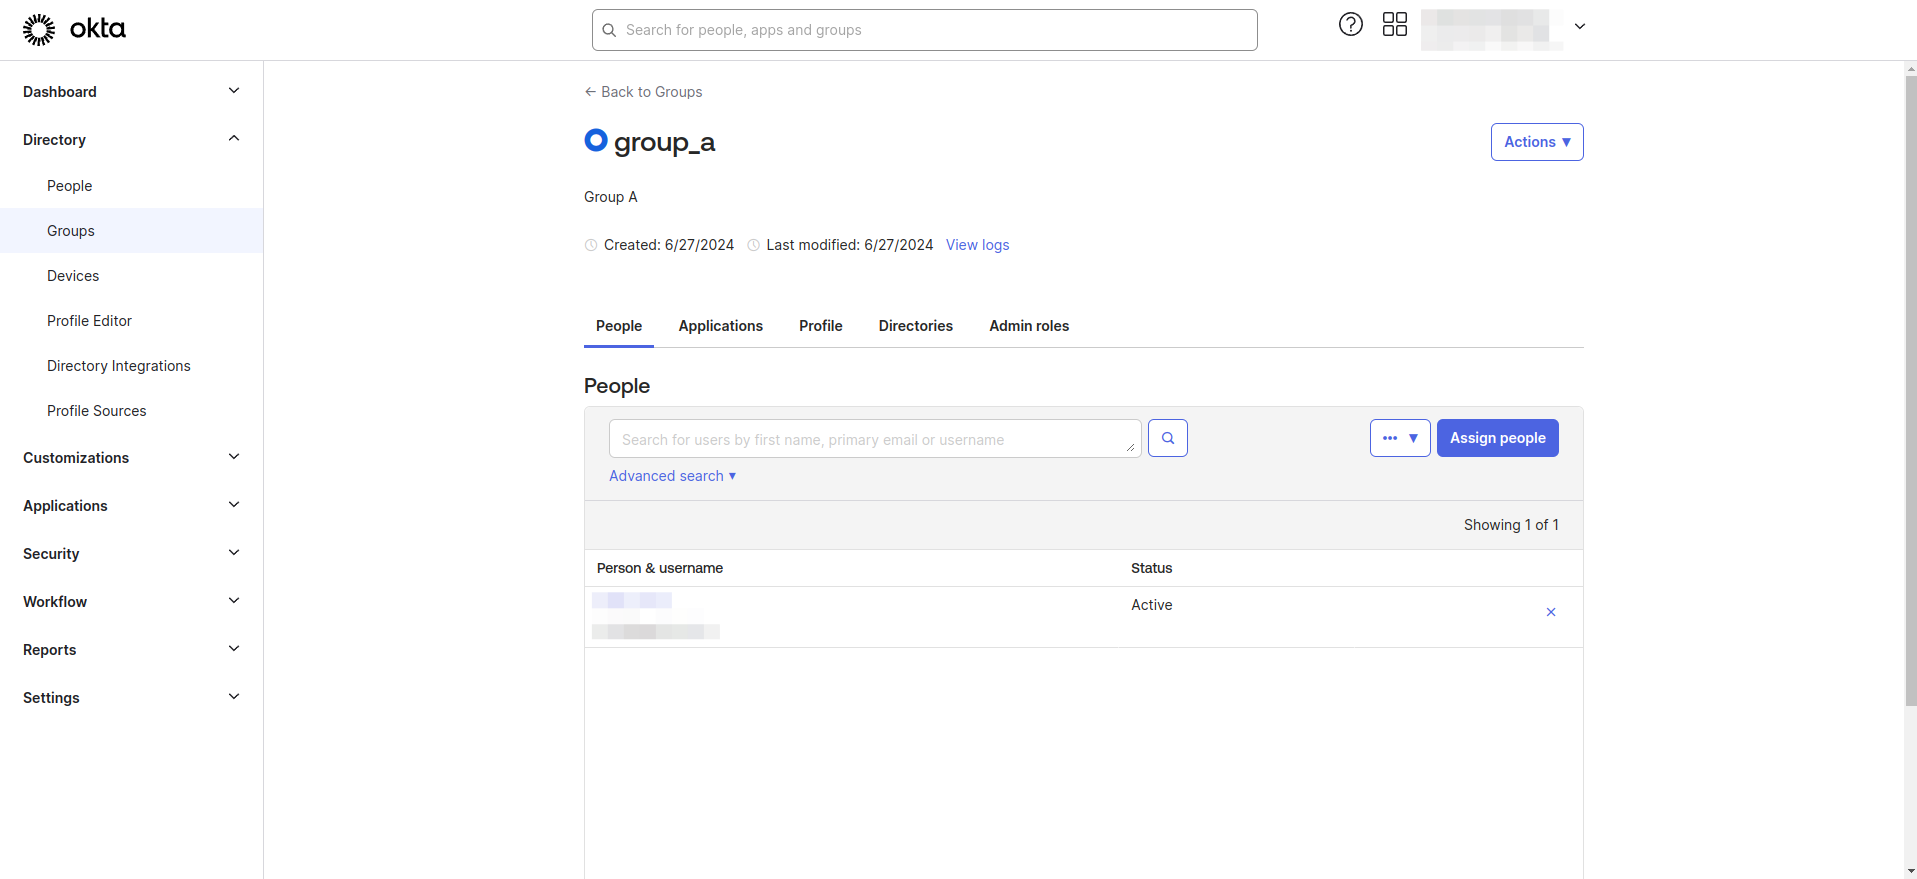
- Navigate to the Directory section in the Okta Dashboard, click on Groups, and create the groups as needed.

- Assign users to groups.
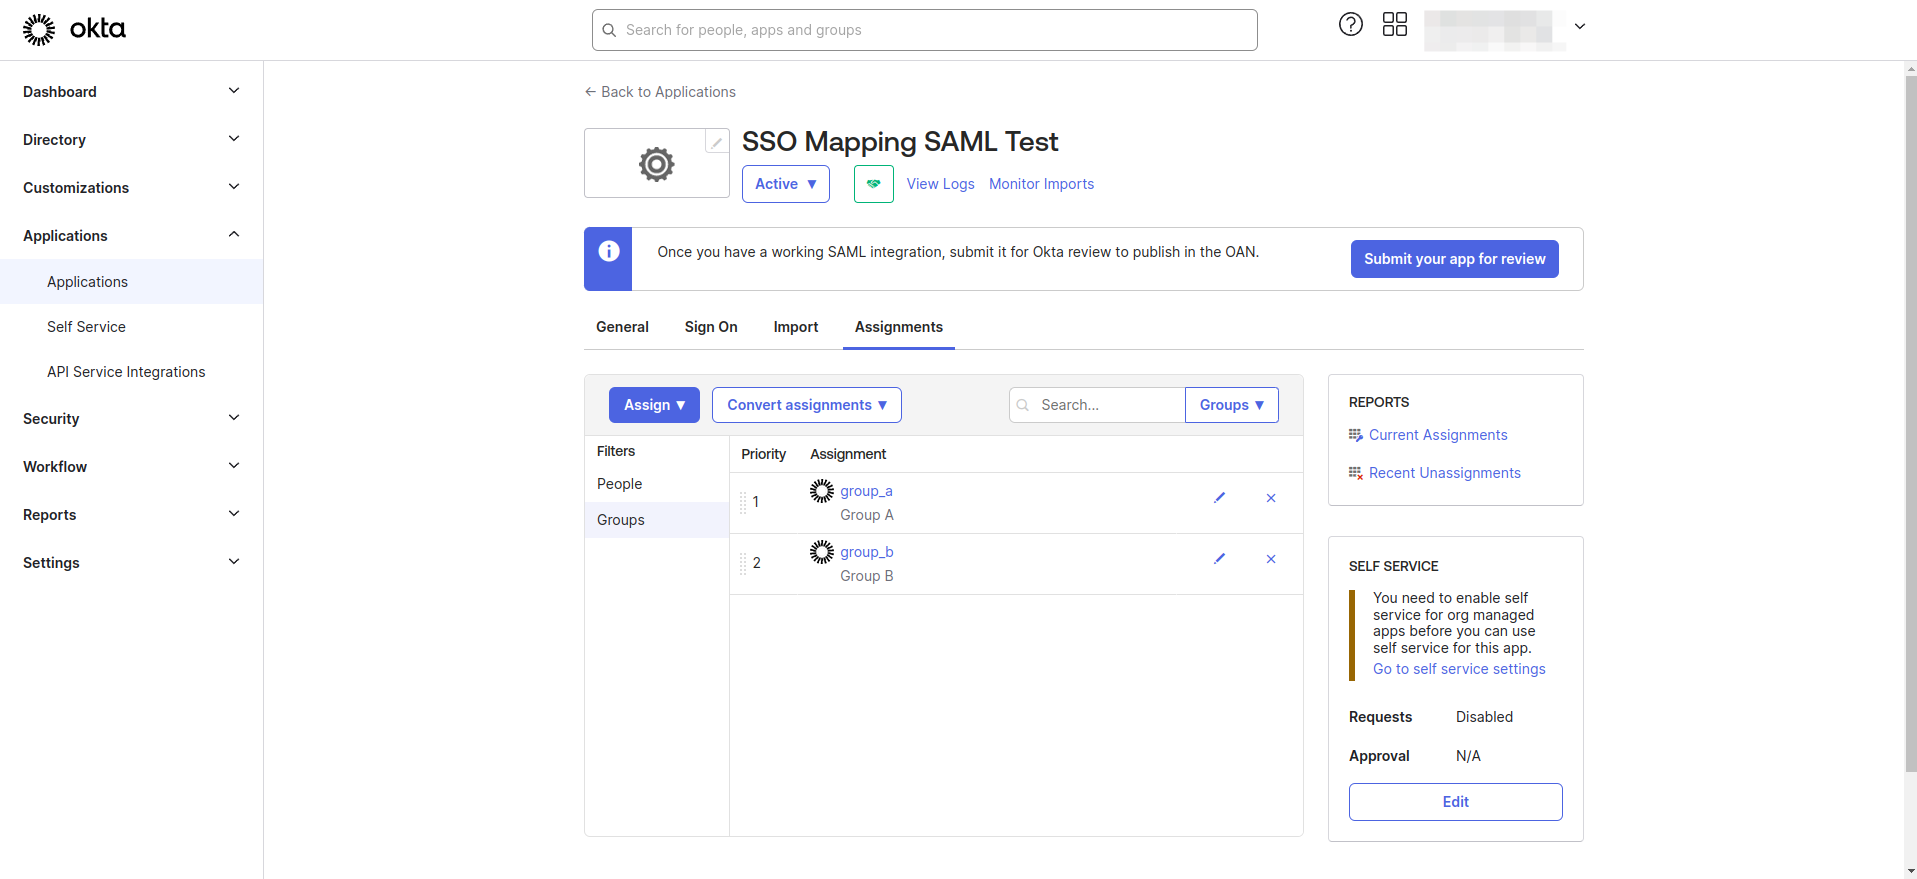
- Navigate to the Applications section and click on Applications tab.
- Select your application from the list and navigate to the Assignments tab. Assign the previously created groups to the application.
- User roles will be stored in a user attribute.
- Navigate to the Directory section, click on Profile Editor. Select the User (default) from profile list.
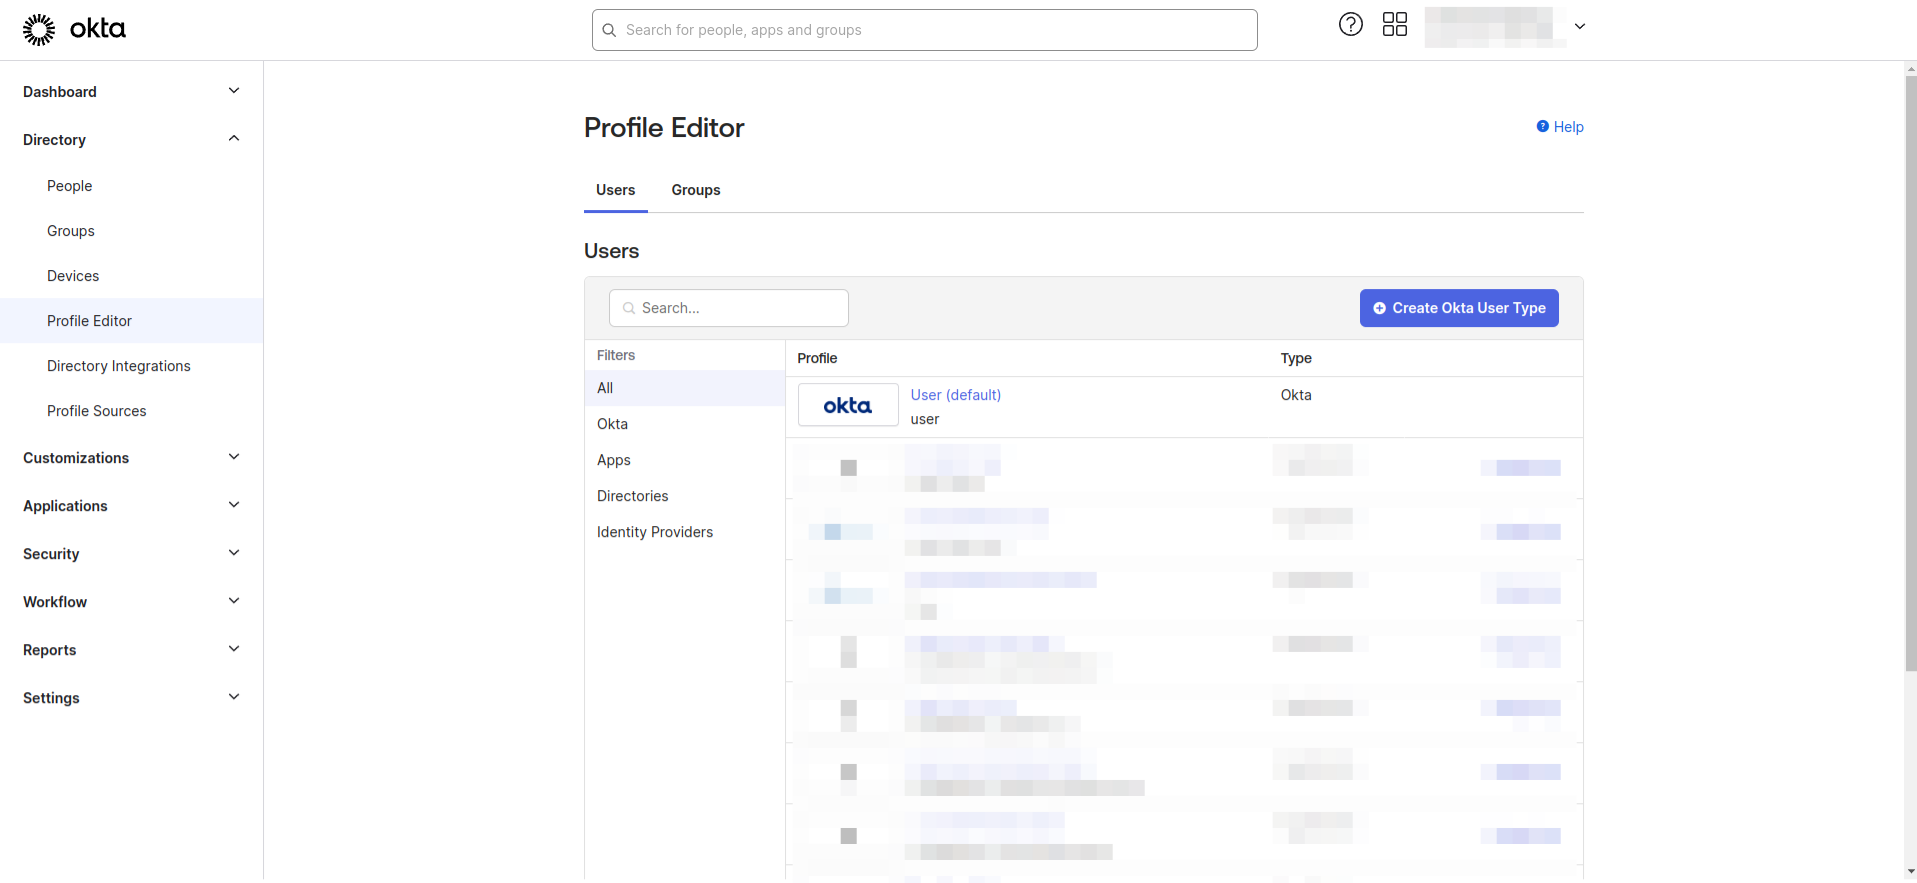
- Click on Add Attribute.
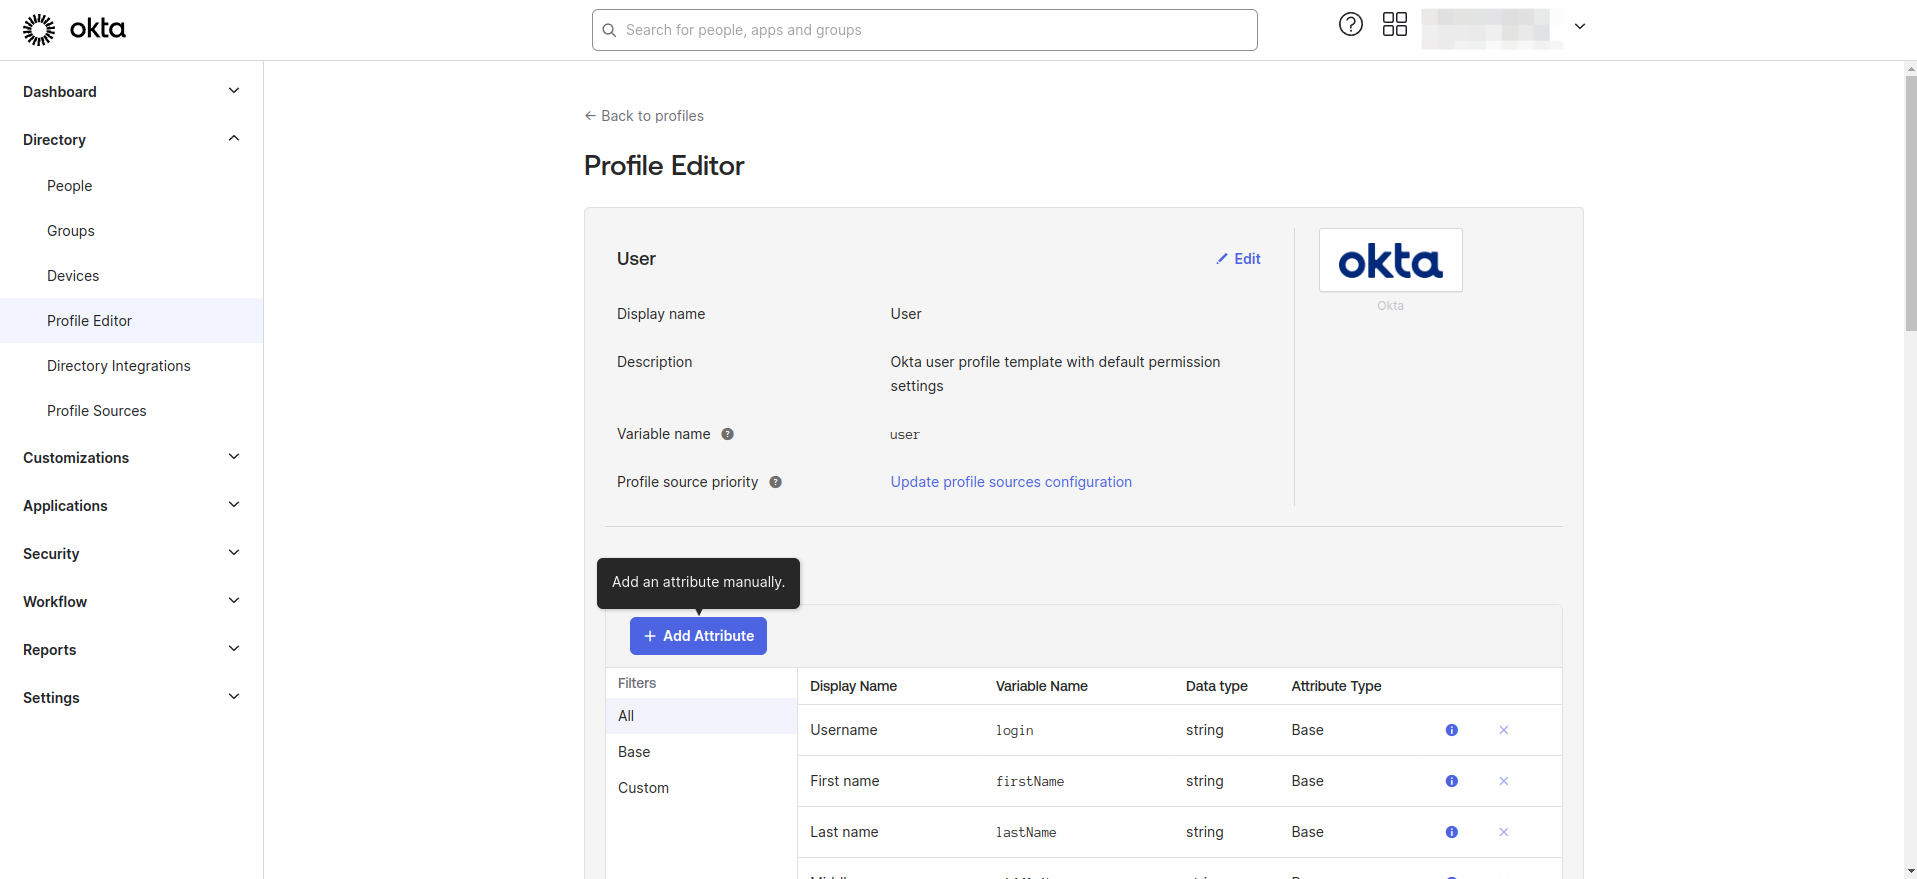
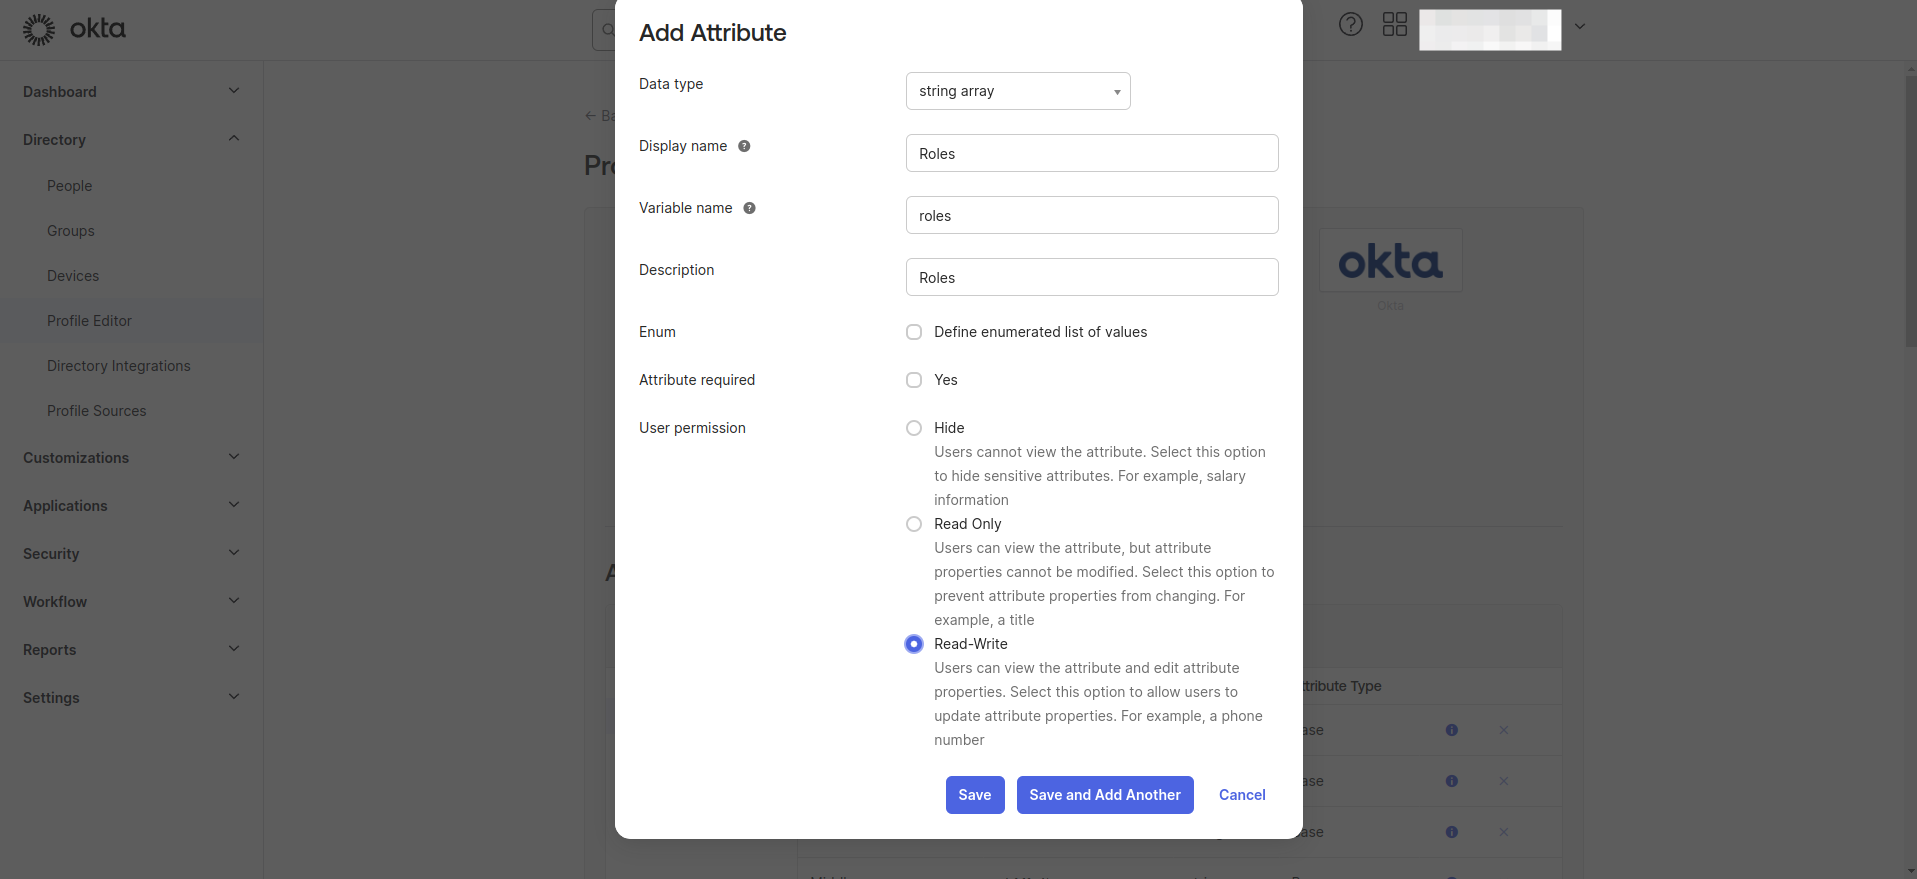
- Add a new user attribute as shown in the image below.
- Now, you can edit the roles attribute of users.
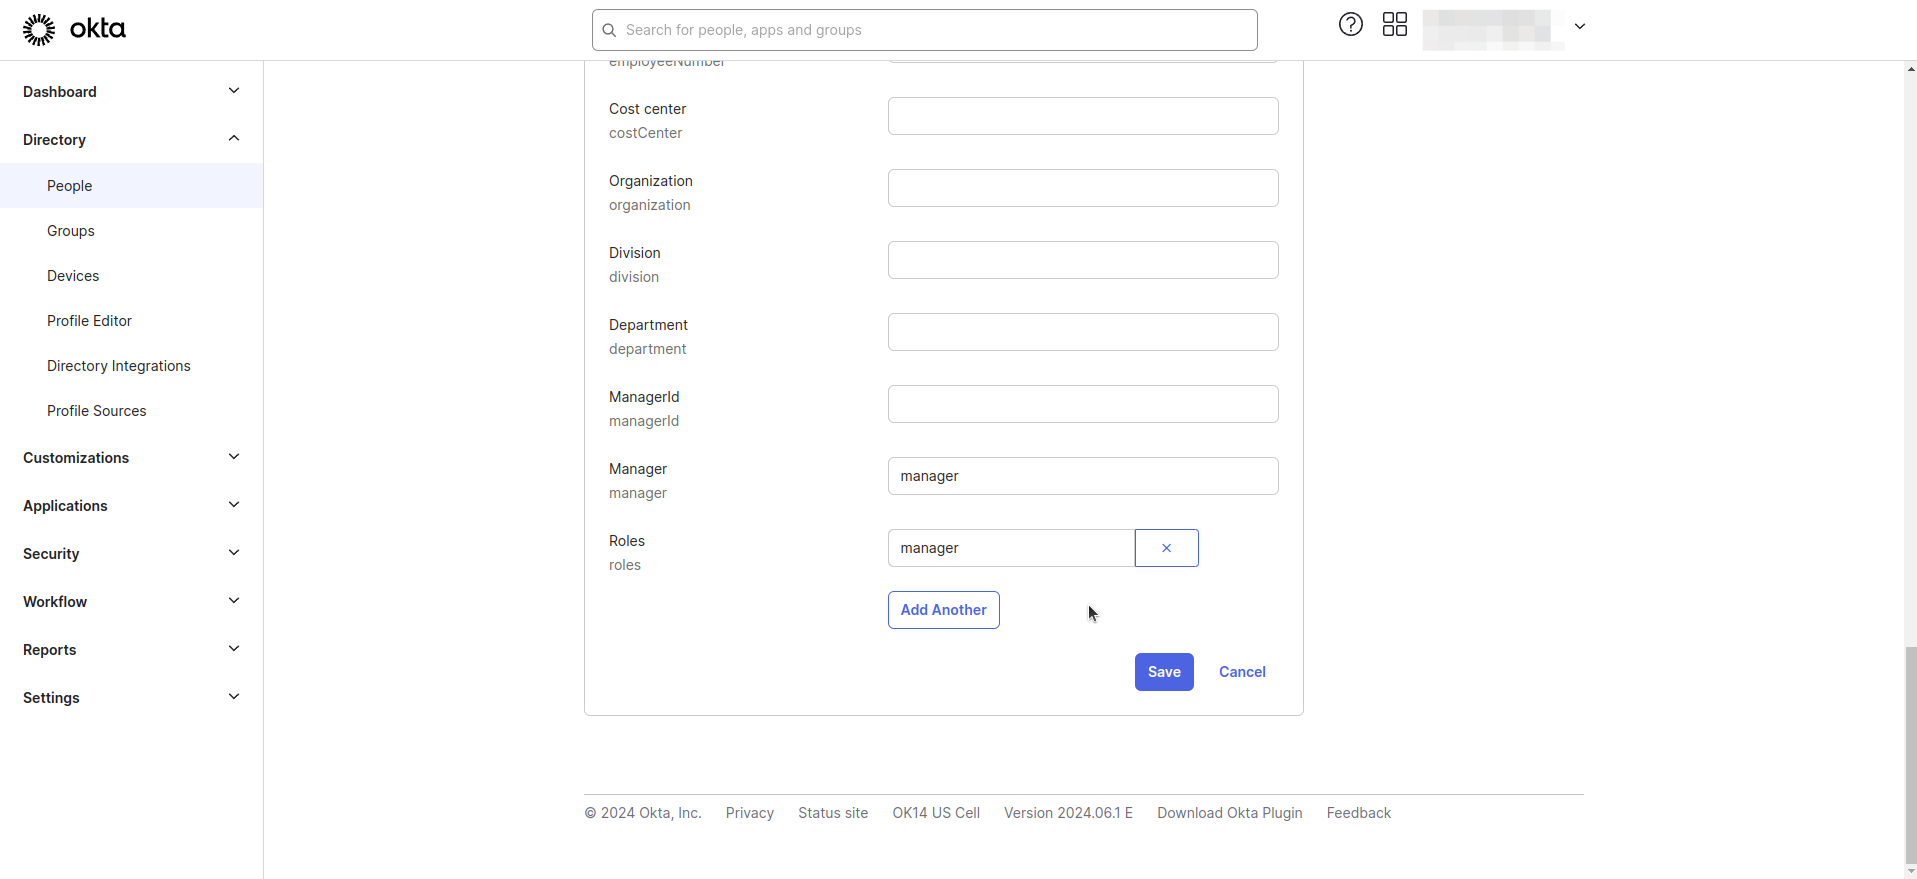
- Navigate to the Directory section, click on People, select a user from the list, and then click on the Profile tab.

- Click on Edit and update the user's role attribute. For example, set it to 'Manager'.
- Claim names for group and role need to be determined. These values can be changed via application settings.
- Navigate to the Applications section, click on Applications tab.
- Select your application from the list and navigate to the General tab. Click on Edit in SAML Settings
- Enter the Group and Attribute statement as as shown in the image below.
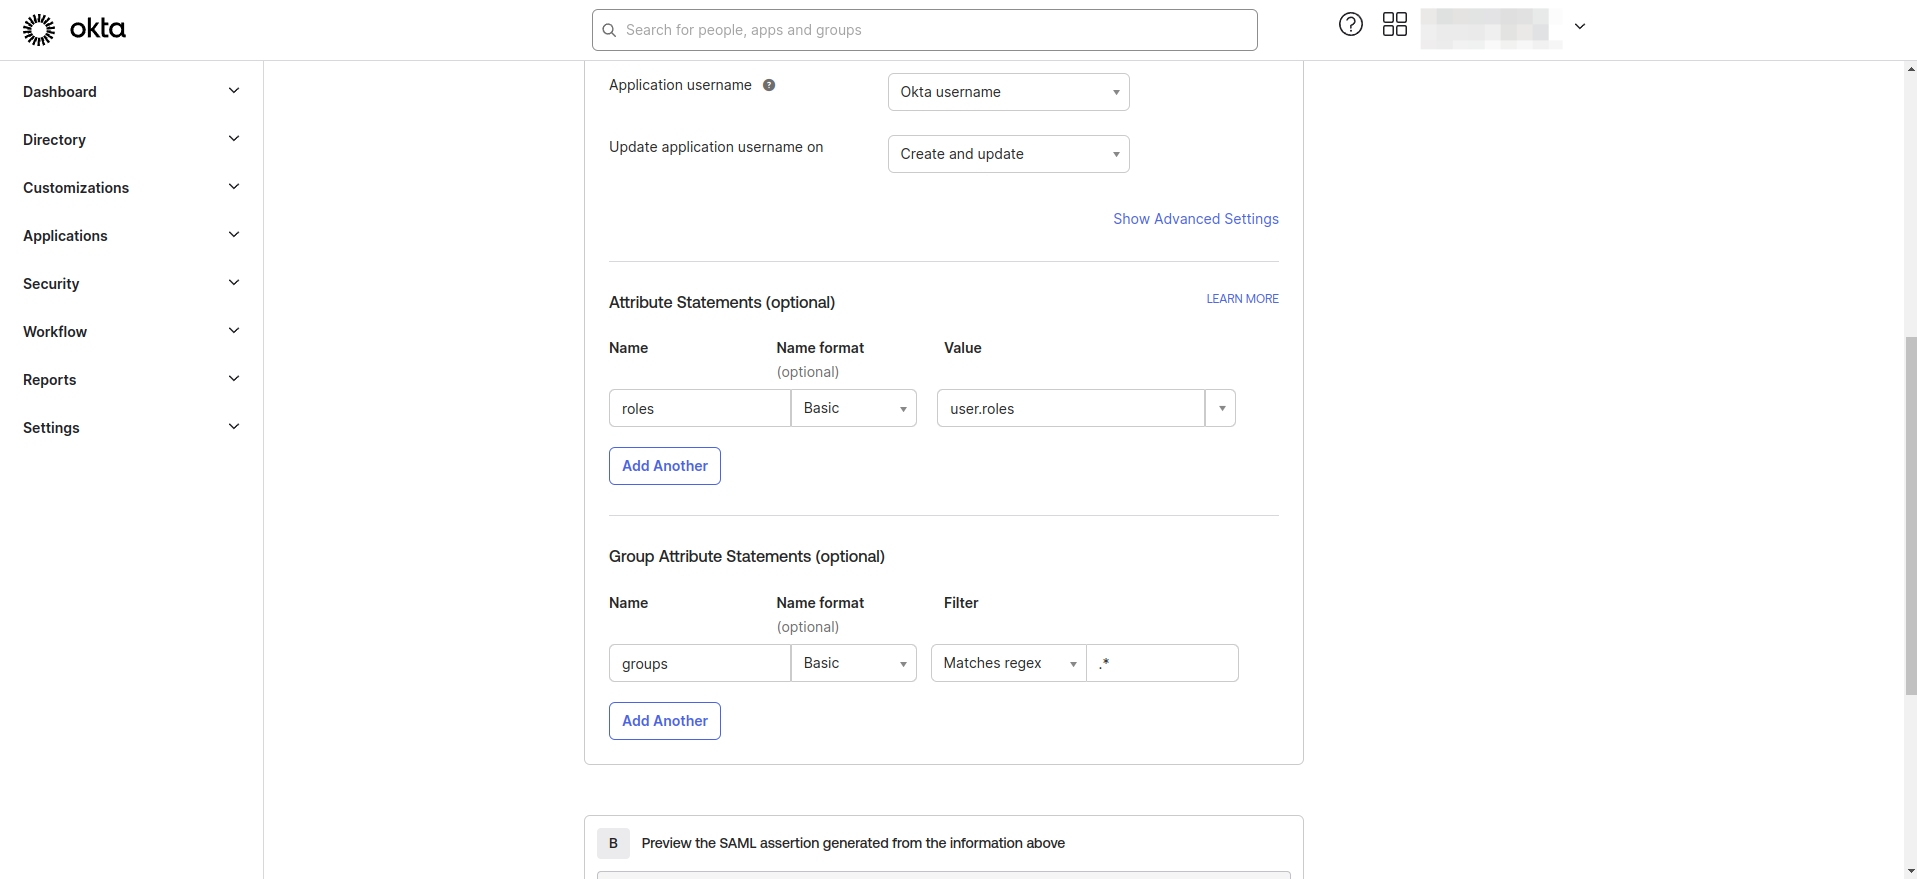
- Go back to Appcircle, enter Group Attribute Name as
groupsand Role Attribute Name asroles.
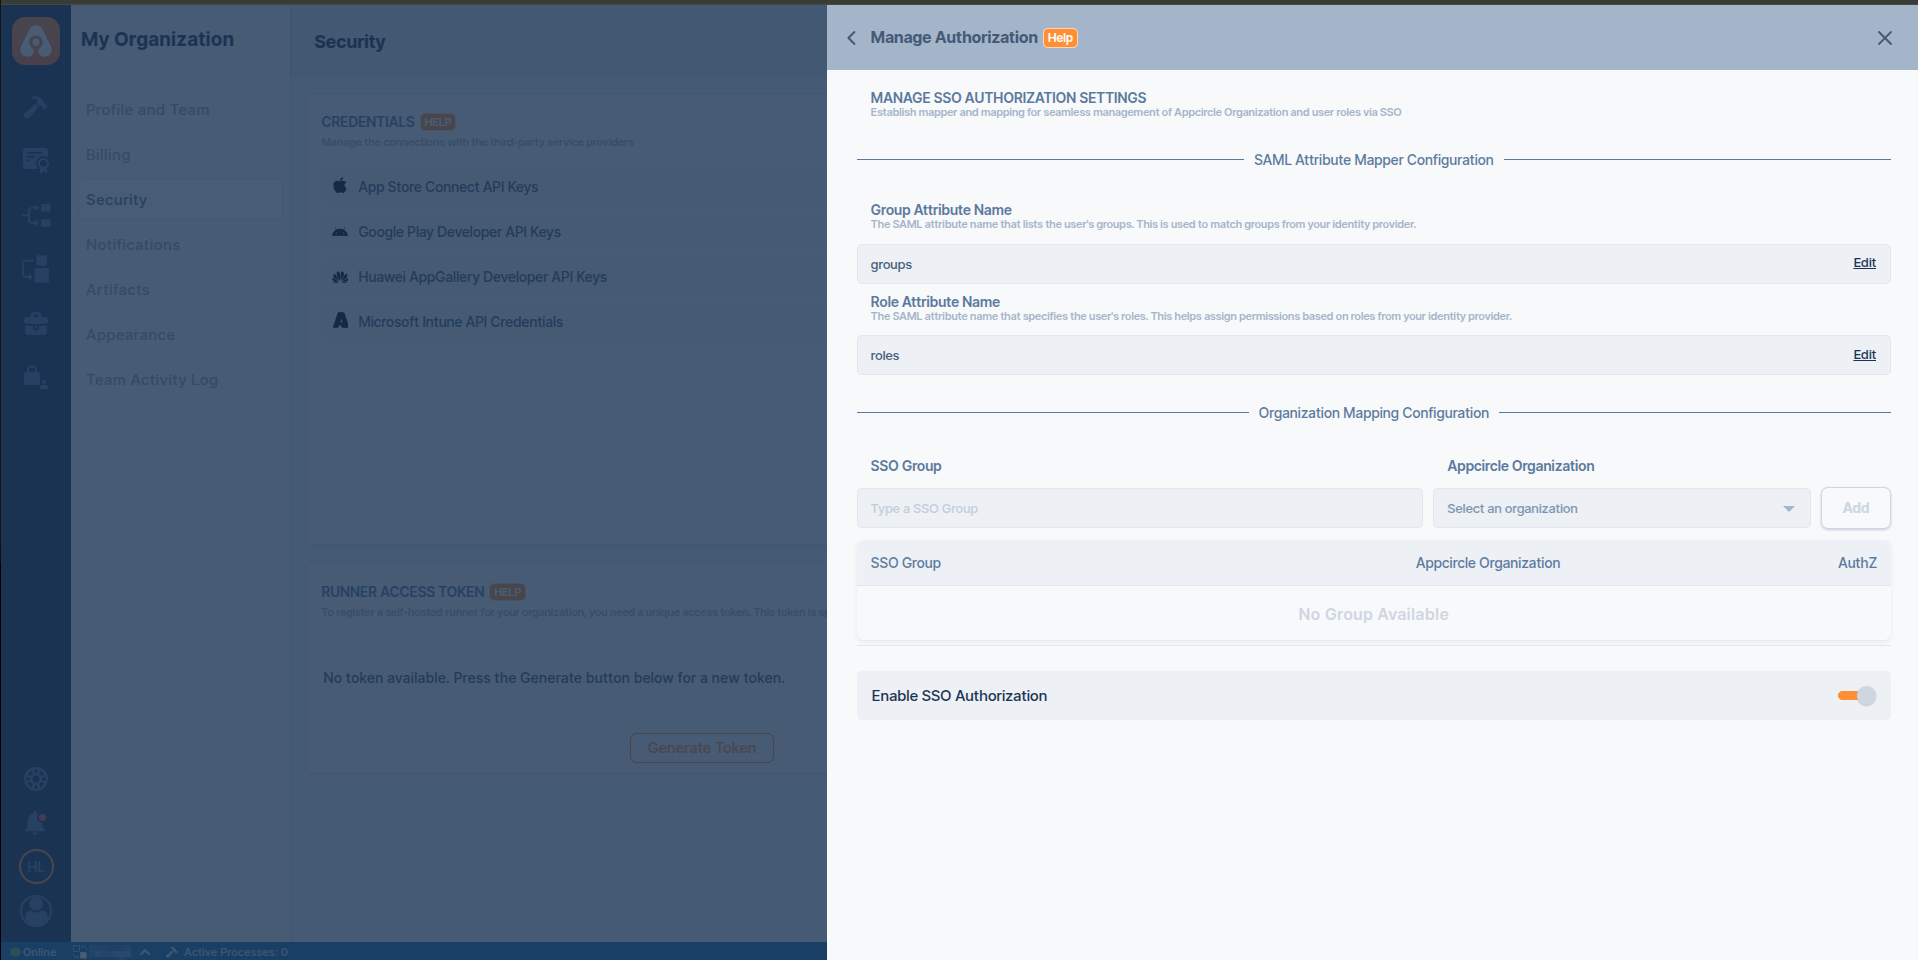
- Now you can define group and role mappings. Please refer to Group and Role Mapping Configuration.