SSO Authorization
1. Introduction
In Appcircle, authorization for SSO users can be managed by mapping user groups and roles from your identity provider (IdP) to specific module permissions and organizations within Appcircle. This ensures seamless Role-Based Access Control (RBAC) across the platform.
Before configuring SSO-based authorization, you must first complete the SSO integration setup. You can refer to the SSO Integration Documentation for detailed instructions on how to configure SSO with your chosen provider, such as Azure AD, Okta, or Auth0. Once SSO integration is complete, you can configure authorization by mapping IdP groups and roles to Appcircle organizations and module permissions.
Prerequisites
- SSO integration with your chosen identity provider (Auth0, Azure AD, Okta, OneLogin).
- Knowledge of groups and roles in your IdP that you want to map to Appcircle organizations and permissions.
- Administrative access to Appcircle and your IdP.
Quick Access
Jump directly to your provider configurations:
- Auth0 - Open ID Connect
- Auth0 - SAML
- Microsoft Entra ID / Azure AD Configuration
- Okta - Open ID Connect
- Okta - SAML
Overview of Configuring SSO Authorization
In Appcircle, user access is managed through organizations and organization-specific roles. You can add users to any organization and assign them roles in that organization.
With SSO Authorization, you map your IdP (Identity Provider) groups to the corresponding Appcircle organizations, so any user in a particular IdP group automatically becomes a member of the matching organization in Appcircle. This means you no longer need to manually manage user organization membership and role assignments, as the process is handled through your IdP’s group memberships. Then, you must also map your IdP groups or roles (depending on your IdP configuration) to Appcircle roles to manage each user’s permissions.
Example Setup
Suppose you have the following structure in Appcircle:
- Root Organization
- Sub Organization1
- Sub Organization2
1. Create Corresponding IdP Groups
Create matching groups in your IdP for each of your Appcircle organizations:
- IdP group for Root Organization → Root Organization
- IdP group for Sub Organization1 → Sub Organization1
- IdP group for Sub Organization2 → Sub Organization2
Any user who is a member of the IdP group mapped to Root Organization will automatically be added to Root Organization in Appcircle, and likewise for your sub-organizations.
2. Define Role Mappings
For each group-organization pairing, you must configure role mapping to manage user permissions in that organization. For example, you might set up role mappings like this:
- IdP group “Owners” → Owner role in Appcircle
- IdP group “Managers” → Build Profile Manager, Testing Distribution Manager etc. role in Appcircle
- IdP group “Viewers” → Build Profile Viewer role in Appcircle
You would create separate spesific IdP groups for each organization. For example:
- IdP group "AC-SubOrg1-Owners" → Owner role in Sub Organization1
- IdP group "AC-SubOrg1-Managers" → Testing Distribution Manager role in Sub Organization1
By assigning a role mapping for every group-organization mapping, you ensure that users automatically receive the appropriate permissions as soon as they are placed in the relevant IdP group.
Additional Notes
- You must configure a group-to-organization mapping for each organization (root and sub organizations).
- You must define role mappings for each group-organization pairing. If no role mapping exists, users will not have any permissions in organization.
- User organization memberships and permissions are synchronized on every SSO login.
- If your mapping configuration is incorrect, Appcircle ensures at least one Owner remains in the organization by ignoring the faulty mapping.
- You do not need to invite users manually if SSO Authorization is enabled.
2. General Configuration Steps
These steps will guide you through the configuration within your chosen identity provider and Appcircle.
Step 1: Configure Your Identity Provider
- Perform identity provider-specific configurations, including creating groups and roles, and defining group and role claims/attributes.
- In Appcircle, enter the group and role claim/attribute names as defined in your IdP.
Follow 3. Specific Provider Configuration section to complete this steps.
Step 2: Enable SSO Mapping and Configure Group and Role Mappings
Accessing SSO Mapping Settings
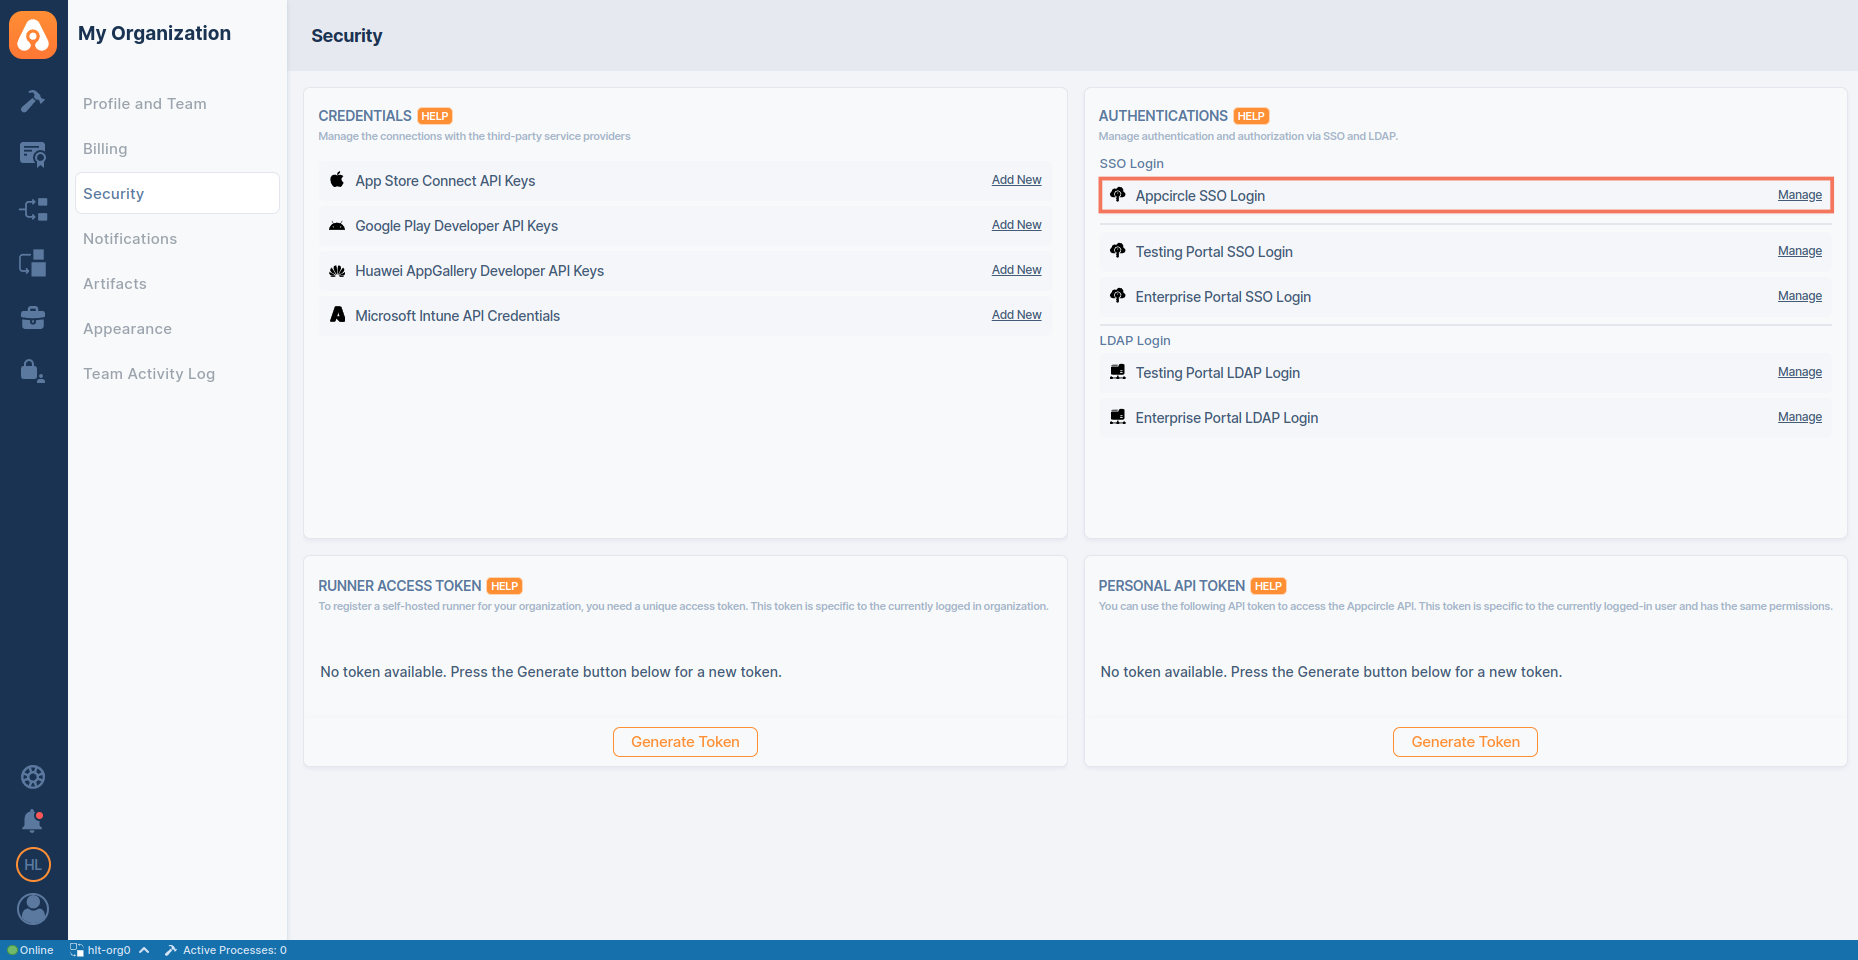
- Navigate to the Organization > Security > Authentications section on your dashboard.
- Select the Manage on the Appcircle SSO Login.
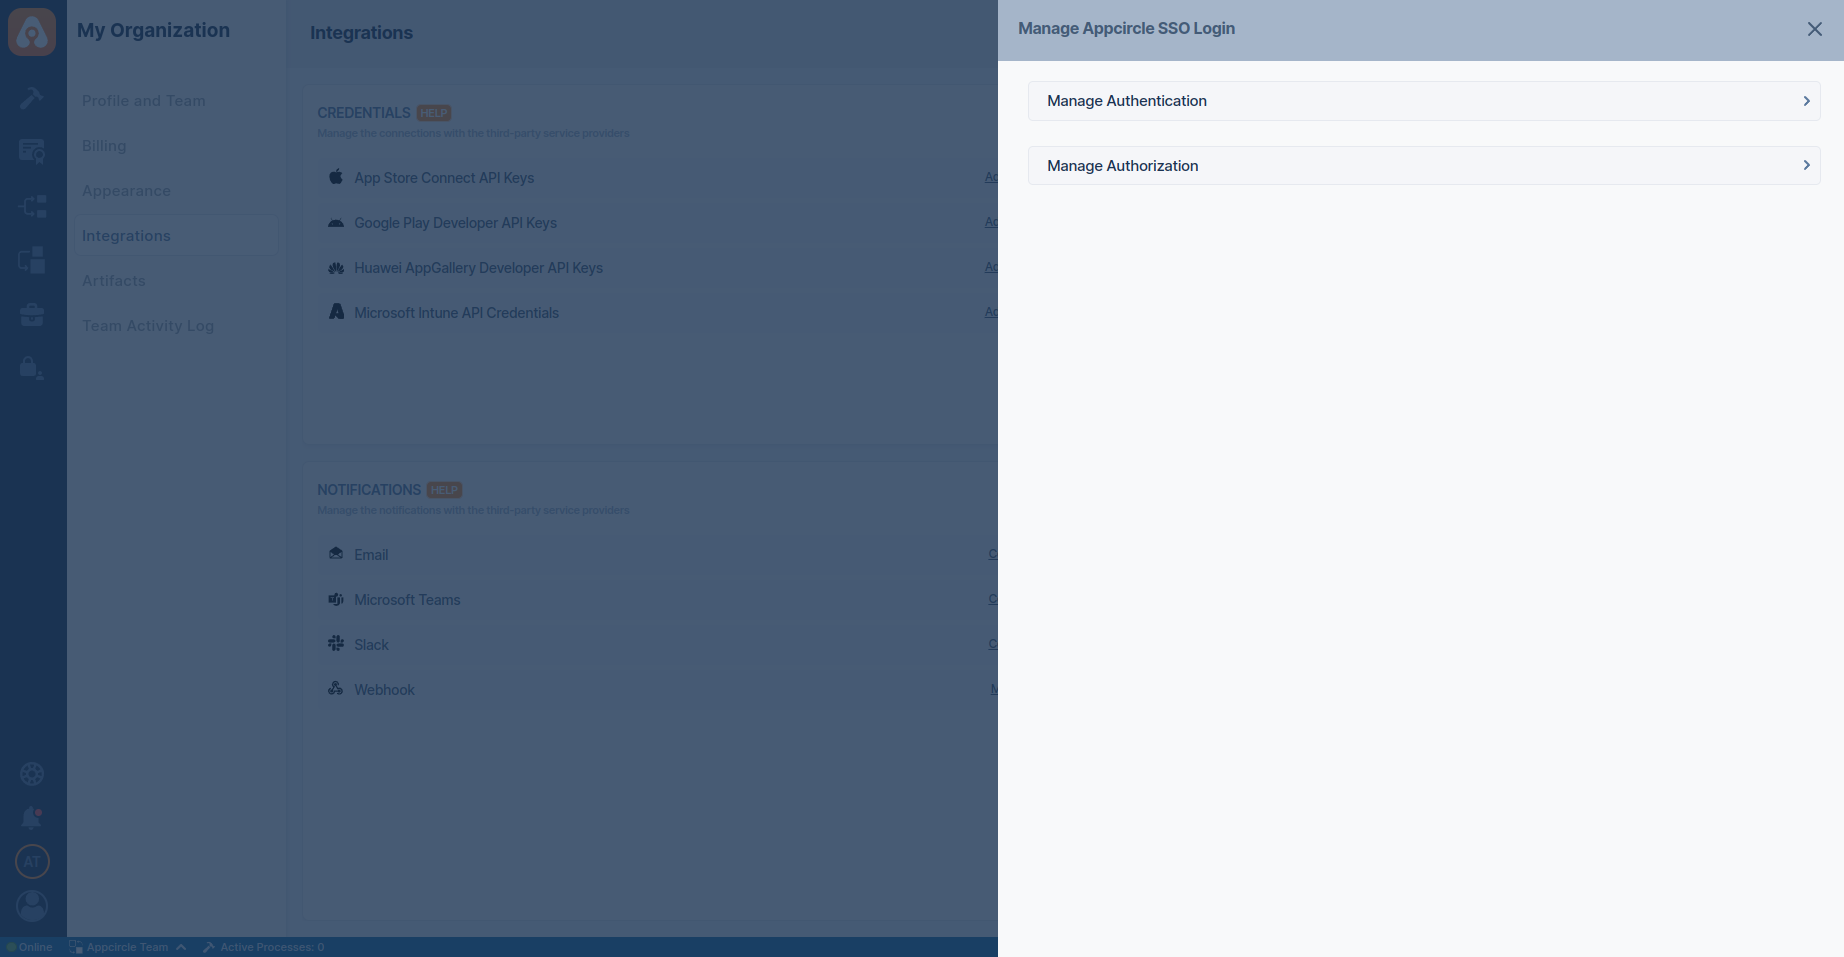
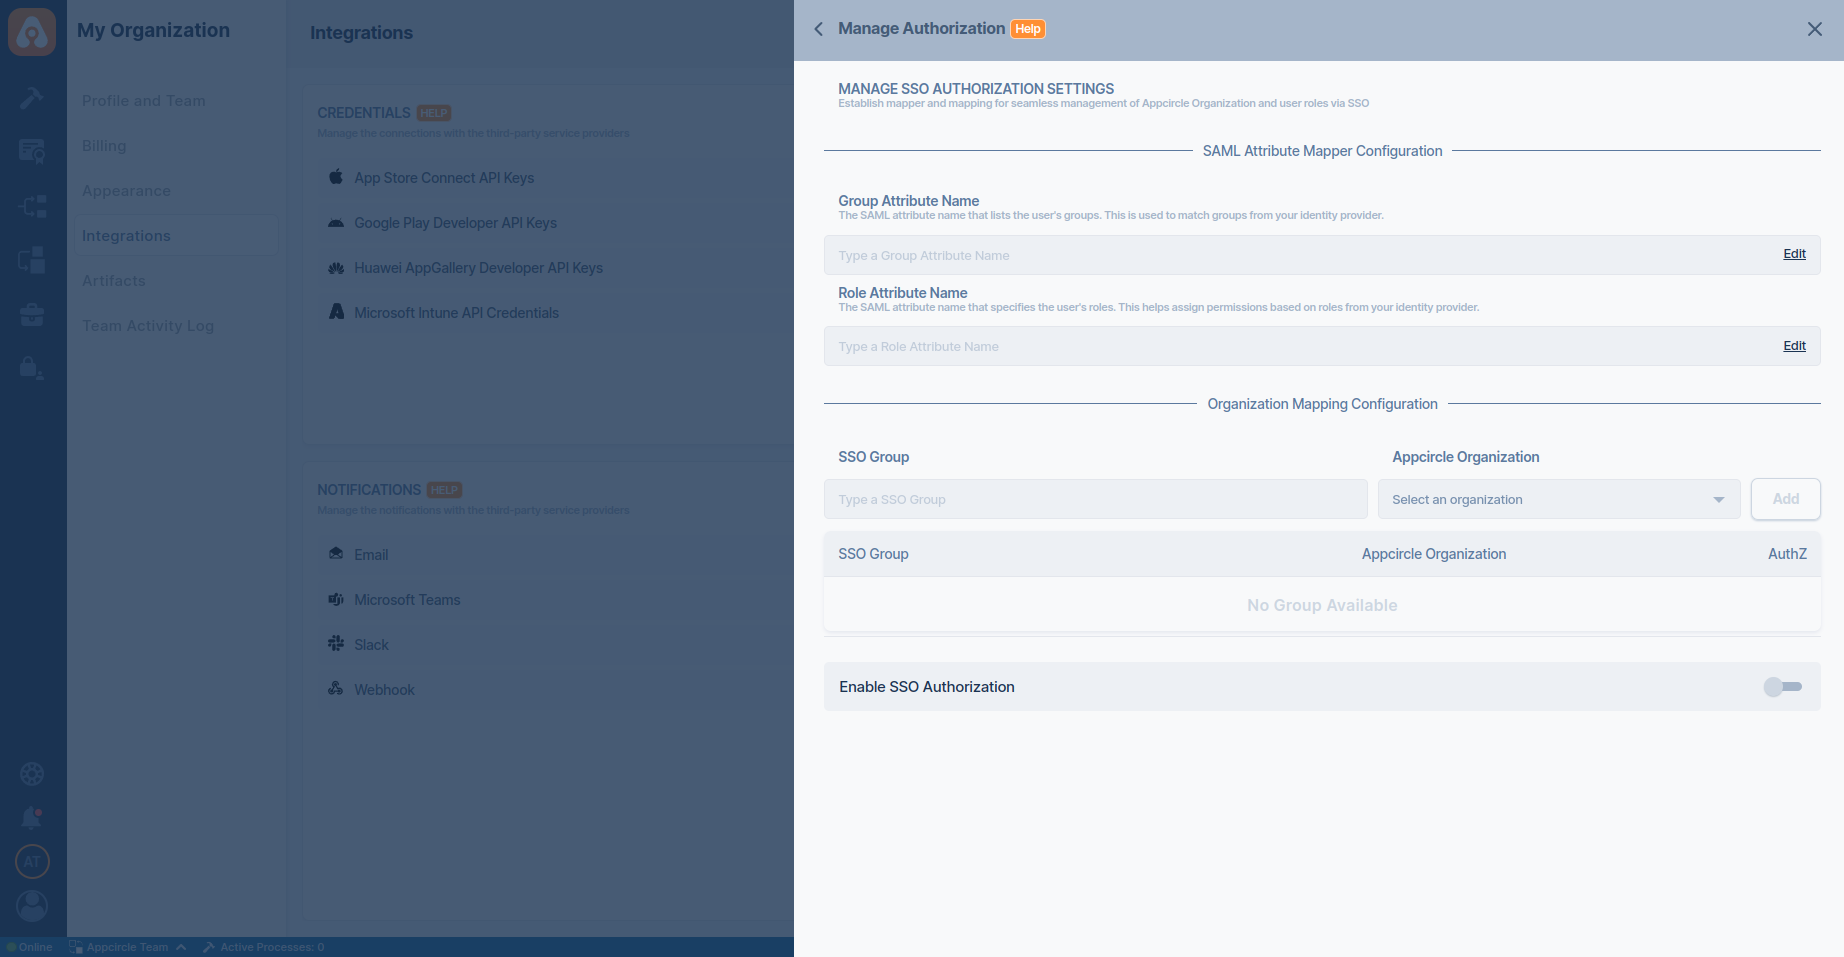
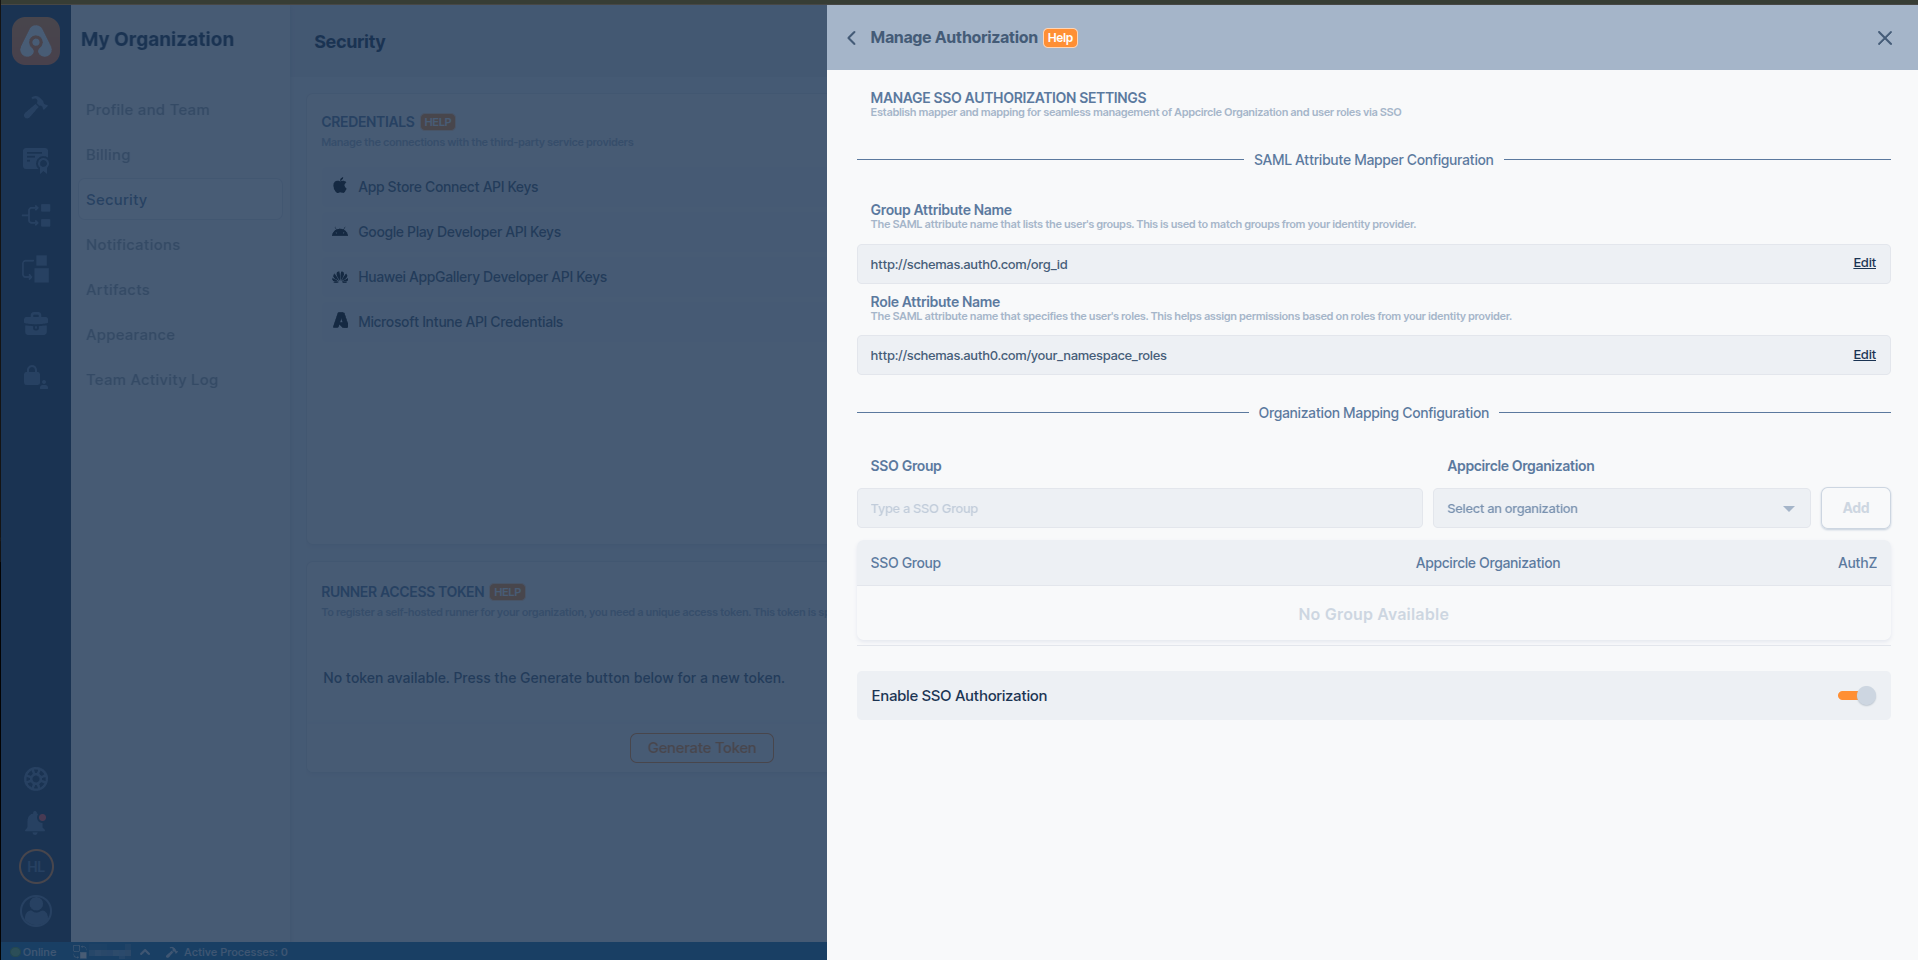
- Select the Manage Authorization
Group and Role Mapping Configuration
You can refer to the Overview of Configuring SSO Authorization for a better understanding of group and role mapping.
-
Enter the name of the SSO group and select the corresponding Appcircle organization you want to map. Ensure the group name is correct.
-
Click Add to map the SSO group to an Appcircle organization. This will automatically link users from the SSO group to the selected organization in Appcircle.
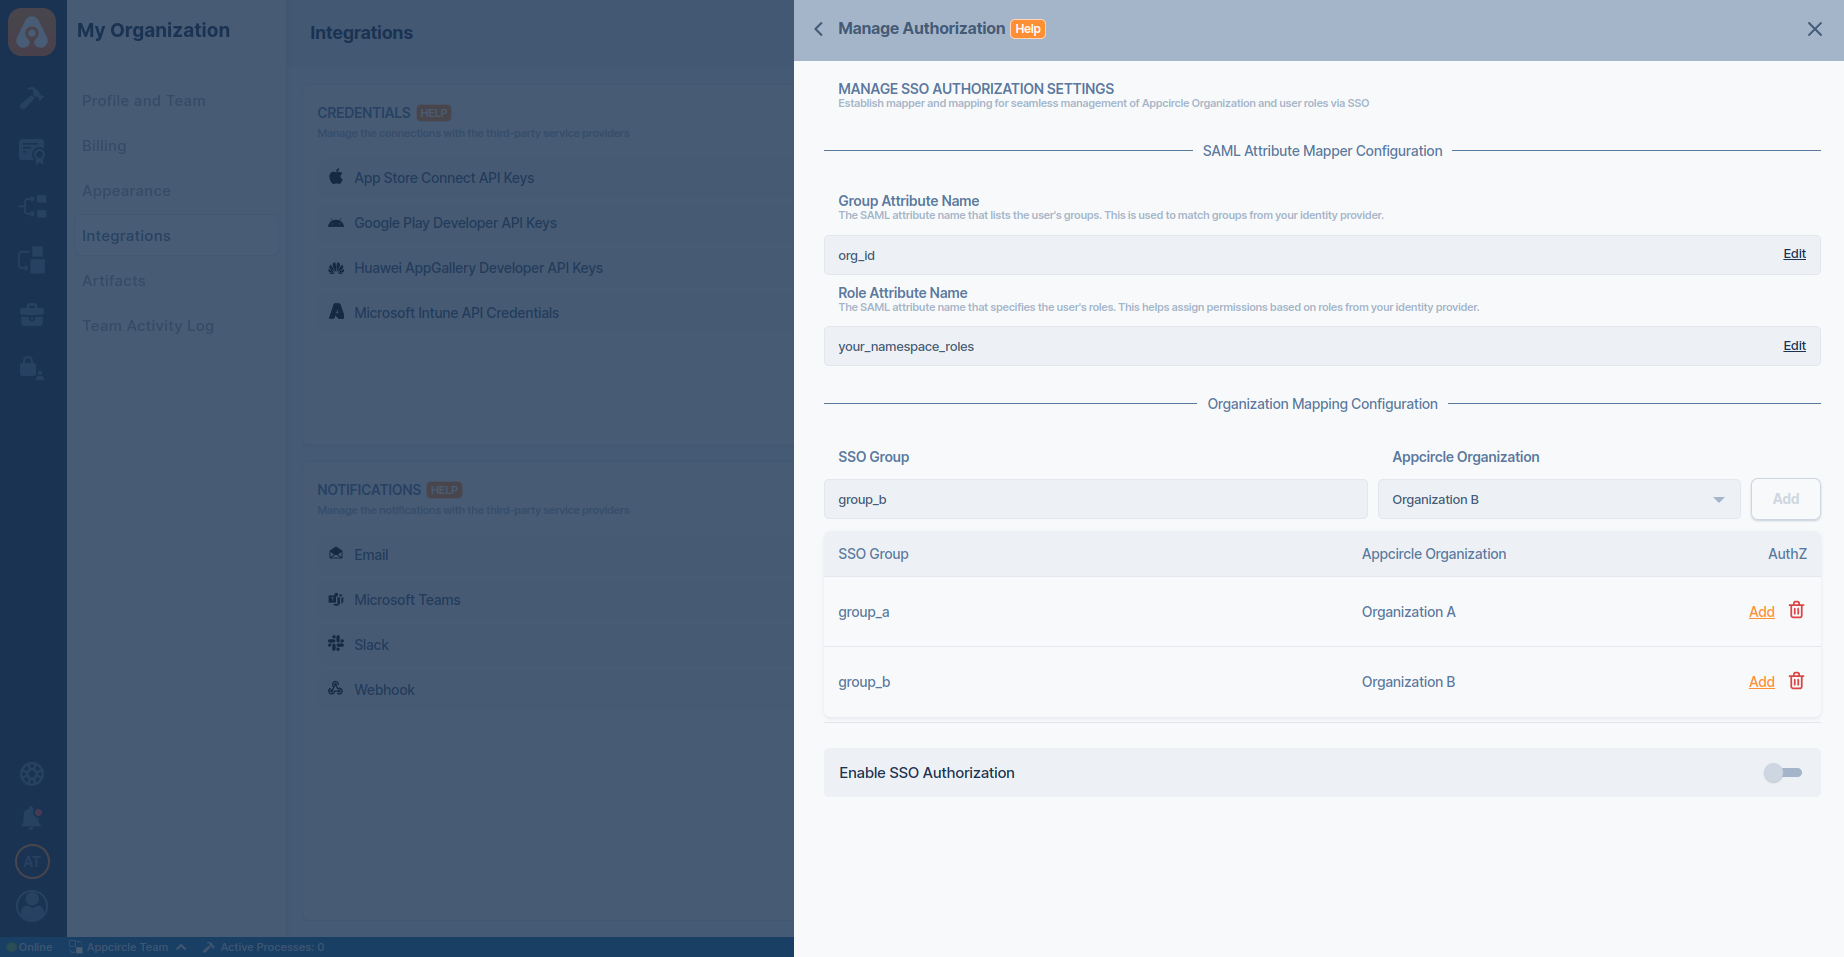
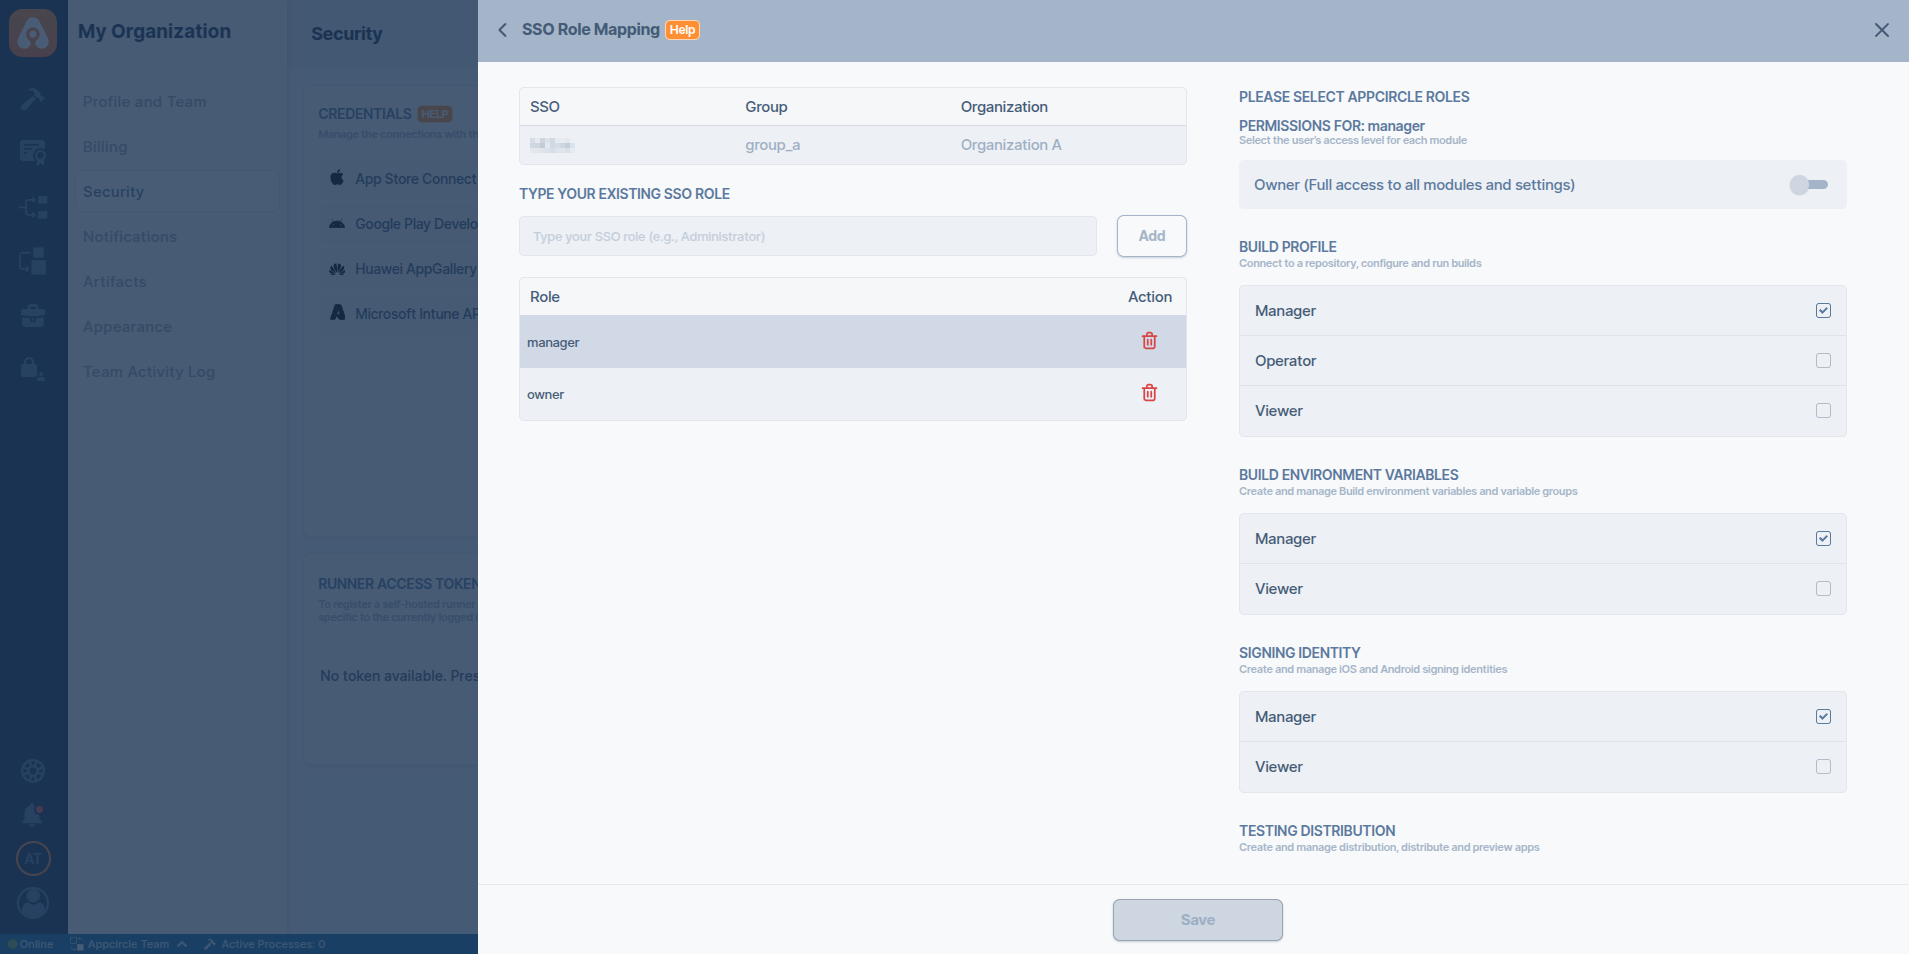
- You must define role mappings for each group mapping. Click the Configure button to set up role mappings.
- Enter the role name and select the corresponding Appcircle roles you want to map. Ensure the role name is correct.
- Finally, enable SSO Authorization with the Enable SSO Authorization toggle.
3. Specific Provider Configuration
Auth0 (OpenID Connect)
Auth0 (OpenID Connect)
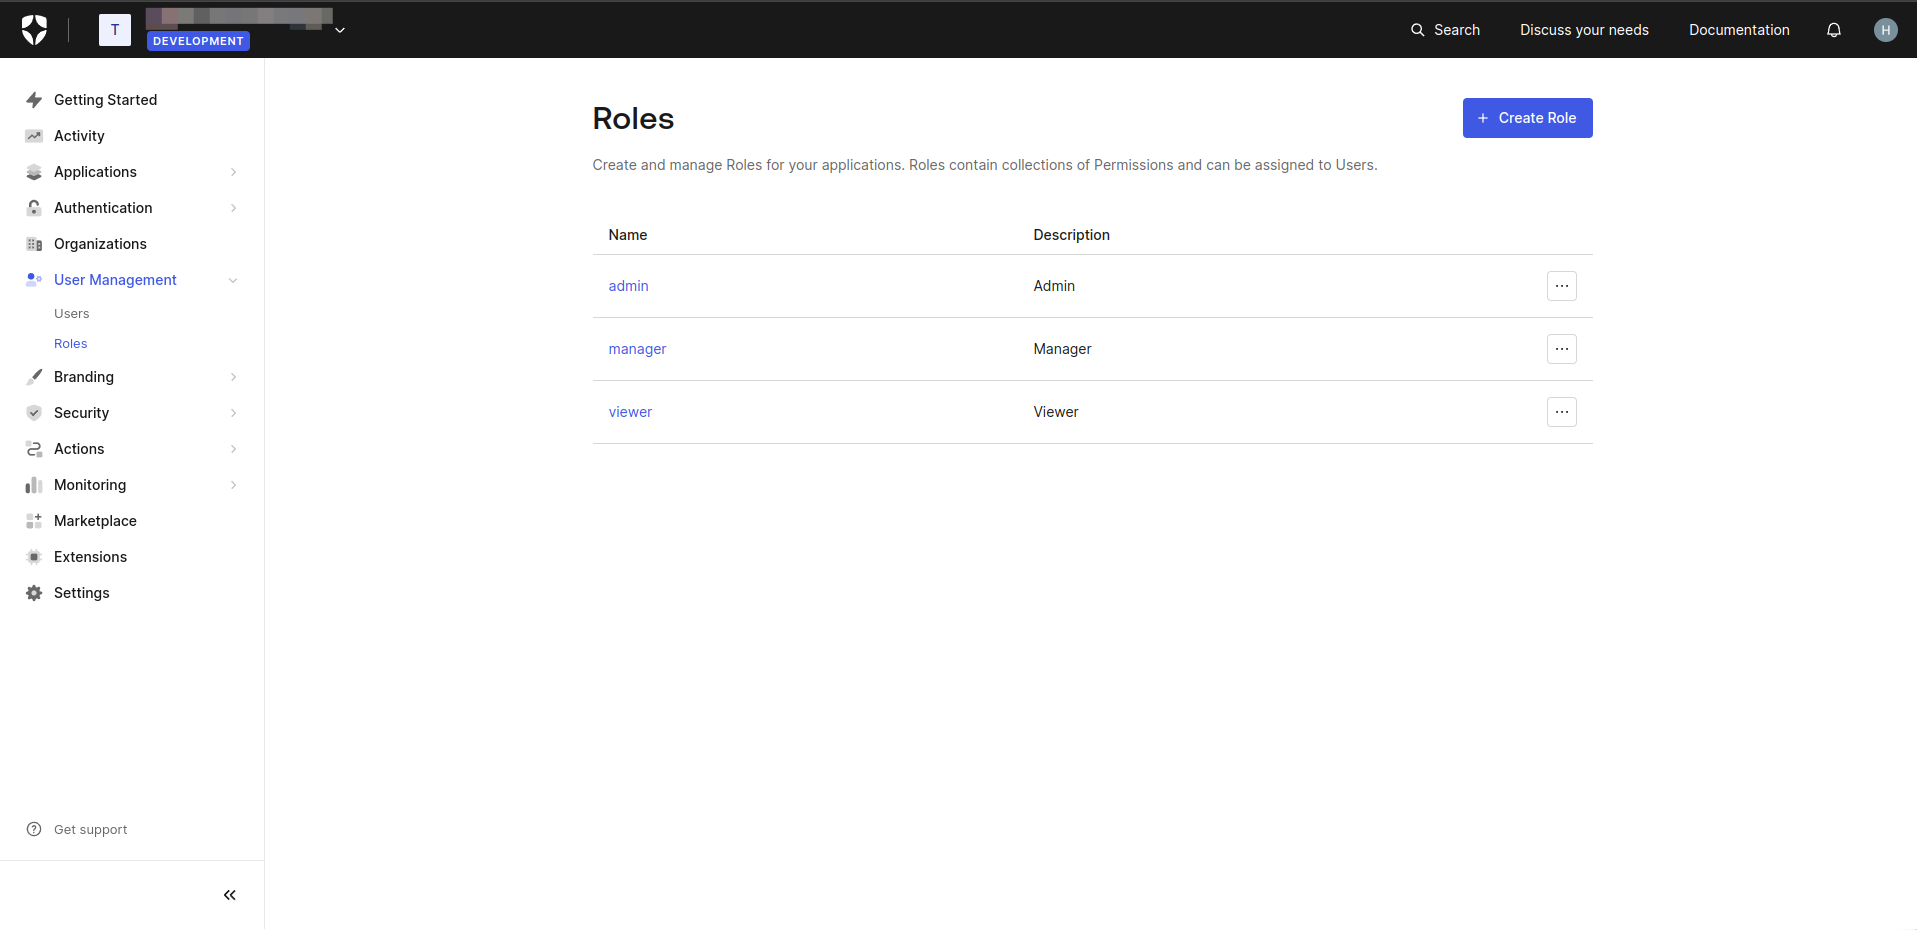
Step 1. Create Roles
- In the Auth0 dashboard, navigate to the User Management > Roles section.
- Click Create Role button. Create necessary roles.
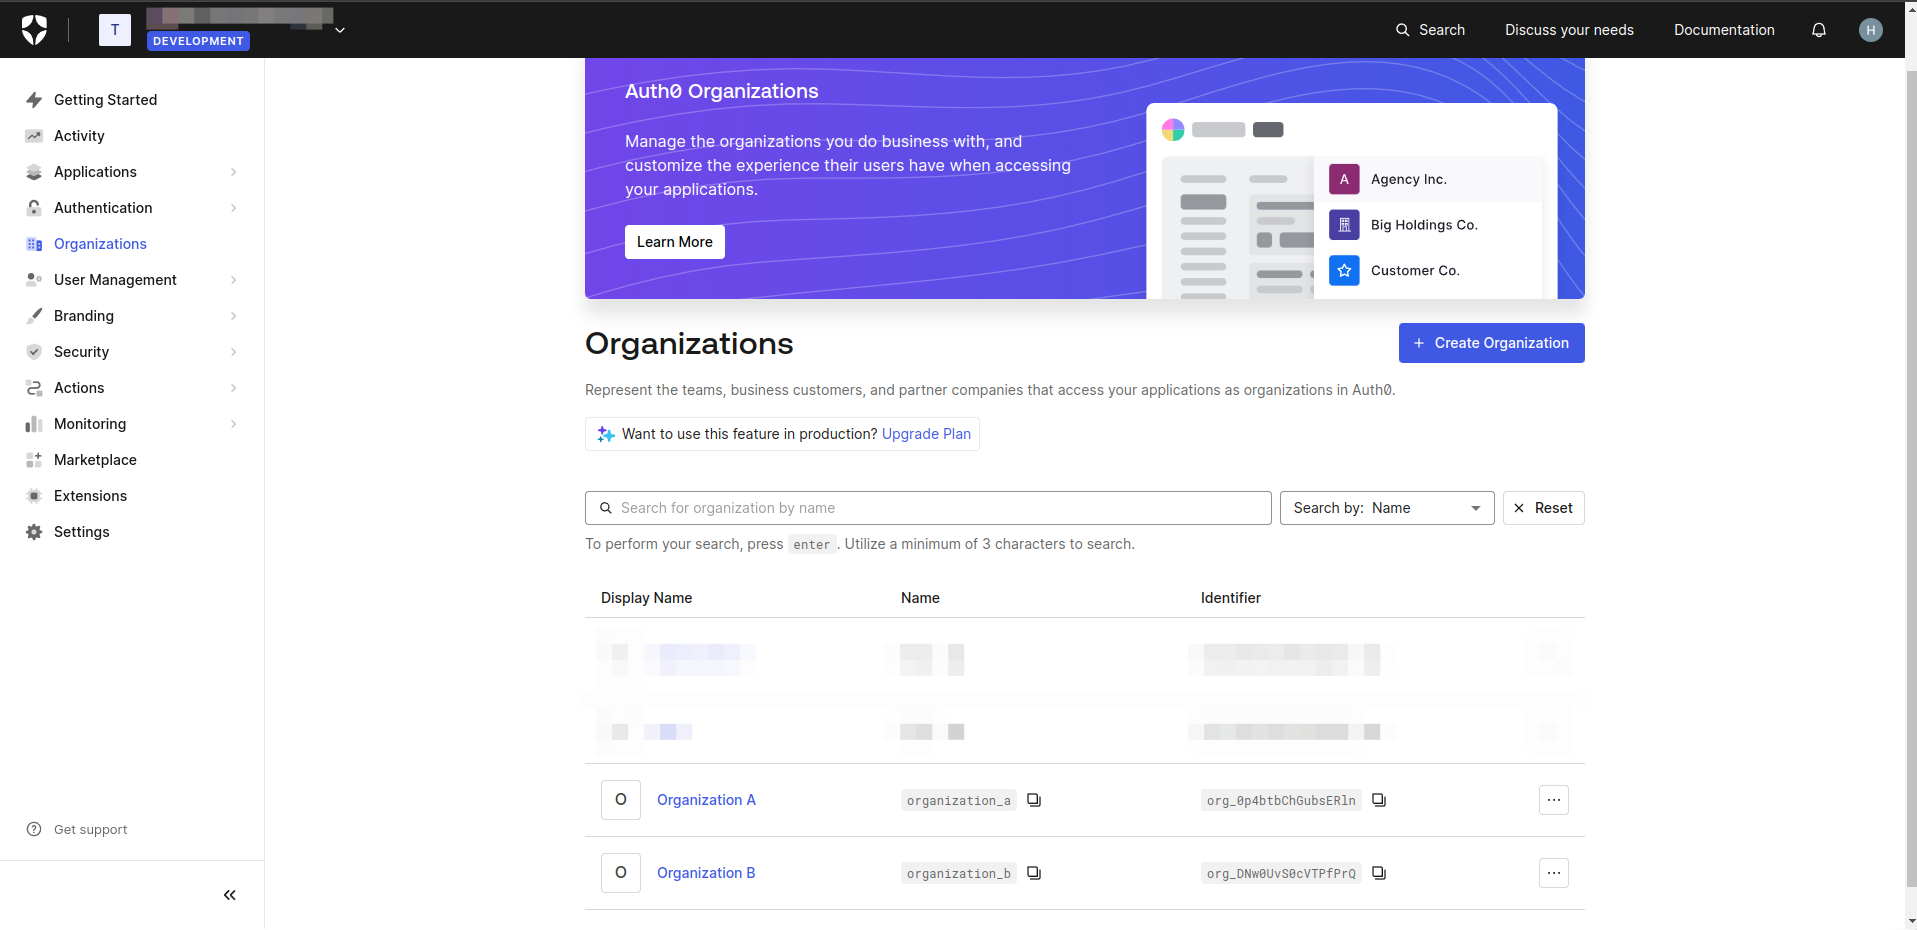
Step 2. Create Organization
- In the Auth0 dashboard, navigate to the Organization section.
- Click Create Organization button to create organizations.
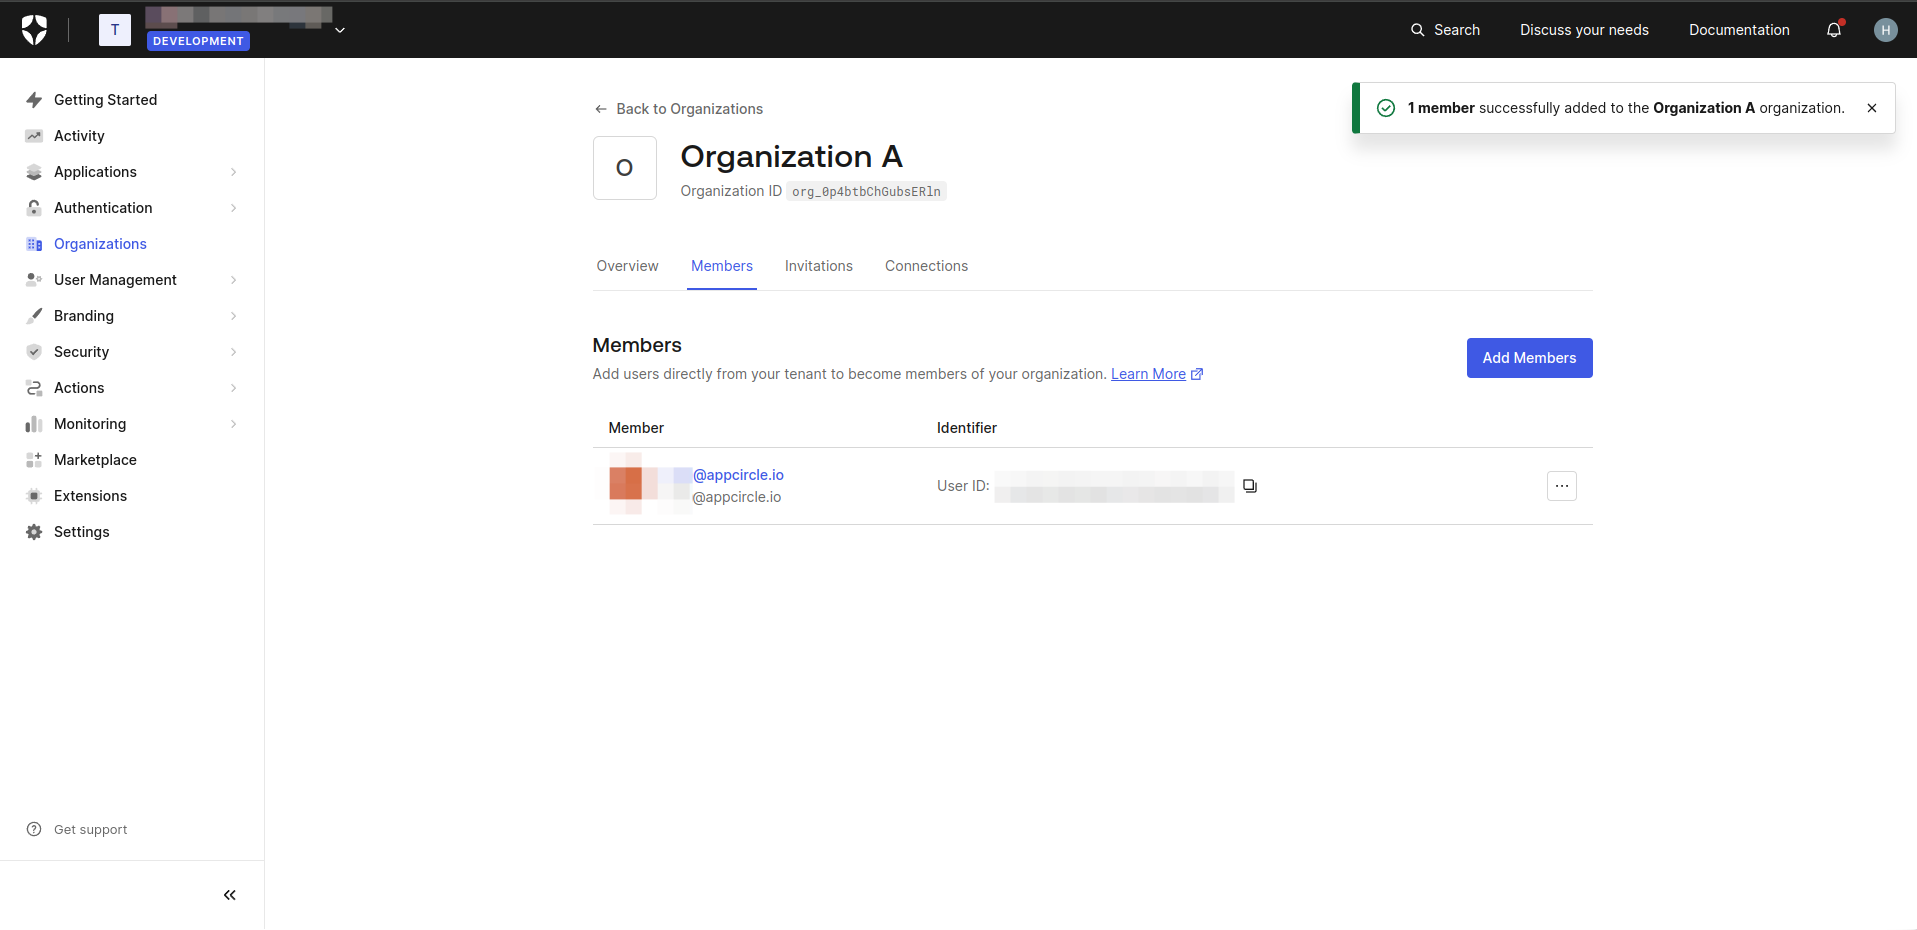
- Click the created organization to navigate to Organization Details.
- On the Organization Details screen, click the Members tab to manage members of organization.
- Click the Add Members button to add users who will become members of your organization.
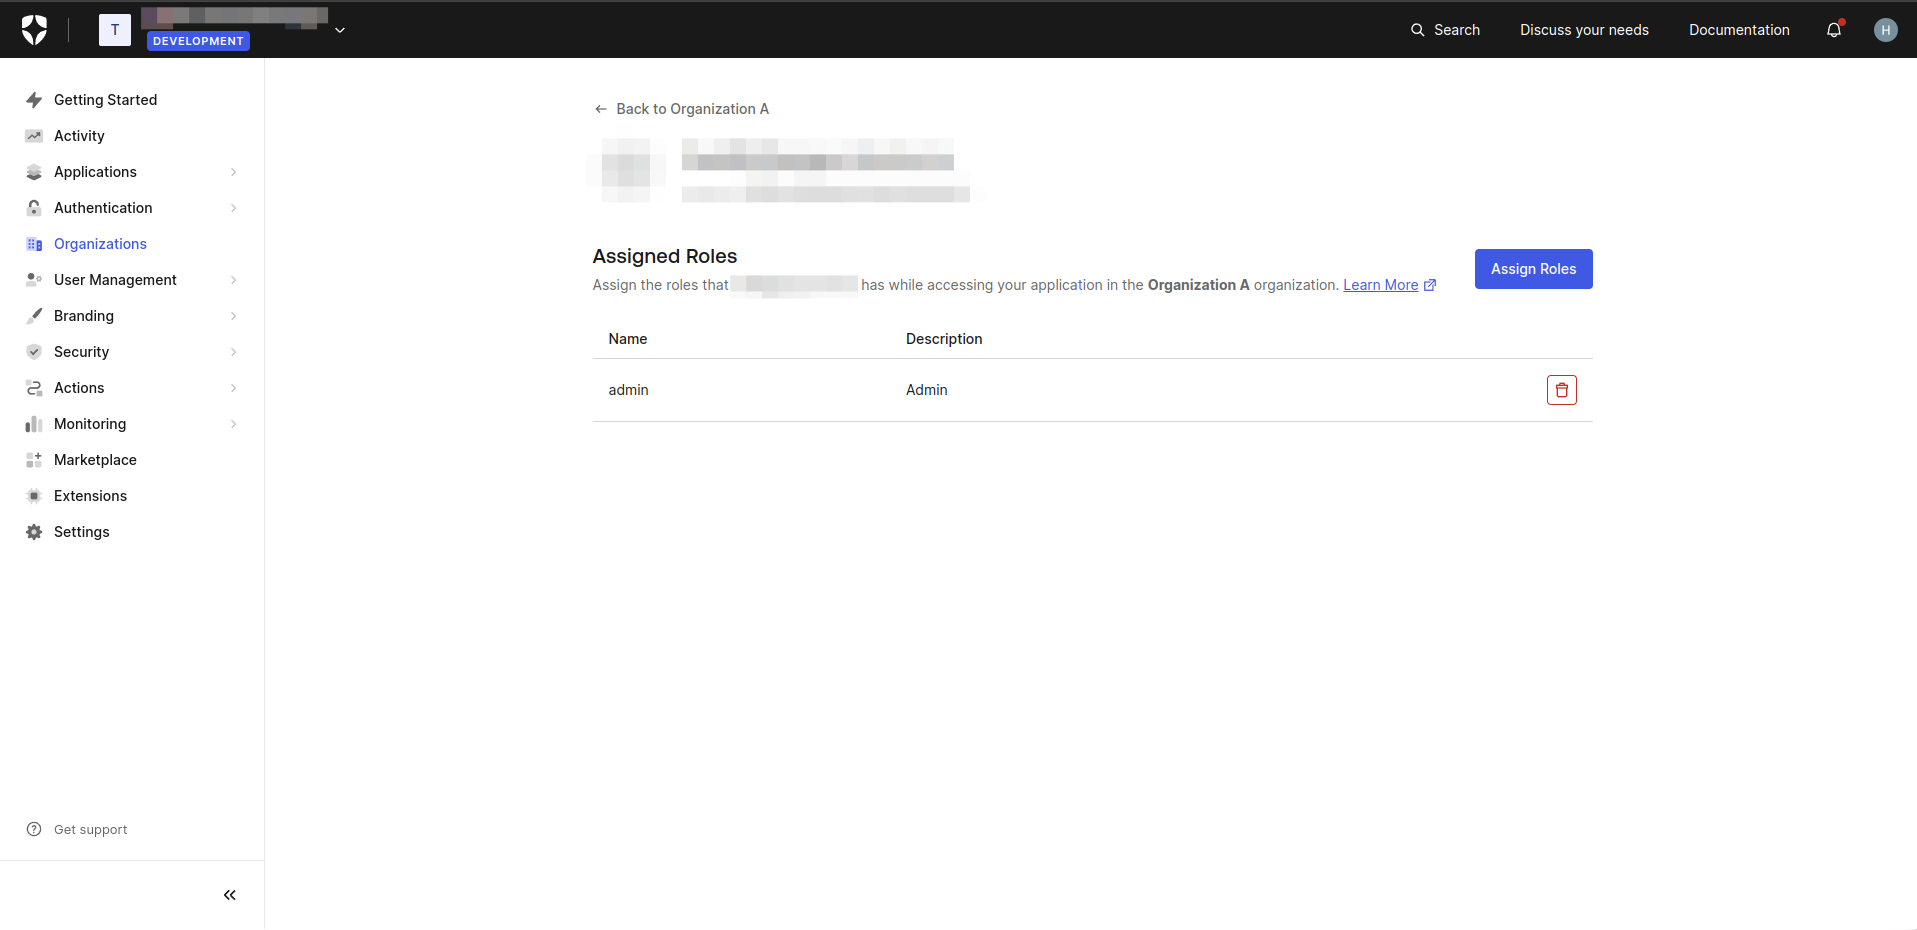
- On the Members screen, click the three dots and select Assign Roles. Assign the desired roles to users for organization.
- On the Organization Details screen, navigate to the Connections tab.
- Click the Enable Connections button
- Select Username-Password-Authentication and click Enable Connection
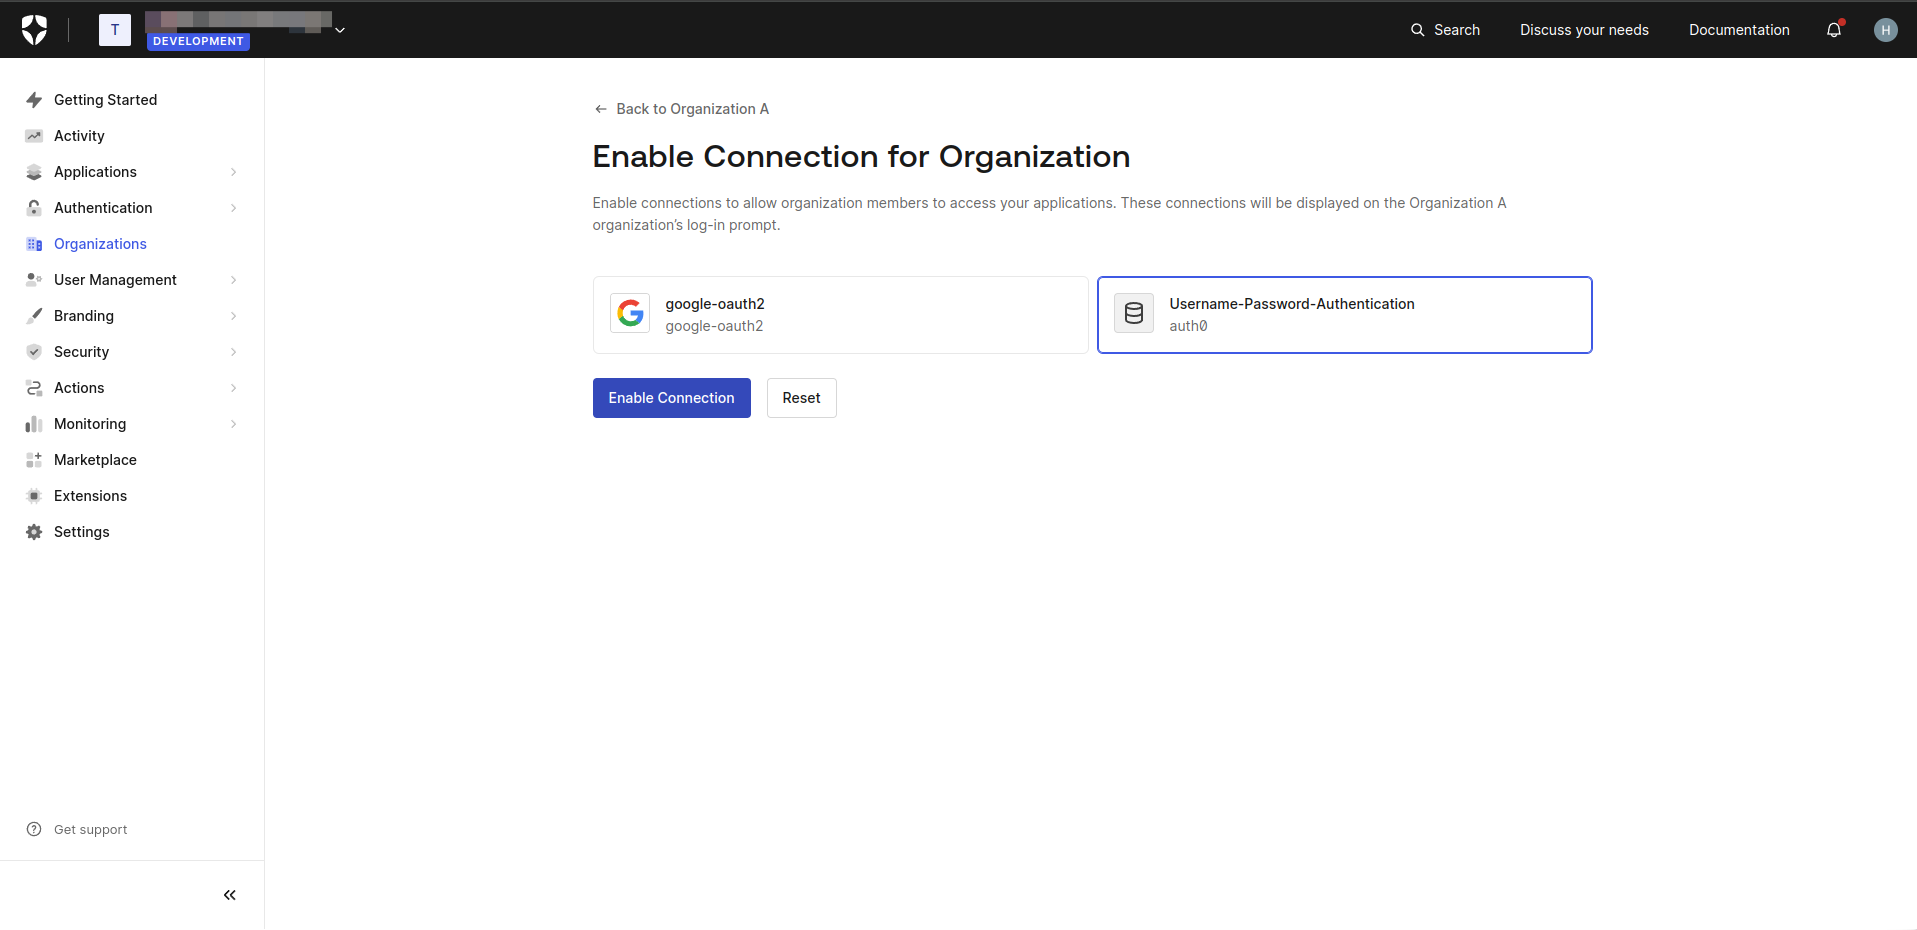
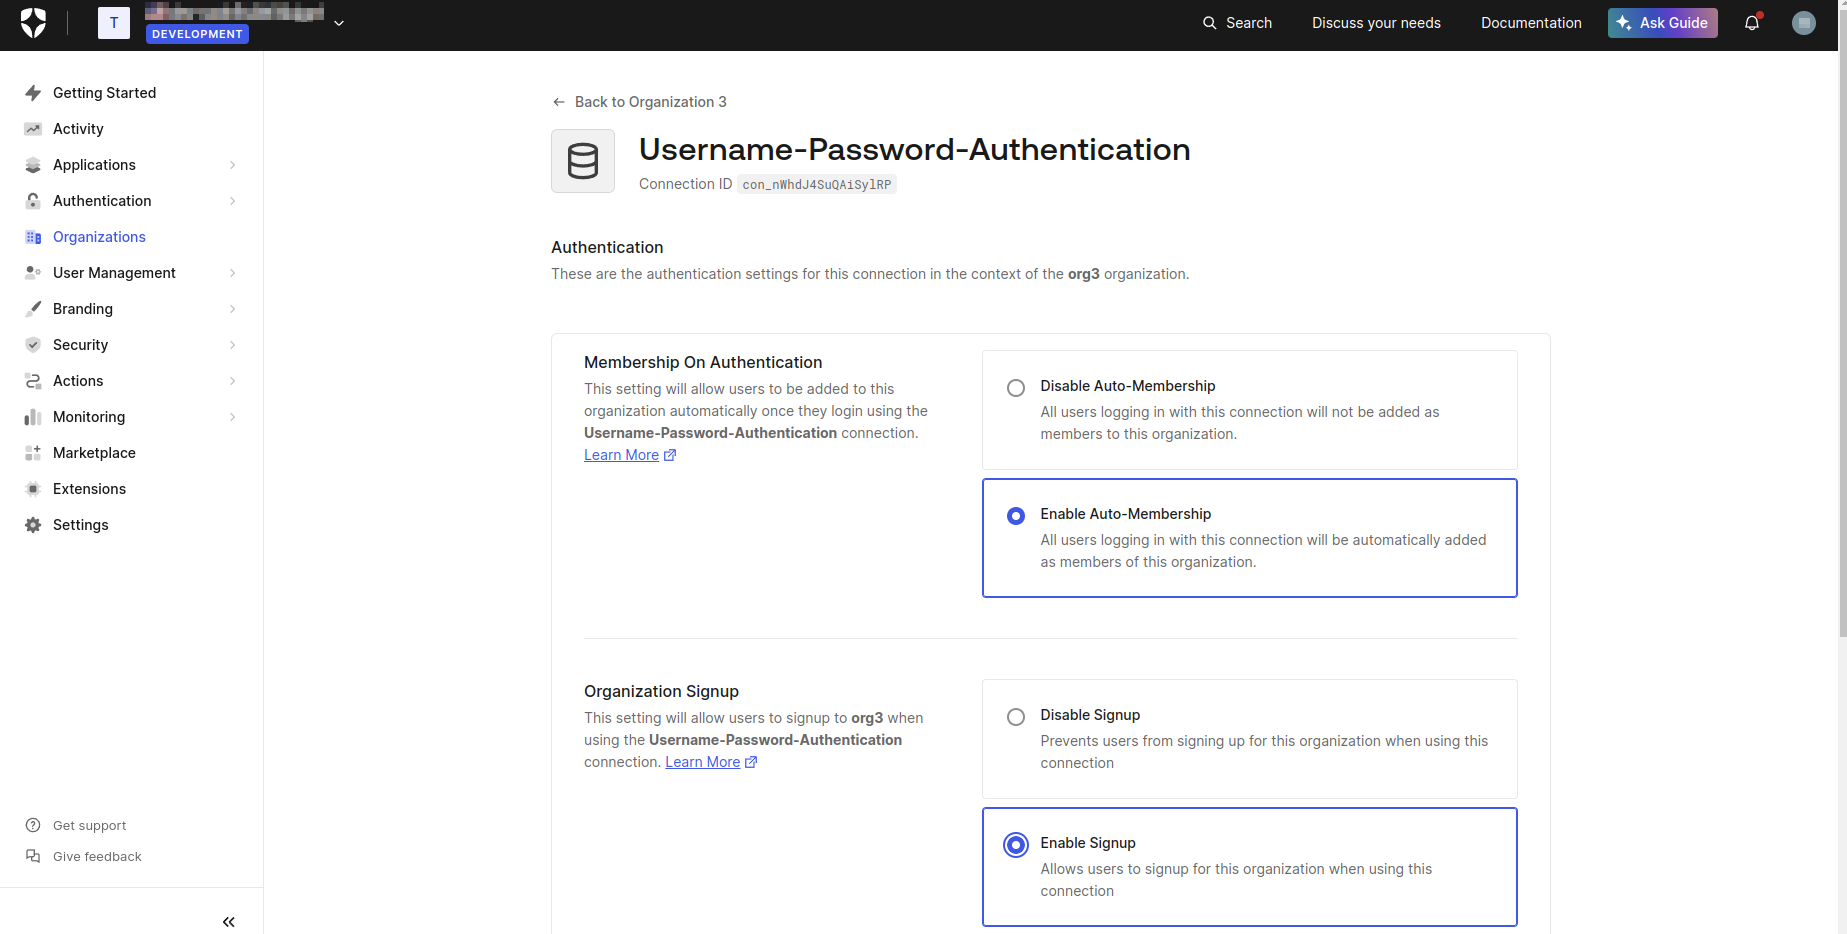
- Select Enable Auto-Membership and Enable Signup on the displayed screen, then click Save.
Step 3. Enable Organization for your application
- In the Auth0 dashboard, navigate to the Applications section.
- Select the relevant application.
- On the Application Details screen, navigate to the Organizations tab.

- Click Disable Grants Now.
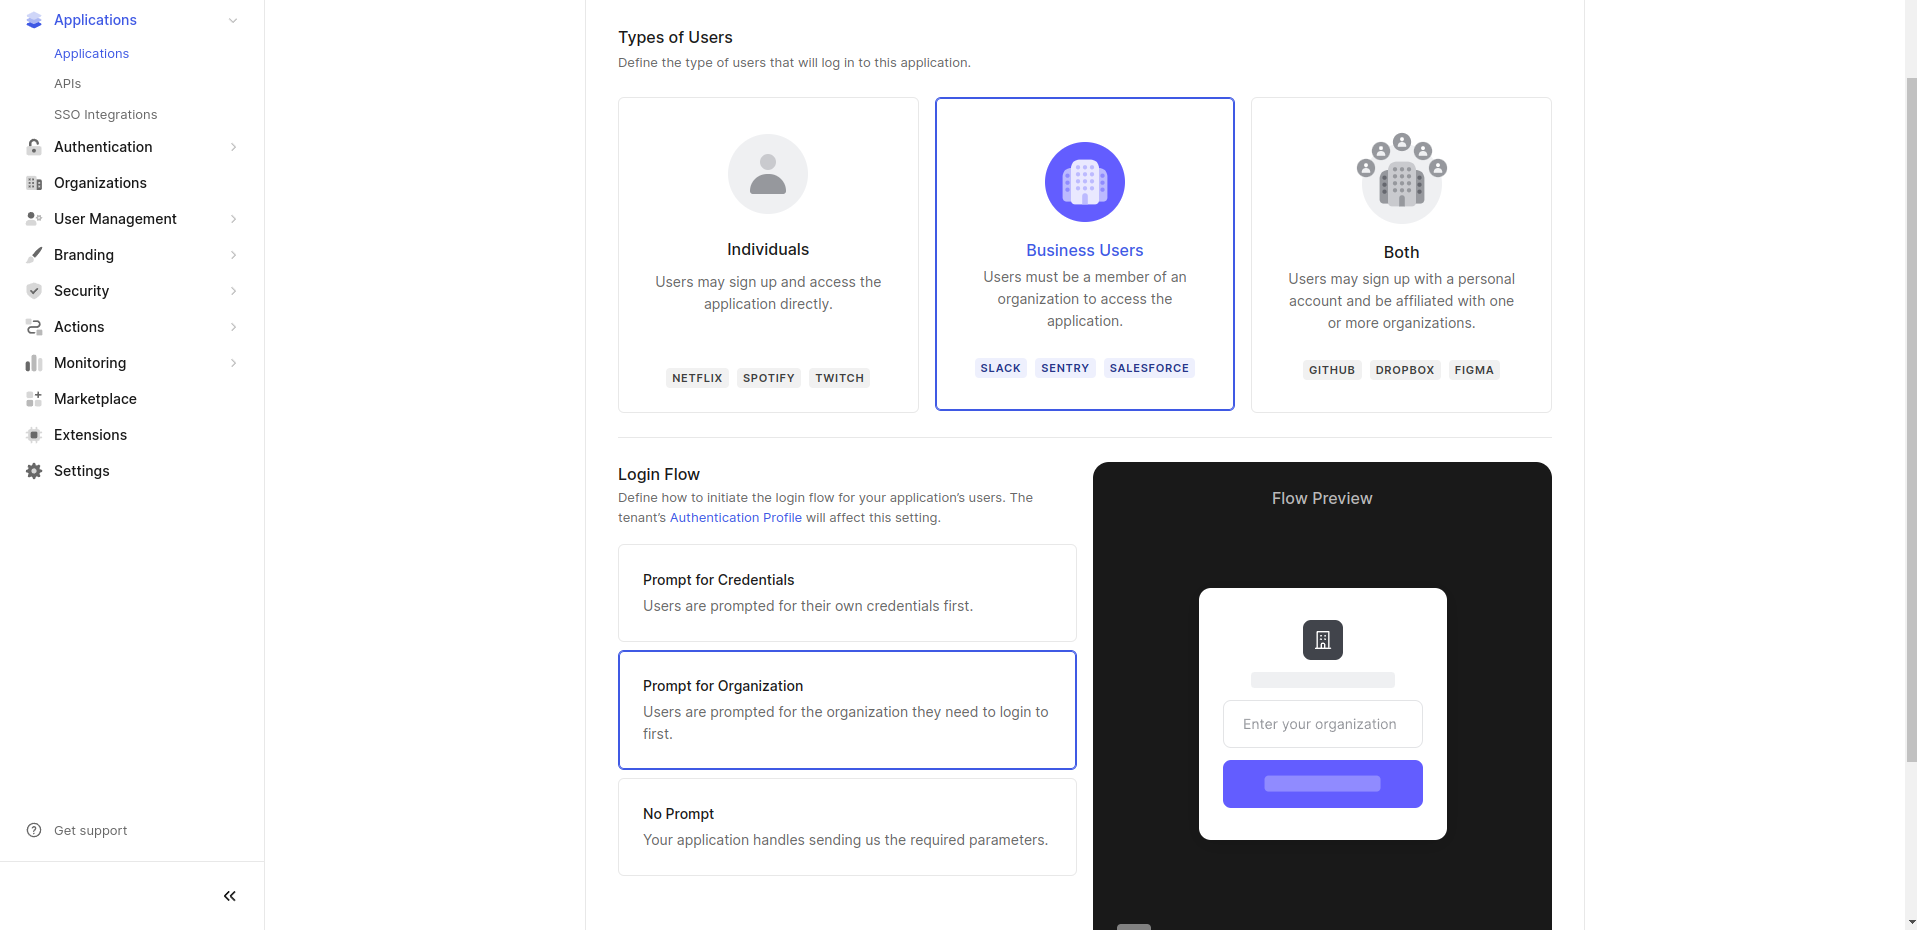
- Choose Business Users for the type of users and select Prompt for Organization for the login flow.
- Click Save Changes.
Step 4. Define Group And Role Attributes & Claims
The user's group and role values should be included in the token as claims. This enables retrieval of the user's group and role during SSO login. The groups claim is already present in the token. Follow these steps to add the roles claim:
- In the Auth0 dashboard, navigate to the Actions > Library section.
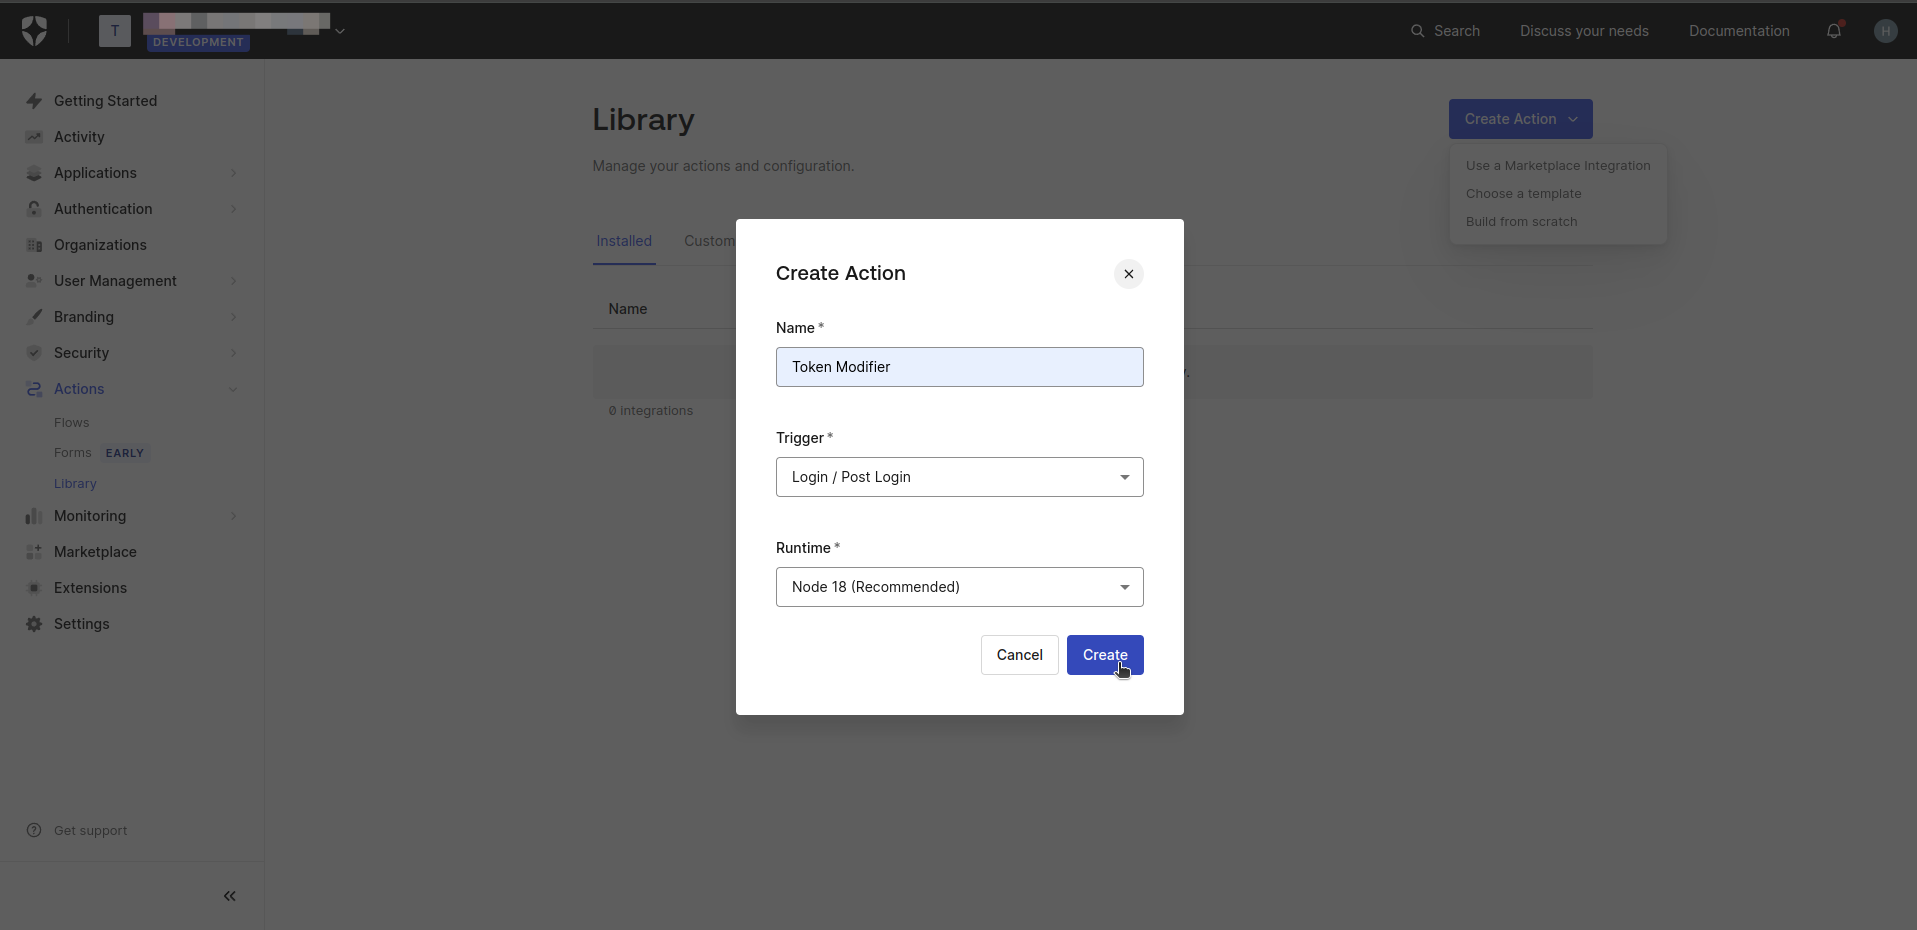
- Click the Create Action button and select Build from Scratch.
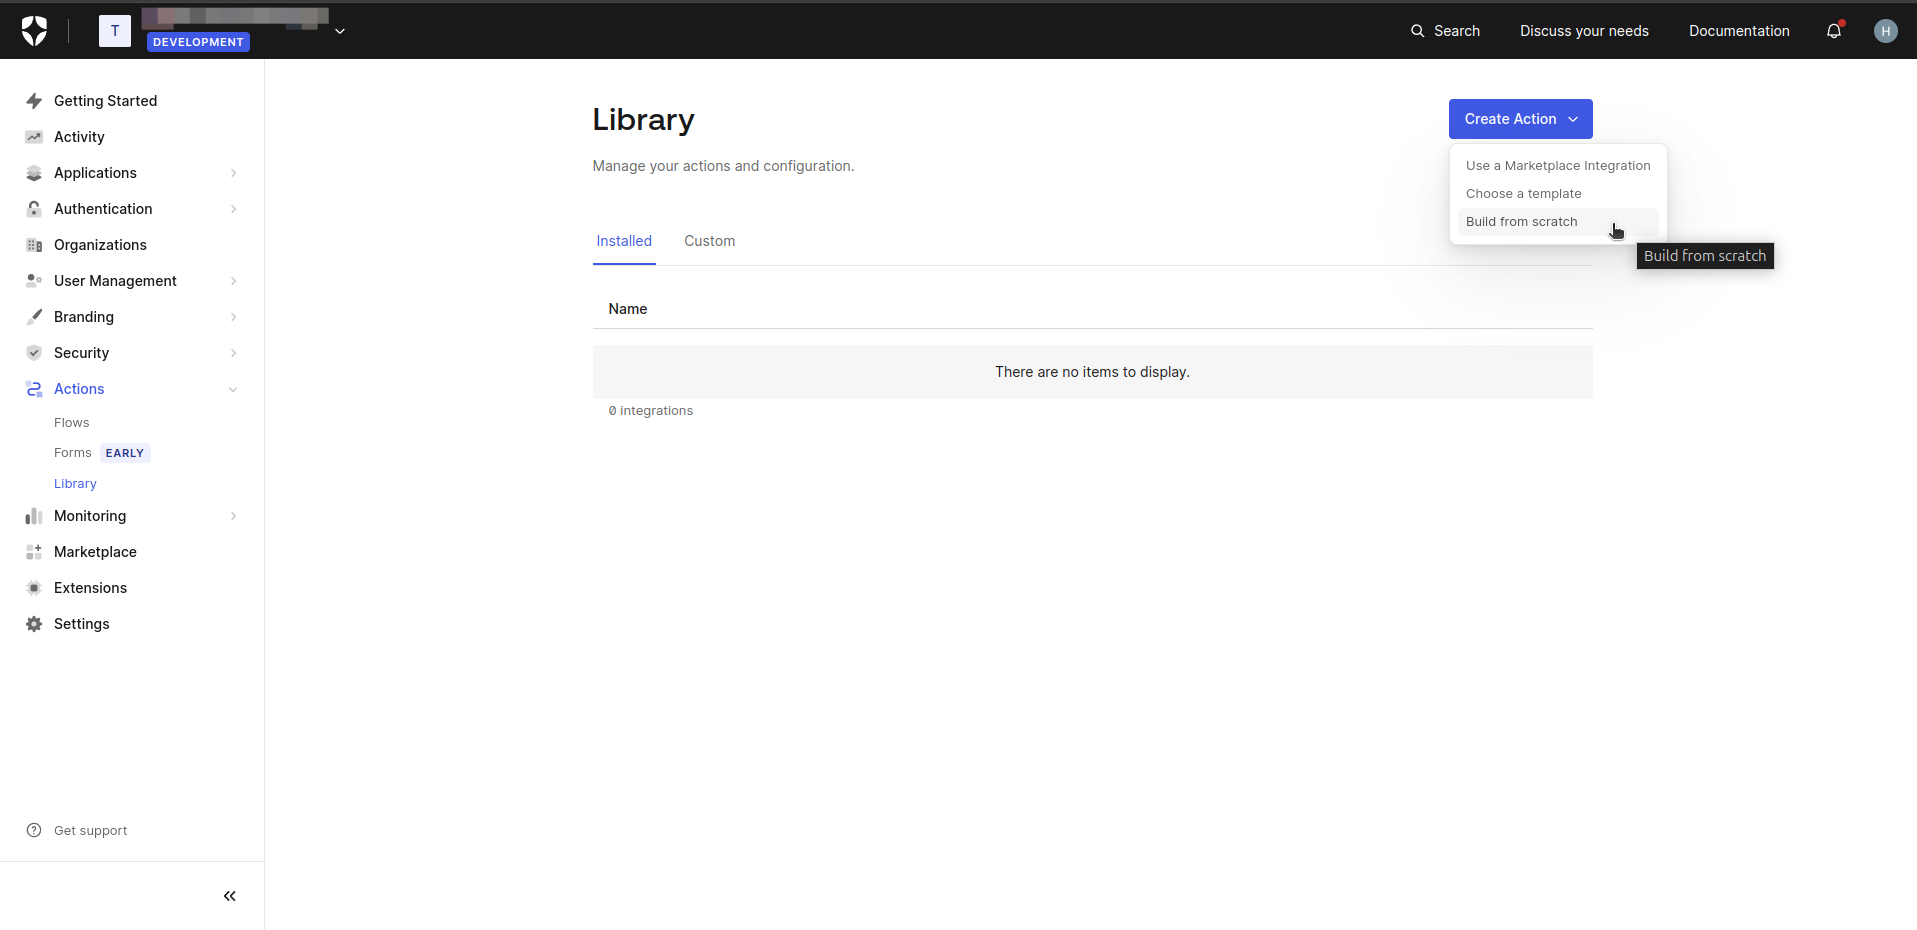
- Enter an appropriate name for the Custom Action in the popup window. Keep the remaining settings at their default values,as shown in the image below.
- On the Custom Action Details screen, copy and paste following Javascript code to code editor.
exports.onExecutePostLogin = async (event, api) => {
  const namespace = 'your_namespace_';
  if (event.authorization) {
    api.idToken.setCustomClaim(`${namespace}roles`, event.authorization.roles);
    api.accessToken.setCustomClaim(`${namespace}roles`, event.authorization.roles);
  }
}
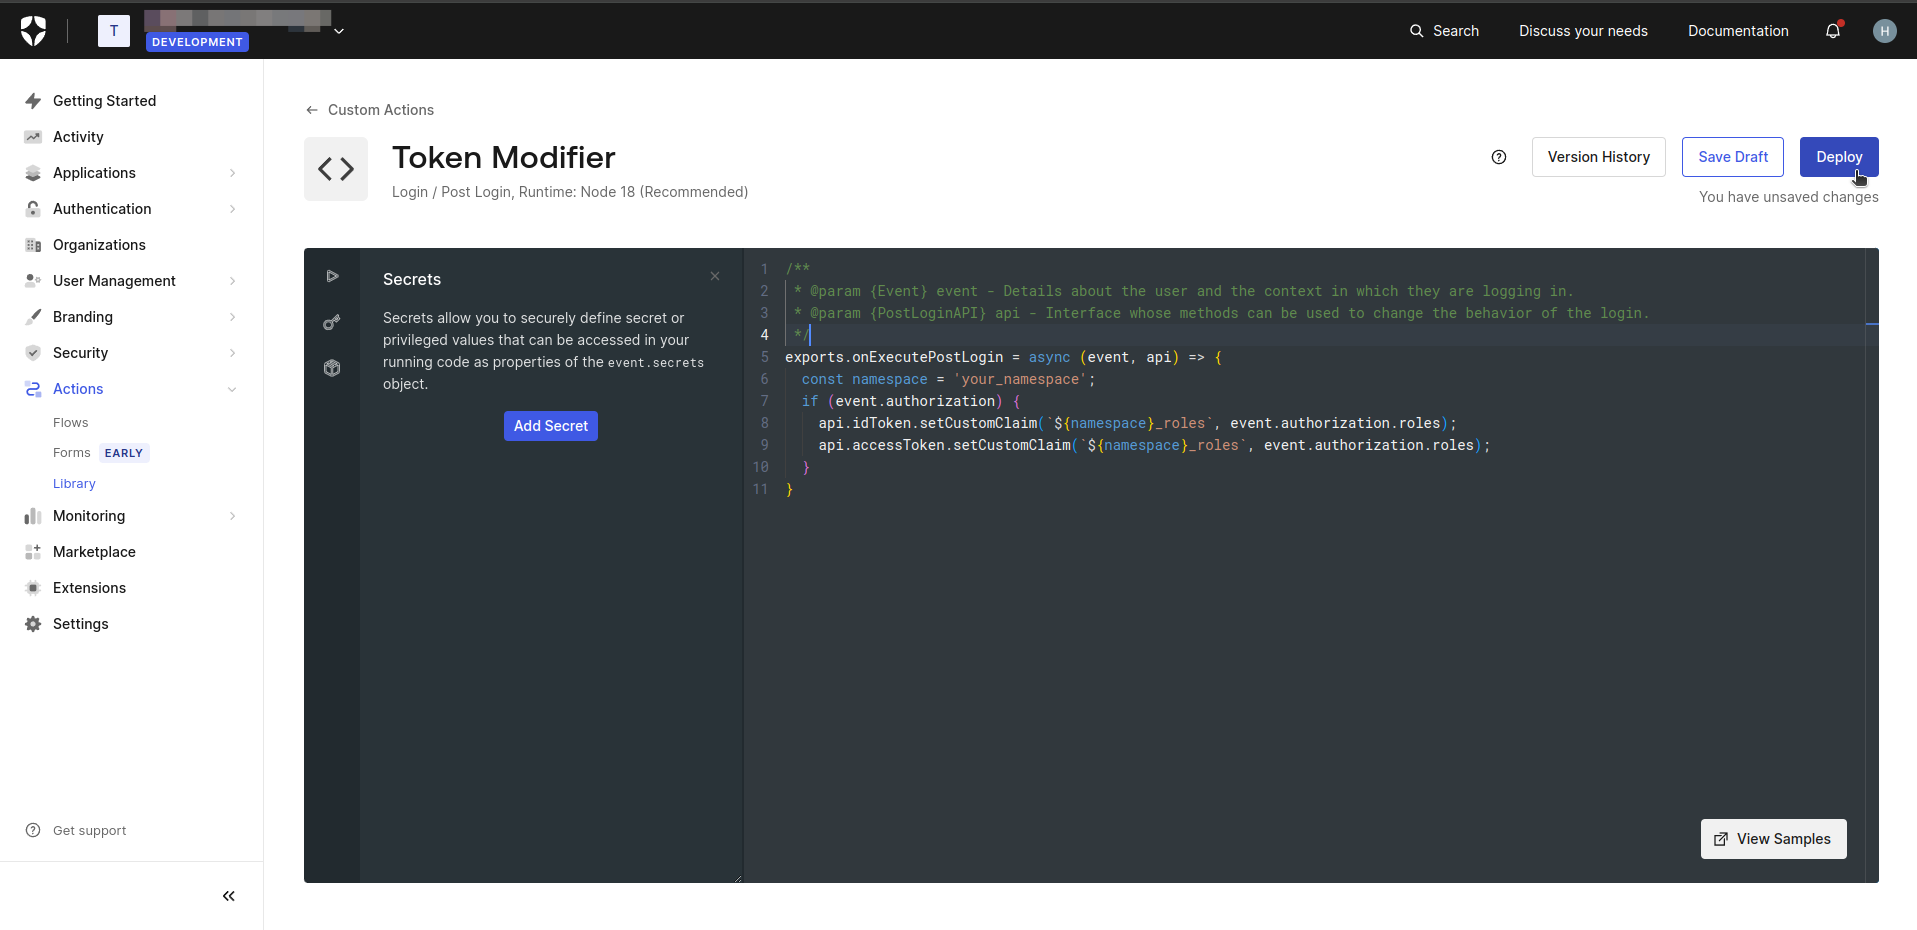
- Finally click on the Deploy button.
- In the Auth0 dashboard, navigate to the Flows section.
- Click the Login.
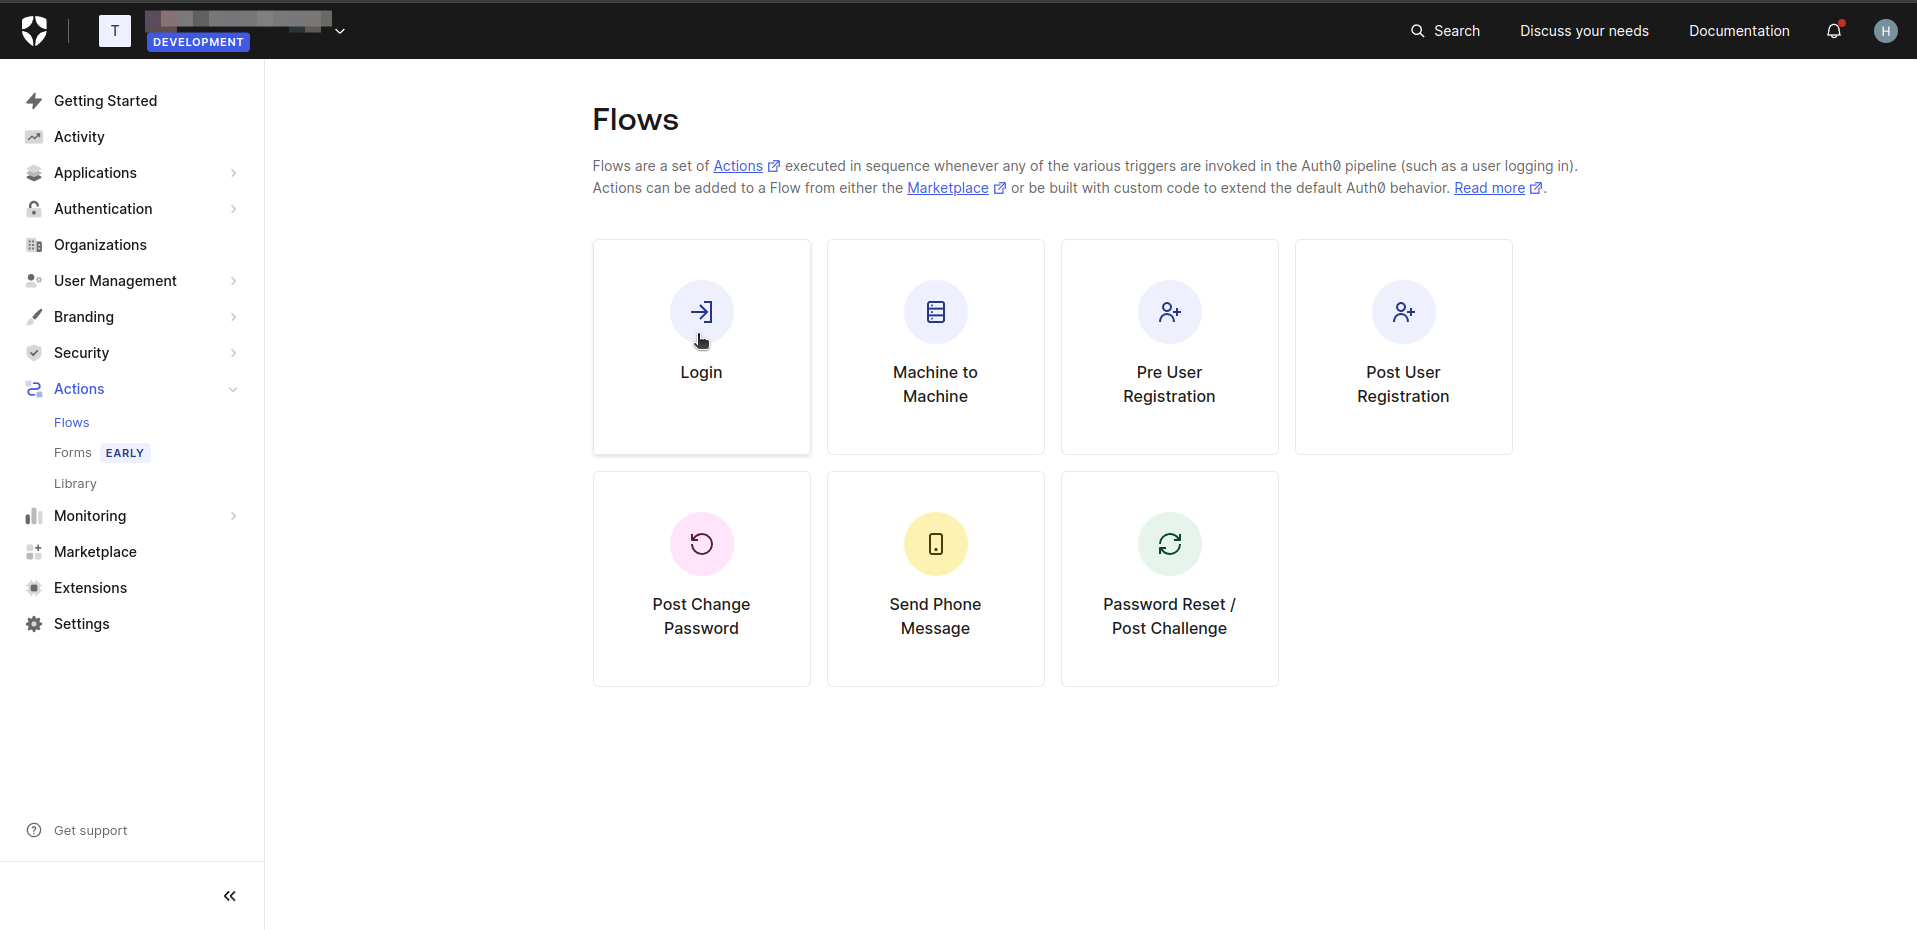
- Drag and drop the custom action created previously. The role claim has been added to the token.
Step 5. Define Group and Role Claim Names in Appcircle
- Navigate to the Organization > Security > Authentications section on your dashboard.
- Select the Manage on the Appcircle SSO Login.
- Select the Manage Authorization.
- Enter the Group Claim Name as org_id and the Role Claim Name as your_namespace_roles. Note that the role claim is created as a custom claim in Auth0, so use the name you determined earlier.
Auth0 (SAML)
Auth0 (SAML)
Step 1. Create Roles
- In the Auth0 dashboard, navigate to the User Management > Roles section.
- Click Create Role button. Create necessary roles.
Step 2. Create Organization
- In the Auth0 dashboard, navigate to the Organization section.
- Click Create Organization button to create organizations.
- Click the created organization to navigate to Organization Details.
- On the Organization Details screen, click the Members tab to manage members of organization.
- Click the Add Members button to add users who will become members of your organization.
- On the Members screen, click the three dots and select Assign Roles. Assign the desired roles to users for organization.
- On the Organization Details screen, navigate to the Connections tab.
- Click the Enable Connections button
- Select Username-Password-Authentication and click Enable Connection
- Select Enable Auto-Membership and Enable Signup on the displayed screen, then click Save.
Step 3. Enable Organization for your application
- In the Auth0 dashboard, navigate to the Applications section.
- Select the relevant application.
- On the Application Details screen, navigate to the Organizations tab.
- Click Disable Grants Now.
- Choose Business Users for the type of users and select Prompt for Organization for the login flow.
- Click Save Changes.
Step 4. Define Group And Role Attributes & Claims
The user's group and role values should be included in the token as claims. This enables retrieval of the user's group and role during SSO login. The groups claim is already present in the token. Follow these steps to add the roles claim:
- In the Auth0 dashboard, navigate to the Actions > Library section.
- Click the Create Action button and select Build from Scratch.
- Enter an appropriate name for the Custom Action in the popup window. Keep the remaining settings at their default values,as shown in the image below.
- On the Custom Action Details screen, copy and paste following Javascript code to code editor.
exports.onExecutePostLogin = async (event, api) => {
  const namespace = 'your_namespace_';
  if (event.authorization) {
    api.idToken.setCustomClaim(`${namespace}roles`, event.authorization.roles);
    api.accessToken.setCustomClaim(`${namespace}roles`, event.authorization.roles);
  }
}
- Finally click on the Deploy button.
- In the Auth0 dashboard, navigate to the Flows section.
- Click the Login.
- Drag and drop the custom action created previously. The role claim has been added to the token.
Step 5. Define Group and Role Attributes names in Appcircle
- Navigate to the Organization > Security > Authentications section on your dashboard.
- Select the Manage on the Appcircle SSO Login.
- Select the Manage Authorization.
- Enter the Group Attribute Name as
http://schemas.auth0.com/org_idand the Role Attribute Name ashttp://schemas.auth0.com/your_namespace_roles. Note that the role attribute is created as a custom attribute in Auth0, so you must use the name you determined previously.
Microsoft Entra ID (SAML)
Microsoft Entra ID (SAML)
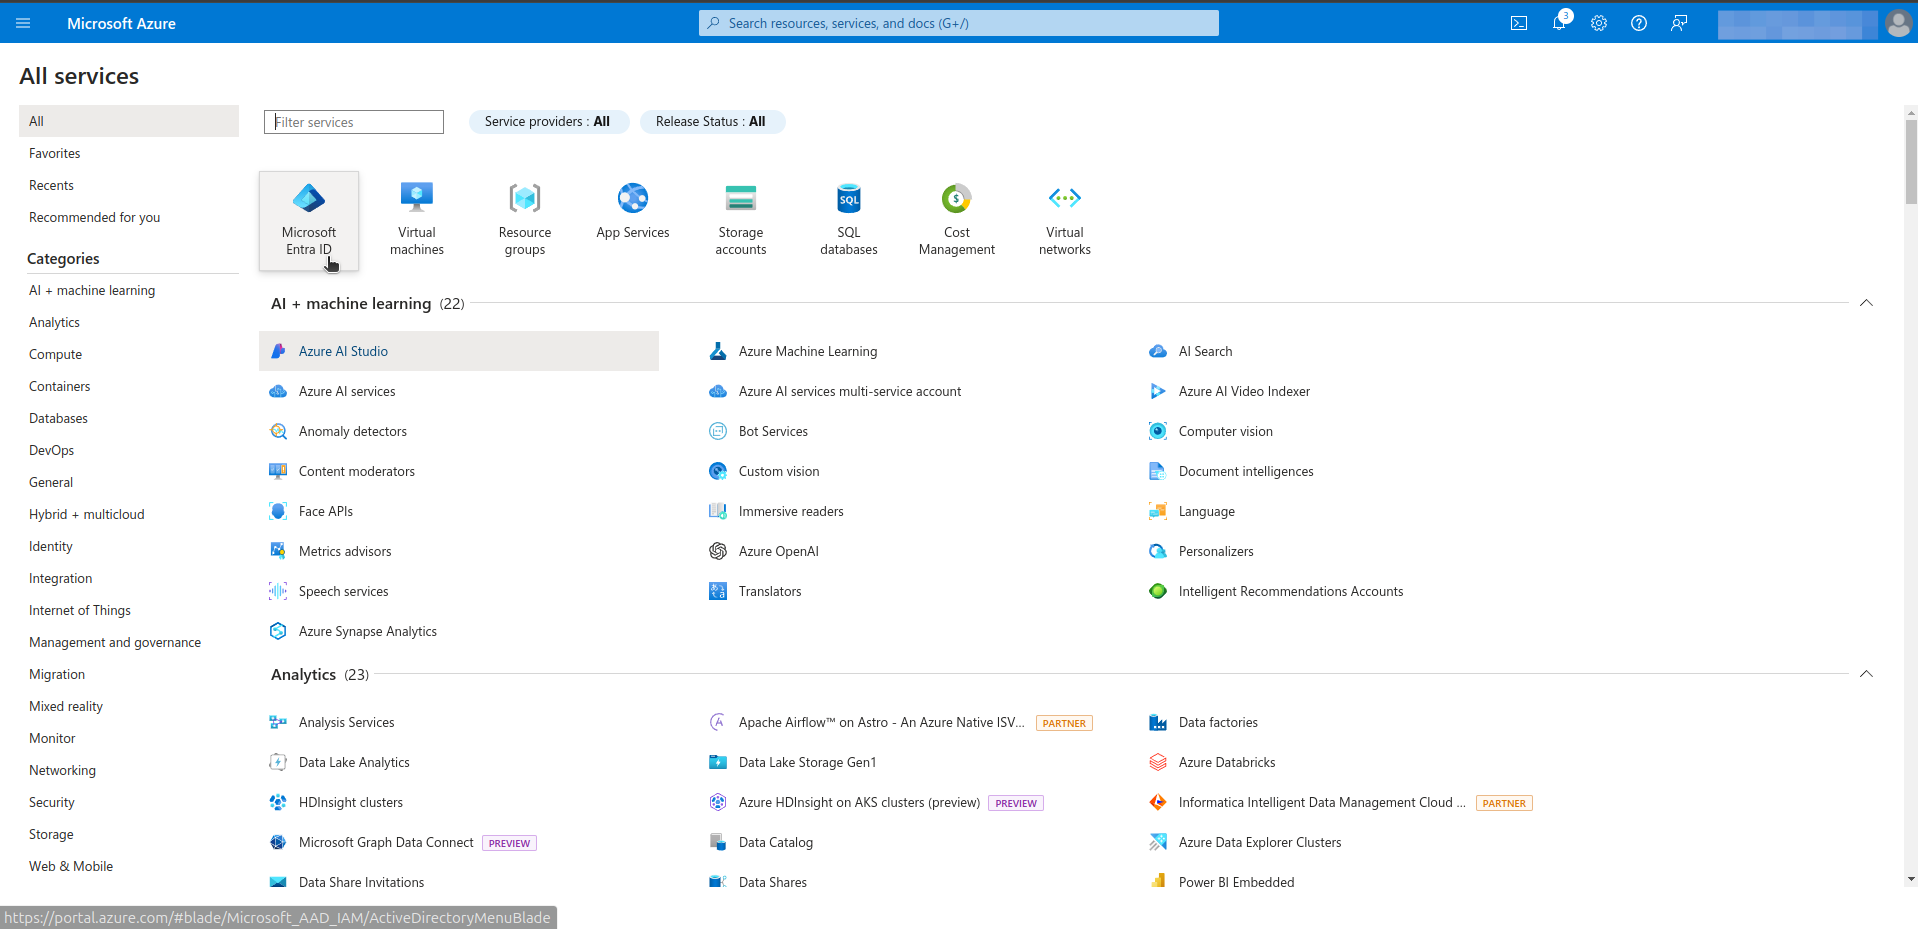
Step 1. Create Groups in Microsoft Entra ID
- Log in to Azure as an admin and navigate to Azure Services > Microsoft Entra ID
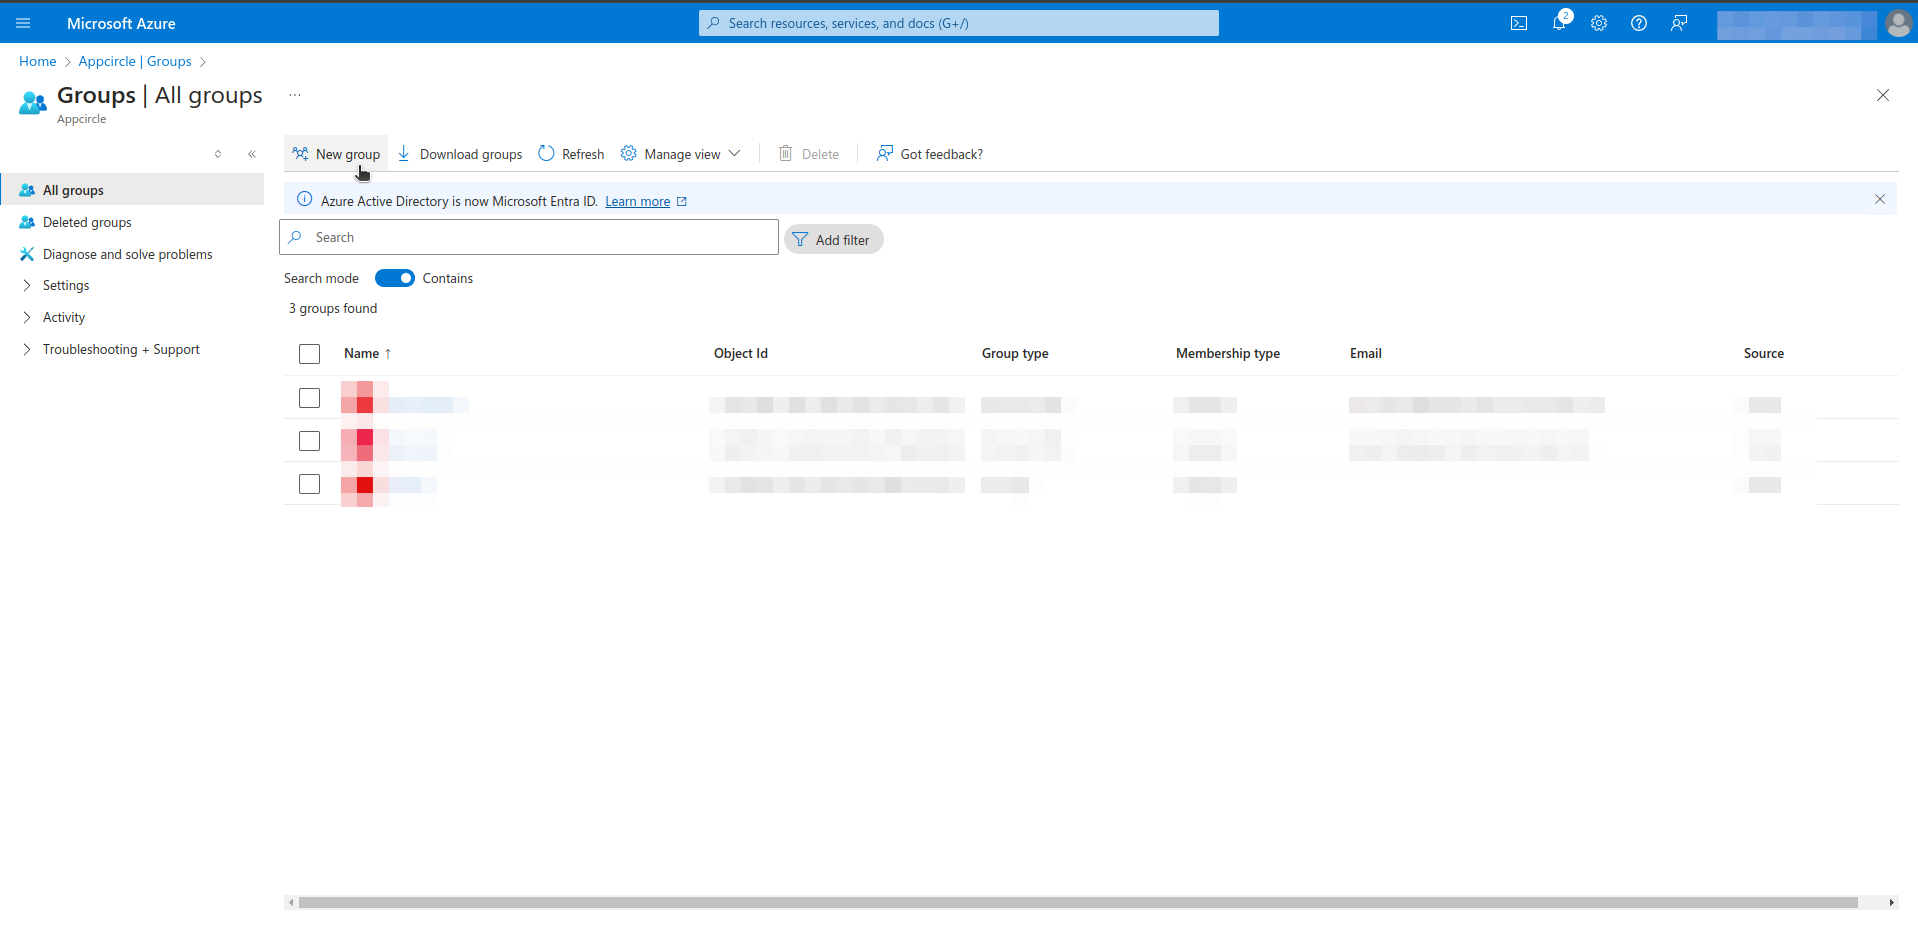
- Navigate to the Manage > Groups section from left menu.
- Click the New Group.
- Assign a proper name and description to the new group. Designate an owner and members to the group.
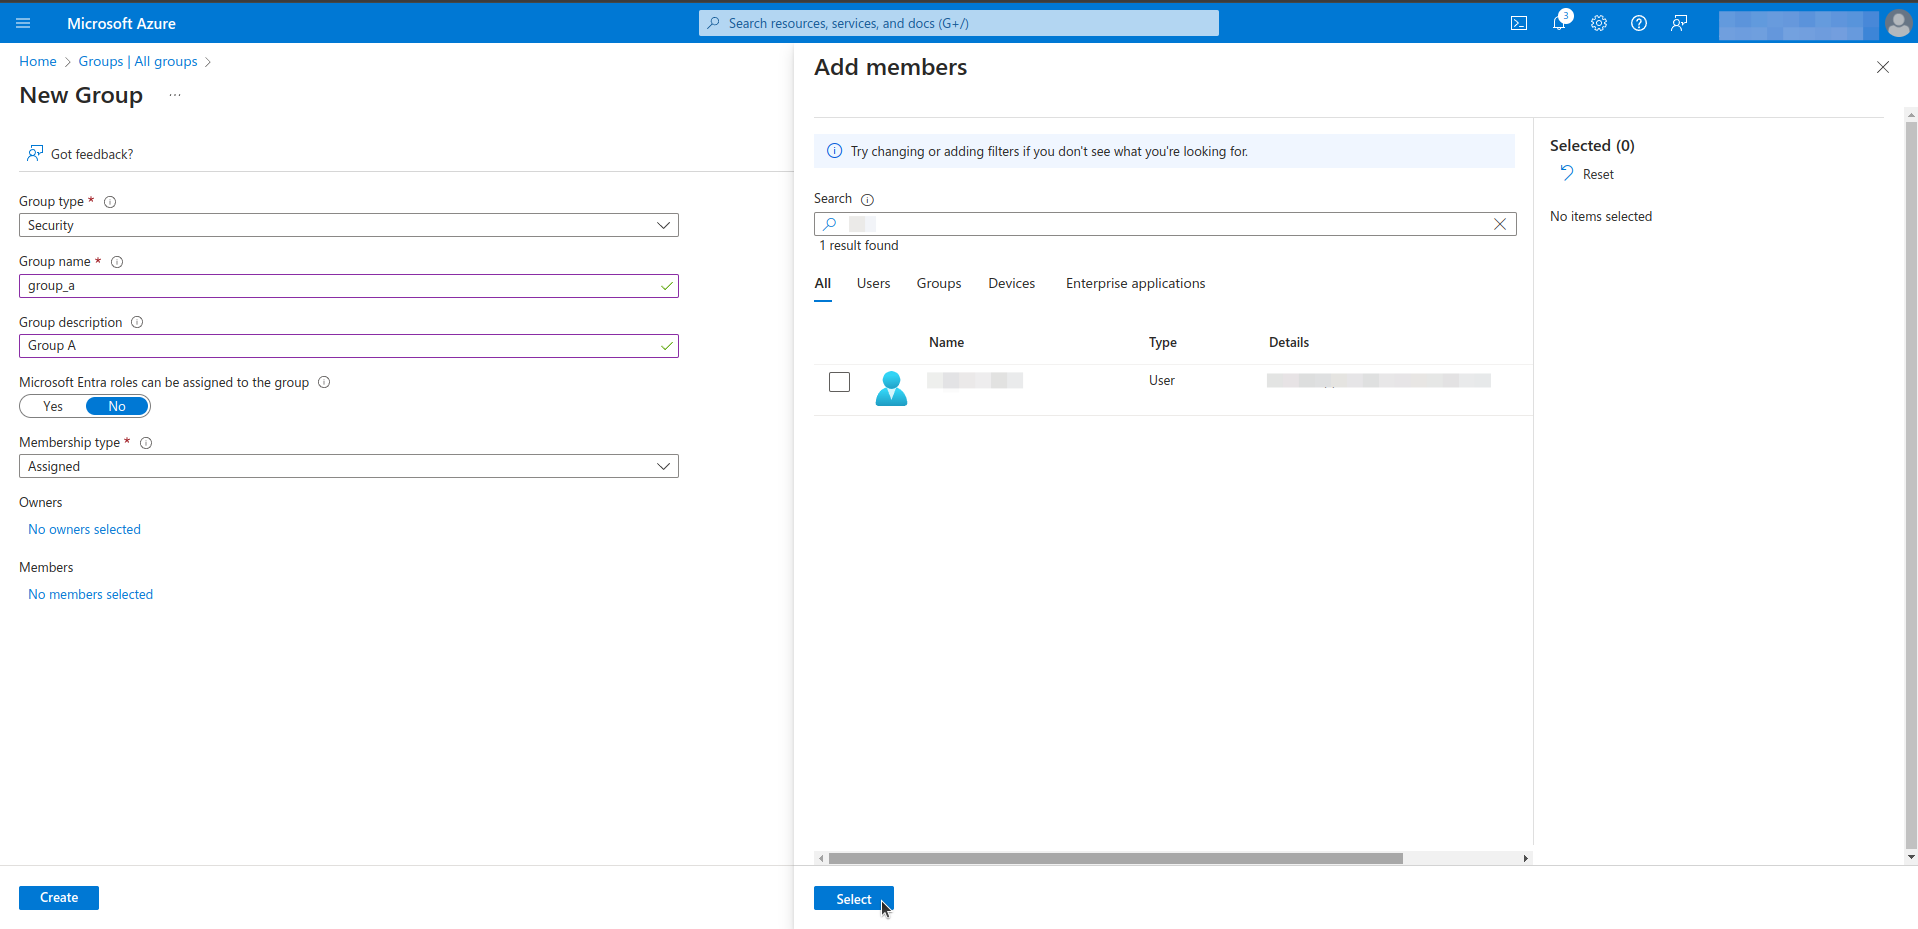
- Create the groups for map to Appcircle organizations and roles as needed.
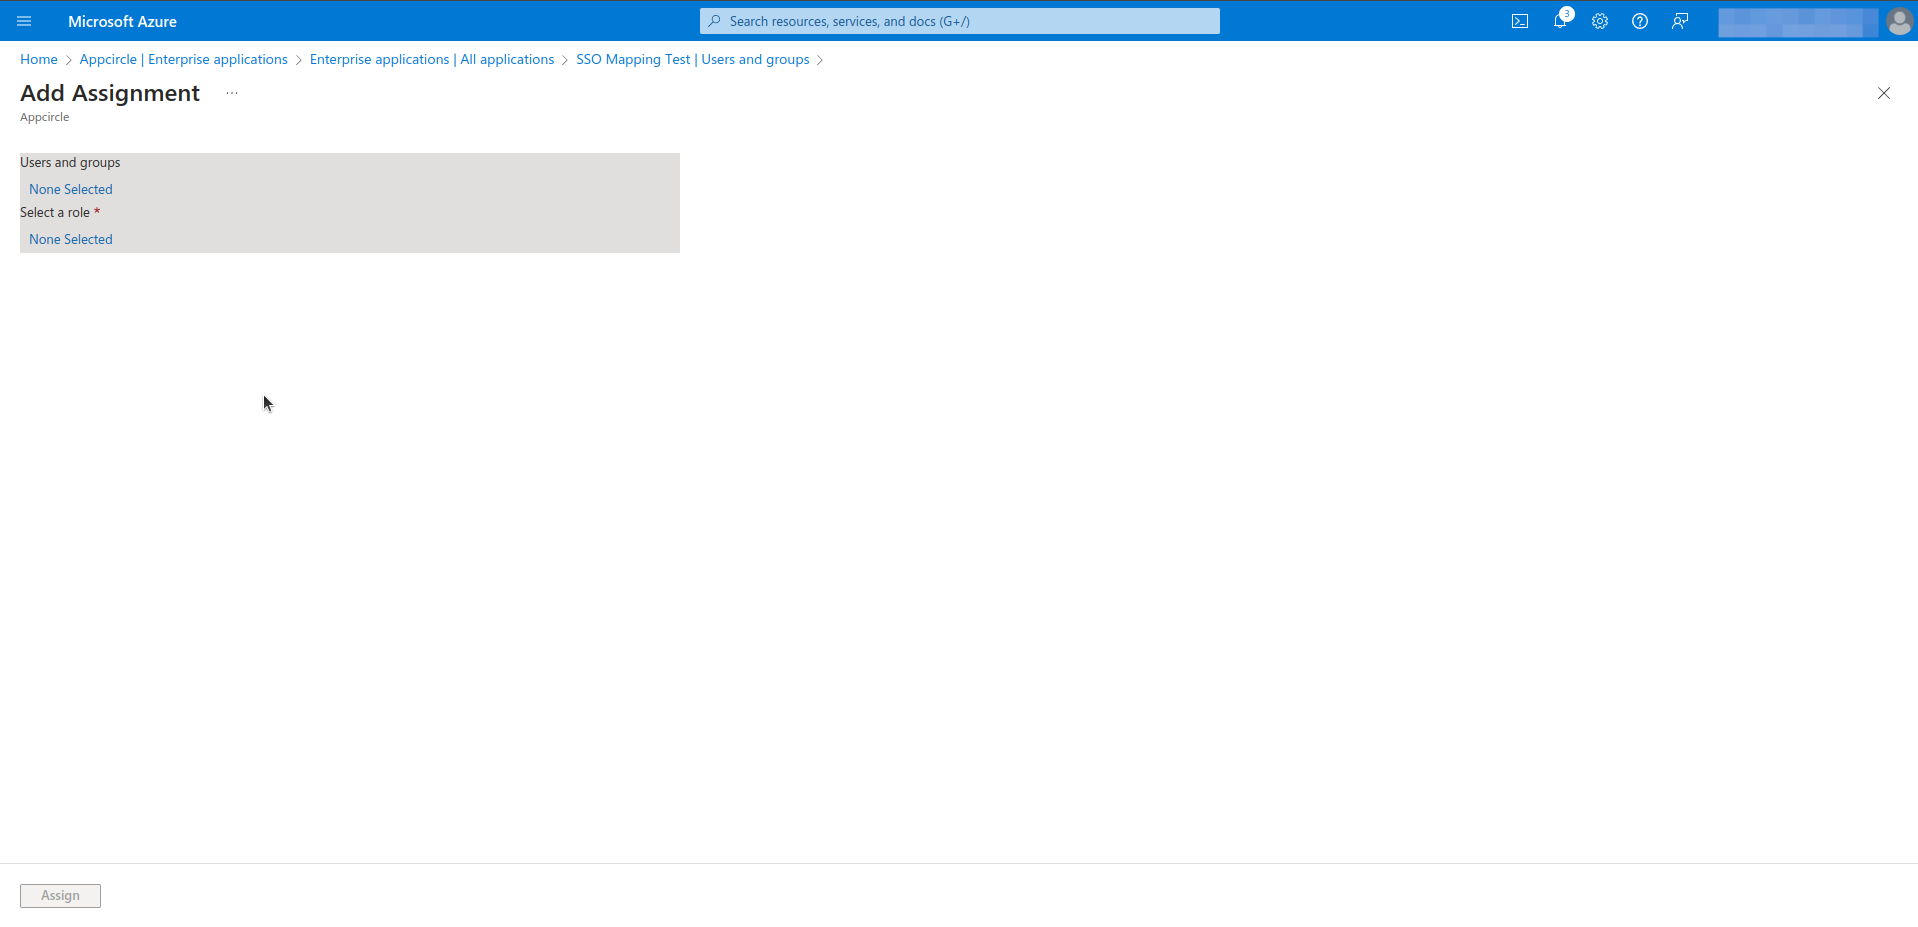
Step 2. Assign user and group to application in Microsoft Entra ID
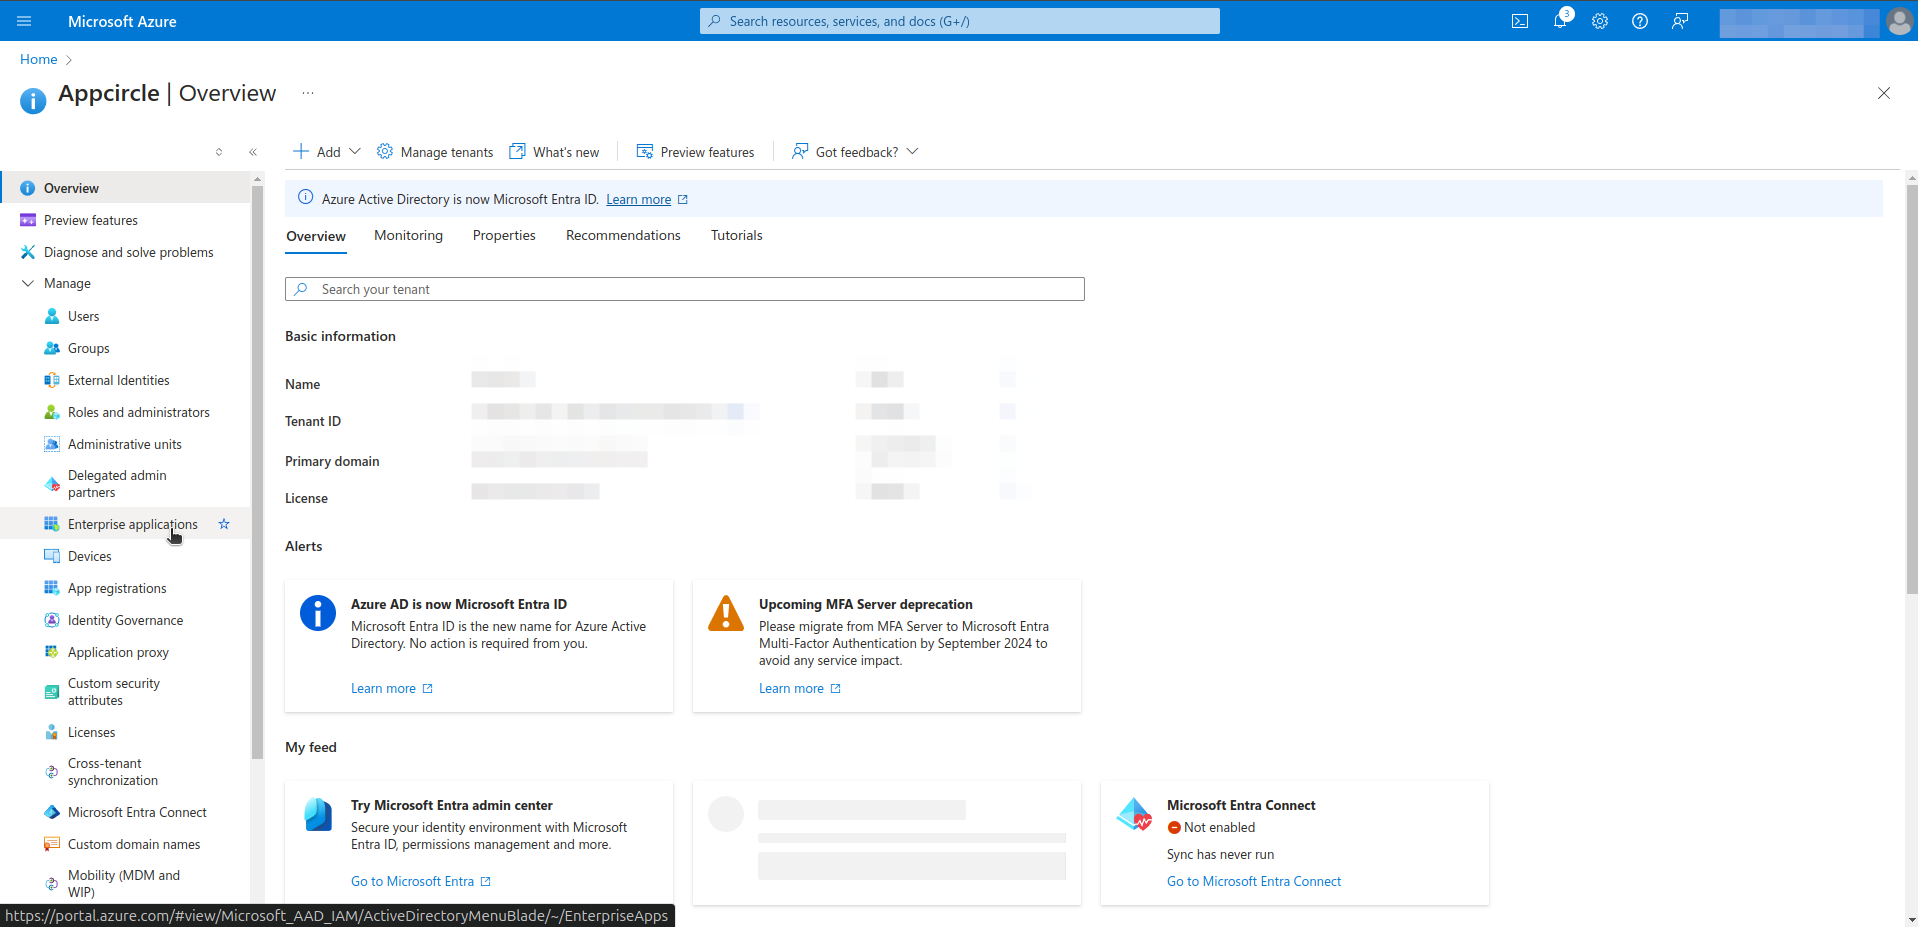
- Navigate to the Azure Services > Microsoft Entra ID.
- Navigate to the Manage > Enterprise applications section from left menu.
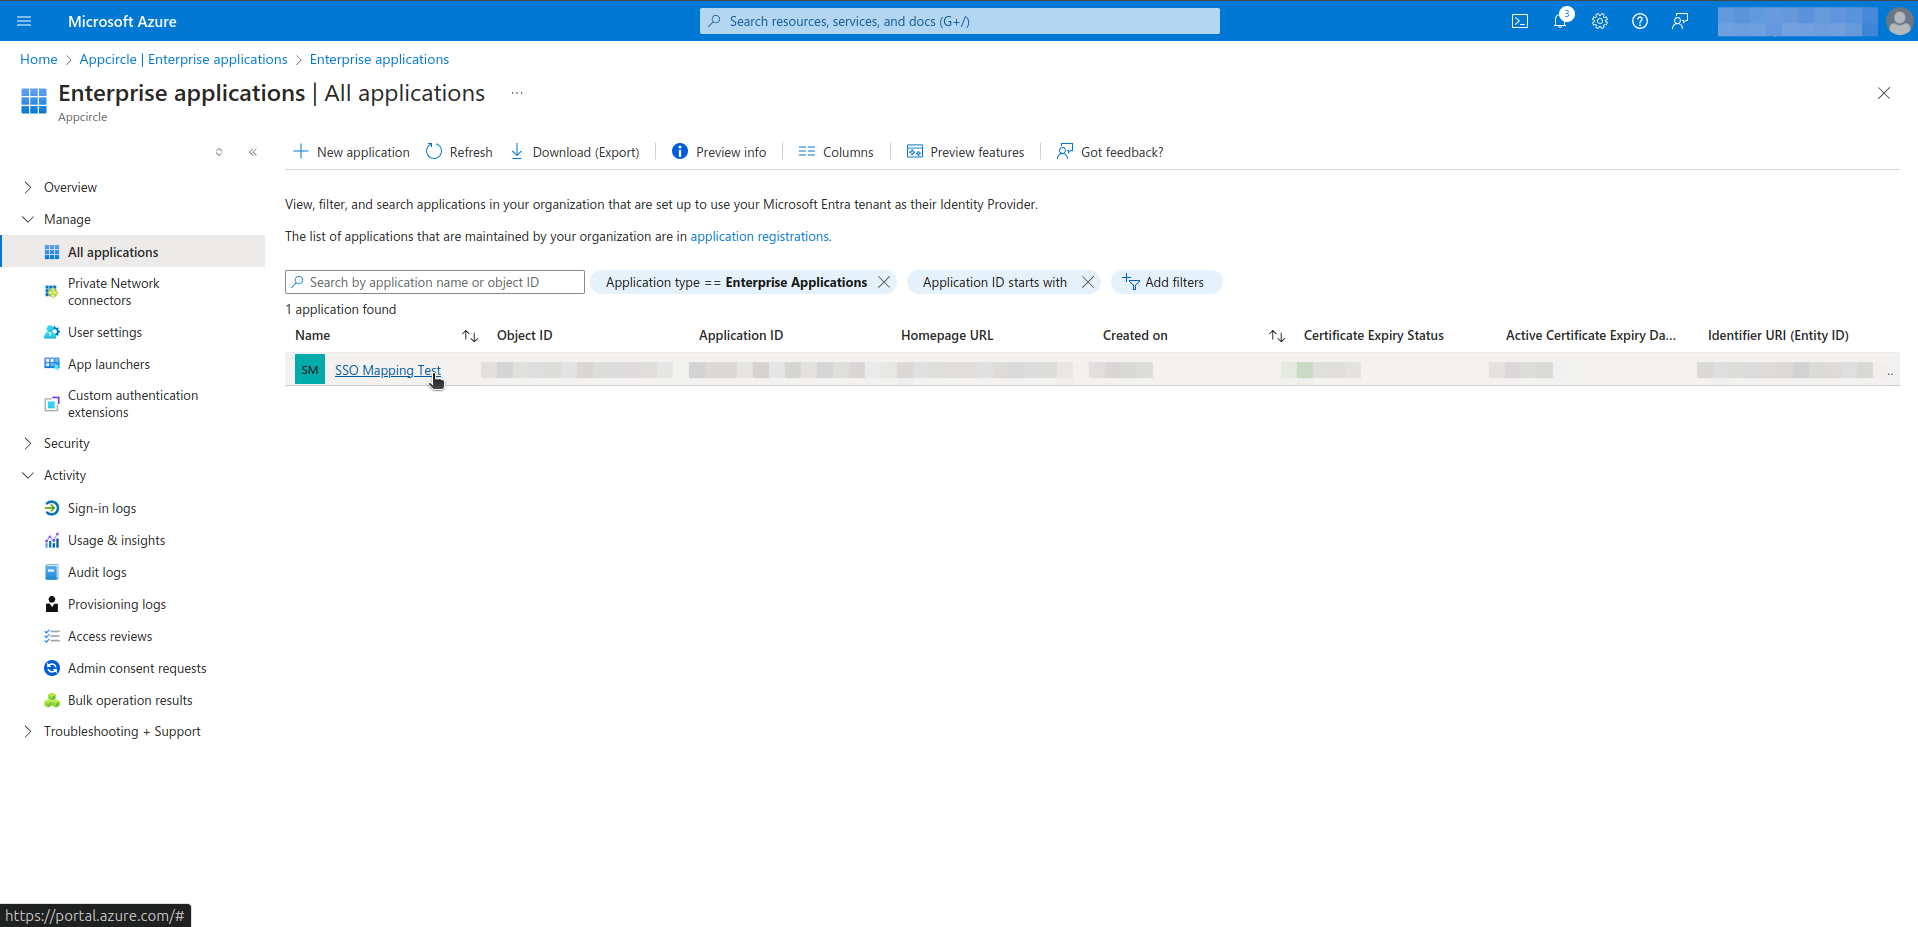
- Click your application.
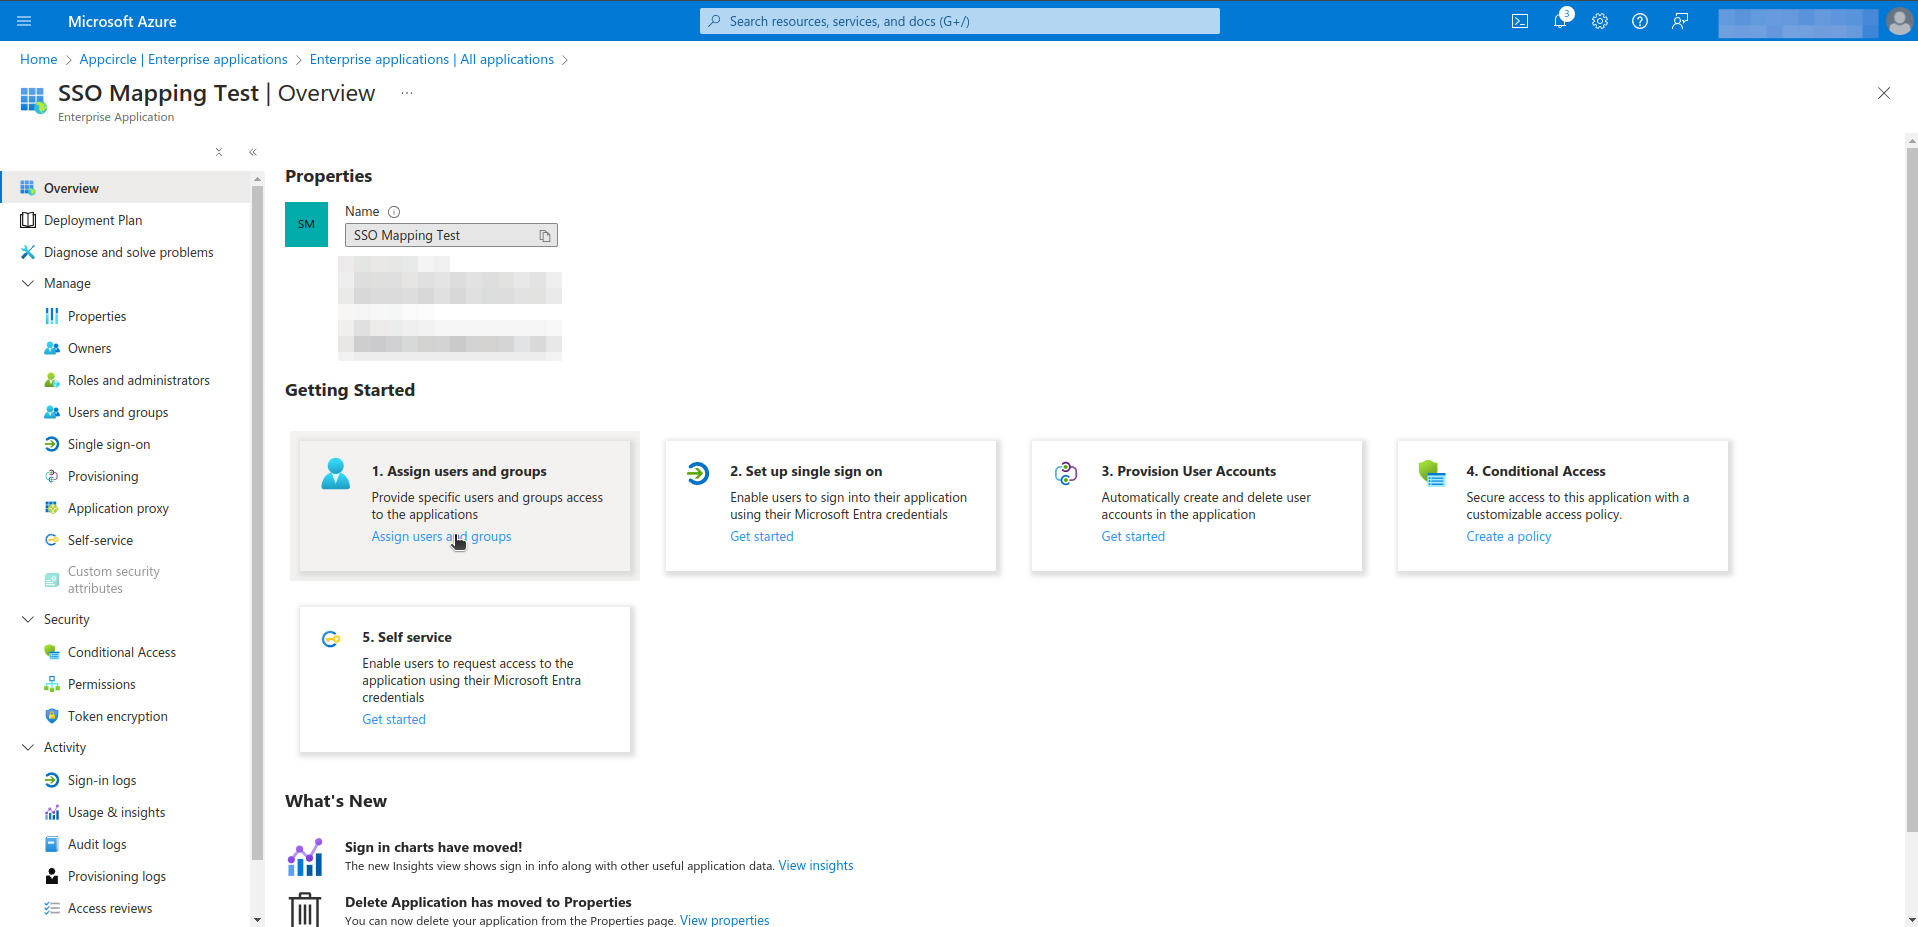
- Click Assign users and groups.
- Click Add user/group.
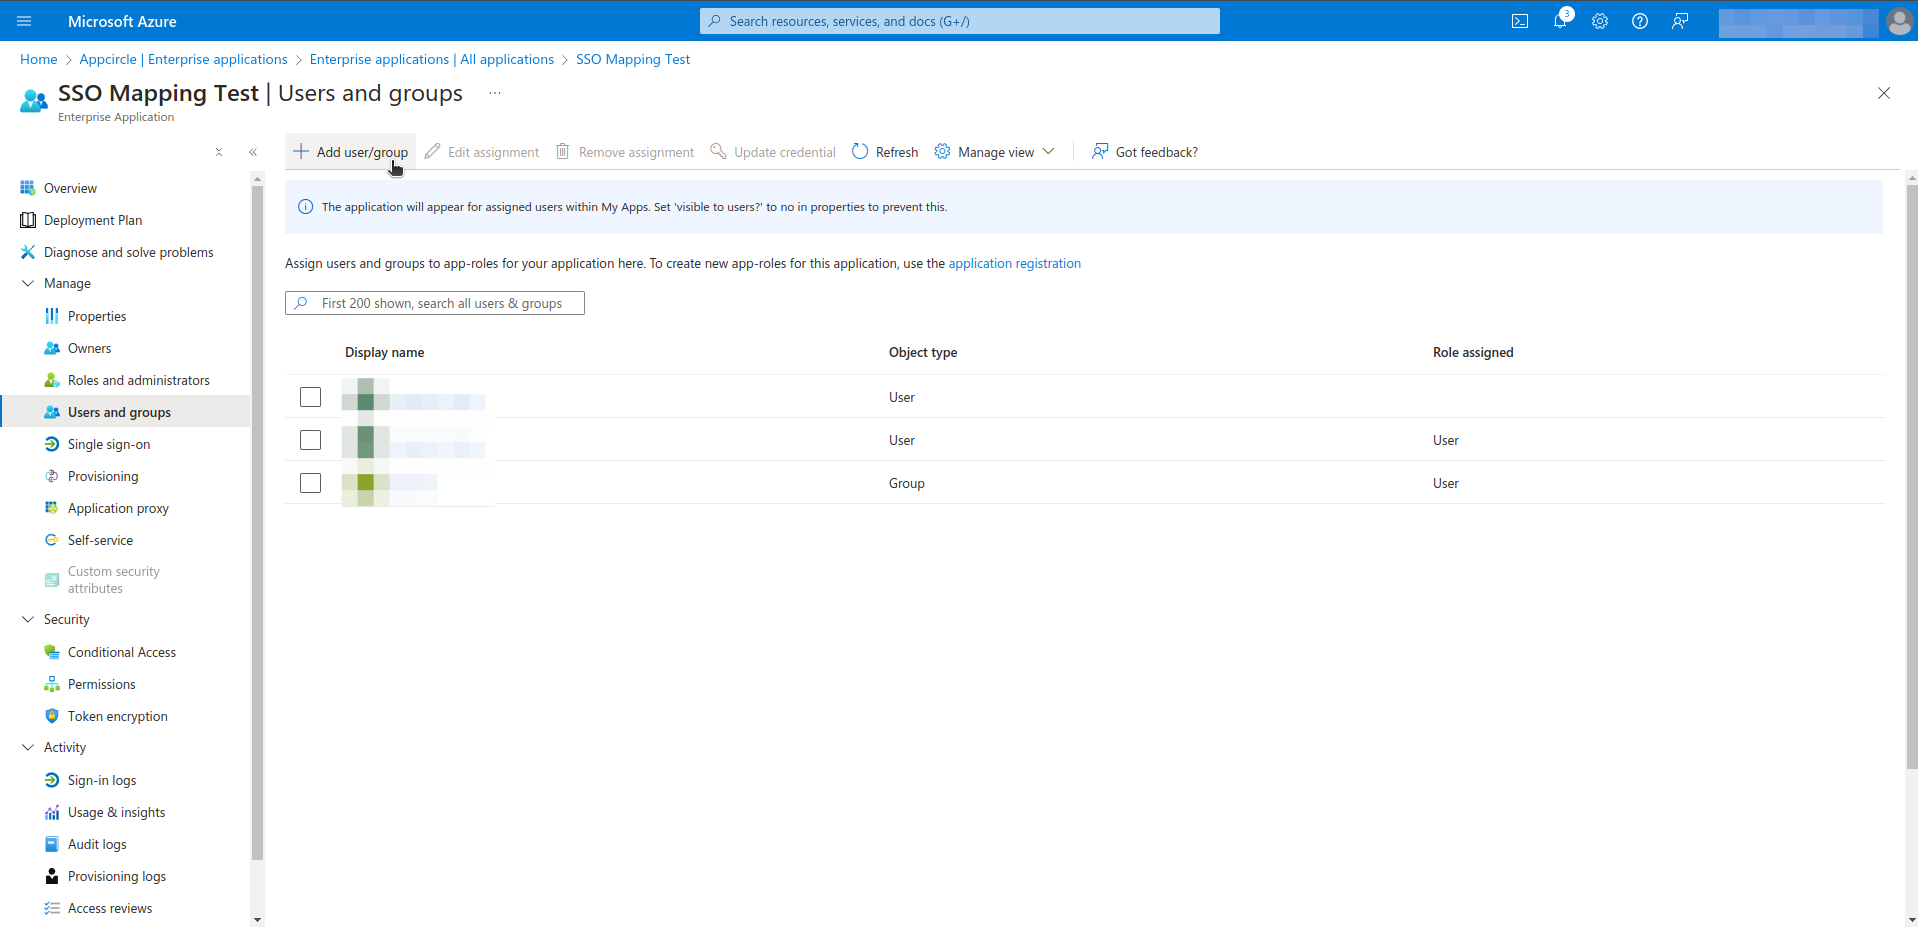
- Select users and groups. This process can be repeated as needed.
Step 3. Define Group Attribute & Claim in Microsoft Entra ID
- Navigate to the Manage > Single sign-on section from left menu.
- Click Edit in Attributes & Claims section.
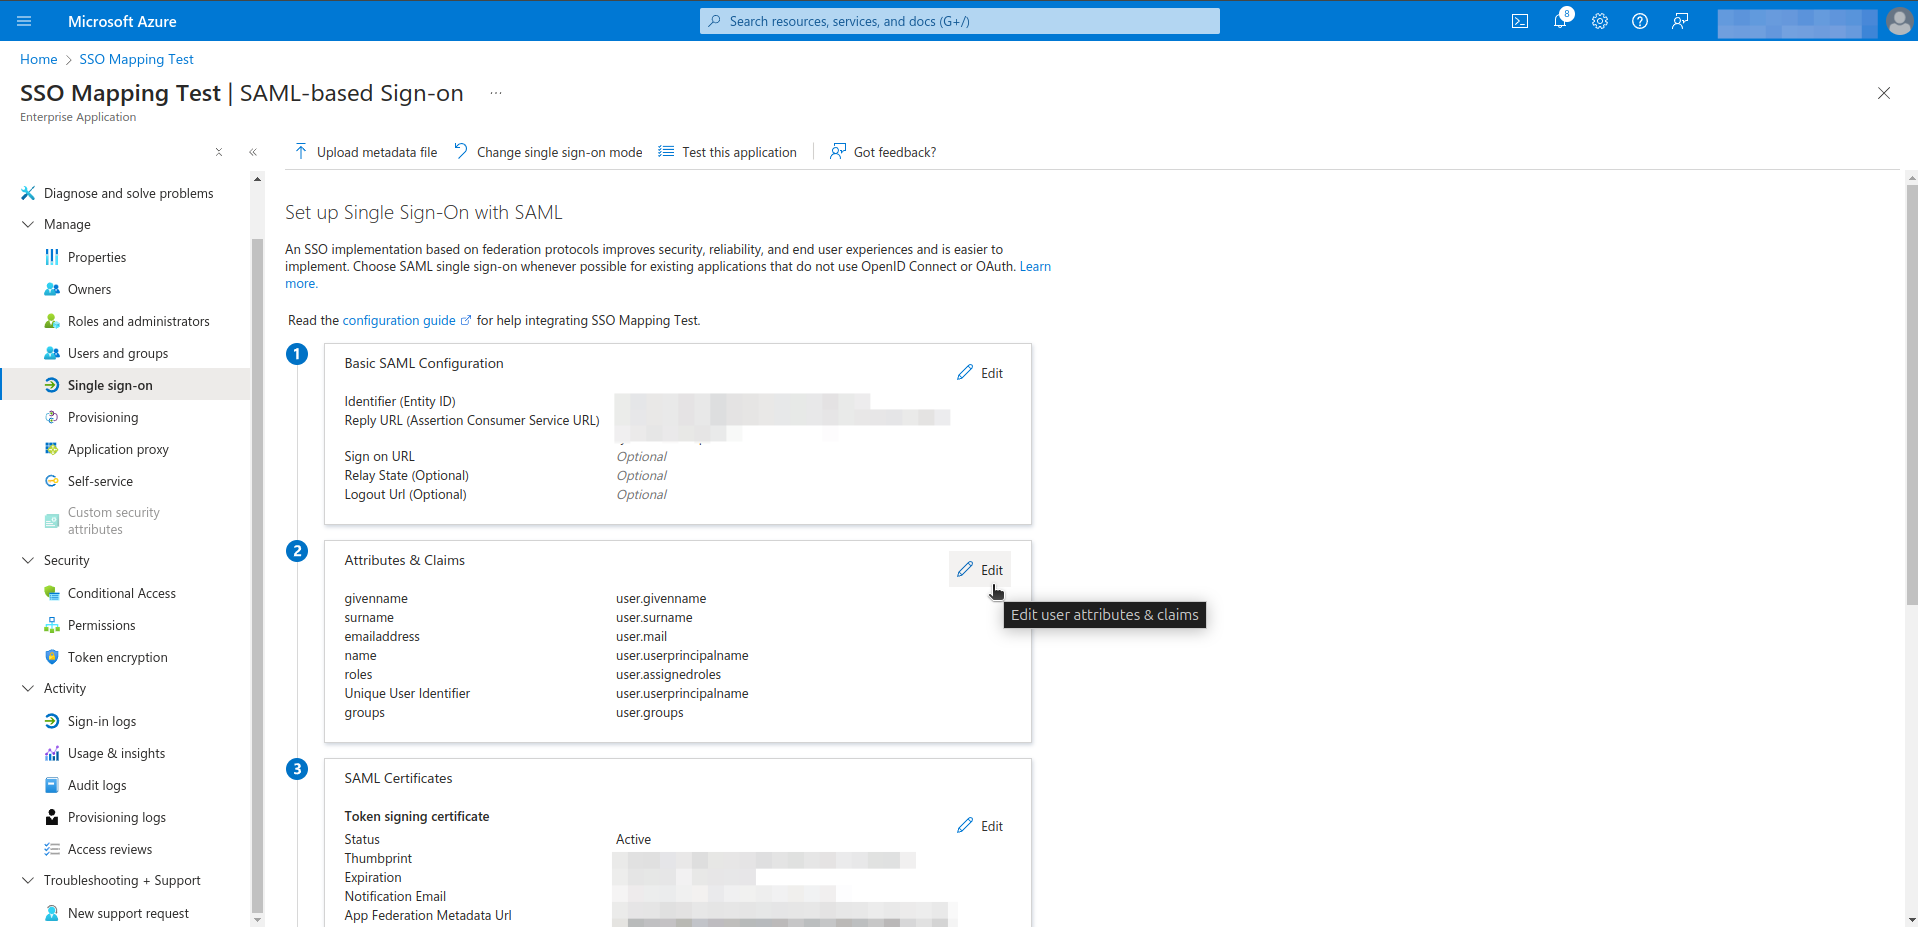
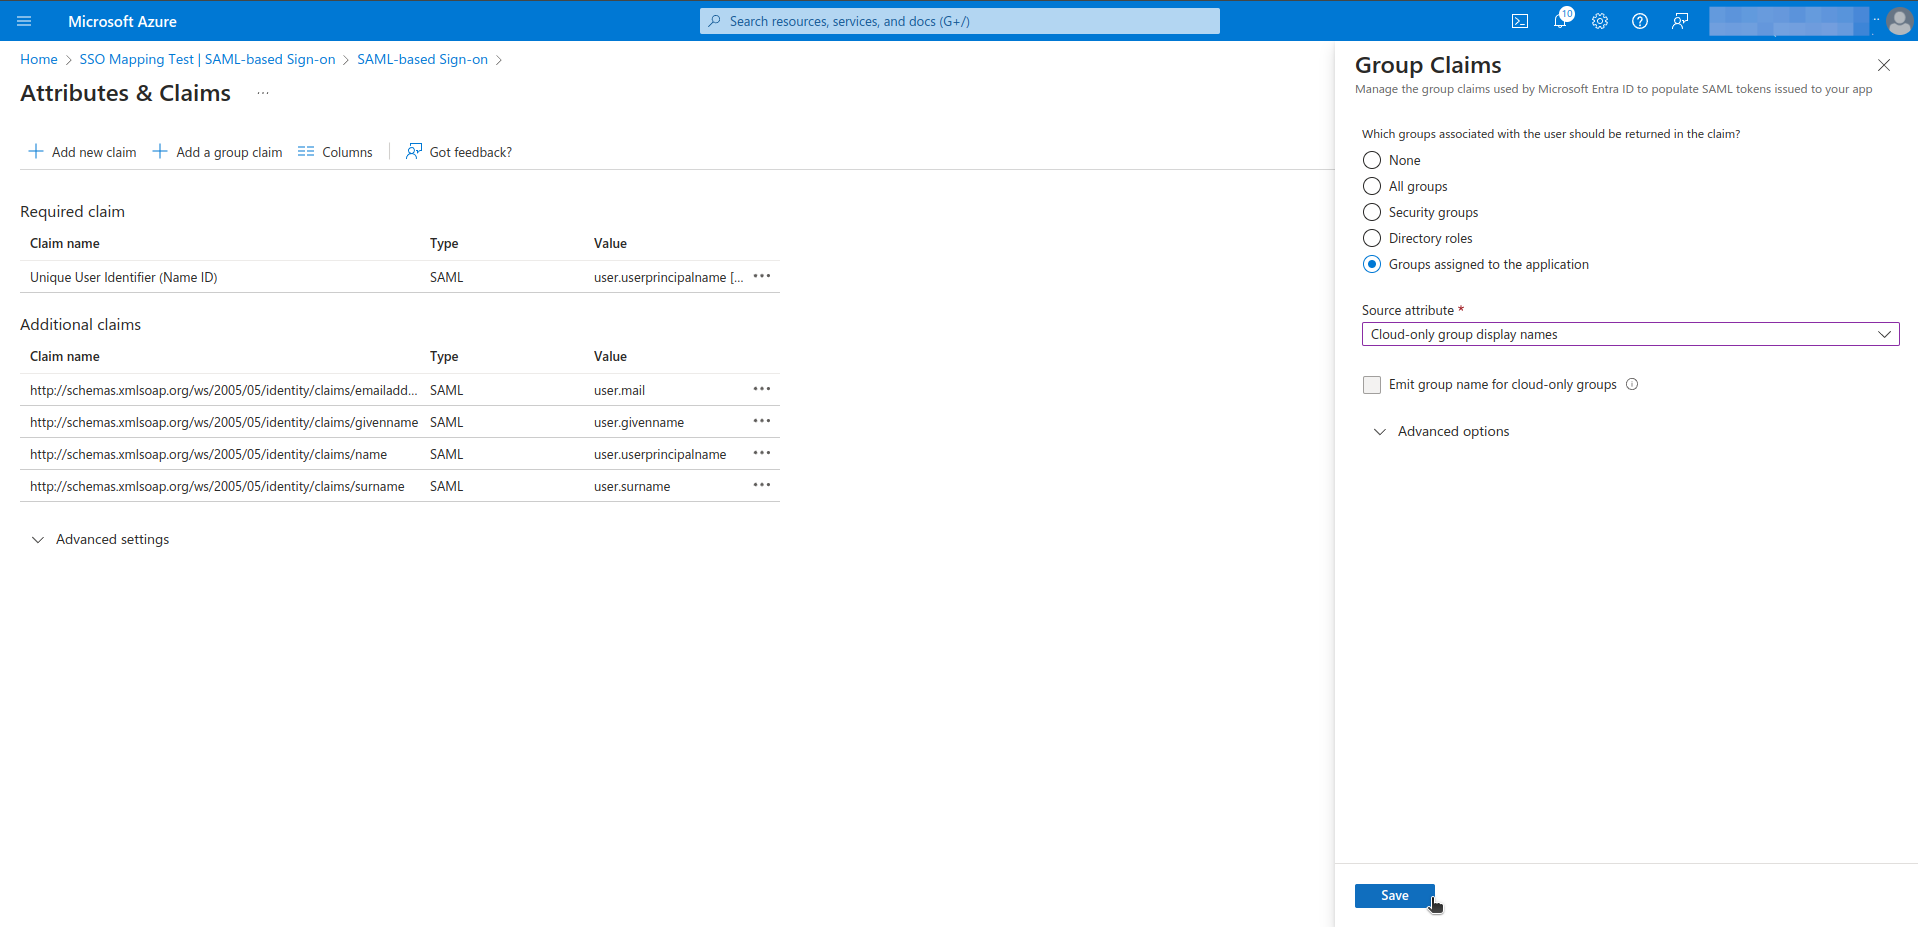
- Click the Add a Group Claim.
- Select the Groups assigned to the application
- Select the Cloud only group display names as source attribute.
- Then click on the Save button
Step 4. Define Group and Role Attribute names in Appcircle
- Navigate to the Organization > Security > Authentications section on your dashboard.
- Select the Manage on the Appcircle SSO Login.
- Select the Manage Authorization.
- Enter Group Attribute Name as
http://schemas.microsoft.com/ws/2008/06/identity/claims/groupsand Role Attribute Name ashttp://schemas.microsoft.com/ws/2008/06/identity/claims/groups.
We use EntraID groups to manage user groups and roles. Both are sent to Appcircle in one claim. If needed, you can set up a more advanced configuration with a separate claim for roles.

Okta (OpenID Connect)
Okta (OpenID Connect)
Step 1. Create Groups and Define Group Claim
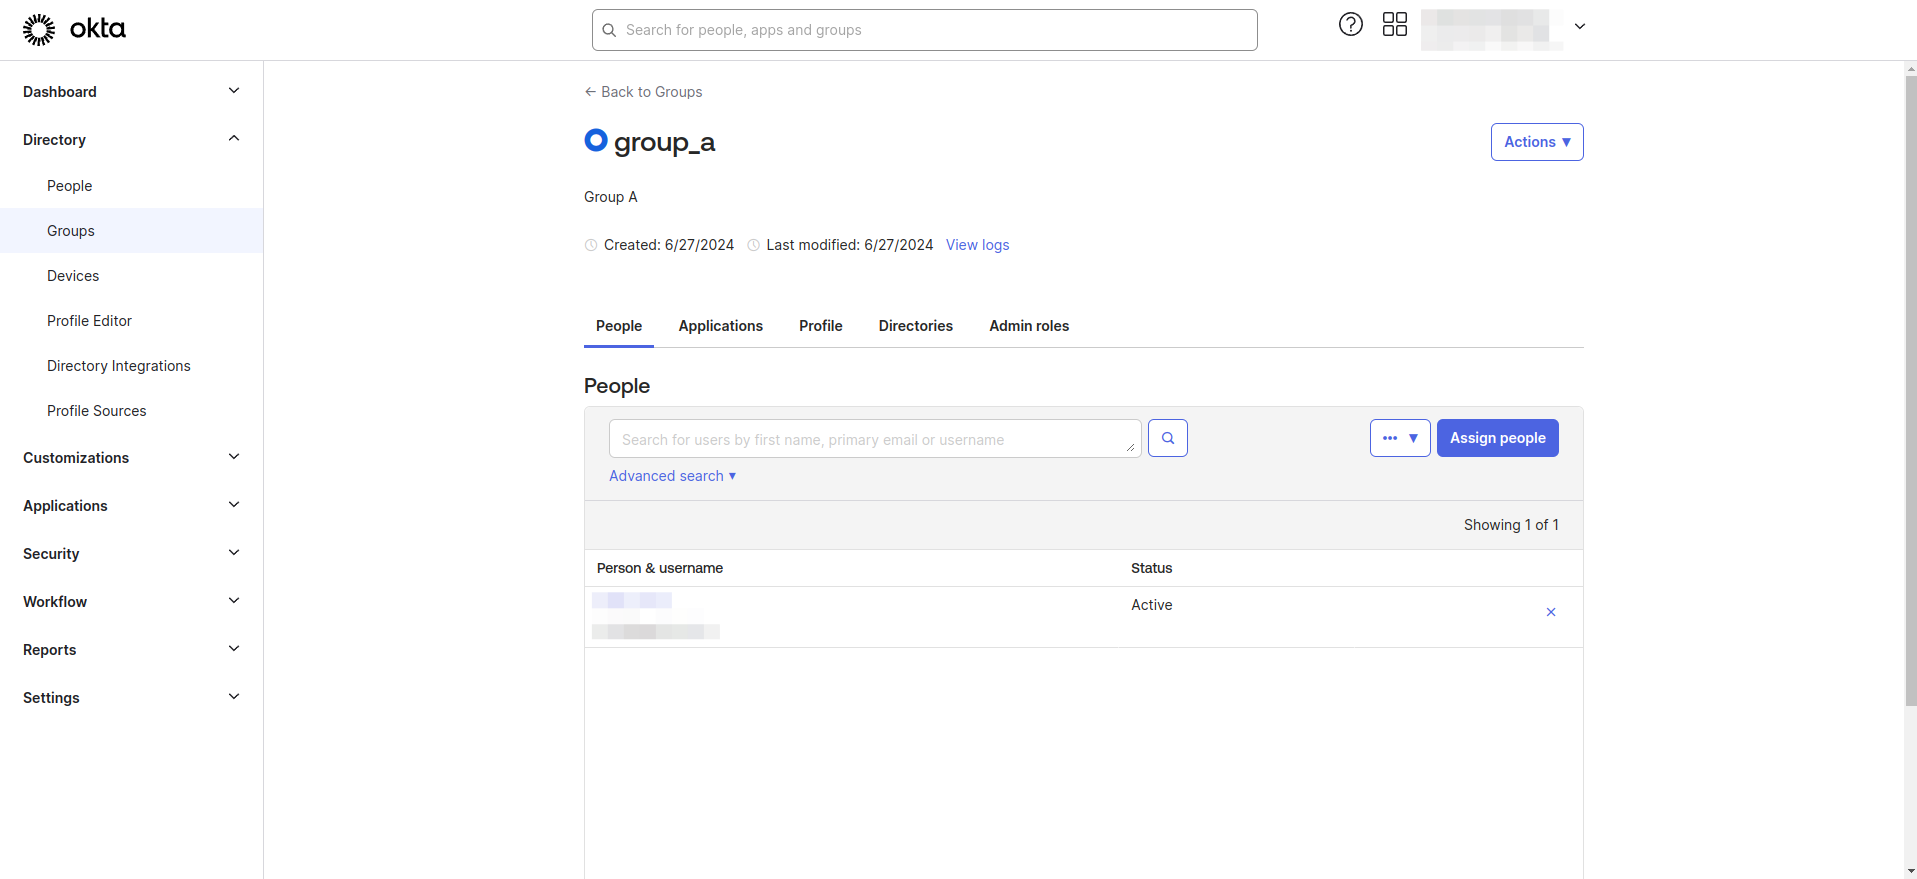
- Navigate to the Directory > Groups section in the Okta Dashboard
- Create the groups for map to Appcircle organizations and roles. In this guide, we’ll use Okta groups to manage user groups and roles.

- Assign users to groups.
- Navigate to the Applications > Applications section from left navigation menu.
- Select your application from the list
- Navigate to the Sign on tab.
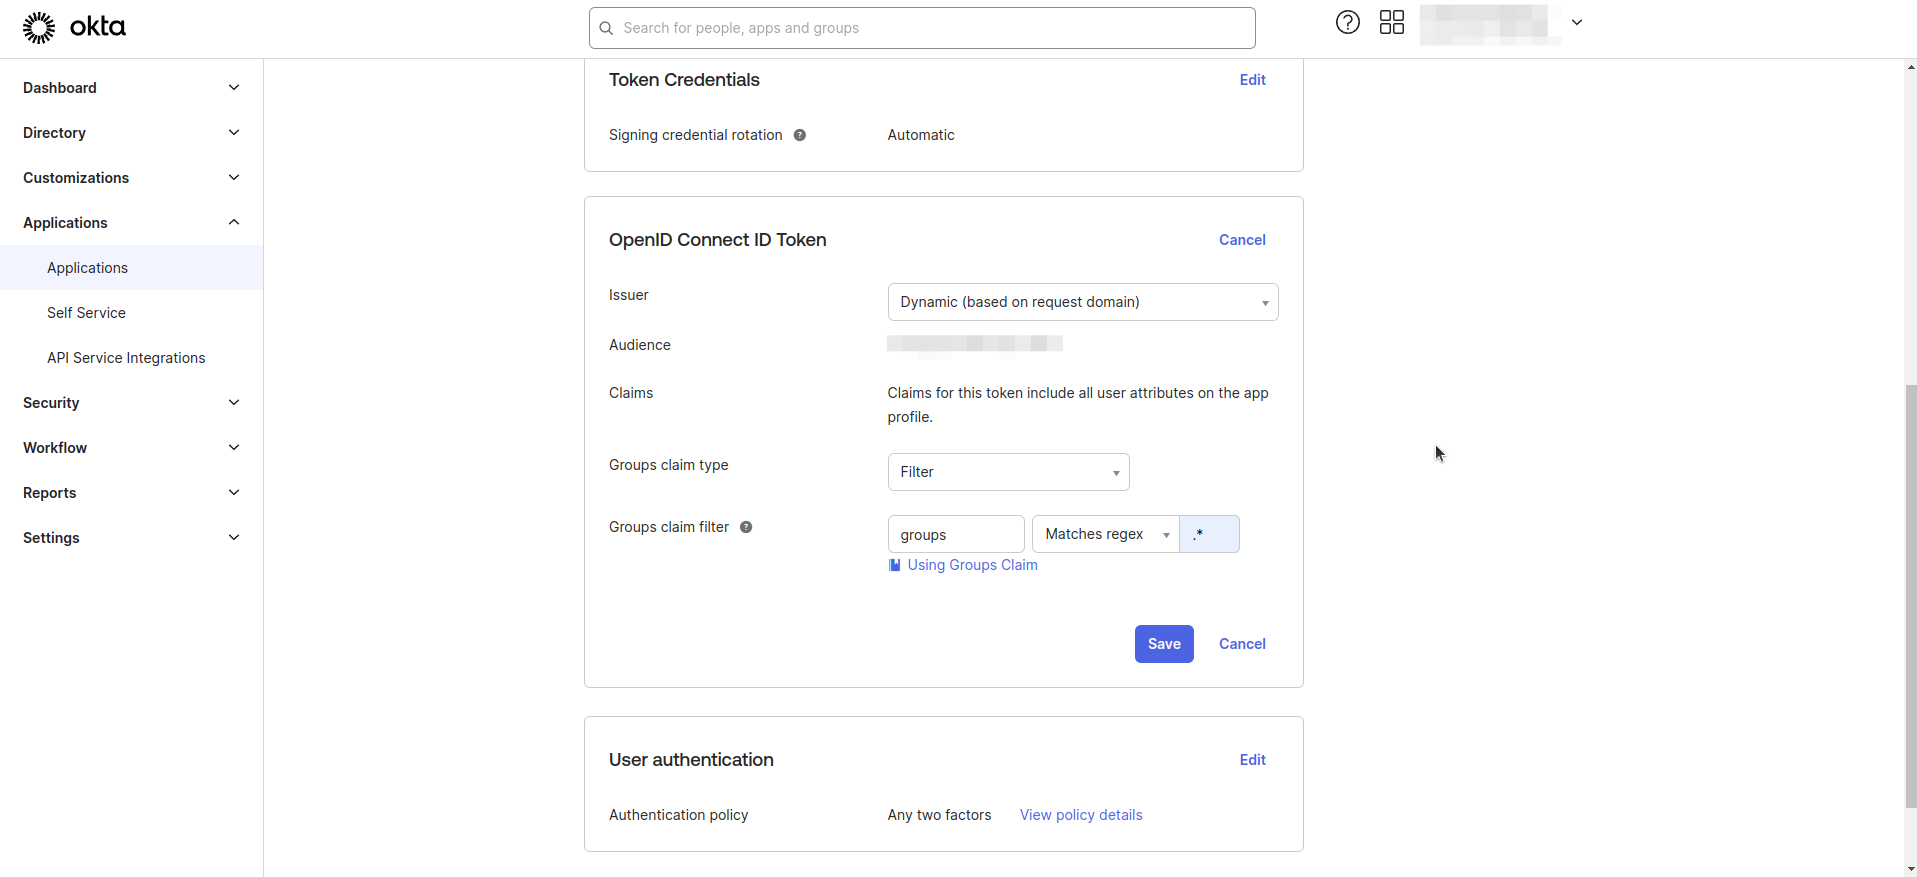
- Click Edit for OpenID Connect ID Token.
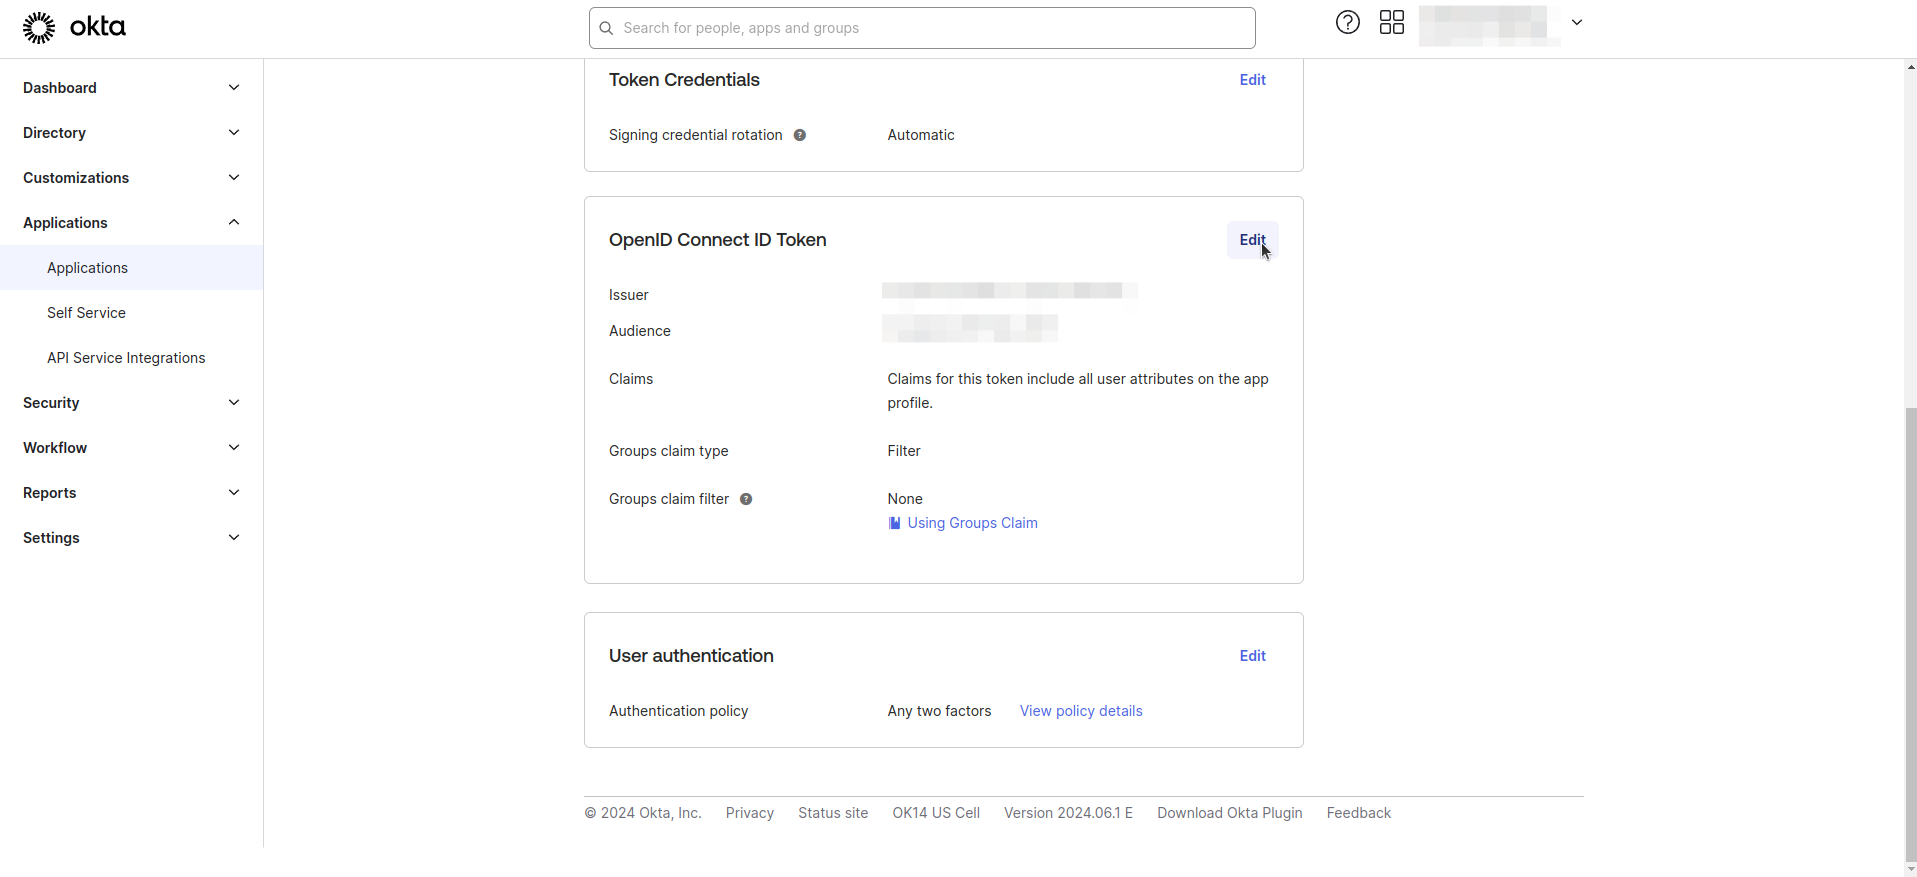
- Enter Groups claim filter as shown in the image below.
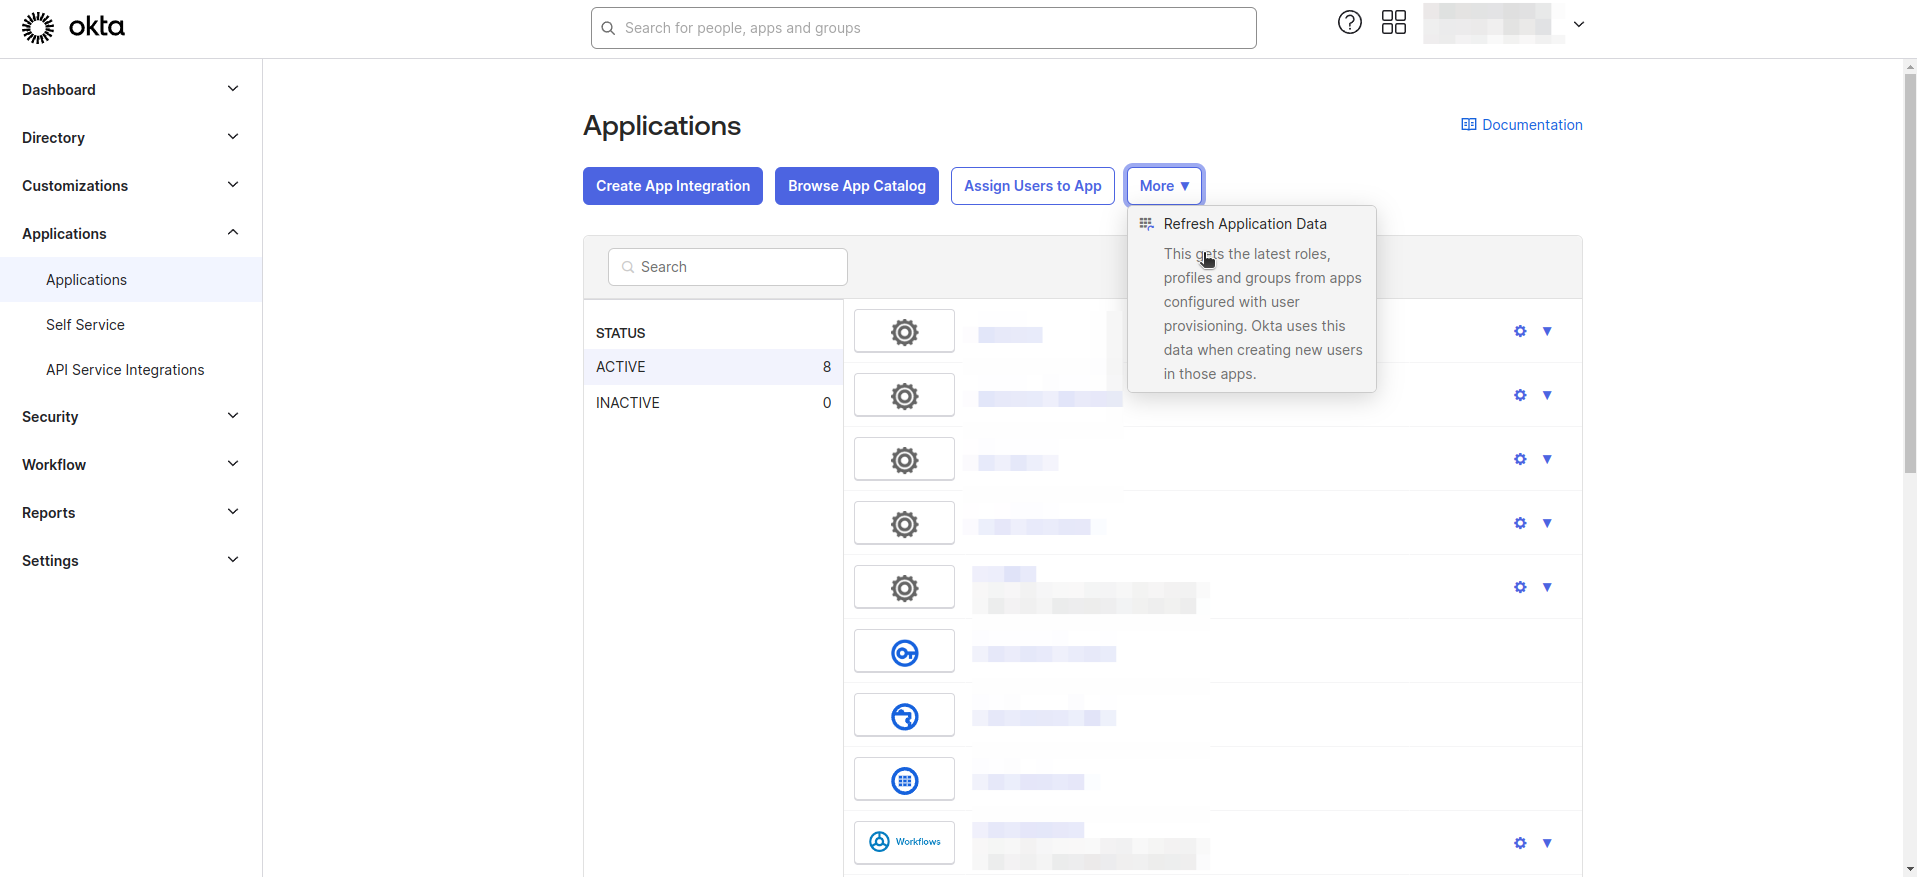
- Navigate to the Applications > Applications section from left navigation menu.
- Click Refresh Application Data.
Step 2. Define Group and Role Claim in Appcircle
- Navigate to the Organization > Security > Authentications section on your dashboard.
- Select the Manage on the Appcircle SSO Login.
- Select the Manage Authorization.
- Enter Group Attribute Name as
groupsand Role Attribute Name asgroups.
We use Okta groups to manage user groups and roles. Both are sent to Appcircle in one claim. If needed, you can set up a more advanced configuration with a separate claim for roles.

Step 3: Update SSO Scope Configuration
- Navigate to the Organization > Security > Authentications section on your dashboard.
- Select the Manage option under the Appcircle SSO Login.
- Select Manage Authentication and click the Edit button.
- Add the groups to the Default Scope field.
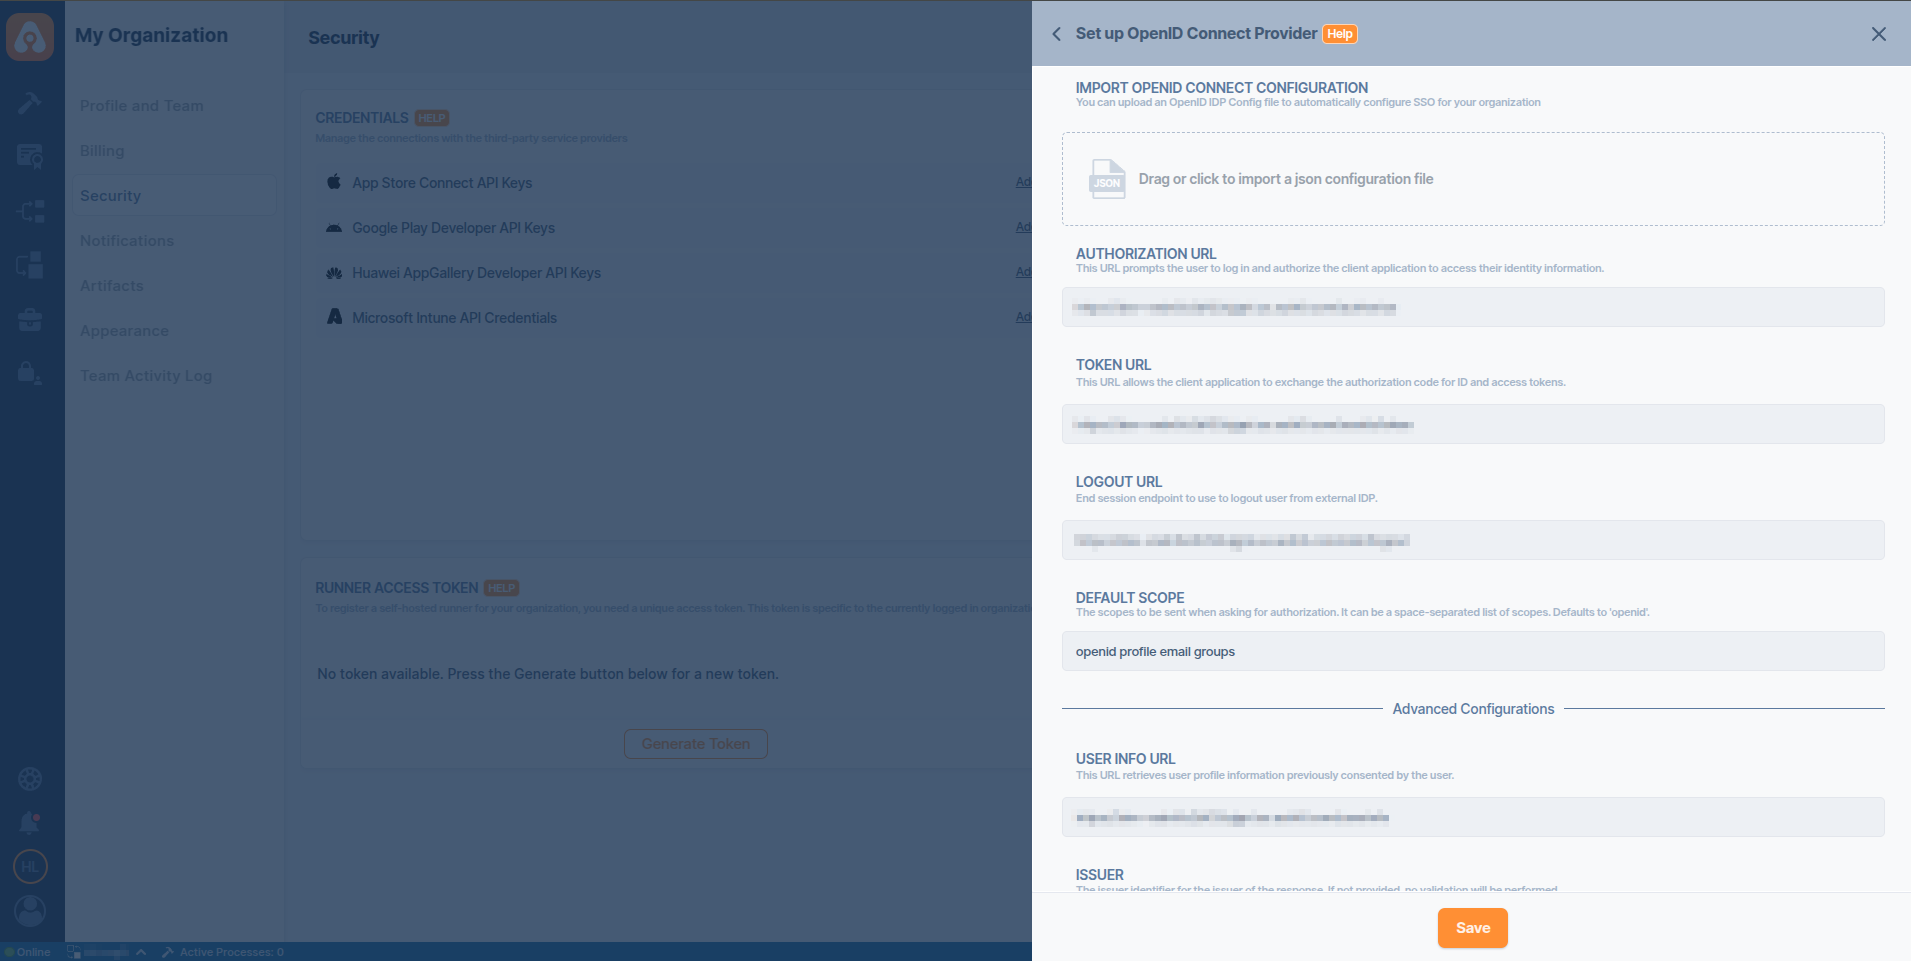
- Click the Save button.
Okta (SAML)
Okta (SAML)
Step 1. Create Groups and Assign to the Application
- Navigate to the Directory > Groups section in the Okta Dashboard. Create the groups for map to Appcircle organizations and roles. In this guide, we’ll use Okta groups to manage user groups and roles.
- Assign users to groups.
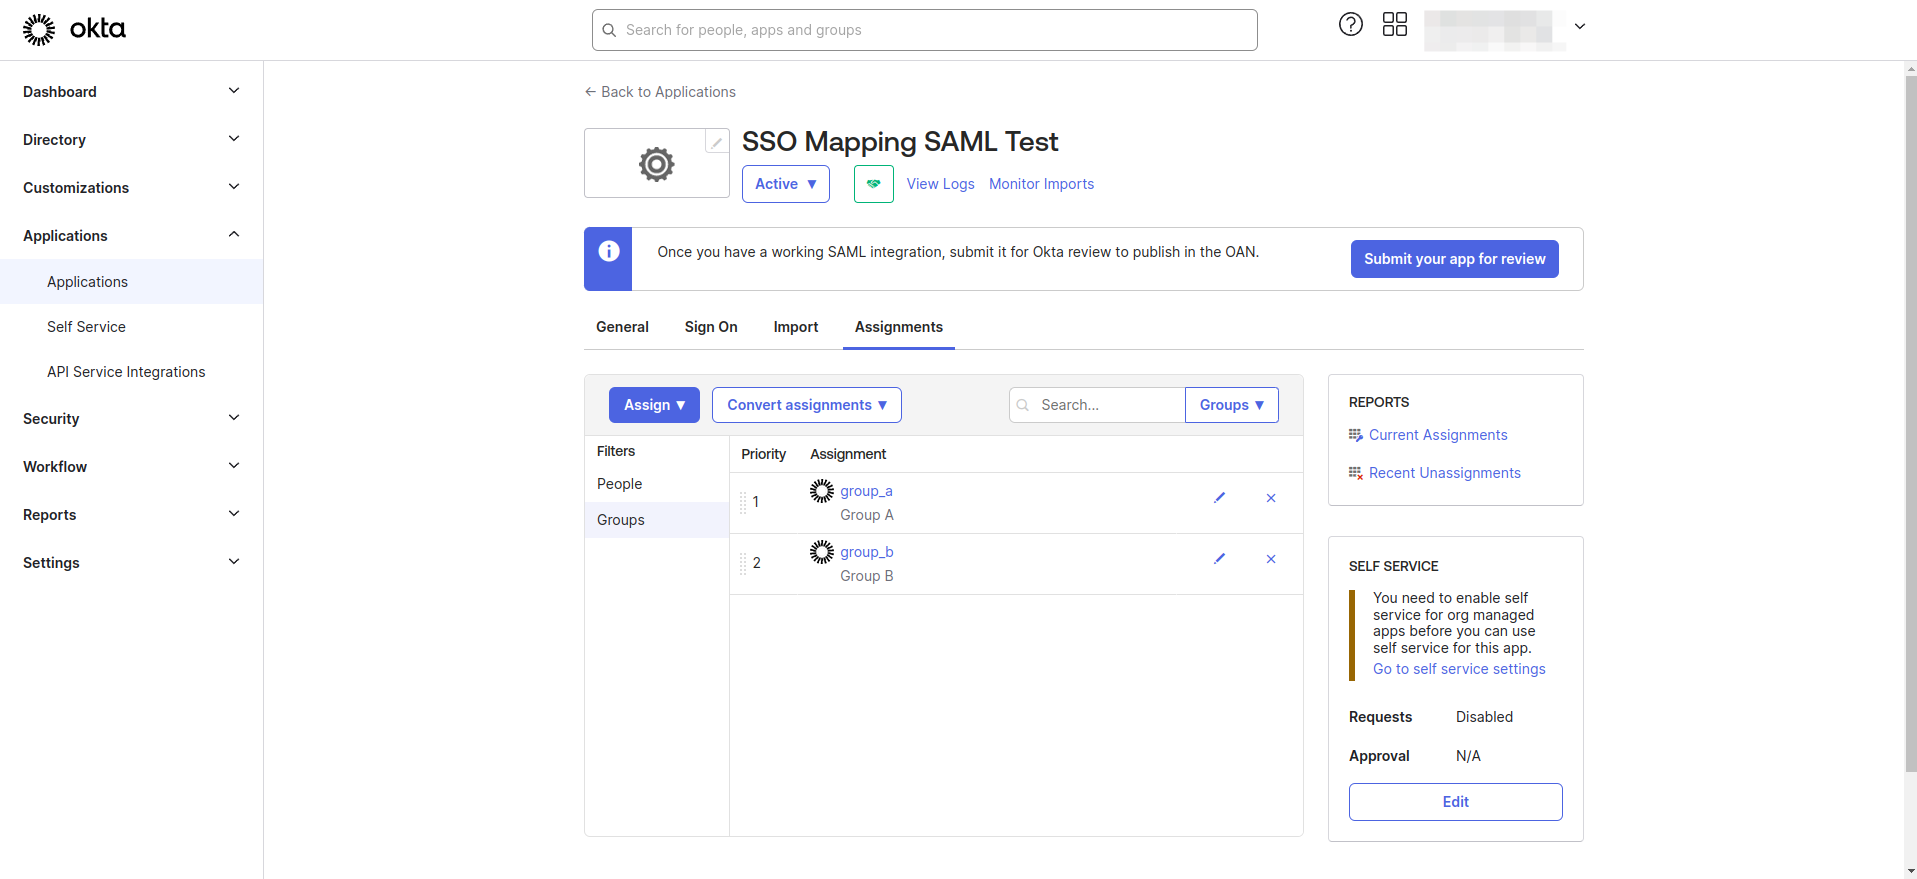
- Navigate to the Applications > Applications section from left navigation menu.
- Select your application from the list
- Navigate to the Assignments tab.
- Assign the previously created groups to the application.
Step 2. Define Group and Role Attributes
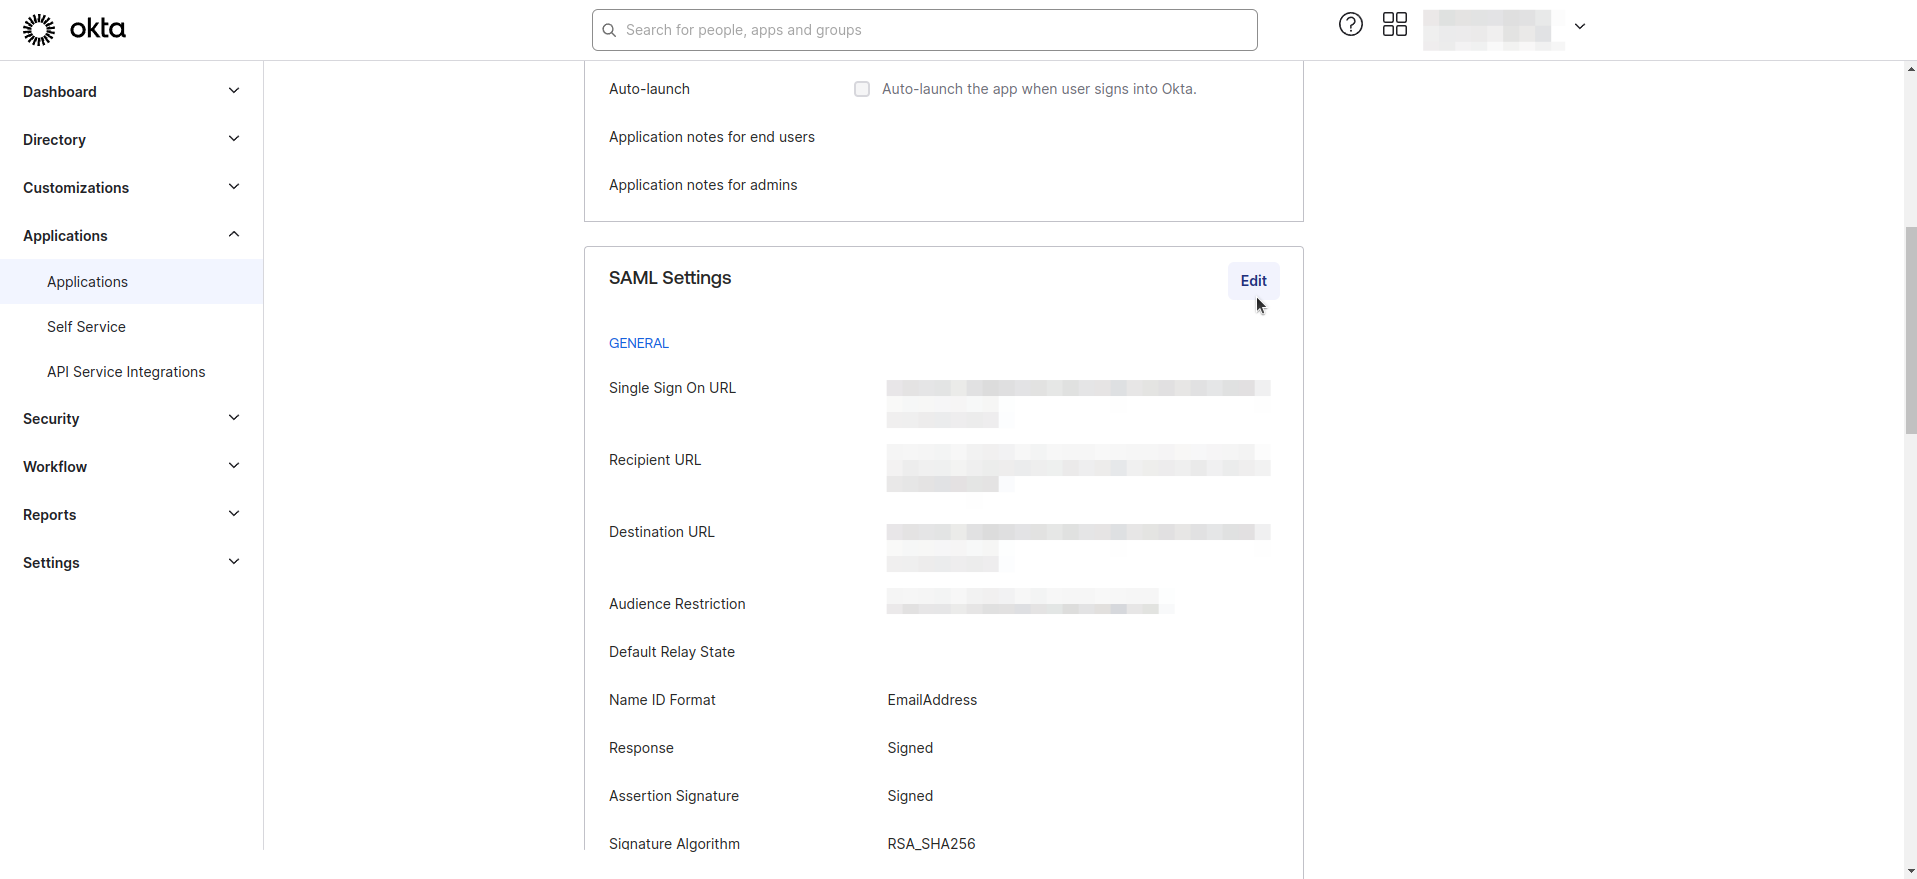
- Navigate to the Applications > Applications section.
- Select your application from the list and navigate to the General tab.
- Click on Edit in SAML Settings
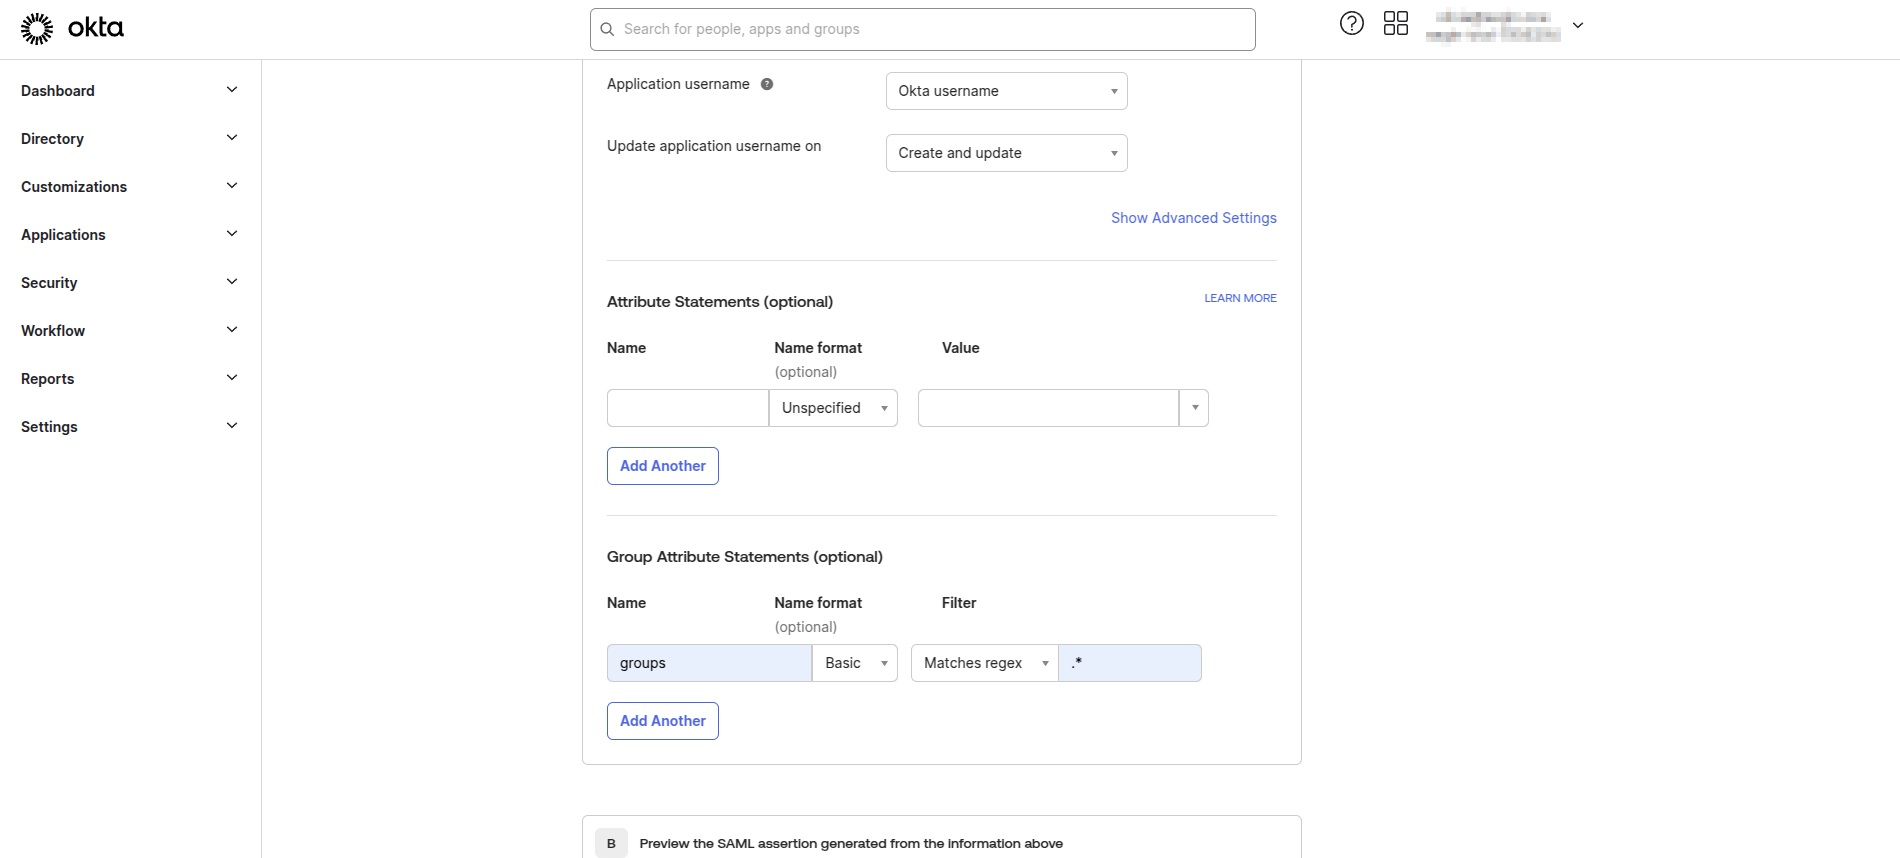
- Enter the Group Attribute statement as following configuration.
- Name: Enter "groups"
- Name format: Select "Basic"
- Filter: Select "Matches regex"
- Filter Value: Enter ".*"
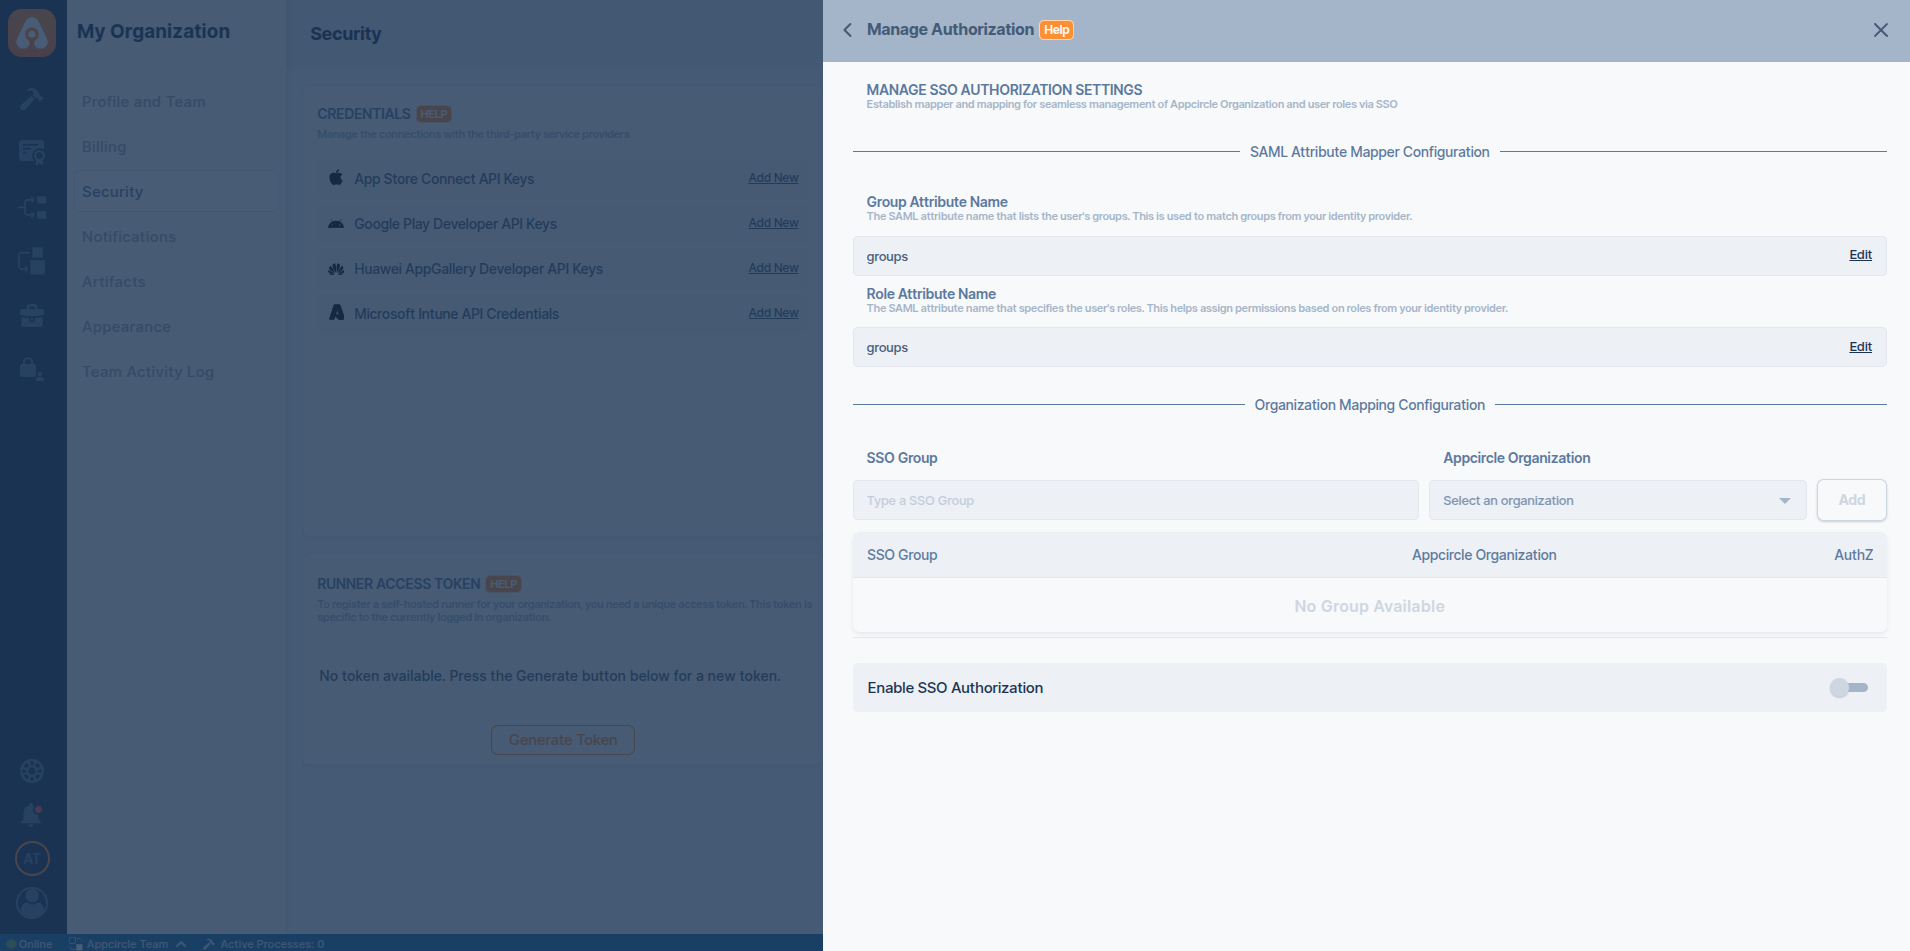
Step 3. Define Group and Role Claim in Appcircle
- Navigate to the Organization > Security > Authentications section on your dashboard.
- Select the Manage on the Appcircle SSO Login
- Select the Manage Authorization.
- Enter Group Attribute Name as
groupsand Role Attribute Name asgroups.
We use Okta groups to manage user groups and roles. Both are sent to Appcircle in one claim. If needed, you can set up a more advanced configuration with a separate claim for roles.
4. Testing and Verification
After configuring SSO Mapping, it is important to test the integration to ensure that users have the correct permissions based on their groups and roles. This section covers how to test the integration.
When a user logs into Appcircle, their organization membership and roles are updated according to the configured Group and Role Mapping.
- Open an incognito window in your browser to avoid any cached sessions interfering with the test.
- Use SSO to log in to Appcircle with a test account.
- Verify if the user's organization membership and roles are updated according to the configured Group and Role Mapping.
In self-hosted deployments, the organization memberships and roles of admin users do not change with SSO authorization; they will remain the same.
Organizations must have at least one owner. After processing SSO Authorization Mapping, if there are no remaining owners in the organization, the user's role and organization membership will remain unchanged for that organization.
5. Limitations
Due to technical limitations, SSO mapping does not support automatic synchronization. Changes such as the removal of a user from the Identity Provider or updates to their groups or roles will only take effect when the user logs in to Appcircle.