How to Create an Integration
This guide outlines the process for creating a new Integration in Appcircle.
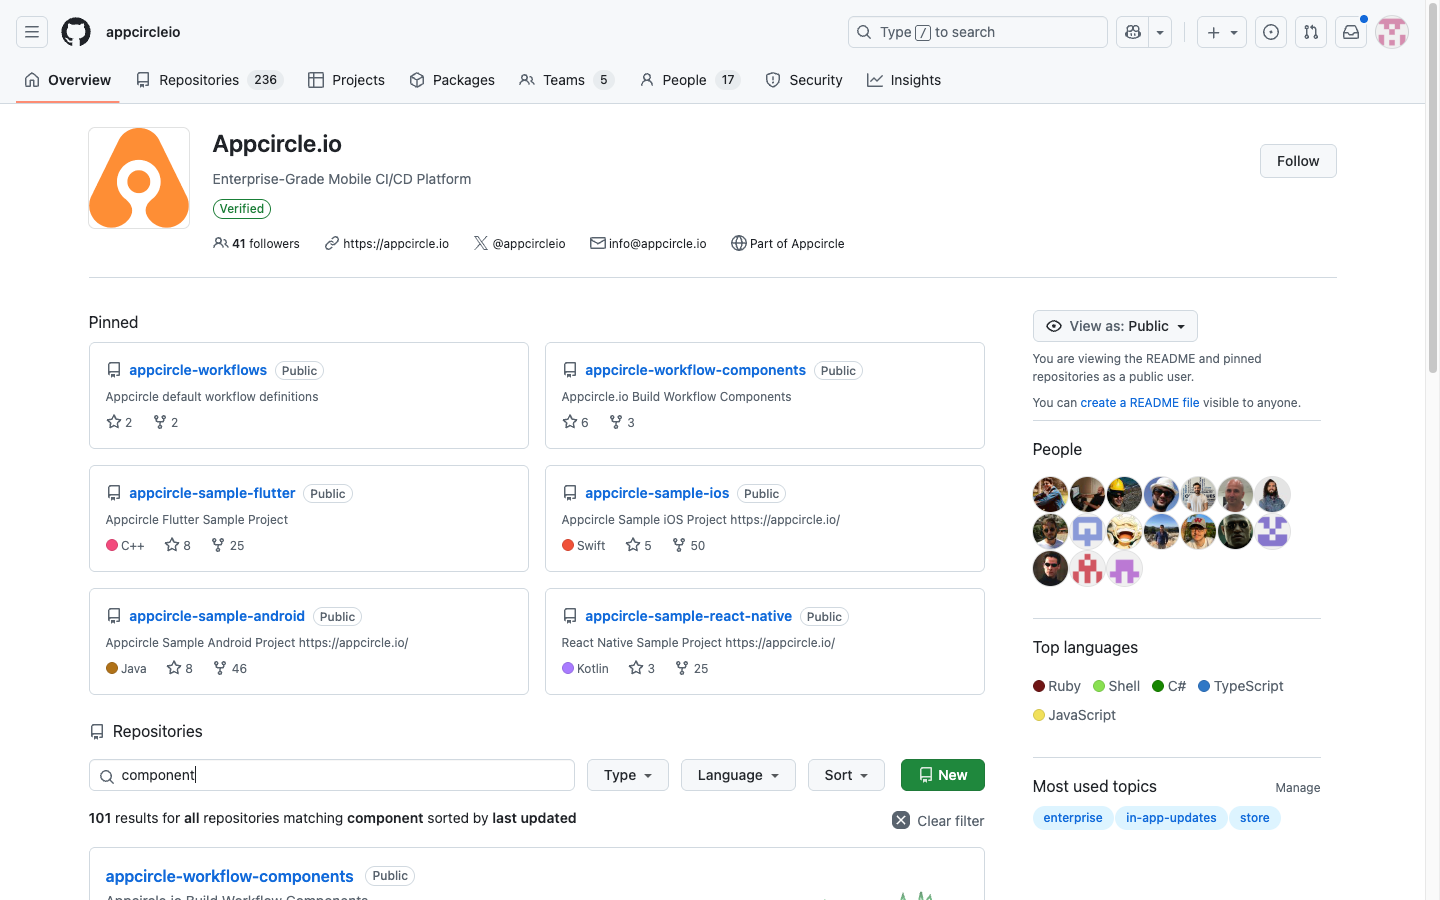
Before creating a new integration, please check the Appcircle Integrations page to ensure the integration does not already exist.
1. Repository Creation
The first phase is to create a dedicated repository where the step’s code will be managed.
1.1. Contact Appcircle Team
Before starting the development of a new integration, contributors must first get in touch with the Appcircle team. This ensures that the proposed step aligns with Appcircle’s roadmap and standards.
Contact the Appcircle Team: 🔗 Contact Appcircle Team
1.2. Create Repository in Appcircle Organization
Once the proposal is approved, the contributor should request the creation of a new repository under the appcircleio GitHub organization. All official workflow steps are maintained under this organization to ensure consistency, security, and proper maintenance.
2. Core Implementation
This section describes the core implementation details of the workflow step, including the step structure, configuration, and scripting conventions.
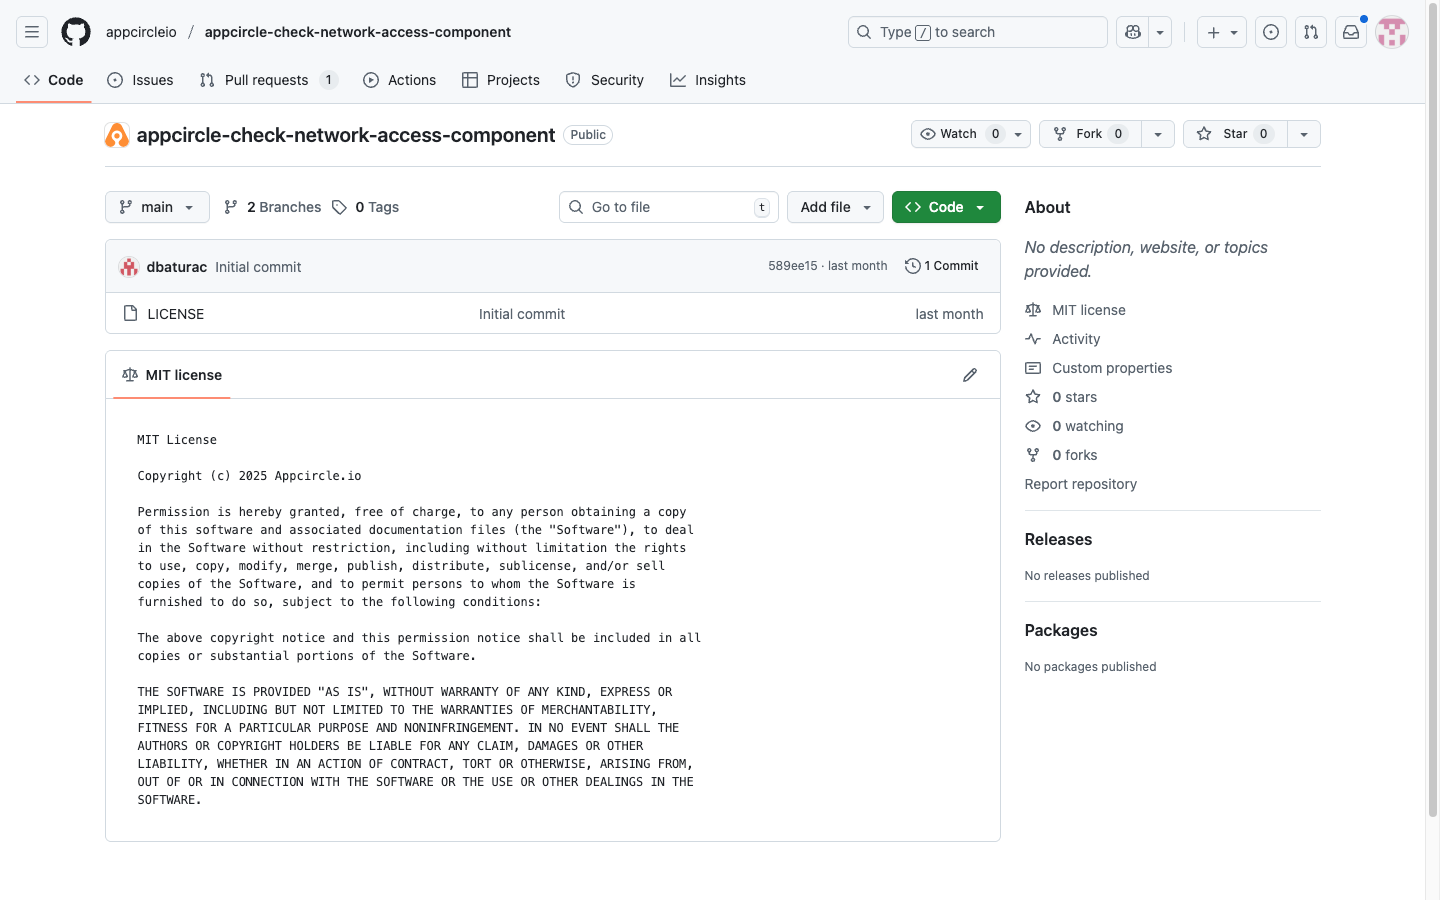
When the Appcircle team creates a repository, it will include an MIT license by default. Please do not remove or modify this file, as the license ensures openness, reusability, and legal protection for both contributors and users.
2.1 Main Code File Standards
Each workflow step must include a main execution file. Currently, Appcircle supports two languages: Ruby and Bash.
Therefore, the main file must be named either main.rb or main.sh.
2.1.1 Code Quality Requirements
All workflow steps in Appcircle are open source. Code should be easy to understand and maintain, as all users may contribute to it. Following Clean Code principles is mandatory.
2.1.2 Code Consistency Requirements
All steps must follow the same conventions for naming, file structure, and environment handling.
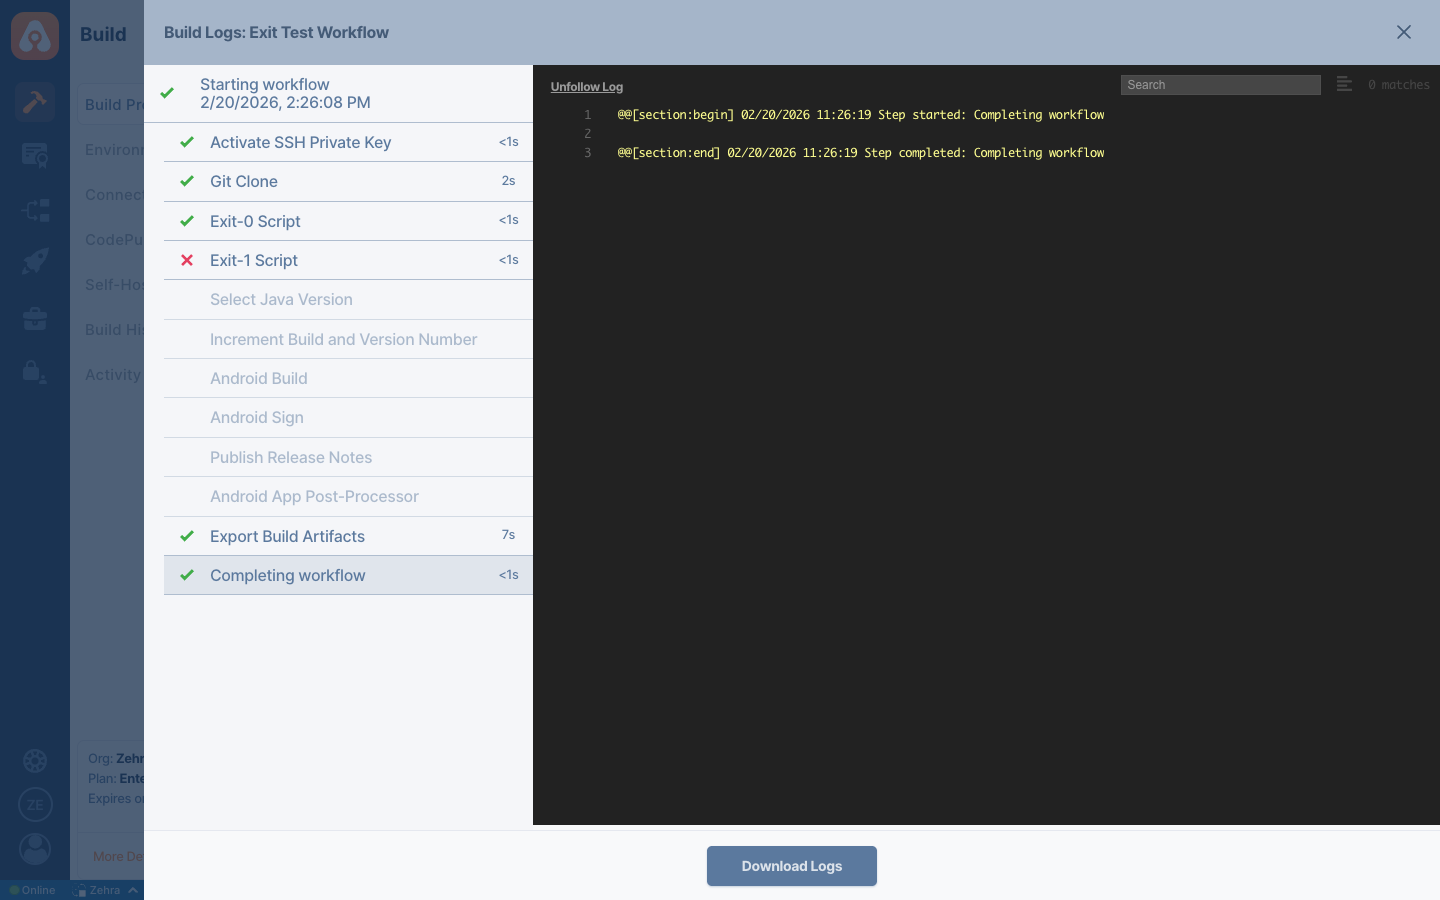
Exit Codes
All steps must use the following exit conventions:
exit 0: The step completes successfully, and execution continues to the next step.exit 1: The step fails and breaks the workflow execution.
Error Logging
To display an error message to the user, print it with the @@[error] tag:
@@[error] Your error message here
Any log printed in this format will be shown as an error message in the Appcircle interface.
Running Terminal Commands
All terminal commands must be executed through a function named run_command. This ensures consistent logging and error handling across all steps. The command must be printed with the @@[command] tag before execution.
Example run_command implementation in Ruby:
def run_command(command)
  puts "@@[command] #{command}"
  status = nil
  stdout_str = nil
  stderr_str = nil
  Open3.popen3(command) do |stdin, stdout, stderr, wait_thr|
    stdout.each_line do |line|
      puts line
    end
    stdout_str = stdout.read
    stderr_str = stderr.read
    status = wait_thr.value
  end

  unless status.success?
    abort(stderr_str)
  end
end
Environment Variables
- Save new environment variables to the
AC_ENV_FILE_PATH.
2.1.3 Logging and Output Standards
Logs must follow a color-coded system for consistency:
- Green: Success messages
- Yellow: Warnings and status updates
- Blue: Ongoing operations
- Red: Error messages
Logging patterns:
- Error messages must start with the
@@[error]tag. - Commands must start with the
@@[command]tag.
For reference:
- Example workflow step code for color usage: appcircle-android-post-process-component/main.rb
- Example workflow step code for logging patterns: appcircle-cache-pull-component/main.rb
Never access environment variables directly within your step's code. Instead, expose each required variable as a named input in your component.yaml, and set its defaultValue to the corresponding environment variable.
Why?
- Makes the step easier to test in isolation.
- Users can clearly see all required inputs without reading through the source code.
- Inputs can be overridden when needed, improving flexibility.
Example:
inputs:
  - key: AC_BUILD_NUMBER
    defaultValue: "$BUILD_NUMBER"
    title: "Build Number"
    isRequired: true
Then in your main code, read AC_BUILD_NUMBER as a regular input — not $BUILD_NUMBER directly.
2.2 component.yaml Configuration
Each step must include a component.yaml file that defines the step’s metadata, inputs, outputs, and execution details.
This file ensures the step integrates properly into the Appcircle platform.
For example, you can review how the component.yaml of the following repository is structured as follows:
Required YAML Structure
Specifies the essential fields and format of every component.yaml file must follow for proper step integration.
platform: "The projects the step operates on. Options: 'Common', 'Android', or 'iOS. If empty, it supports all platform.'"
buildPlatform: "The platforms the step operates on. Options: 'ReactNative', 'JavaKotlin', 'Flutter', 'ObjectiveCSwift'. If empty, it supports all build platform."
displayName: "The step name displayed in the workflow step list."
description: "The step description displayed in the workflow step list."
inputs:
  - key: "Defines the input key used in the main code by the step."
    defaultValue: "Default value for the input. If `editorType` is 'select', one of the options should be specified here."
    isRequired: "Options: true/false. If true selected, and value not defined, `main.rb` will fail to execute."
    title: The title displayed for this input in the step details interface.
    description: "Description displayed for this input in the step details interface."
    editorType: "Defines the type of the value field. Options: 'select', 'textarea', 'text'. Defaults to 'text' if not specified."
    options: "If `editorType` is 'select' options should be provided here. Example: 'true,false'."
    helpText: "Help text if available. This is not displayed in the interface."
  - key: ...
outputs: #if there are
  - key: "Defines the output key used in the main code by the step."
    defaultValue: "Specify the environment variable where the step output will be assigned."
    title: The title displayed for this output in the step details interface.
    description: "Description displayed for this output in the step details interface."
    helpText: "Help text if available. This is not displayed in the interface."
  - key: ...
processFilename: "ruby" # Programming language. Options: Ruby, Bash.
processArguments: "%AC_STEP_TEMP%/main.rb" # Main execution file (change to main.sh if main code is bash)
files:
  - "main.rb"  # Main execution file (change to main.sh if main code is bash)
  - "additional_files.rb" # Add here any additional files from the same repository that are used within the main code, if any.
  # For example additional files, see the,
  # [Git Clone step](https://github.com/appcircleio/appcircle-git-clone-component/blob/e5c185fd9a2657744dd7fdcd2bf1c4a2e7a356c5/component.yaml#L66)
There are two validation rules to be considered for the input:
- If
isRequired: trueand input is not provided, step execution will fail. - For
editorType: select,defaultValuemust match one of the provided options.
Always wrap the value with double quotes ("") to explicitly mark it as a string.
Even if you provide a value like beeloan, the component.yaml will send it as a string.
2.3 README.md Rules
Each step must include a README.md file to provide clear usage instructions and input/output definitions.
Follow the template below:
# Appcircle Step Title

Step description.

## Required Input Variables

- `AC_REQUIRED_INPUT_NAME`: Explanation for this required input.
- ...

## Optional Input Variables

- `AC_OPTIONAL_INPUT_NAME`: Explanation for this optional input.
- ...

## Output Variables

- `AC_OUTPUT_NAME`: Explanation for this output.
- ...

Add any additional relevant information after this section.

## Contributing

We welcome contributions to improve this workflow step. If you would like to add enhancements or fix issues, please refer to the [Appcircle Contribution Guidelines](Link to this documentation). Following these guidelines ensures consistency across all steps and helps us review and merge your contributions more efficiently.

Thank you for helping us make Appcircle better! 🙌
After completing these files, the workflow step will be ready for testing.
2.4 Unit Test Configuration
Each new integration should include unit tests to verify that the step behaves as expected before publishing.
2.4.1 Test File Structure
Place test files in a test/ directory at the root of the repository. Name your test file according to the main code language:
test/test_main.rbfor Ruby stepstest/test_main.shfor Bash steps
2.4.2 Testing Requirements
Tests must cover the following scenarios:
- Happy path: The step runs successfully with valid inputs.
- Missing required inputs: The step fails gracefully when a required input is not provided.
- Invalid inputs: The step handles unexpected or malformed values properly.
2.4.3 Running Tests Locally
Before submitting a pull request, ensure all tests pass locally:
# For Ruby
ruby test/test_main.rb

# For Bash
bash test/test_main.sh
2.4.4 Test Coverage
All critical functions in the main code file should be covered by tests. Aim for at least 80% coverage to ensure reliability and maintainability.
Once unit tests are configured and passing, the workflow step is considered complete and ready for the review and testing process.
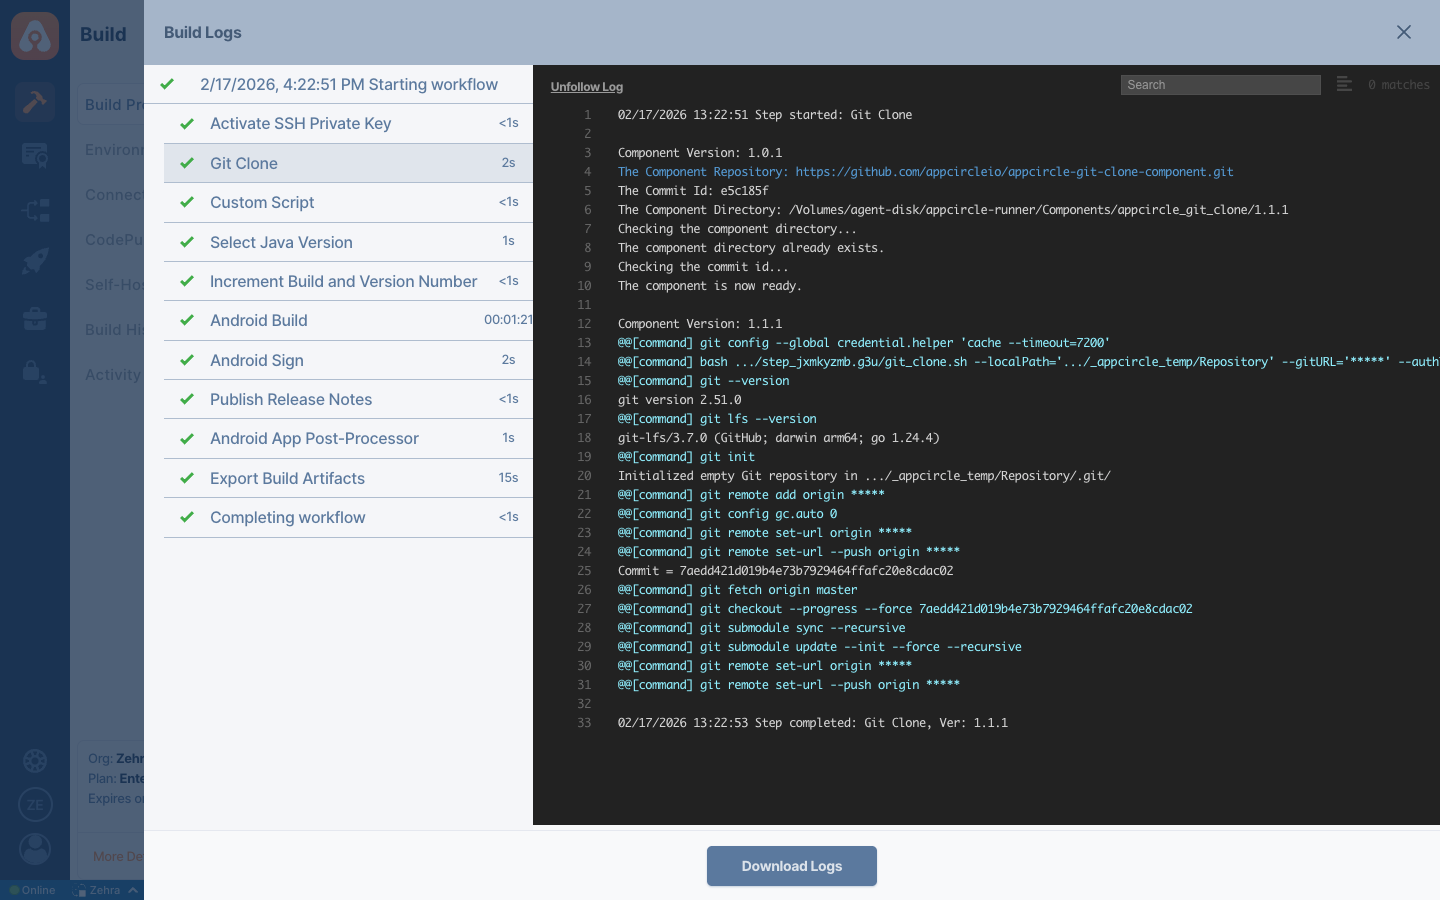
3. Testing the Step
After completing your source code, you need to follow these steps to test your custom step:
- Create your workflow and add a Custom Script to the designated location where your step should be placed.
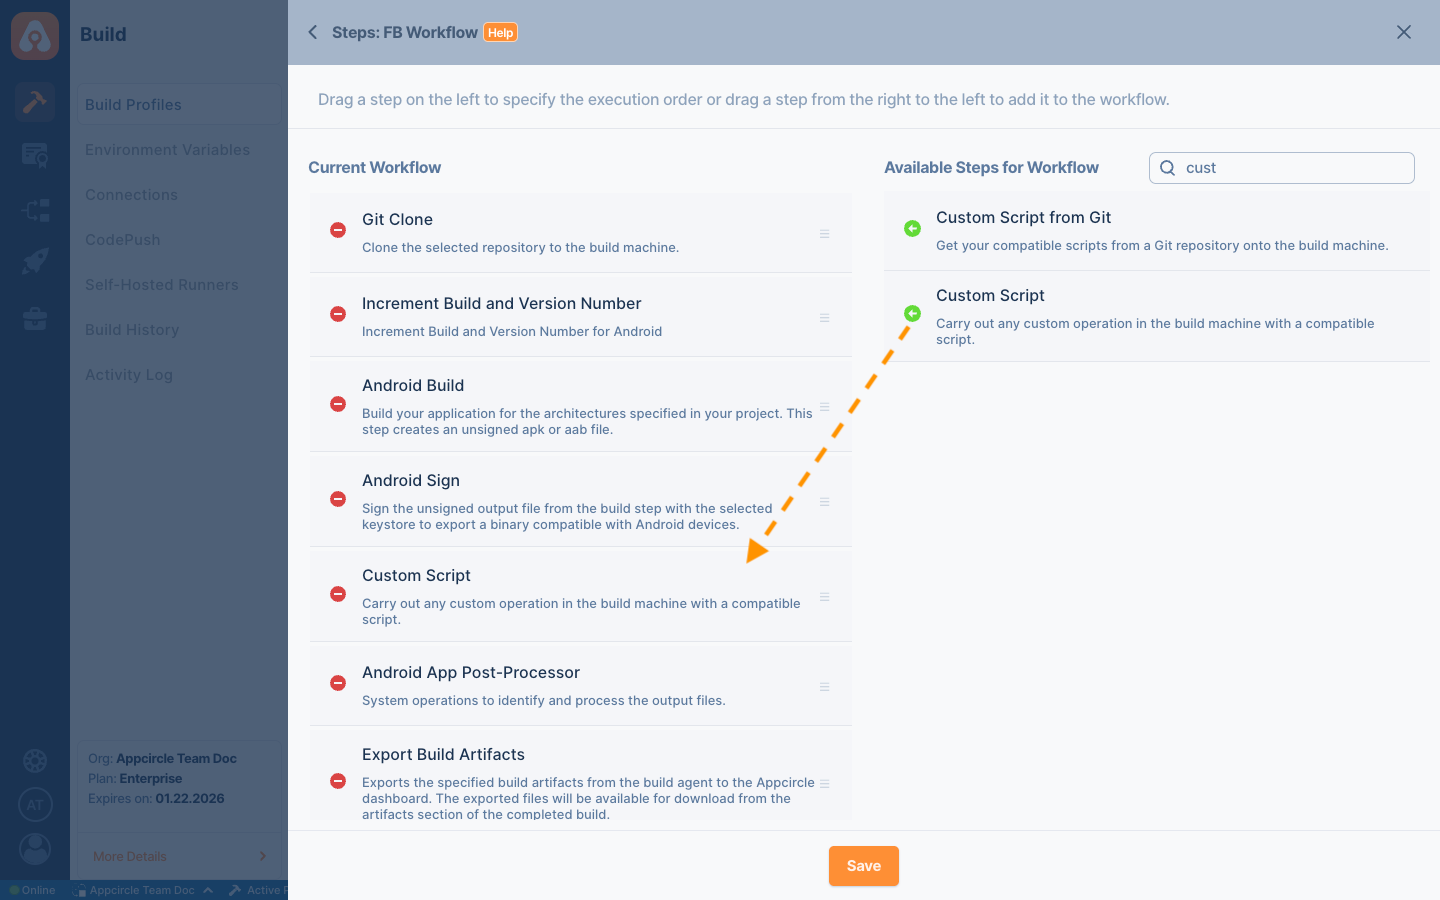
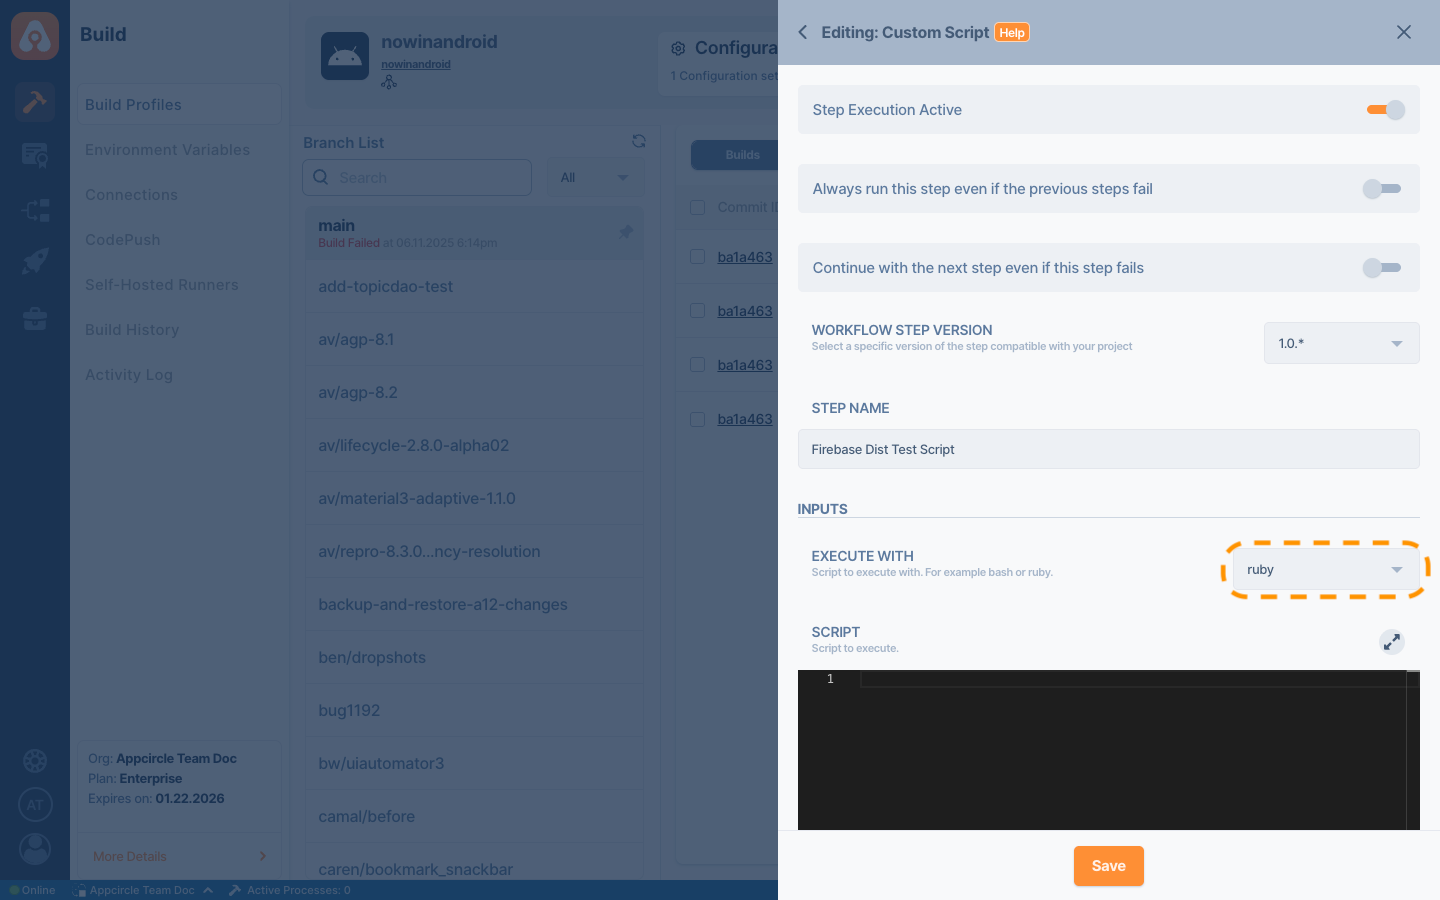
- Rename the Custom Script to reflect its purpose and functionality.

- Select the appropriate language for the Custom Script to match your main code's programming language.
- Paste your main code into the Custom Script editor.
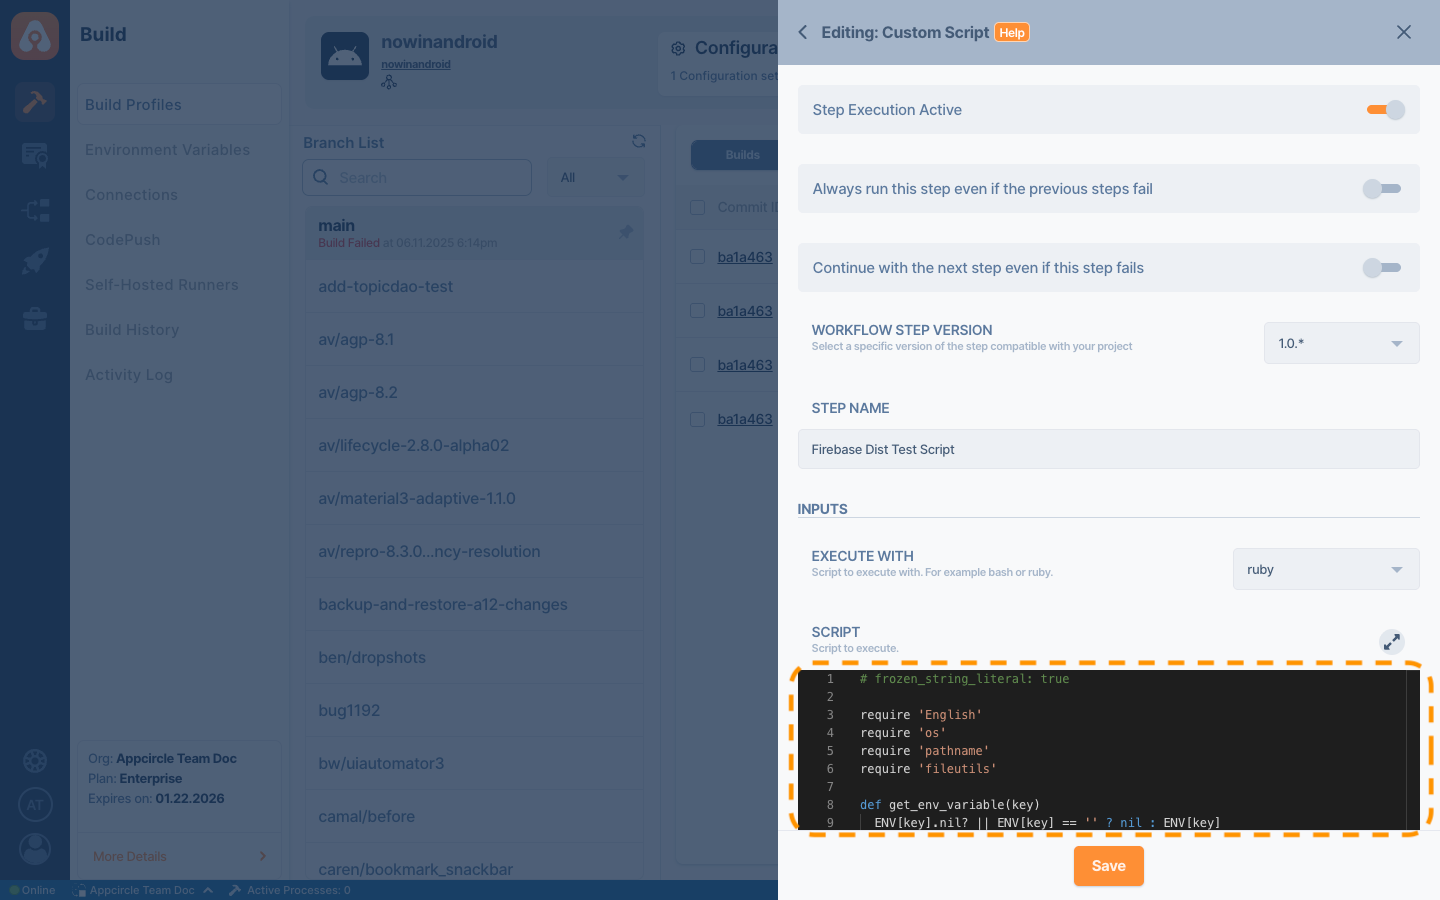
- Click the Save button.
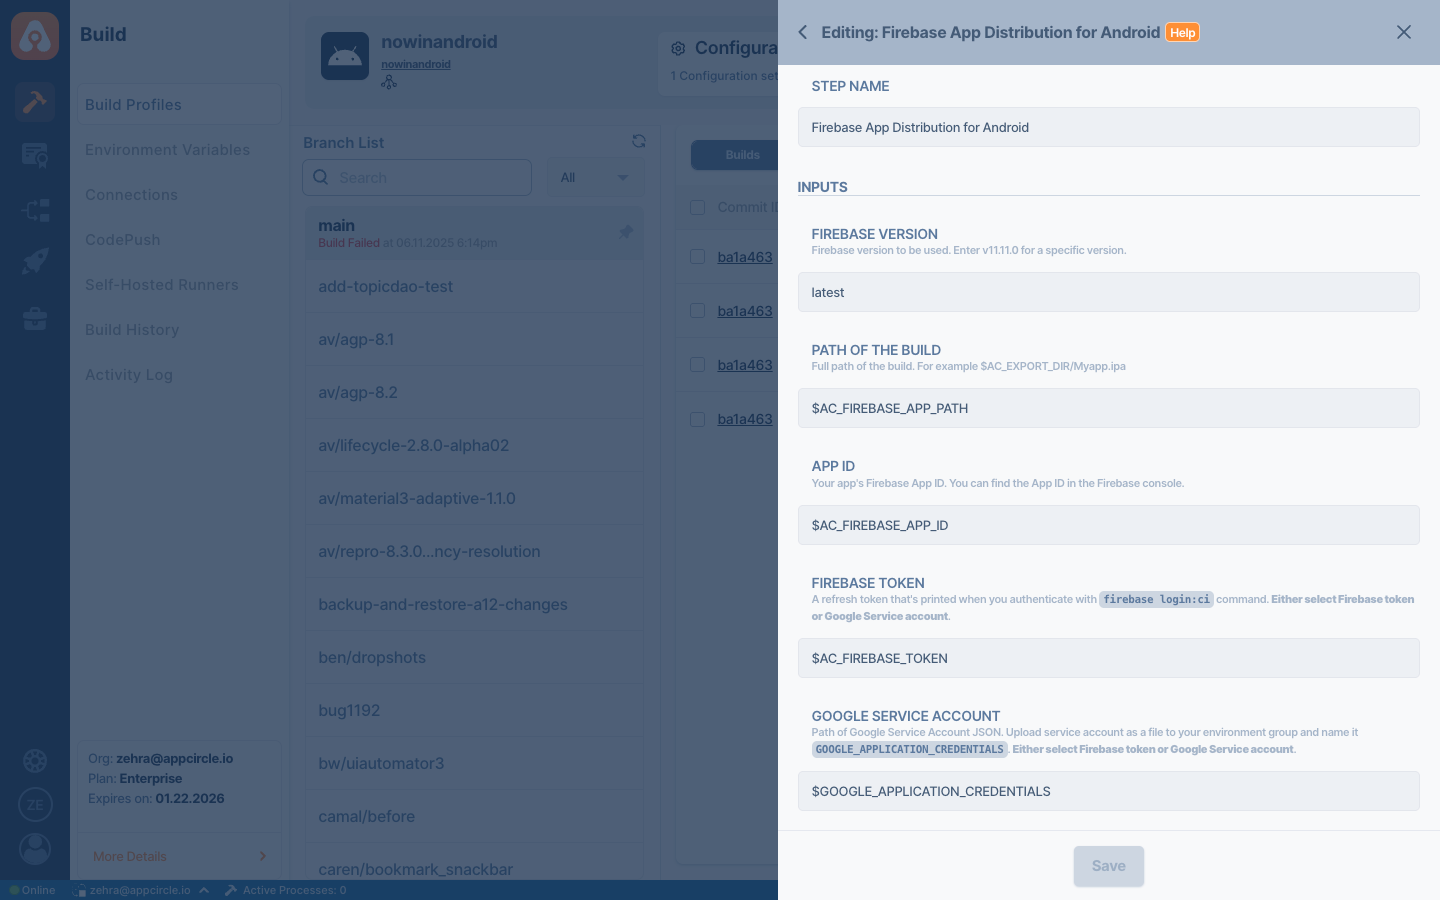
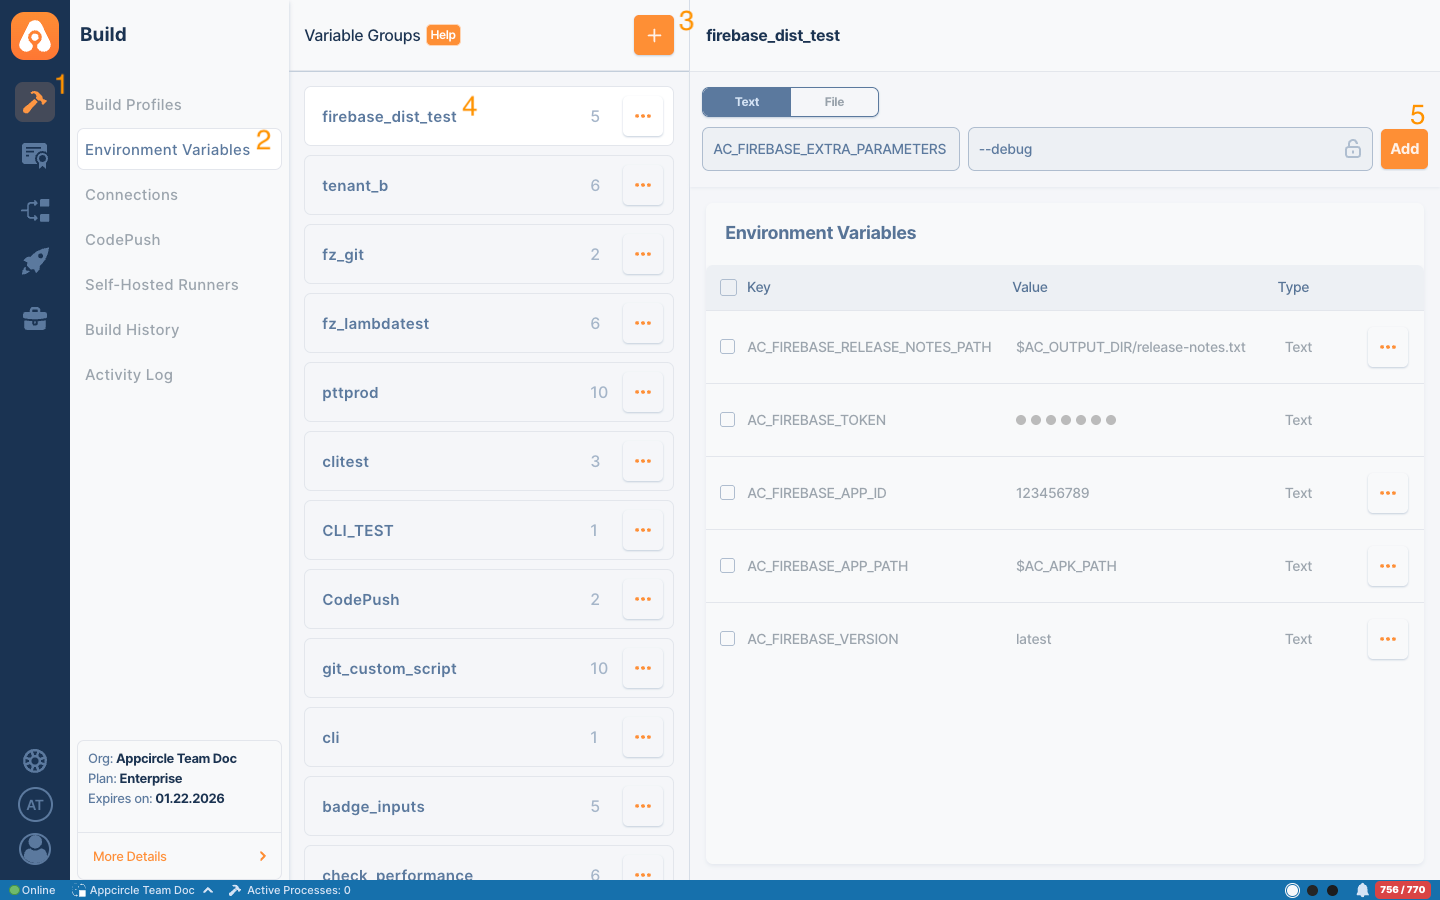
- Configure input variables (if required by component.yaml):
- Navigate to the Environment Variables page
- Create a new environment variable group for the required inputs
- Define key-value pairs for each required input parameter.
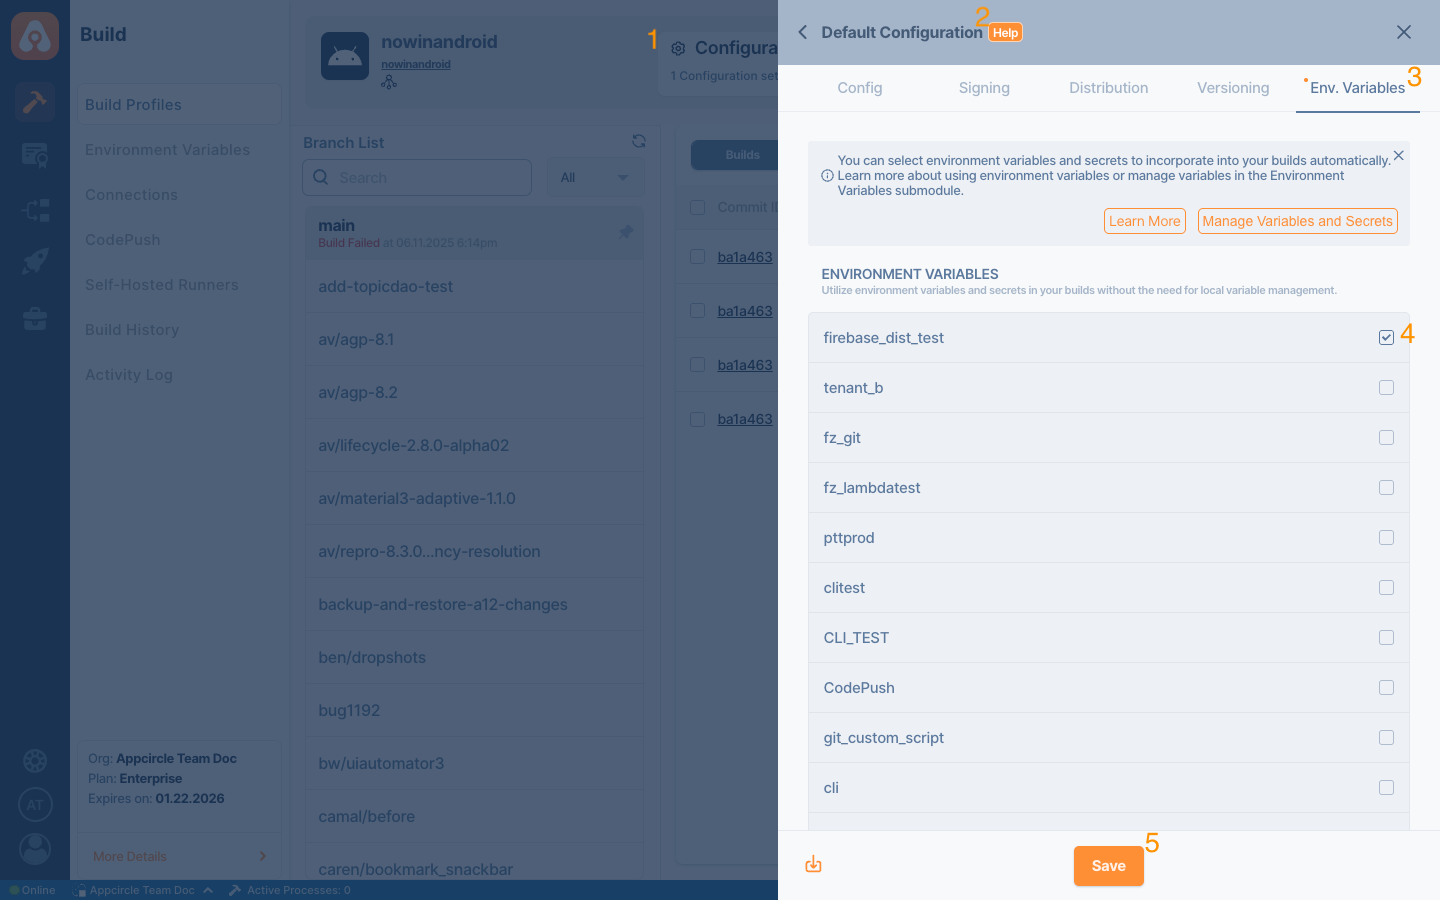
- Select the environment variable group from the Configuration that will be used to start the build.
- Start the build and monitor the execution.

3.1 Post-Testing Requirements
Once your tests are complete successfully, you must finalize the documentation explaining how to use this step effectively.
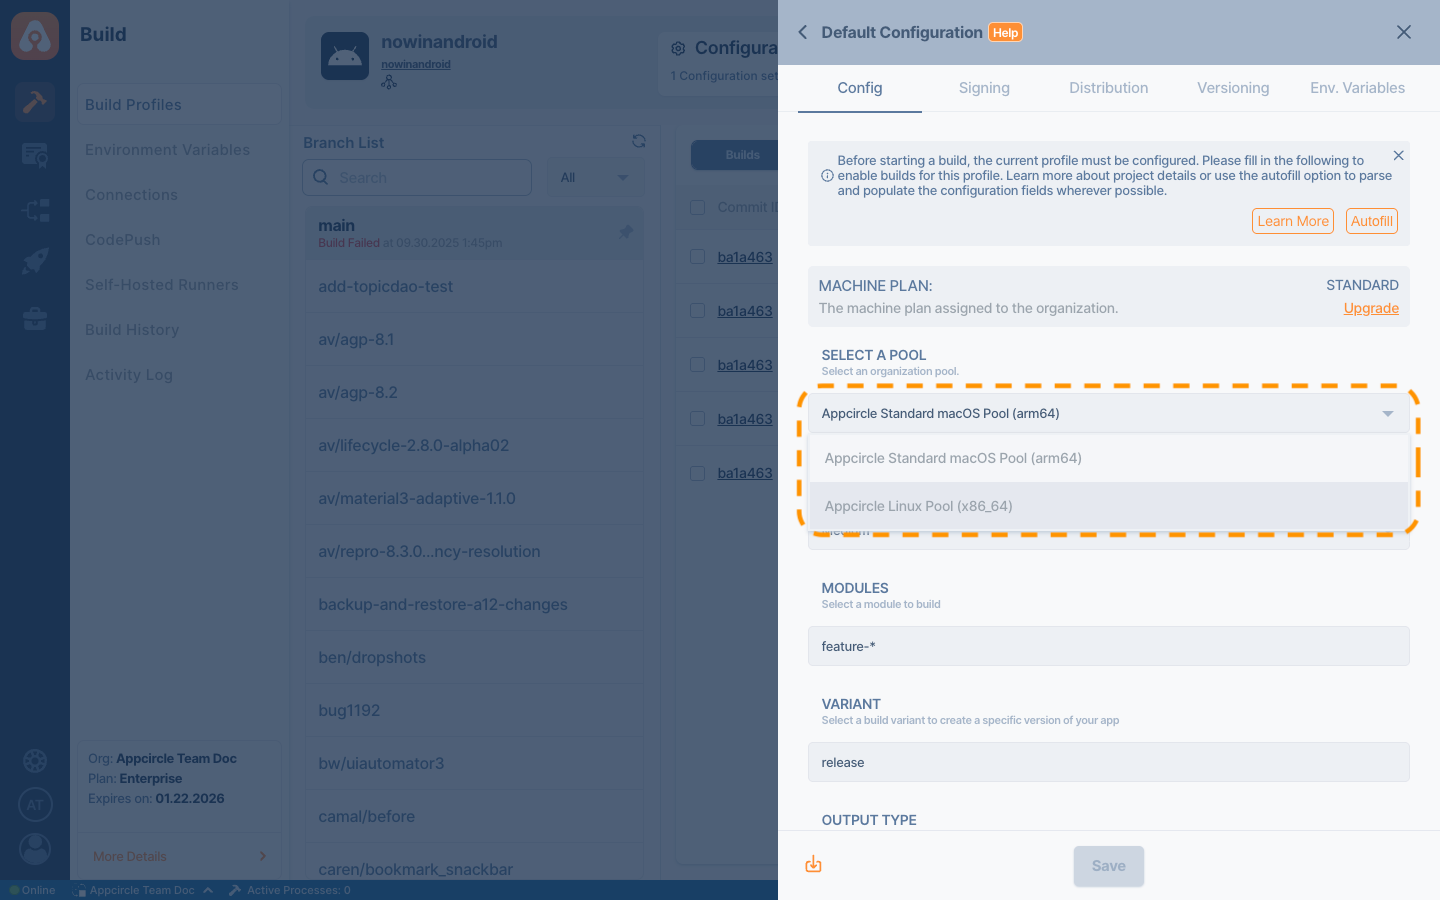
In certain scenarios, you may need to test the following additional cases:
- Cross-platform testing: If necessary, test across different pools such as React Native, Flutter, Java/Kotlin, or Swift.
- Different Operating System Testing: If necessary, test across different pools such as Linux or macOS.
- Integration testing: Test with other integrations that are likely to be used together.
3.2 Testing Checklist
Use this checklist to ensure all testing requirements are met before submitting your custom step:
- Custom Script created and configured
- Code successfully pasted and language selected
- Environment variables properly defined and selected in the Configuration
- Test execution completed without errors
- Cross-platform compatibility verified (if applicable)
- Integration with existing components tested
✅ Once these steps are successfully completed, you can proceed to the documentation.
4. Documentation
Appcircle's documentation repository is open source. You can create a pull request to this repository and request your documentation to be merged.
There are specific rules that must be followed for workflow documentation, outlined below:
4.1 Document Location
The location of your documentation depends on your step's platform compatibility:
- Cross-platform steps (all platforms) → Common Workflow Steps
- iOS-specific steps → iOS Specific Workflow Steps
- Android-specific steps → Android Specific Workflow Steps
- React Native-specific steps → React Native Specific Workflow Steps
- Flutter-specific steps → Flutter Specific Workflow Steps
Your documentation must comply with the Document Guidelines in the README to follow the latest contribution standards.
Important: File names should follow the lower-kebab-case template format.
4.2 Adding Step to Index Page
After determining your document's location, add your workflow step to the corresponding index.md page. Steps must be listed in alphabetical order by step name; find the correct position before inserting your entry. Include your step as shown below:
...
## [Step Name](Relative URL of component. e.g., /workflow/platform-name/component-name)

Brief description of what the step does.
...
4.3 Document template
For general template information, refer to the documentation README.
The step documentation template structure is as follows:
---
title: Add the title used in the component.yaml on repo.
description: Add a concise purpose for the document/component.
💬 The new tag should be added to the docs/tags.yaml file in accordance with the Tag Strategy:
💬 https://github.com/appcircleio/appcircle-docusaurus?tab=readme-ov-file#tag-strategy.
tags: [add, terms, or, keywords, relevant, to, this topic]
---

💬 Add the following line for adding screenshots seamlessly.
import Screenshot from '@site/src/components/Screenshot';

# Step Name

The introduction below the title should include general information about the component's purpose.

Add detailed information about the document in the following paragraphs if needed.

## Prerequisites

💬 Option 1: With Prerequisites
Before running the **Step Name** step, you must complete certain prerequisites, as detailed in the table below:

💬 Add a table listing dependencies with the following columns

| Prerequisite Workflow Step | Description |
|---------------------------|-------------|
| [**Prerequisite Step Name**](Relative URL of component. e.g., /workflow/platform-name/component-name) | Description of why it is needed. |
| ... | ... |


💬 Option 2: No Prerequisites

There are no prerequisites required before using the **Step Name** step.

💬 If sequential execution is required with no dependency, add it as a caution like the following.

:::caution

If [**Pre Component Name**](Relative URL of component. e.g., /workflow/platform-name/component-name) component is in the workflow, the **Component Name** must come before it.

:::

💬 Or you can prefer following caution:

:::caution

 The following steps can only be used after the **Component Name** step:
 - [**Pre Component Name**](Relative URL of component. e.g., /workflow/platform-name/component-name)
 - ...

:::

💬 Add additional necessary information, such as info or a caution box. If it is a repeating info box, etc., make it a component and reuse it.

## Input Variables

💬 If there are input variables, add the following introduction
This step contains some input variable(s). It needs these variable(s) to work. The table below gives an explanation for this variable(s).

💬 Add a screenshot link of the component input details page below the description.

💬 Include a table with these columns:
| Variable Name              | Description                                        | Status            |
|----------------------------|----------------------------------------------------|-------------------|
| `$AC_INPUT_VAR_NAME`       | Add an explanation. Include examples if necessary. | Required/Optional |
| ...                        | ...                                                | ...               |

## Output Variables

💬 If there are output variables, add the following introduction
The output(s) resulting from the operation of this component are as follows:

💬 Include a table with these columns:
| Variable Name               | Description                                        |
|-----------------------------|----------------------------------------------------|
| `$AC_OUTPUT_VAR_NAME`       | Add an explanation. Include examples if necessary. |
| ...                         | ...                                                |

💬 If there is no output variable, ignore this header. However, what the component provides as output can be added with a note box or info box.

---

💬 Include necessary information about the source code.
To access the source code of this component, use the following link:

https://github.com/appcircleio/appcircle-x-y-z-component.git

---

## FAQ

### How can I solve the `error message keywords`?

### **Problem Description**
Provide a brief and precise explanation of the error and the context in which it occurs.

### **Error Message Example (If there is)**
If the error message is specific, include it within code blocks for clarity.

### **Possible Causes**
List the possible root causes for the error if known.

### **Possible Solutions**
- Provide step-by-step solutions to resolve the issue.
- Include command-line examples or configuration file changes if needed.

### **Additional Tips (Optional)**
Mention helpful practices or additional checks.
Once you have filled out this template according to your workflow, you can submit your document for review.
Please do not forget to remove any comment lines starting with "💬".
5. Create Content for the Integration Page
The newly added integration must be listed on the Appcircle Integrations page in the same format as existing integrations available at

To enable the relevant person on the Appcircle side to complete this addition, the integration content must be included in the pull request, either as
- A dedicated file, or
- A clearly formatted PR comment.
The content should strictly follow the structure below:
# Integration Name

Short description of the integration and its purpose.

## Key Benefits
**Feature 1**: Description

**Feature 2**: Description

...

## Points to Consider
**Consideration 1**: Description

**Consideration 2**: Description

...

## FAQs

### Question 1
Answer

### Question 2
Answer

...
Notes
- The Integration Name should be clear and consistent with the product or service name.
- Descriptions should be concise, technical, and user-focused.
- All sections are required to ensure consistency across the Integrations page.
6. Review & Deployment Process
After completing your step implementation and documentation, inform the Appcircle team. The team will review and test both the code and the documentation. During this process:
- Code Review: The team will evaluate your component's functionality, performance, and adherence to best practices.
- Documentation Review: All documentation will be checked for clarity, completeness, and consistency with existing standards.
- Testing Phase: Comprehensive testing will be conducted to ensure compatibility and reliability.
- Communication: You may be contacted for clarifications, additional information, or requested modifications.
What to Expect
- Response Time: Initial review feedback is typically provided as soon as posible.
- Collaboration: Be prepared to iterate on feedback and make necessary adjustments.
- Final Approval: Once all requirements are met, your contribution will be approved for deployment.
🎖️ Thank you for your contribution to the Appcircle community!
We appreciate your effort in expanding our platform's capabilities and helping fellow developers succeed.