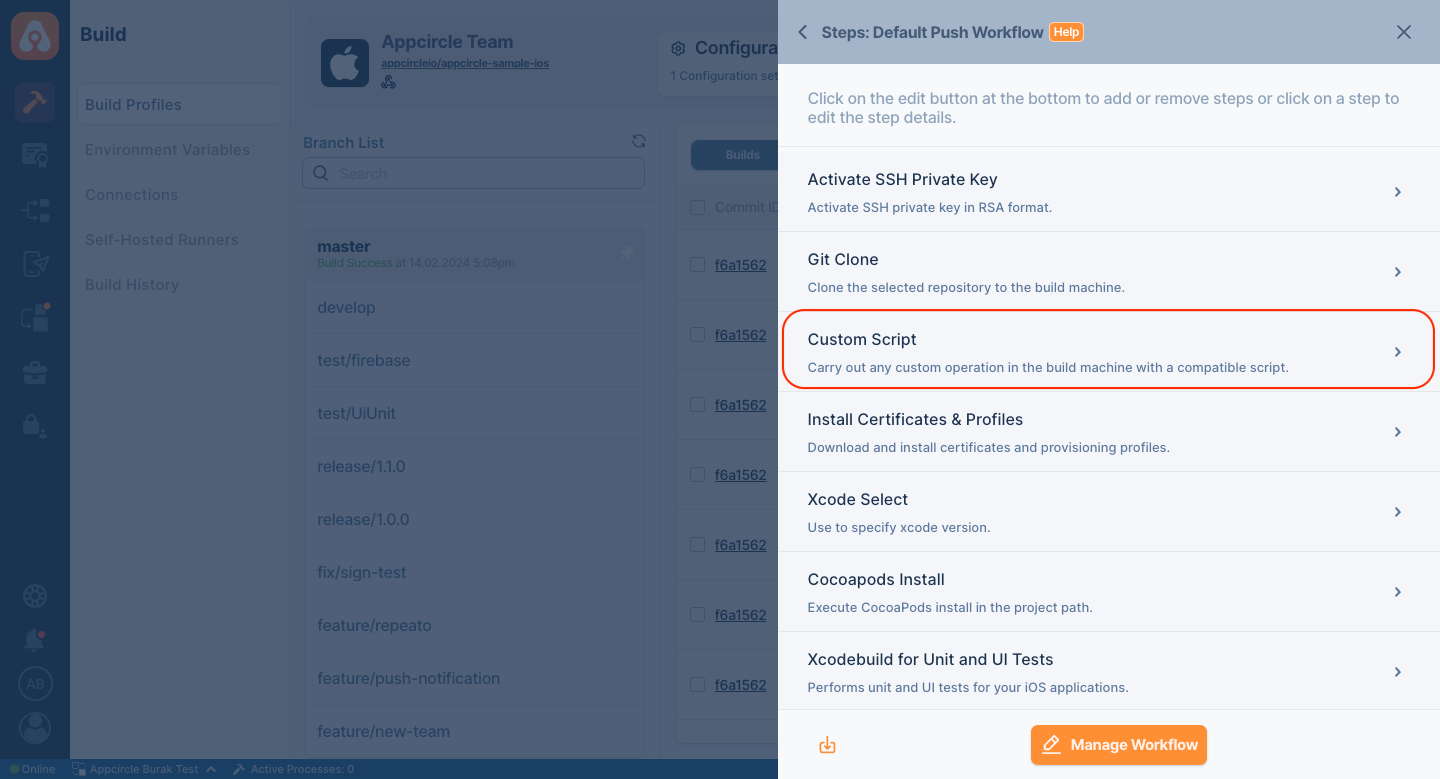
Custom Script
You can use Custom Script steps for additional functionalities in your builds. Appcircle will run the commands in your custom scripts and perform the specified actions. These scripts will be run on the runner and you can use any functionality of the build environment as you need.
Prerequisites
There are no prerequisites required before using the Custom Script step.
Note that you can put the Custom Script component anywhere you want in the workflow. This step is used to add different capabilities to the existing workflow.

Input Variables
This step contains some input variable(s). It needs these variable(s) to work. The table below gives explanation for this variable(s).

If you need to use sensitive variable in your script, please do not use these sensitive variables such as Username, Password, API Key, or Personal Access Key directly within the step.
We recommend using Environment Variables groups for such sensitive variables.
| Variable Name | Description | Status |
|---|---|---|
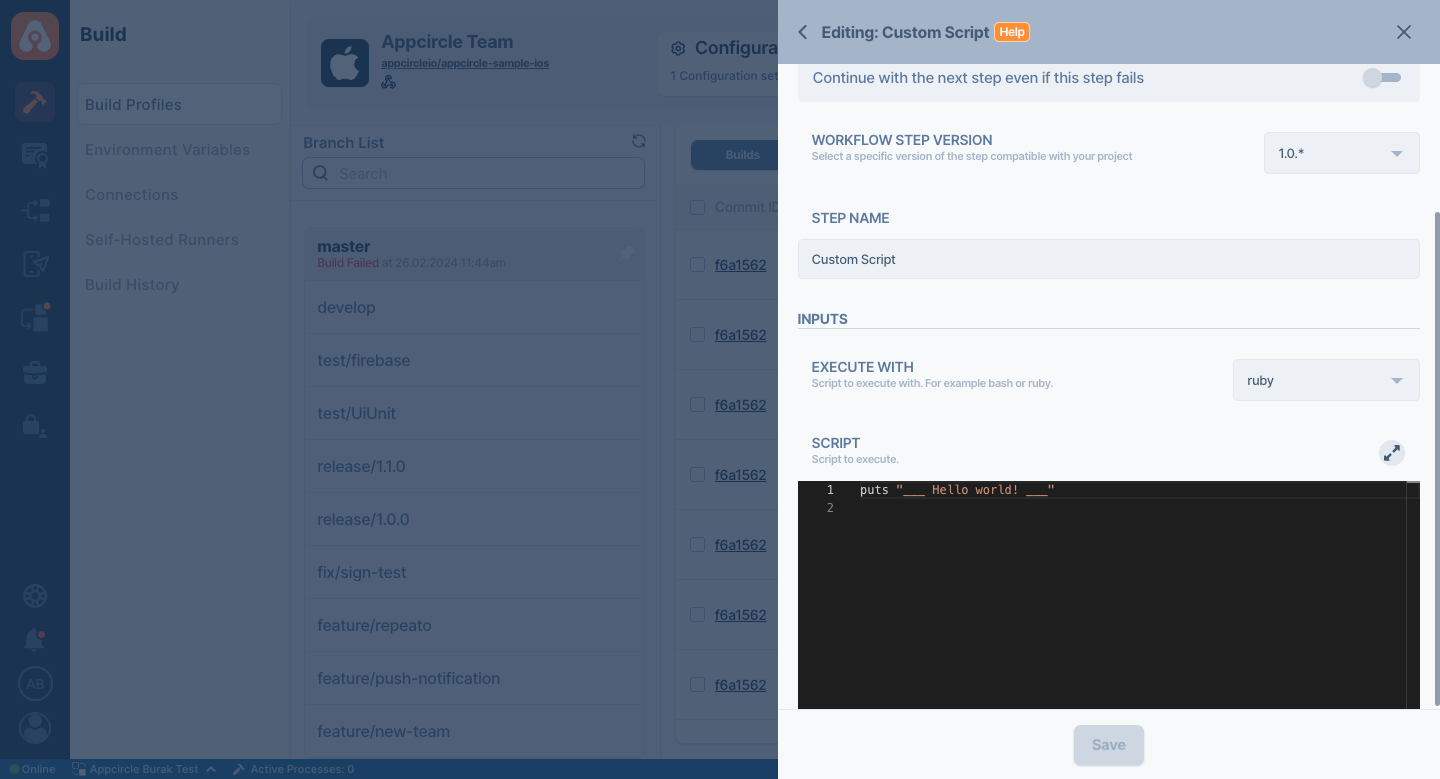
Execute | You can run your script as Bash, Ruby, Python, or Nodejs, based on the selected Execute With environment. | Required |
Script | With the Script input variable, you can add the script you want to run and run it directly in the selected language. If you leave this input blank, it will proceed to the next step without taking any action. | Optional |
Note that the Script area works according to the selected language variable. If you want to run a script in any language, make sure that you select the language correctly.
To access the source code of this component, please use the following link:
FAQ
How to change Java version
Appcircle currently has OpenJDK 17 (default), OpenJDK 8, OpenJDK 11 and OpenJDK 21.
Android Build step uses OpenJDK 17 as default JDK version.
To switch JDK versions, you can now use the dedicated Select Java Version component, so there is no need to use Custom Script for this task. For further details on this component, refer to the documentation:
However, if you prefer to update or improve it manually on Custom Script, the source code is available here:
How to install a new package to the build machine?
You can use the compatible package managers to install packages.
For the macOS build machines for iOS builds, _brew _is a commonly used package manager with commands like brew install maven
For the Linux (Debian) build machines for Android builds, apt-get can be used for 3rd party packages such as apt-get -y install maven
How to change the package name/application ID dynamically?
With custom scripts, you can edit the Info.plist and the build.gradle files.
- iOS
- Android
cd $AC_REPOSITORY_DIR/Your-Target-Folder
/usr/libexec/PlistBuddy -c "Set :CFBundleIdentifier io.myapp" "./Info.plist"
cd $AC_REPOSITORY_DIR/app
sed -i '' 's/old-value/new-value/g' build.gradle
How to access a file in the repository directory?
For each step in the workflow, you can view the input and output variables in the step configuration.
The repository directory is an output of the Git Clone step and its patch can be accessed with the $AC_REPOSITORY_PATH environment variable by any step added after the Git Clone step. An example is as follows:
cd $AC_REPOSITORY_DIR
cat README
How to a add a file as a downloadable build artifact?
You can add any file to the output directory that contain the build artifacts using the $AC_OUTPUT_DIR environment variable. An example is as follows:
cd $AC_REPOSITORY_DIR/app/build/reports/
mv lint-results* $AC_OUTPUT_DIR/
How to break pipeline on low test coverage
This document provides a sample custom script written in Ruby that can be integrated into your CI/CD pipeline to enforce a minimum test coverage threshold. The script is designed to break the pipeline if the covered test result falls below a specified percentage.
Please note that this custom script must be placed after the Test Reports step in the workflow.
require 'json'

def env_has_key(key)
    !ENV[key].nil? && ENV[key] != '' ? ENV[key] : abort("Missing #{key}.")
end

output_dir = env_has_key('AC_OUTPUT_DIR')

def read_json_file(test_result_file_path)
  JSON.parse(File.read(test_result_file_path))
end

def extract_line_coverage(json_data)
  json_data['coverage']['lineCoverage']
end

begin
test_result_file_path = "#{output_dir}/test_results.json"
json_data = read_json_file(test_result_file_path)
line_coverage = extract_line_coverage(json_data)

puts "Current Line Coverage: % #{line_coverage * 100}"

min_coverage = 2.0
puts "Minimum coverage percentage: #{min_coverage}"

if (line_coverage * 100) < min_coverage
    puts "Coverage is #{line_coverage} and below minimum coverage percentage given #{min_coverage}. \nExiting."
    exit (1)
else
    puts "Coverage is above the threshold. It is clear."
end

rescue StandardError => e
  puts "An error occurred: #{e.message}"
end
Please feel free to edit the following variables according to your own requirements:
test_result_file_path: The file path of the test result file from which to retrieve the covered percentage value.min_coverage: The minimum percentage required for the pipeline to continue without breaking.
How to use environment variables along with the sudo command?
Both user-created and Appcircle-reserved environment variables can be used within a custom script with any required command. But, by default, commands that are triggered with sudo will not reach them since the user scope is changed.
In order to use all user environment variables with sudo, you should add the -E argument to the sudo command. The -E (preserve environment) option indicates to the security policy that the user wishes to preserve their existing environment variables.
For instance, you can check the list of environment variables in the build pipeline using the command below.
sudo -E printenv
How can I send a custom email?
Appcircle provides a ready-to-use email structure in the Testing Distribution and Publish modules. This structure varies across the two modules. If desired, the user can customize this structure by using the Custom Script below to send their own custom email.
The following Bash script is set to use a Gmail SMTP Server. For more information, please visit Gmail SMTP Server documentation.
# Set SMTP server
CS_HOST="smtp.gmail.com"
CS_PORT="587"
CS_ACCOUNT="gmail"

# Make sure to replace CS_EMAIL, CS_USERNAME, and CS_PASSWORD with your account details
CS_EMAIL="your-email-address@gmail.com"
CS_USERNAME="your-email-address@gmail.com"
CS_PASSWORD="your-email-password"

# Set email details
CS_EMAIL_SUBJECT="Test Email Subject"
CS_EMAIL_TO="recipient-address@mail.com,recipient-2-address@mail.com"
# This part will be used for visualization
CS_EMAIL_FROM="Sender Name <sender-address@gmail.com>"
CS_EMAIL_BODY="This is the body of the sent email."
# Set TLS and SSL usage
CS_USE_TLS="True"
CS_USE_SSL="False"

# Detect operating system
os=""
if uname -a | grep -iq "darwin"; then
    os="darwin"
elif uname -a | grep -iq "linux"; then
    os="linux"
fi

# Create the .msmtprc file with appropriate permissions
cat <<EOF > ~/.msmtprc
defaults
auth on
tls on
EOF

# Check if OS is supported and install necessary packages
if [ "$os" == "darwin" ]; then
    if ! command -v brew > /dev/null 2>&1; then
        echo "Can't find brew installation; make brew command visible or install homebrew and try again."
        exit 1
    fi
    brew install mailutils
    brew install msmtp
    echo "set sendmail=/usr/local/bin/msmtp" | sudo tee -a /etc/mail.rc
    { echo -n "tls_fingerprint " && msmtp --serverinfo --tls --tls-certcheck=off --host=$CS_HOST --port=$CS_PORT | egrep -o "([0-9A-Za-z]{2}:){31}[0-9A-Za-z]{2}"; } >> ~/.msmtprc
elif [ "$os" == "linux" ]; then
    if ! command -v apt > /dev/null 2>&1; then
        echo "Apt is not installed; install apt and try again."
        exit 1
    fi
    apt-get update
    apt-get install -y mailutils msmtp msmtp-mta
    echo "tls_trust_file /etc/ssl/certs/ca-certificates.crt" >> ~/.msmtprc
else
    echo "Unsupported OS: $os. Darwin or Linux was expected."
    exit 1
fi

cat <<EOF >> ~/.msmtprc
logfile ~/.msmtp.log
account $CS_ACCOUNT
host $CS_HOST
port $CS_PORT
from $CS_EMAIL
user $CS_USERNAME
password $CS_PASSWORD
account default: $CS_ACCOUNT
EOF

# Restrict permissions for the .msmtprc file to avoid security issues
chmod 600 ~/.msmtprc

# Cleanup .msmtprc whether script ends with success or failure
function cleanup {
  cat /dev/null > ~/.msmtprc
}
trap cleanup EXIT

# Send email
echo "From: $CS_EMAIL_FROM
To: $CS_EMAIL_TO
Subject: $CS_EMAIL_SUBJECT
$CS_EMAIL_BODY" | msmtp --debug --from=$CS_EMAIL -t $CS_EMAIL_TO
This script is written in Bash. When running with Custom Script, you need to set the Execute With parameter as Bash. For more information, please visit the Custom Script Input Variables documentation section.
When using your own SMTP server credentials for the three variables below, using Environment Variables is strongly suggested since this prevents sensitive information, such as passwords, from being exposed to unauthorized individuals.
For more detailed information, please refer to the Environment Variables documentation.
- $CS_EMAIL: SMTP Server email address.
- $CS_USERNAME: Sender email address.
- $CS_PASSWORD: Sender email address password.
Otherwise, to send an email, you need to have some information, such as the email subject, sender email, and recipient email. You can use these parameters to:
- $CS_EMAIL_SUBJECT: Subject of sending email
- $CS_EMAIL_TO: Recipient email address.
- $CS_EMAIL_FROM: Sender email address.
- $CS_EMAIL_BODY: Content of sending email.
If you want to send an email to multiple email addresses instead of a single email address, in the $CS_EMAIL_TO parameter, it will be enough to write all the addresses to send an email separated by commas. For example, $CS_EMAIL_TO=example@email.com,example2@email.com
Since the variables mentioned above, which need to be provided by the user, contain sensitive information like passwords, please use Environment Variables for these types of values.
To do this, comment out or remove the sensitive variables such as $CS_EMAIL, $CS_USERNAME, and $CS_PASSWORD defined at the top of the script, and add them as environment variables instead.
For other variables that need to be defined, you can also make use of environment variables.
If you're using self-hosted runners and they're not starting to build pipelines with clean states as in Appcircle Cloud, this custom script can be insecure to use since the consecutive pipelines are using the same build environment, and it might have last sent email sensitive configuration in some cases.
In order to send email, the script persists SMTP configuration to the ~/.msmtprc file. Although the script has a cleanup mechanism that works for success or failure cases, it cannot work on all conditions. For example, the "cancel build" case should be considered. In this case, the ~/.msmtprc might not be cleaned, and it can be read in the next pipeline.
If you have configured runners similar to the Appcircle Cloud pools and they are wiped off after a build is executed to provide a fresh environment for every build, then there is nothing to consider; it's safe.
When you want to send an email with your Gmail account using Google's SMTP server, you must first authenticate to the Google SMTP server. For this process, you need to enter your App Password in the password field.
In order to generate this password, 2FA authentication must be turned on in your Google account. You can generate and retrieve this password from the App Passwords section under Google Account management. For detailed information about App Passwords, please visit the Google App Password documentation.
This script uses the TLS protocol for SMTP server usage. Since the Gmail SMTP server is used in the script, the required protocols are pulled from Google's SMTP server using the $CS_HOST parameter. If you are using your own SMTP server, don't forget to change the $CS_HOST value here.
On the other hand, to change TLS or SSL usage, you can change the protocol by setting the $CS_USE_TLS or $CS_USE_SSL parameters in the script to true or false. Note that you need to change the $CS_PORT parameter when using SSL and TLS.
For more information about protocols, please visit the Google's TLS and SSL documentation.
To use an SMTP server, this script first installs the necessary certificates, then authenticates to the server with the required credentials and sends the prepared email content to the recipient's email address. In order to change the sender's email address, the SMTP server must allow it by providing the necessary permissions. Otherwise, SMTP servers will send the email using the authenticated email address to prevent spoofing (impersonating someone else).
How can I send the Appcircle build log to another platform?
To send your build log to another platform using an API, you can access the log in your workflow through $AC_LOGFILE.
Here is an example using Dropbox's file-upload API. Replace it with the appropriate API for your platform. If you are going to use DropBox, you can follow the document below to obtain the access token:
Ensure sensitive data, like access tokens, are defined as private environment variables. Learn more:
current_datetime=$(date +"%Y-%m-%d-%H-%M")
dropbox_log_filename="/home/appcircle-logs/ac-log-$current_datetime.txt"

curl -X POST https://content.dropboxapi.com/2/files/upload \
    --header "Authorization: Bearer $DROPBOX_ACCESS_TOKEN" \
    --header "Dropbox-API-Arg: {\"autorename\":false,\"mode\":\"add\",\"mute\":false,\"path\":\"$dropbox_log_filename\",\"strict_conflict\":false}" \
    --header "Content-Type: application/octet-stream" \
    --data-binary @"$AC_LOGFILE"
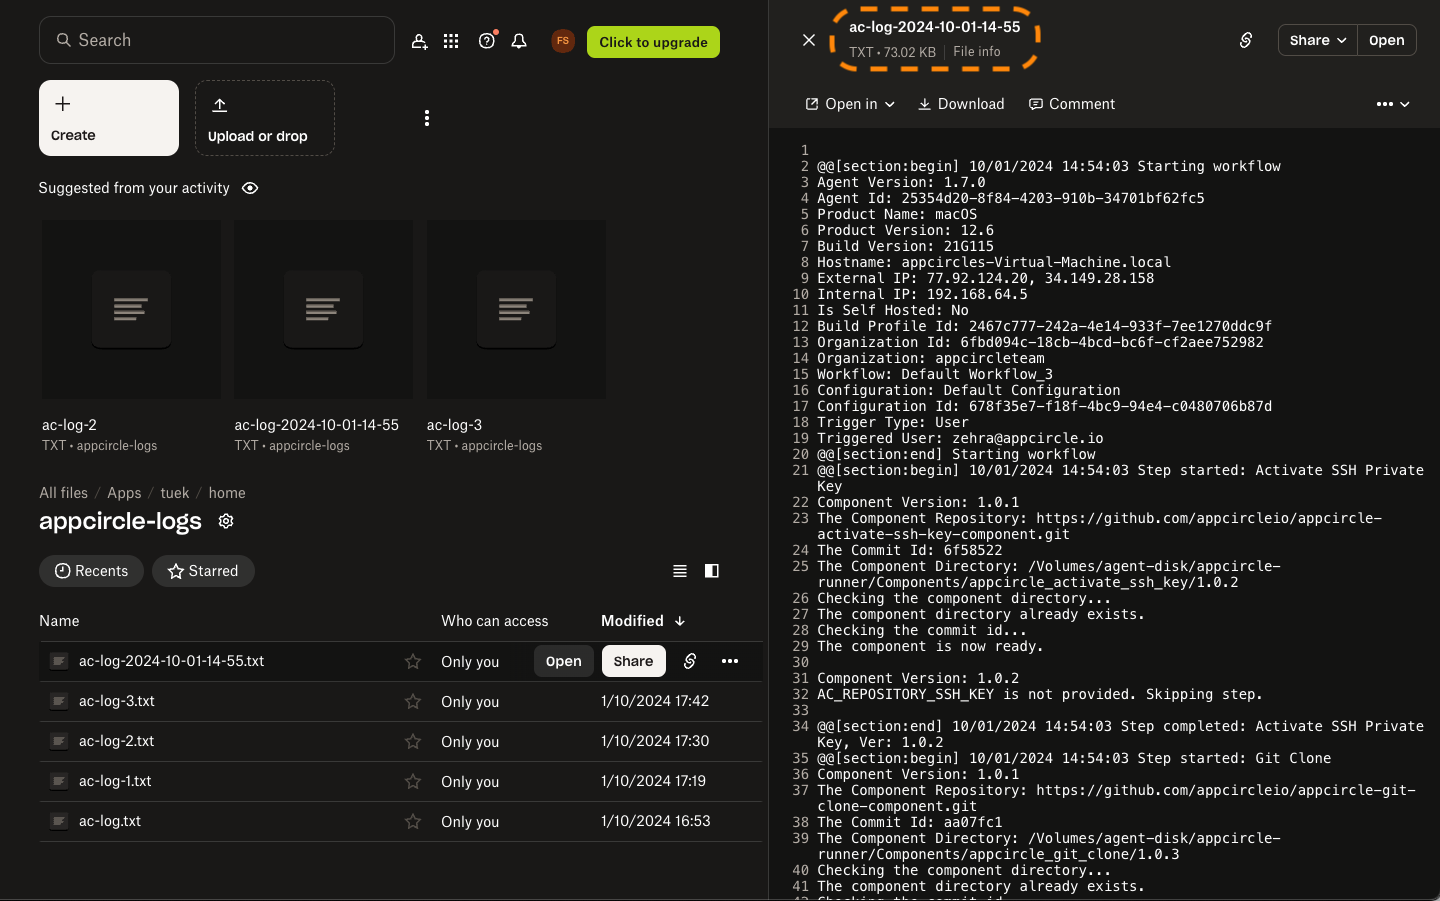
This script generates a timestamped log file (e.g., ac-log-2024-10-01-14-55.txt) in the /home/appcircle-logs in Dropbox.

Ensure that the Custom Script step runs after the Export Build Artifacts step to capture the full log.
How can I print the status of workflow steps with detailed information?
If you want to track or share the status of your workflow or individual steps during a build, you can use the following environment variables:
$AC_BUILD_STATUS: Displays the running status of the workflow so far.$AC_BUILD_STEPS_STATUS: Displays detailed information about each executed step.
The runner version must be 1.8.0 or later to use the above two environment variables.
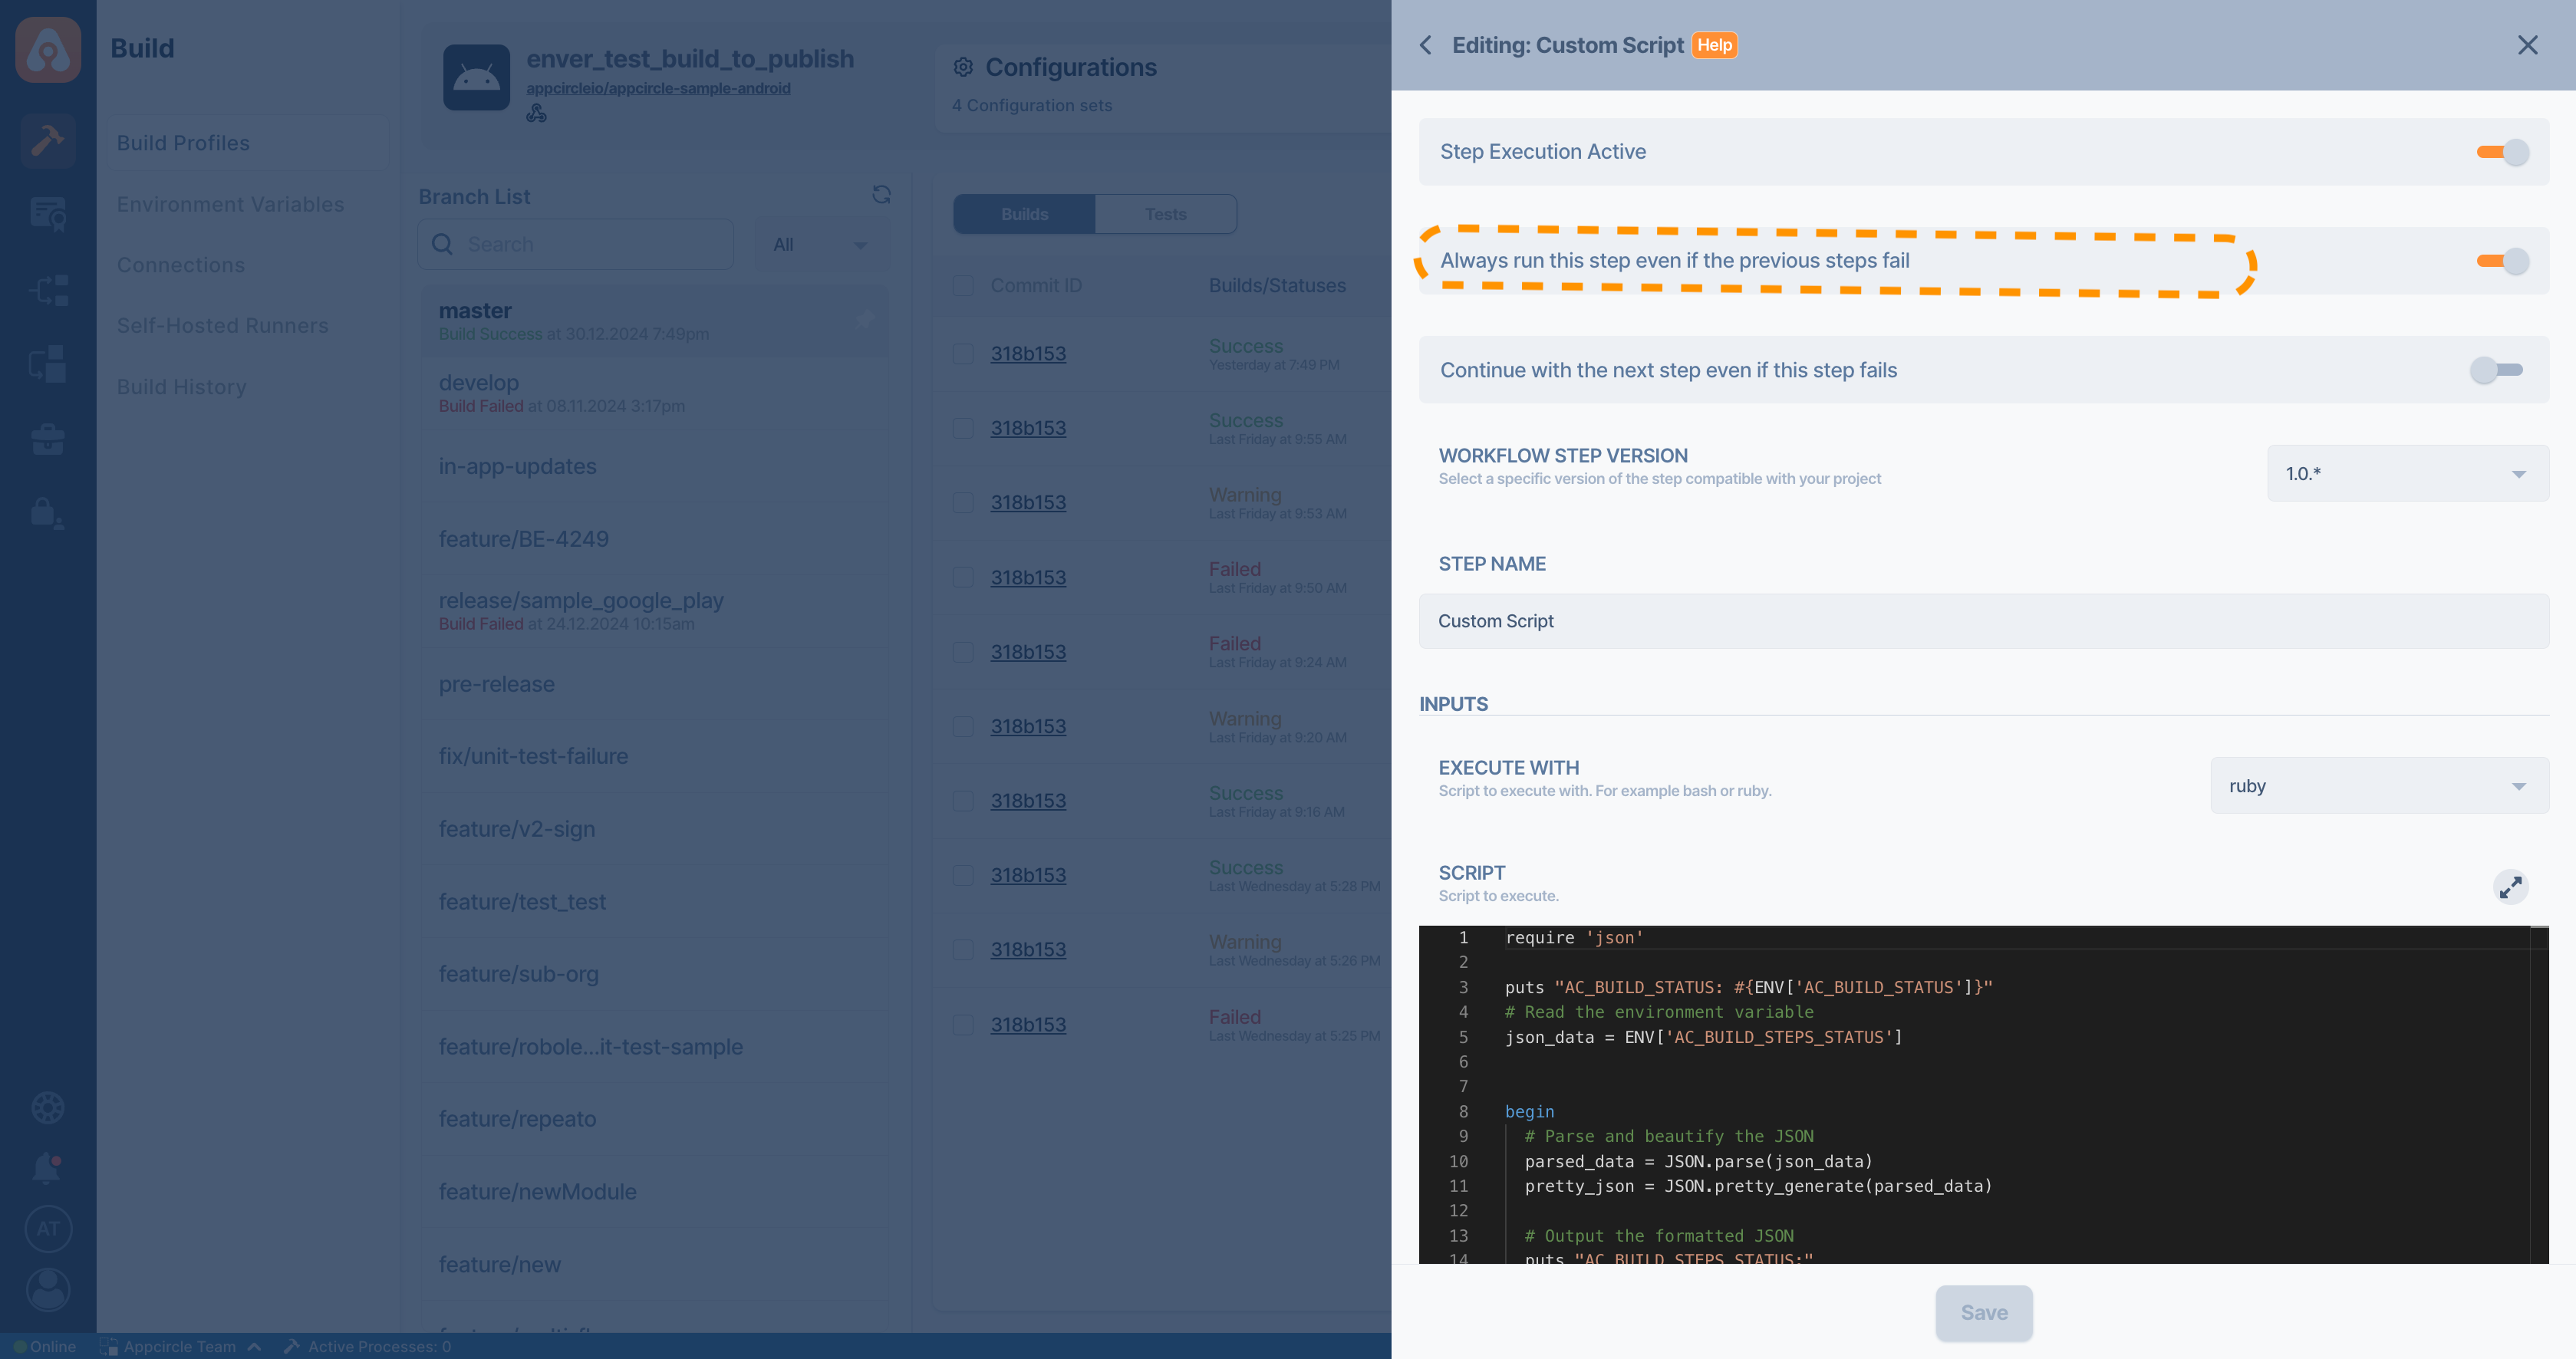
However, the output of $AC_BUILD_STEPS_STATUS is in raw JSON format, which may not be easy to read directly. To make it more readable, you can use the following Ruby script to format and print the information in a user-friendly way:
require 'json'

puts "AC_BUILD_STATUS: #{ENV['AC_BUILD_STATUS']}"
# Read the environment variable
json_data = ENV['AC_BUILD_STEPS_STATUS']

begin
  # Parse and beautify the JSON
  parsed_data = JSON.parse(json_data)
  pretty_json = JSON.pretty_generate(parsed_data)

  # Output the formatted JSON
  puts "AC_BUILD_STEPS_STATUS:"
  puts pretty_json
rescue JSON::ParserError => e
  puts "Failed to parse JSON: #{e.message}"
end
The script above is written in Ruby. To execute it, select Ruby as the Execute with option in the Custom Script step.
To ensure your script works even if one of the steps in the workflow fails (and you want to capture the failed status as well), enable the "Always run this step even if the previous steps fail" option.

If you add a Custom Script step with the code above after the Git Clone step in your workflow, the script will generate an output similar to this:
AC_BUILD_STATUS: Success
AC_BUILD_STEPS_STATUS:
[
  {
    "StepName": "Activate SSH Private Key",
    "BuildStatus": "Success",
    "Duration": 0.133102,
    "StartDate": "2024-12-30T16:48:47.919386Z",
    "FinishDate": "2024-12-30T16:48:48.052488Z"
  },
  {
    "StepName": "Git Clone",
    "BuildStatus": "Success",
    "Duration": 1.90708,
    "StartDate": "2024-12-30T16:48:48.186532Z",
    "FinishDate": "2024-12-30T16:48:50.093612Z"
  }
]
Steps that are disabled in the workflow will not appear in the above output.
Simply include this script in your workflow to better understand and monitor the status of your workflow steps.
How to generate the build log URL during the build time?
When a build is triggered in Appcircle, the build log starts to generate. If you need access to the build log URL, you can retrieve two different output links by adding the Bash script below to the relevant workflow.
Please note that the links for the in-progress and the completed build logs are different, so be sure to use them according to your specific needs.
No specific action is required for these variables, except that the base URL (base_url) may need to be updated if you are using a self-hosted Appcircle.
In the script only base_url may need to be updated if you are using self-hosted Appcircle.
The related build profile can be used simply by adding the Custom Script in Bash.
Assignments are made automatically using environment variables defined by the system, which are represented by values starting with $. These variables are explained in detail in the Reserved Variables section.
build_id=$AC_QUEUE_ID
profile_id=$AC_BUILD_PROFILE_ID
commit_id=$AC_COMMIT_ID

base_url="https://my.appcircle.io/build/detail"

AC_IN_PROGRESS_BUILD_LOG_URL="${base_url}/${profile_id}?modal=/build/modal/Logs&profileId=${profile_id}&commitId=${commit_id}&scope=build&buildId=fakeID${build_id}"
echo "In-Progress Build Log URL: $AC_IN_PROGRESS_BUILD_LOG_URL"

AC_COMPLETED_BUILD_LOG_URL="${base_url}/${profile_id}?modal=/build/modal/Logs&profileId=${profile_id}&commitId=${commit_id}&buildId=${build_id}&scope=build&method=get"
echo "Completed Build Log URL: $AC_COMPLETED_BUILD_LOG_URL"

# To use these URL variables in later steps within the same workflow, add them to ENV_FILE_PATH as shown below; otherwise, they will not be accessible.
echo "AC_COMPLETED_BUILD_LOG_URL=$AC_COMPLETED_BUILD_LOG_URL" >> $AC_ENV_FILE_PATH
echo "AC_IN_PROGRESS_BUILD_LOG_URL=$AC_IN_PROGRESS_BUILD_LOG_URL" >> $AC_ENV_FILE_PATH
How do I store and re-use custom scripts from a Git repository?
If you are looking for a modular way to manage your Appcircle CI custom scripts, you can host your script files in a Git repository and pull them dynamically into the build environment. This approach helps keep your workflow clean and allows centralized version control for your custom scripts.
This section explains how to clone a private Git repository and execute a specific script file from it using the Custom Script step.
The following Bash script has been tested on multiple Git providers using personal access tokens (PAT) for authentication.
If you are using a public repository, you do not need to obtain an access token. In this case, you can use the Git clone command directly in your script without including any authentication.
To use this approach, you must first convert your Bash, Ruby, Python, or Nodejs script into a Git repository. This means placing your script file into a Git repository and pushing it to your preferred Git provider (e.g., GitHub, GitLab, Bitbucket, Azure).
It is recommended to create a repository specifically for the desired custom script as a Bash, Ruby, Python, or Nodejs file.
To successfully clone a repository, your personal access token (PAT) must have at least read access to the repository.
Write or admin permissions are not required for this use case.
Note: When creating a personal access token with GitLab, the token must have at least Reporter access level.
Note: Bitbucket requires a user-level personal access token for Git operations such as cloning. Repository-level access tokens are not supported for Git over HTTPS and will result in authentication errors if used.
This script demonstrates how to fetch a Bash script from a private GitHub Cloud repository as an example. Adjustments are required when using a different Git provider or executing Ruby code.
Using a Git repository to manage your custom scripts provides several key advantages:
Reusability: The same script repository can be used across multiple workflows and build profiles without duplication.
Traceability: Every change to the script is version-controlled and can be audited or rolled back via Git history.
Collaboration: Multiple team members can contribute and review changes through pull requests.
CI/CD Compatibility: Changes in scripts are automatically reflected in builds without needing to manually update workflows.
Branching Support: Different versions of scripts can be maintained using Git branches and referenced independently.
This approach significantly improves scalability, maintainability, and consistency in teams managing multiple CI pipelines.
Please do not use sensitive variables such as Personal API Token, Profile ID directly within the step.
We recommend using Environment Variables groups for such sensitive variables.
#! /bin/bash
set -e

# Git clone URL
CS_GIT_CLONE_URL="https://example.org/exampleuser/examplerepo.git"
CS_GIT_USERNAME="$YOUR_GIT_USERNAME"
CS_GIT_PAT="$YOUR_GIT_PAT"
CS_GIT_BRANCH="main" # or desired branch name
CS_GIT_SCRIPT_FILE="test.sh"  # or "Example.rb"

# Create authorization header using Base64 encoding
AUTH_STRING="$CS_GIT_USERNAME:$CS_GIT_PAT"
ENCODED_AUTH=$(printf "%s" "$AUTH_STRING" | base64)
HEADER_VALUE="Authorization: Basic $ENCODED_AUTH"

TIMESTAMP=$(date +%Y%m%d_%H%M%S)
CS_ROOT_FOLDER="Cloned_Script_$TIMESTAMP"
mkdir -p "$CS_ROOT_FOLDER"
cd "$CS_ROOT_FOLDER"

# Clone the repository using the authorization header
echo "Cloning the repository..."
git -c http.extraheader="$HEADER_VALUE" clone "$CS_GIT_CLONE_URL"

# Navigate into the cloned repository
CS_FOLDER_NAME=$(basename "$CS_GIT_CLONE_URL" .git)
cd "$CS_FOLDER_NAME" || { echo "Failed to enter the directory."; exit 0; }

# Switch to the target branch
git checkout "$CS_GIT_BRANCH"

# Run the script file if it exists
if [ ! -f "./$CS_GIT_SCRIPT_FILE" ]; then
    echo "Script file not found: $CS_GIT_SCRIPT_FILE"
    exit 1
fi

case "$CS_GIT_SCRIPT_FILE" in
  *.sh)
    chmod +x "./$CS_GIT_SCRIPT_FILE"
    ./"$CS_GIT_SCRIPT_FILE"
    ;;
  *.rb)
    ruby "$CS_GIT_SCRIPT_FILE"
    ;;
  *)
    echo "Unsupported script type: $CS_GIT_SCRIPT_FILE"
    exit 1
    ;;
esac
If you are seeing the following error in the build log, please ensure that both the username and the personal access token (PAT) are set correctly. This error is returned by the Git provider when authentication fails due to an incorrect or missing username or PAT:
fatal: could not read Username for Git provider