Build Walkthrough
The Build module is the Continuous Integration (CI) part of Appcircle. It connects to your Git repository, builds your iOS and Android apps in the cloud or on your self-hosted runners, and sends the signed binaries to the other Appcircle modules. It helps you to:
- Connect Any Repository: Use GitHub, GitLab, Bitbucket, Azure DevOps, SSH, or a public URL, in the cloud or self-hosted.
- Control Every Build Step: Edit the workflow of each build with ready-to-use steps from the Workflow Marketplace and your own custom scripts.
- Automate Builds: Start builds on every push, pull/merge request, or tag, or on a schedule.
- Sign and Deliver: Sign binaries with your signing identities and send them automatically to Testing Distribution, Publish, or the Enterprise App Store.
- Track and Audit: Follow build logs in real time, and review build history and configuration changes.

Getting Started
This walkthrough follows the order in which you set up your first build: prepare the prerequisites, create a build profile and connect a repository, create environment variable groups, configure the build, set up the workflow, and start the build. After the first build, you automate builds with triggers, work with the build results, and track them.
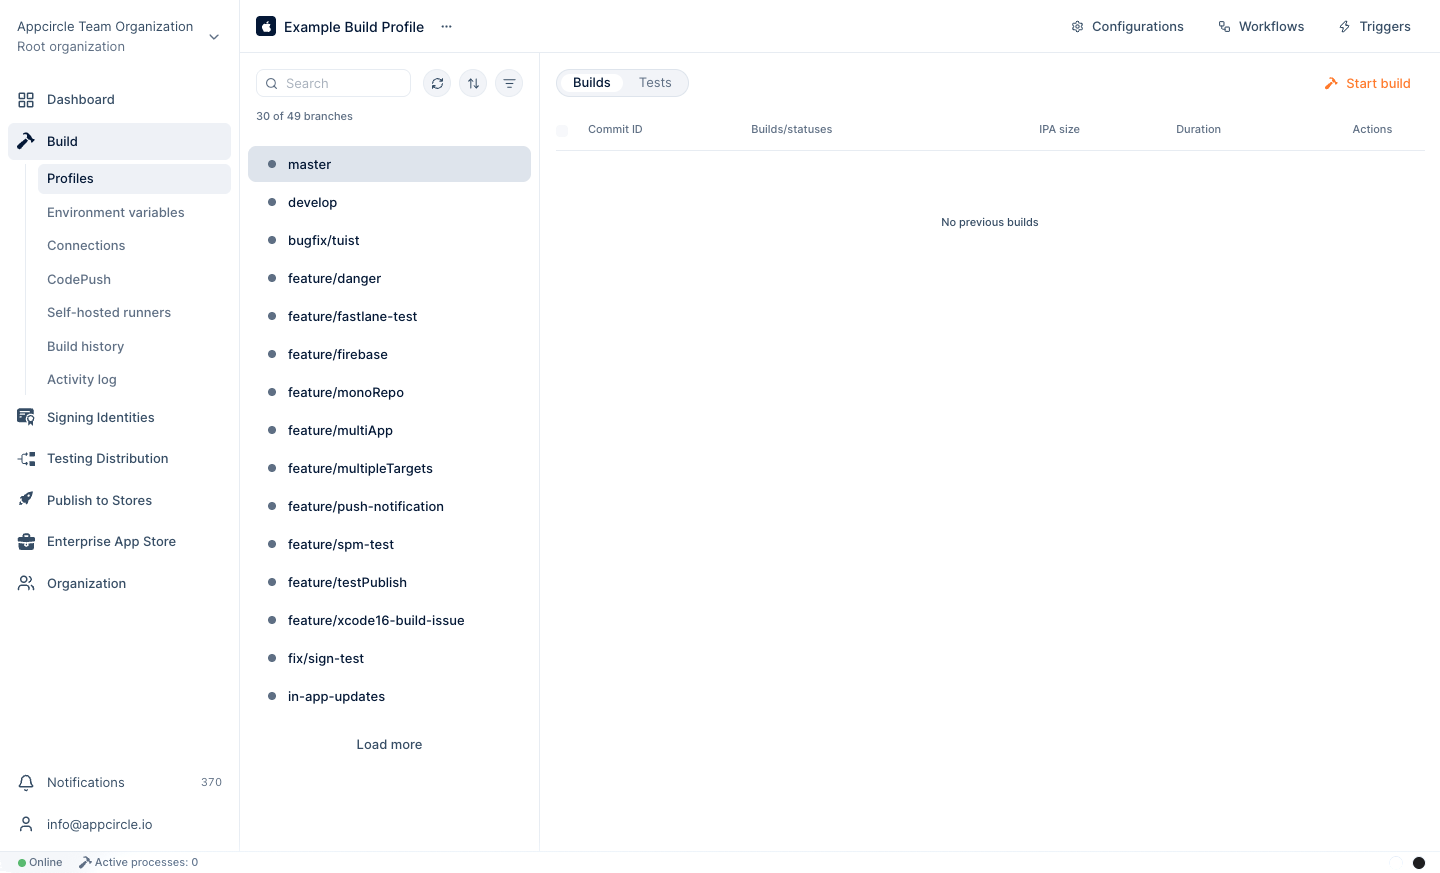
Prerequisites for Using the Build Module
Repository Access
Appcircle reads your source code from a Git repository. Prepare one of the following before you create a build profile:
- GitHub App or OAuth access: Authorize the Appcircle GitHub App for GitHub, or authorize Appcircle with OAuth for GitLab, Bitbucket, or Azure DevOps (Microsoft Entra ID).
- Personal Access Token (PAT): A token with repository read access for GitHub, GitLab, Bitbucket, or Azure DevOps, in the cloud or on a self-hosted server.
- SSH key: A private key whose public key is added to the repository, for any Git provider that supports SSH.
- Public URL: A public repository, with no credentials.
If your repository is in an internal network, Appcircle must be able to reach it. See Accessing Repositories in Internal Networks.
Signing Identities
Binaries must be signed before they can be installed on a device or sent to a store. Before your first release build, add the signing identities to the Signing Identities module:
- iOS: A certificate (
.p12) and a provisioning profile (.mobileprovision) for each bundle identifier. - Android: A keystore (
.keystore) with its passwords and alias.
Without signing, an iOS build produces an .xcarchive file instead of an .ipa, and unsigned binaries are not distributed. See Download Artifacts. Android debug builds are signed with a default keystore.
For an end-to-end guide, see the Signing Identities Walkthrough.
Distribution Targets (Optional)
To send builds to other modules automatically, create the target profiles first. A Testing Distribution profile or a Publish profile must exist before you can select it in the build configuration. An Enterprise App Store profile does not need to exist, because the first build creates it.
Supported Platforms
The Build module supports native iOS (Objective-C / Swift), native Android (Java / Kotlin), React Native, Flutter, .NET MAUI, Xamarin, and Ionic (with custom scripts) projects. For the requirements of each platform, see Platform Build Guides.
Build Profile Setup Process
Creating a Build Profile
A build profile holds the repository connection, configurations, workflows, and triggers of one app for one platform.
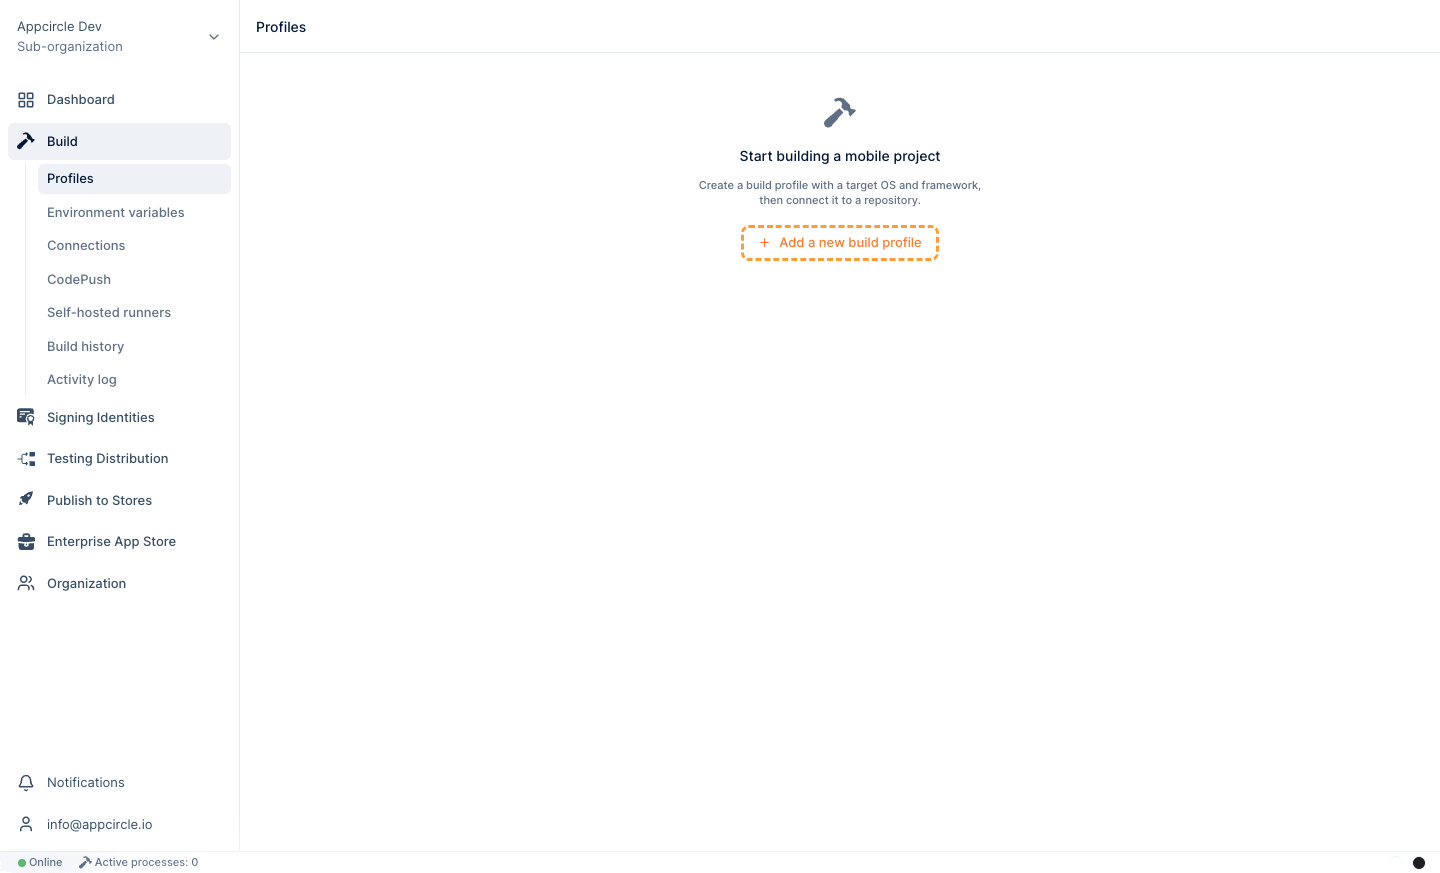
Go to Build and click New profile at the top right. If you have no build profiles yet, click the link in the middle of the page.
Enter a unique name, select the target OS (iOS or Android) and the target platform, and click Save.
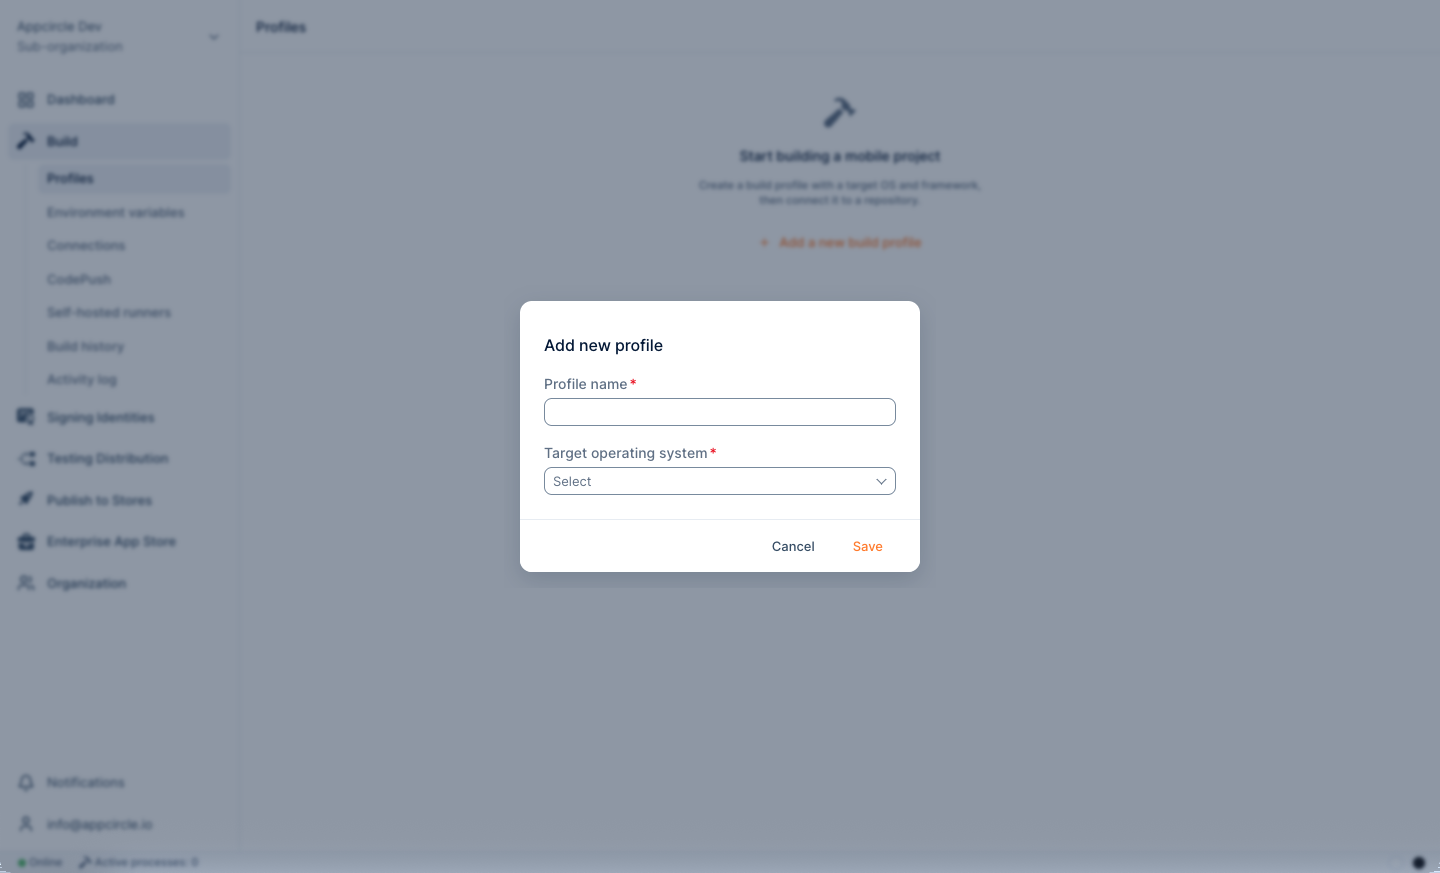
A build profile targets a single OS. For a cross-platform app, create one build profile for iOS and one for Android, both connected to the same repository.
Connecting a Repository
Select one of the connection options to link your source code:
- GitHub
- GitLab
- Bitbucket
- Azure DevOps
- Connect via SSH
- Connect via URL
- Connecting to Multiple Instances
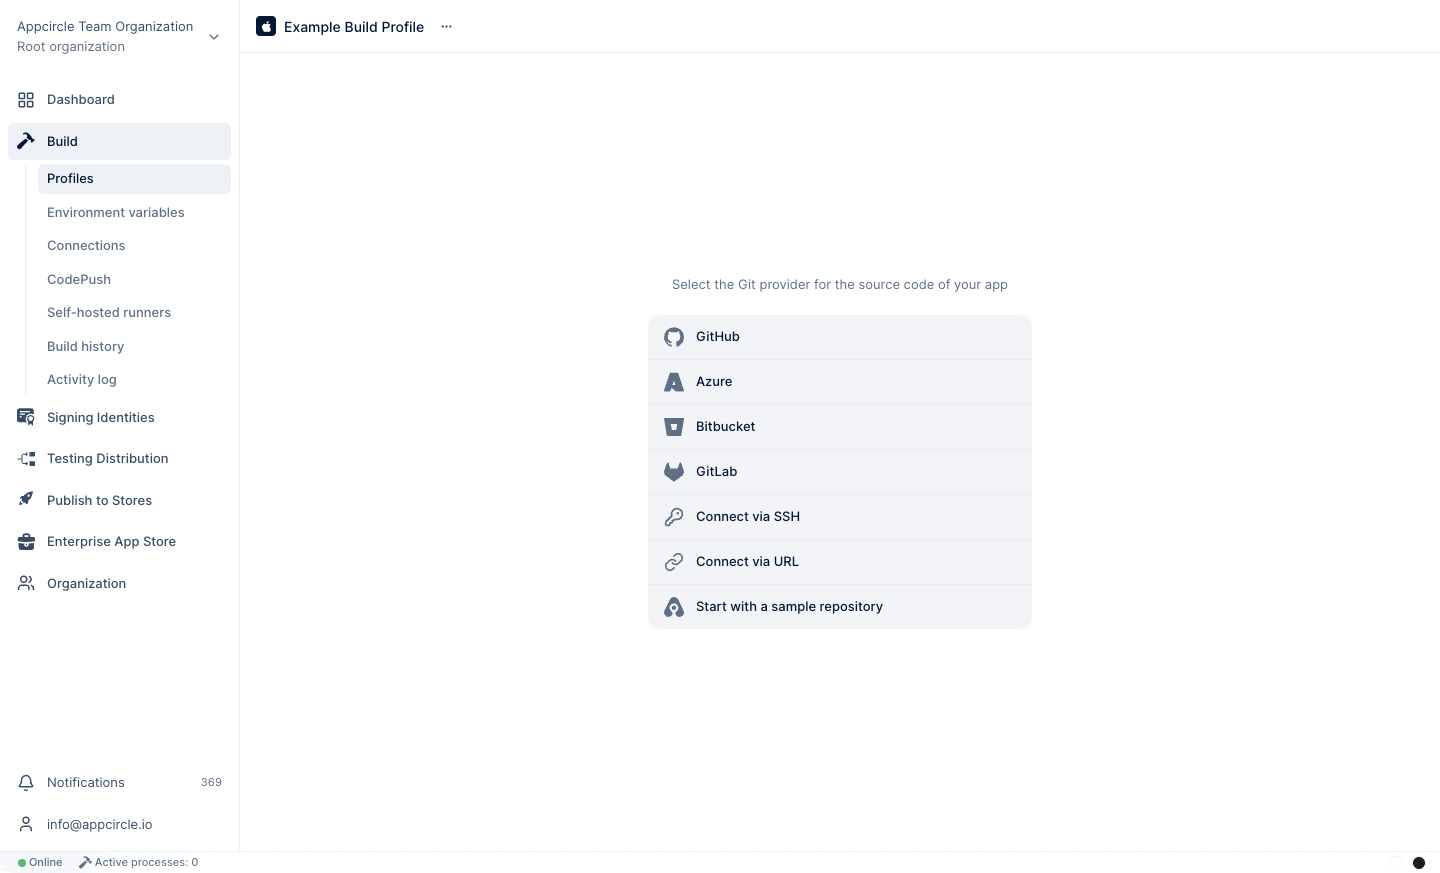
To try Appcircle without your own code, select Start with a sample repository.
After the connection is established, Appcircle fetches the branches and the last 100 commits of each branch. You can search and filter branches, pin frequently used branches to the top, and refresh the list manually. See Branch Operations.
All OAuth and PAT connections of the organization are listed in Build > Connections. To see the connection of a profile, select Source code from the ... menu next to the profile name. See Connections.
Configuring the Build
Creating Environment Variable Groups
Environment variables keep keys, secrets, and files out of your repository. Variable groups are shared by all build profiles in the organization, so create them before you configure the build.
- Go to Build > Environment Variables and click Add variable group.
- Enter a group name, for example
ProdorDev, and press Enter. - Add variables to the group as Text, Secret, or File. Secret values are not shown in build logs.
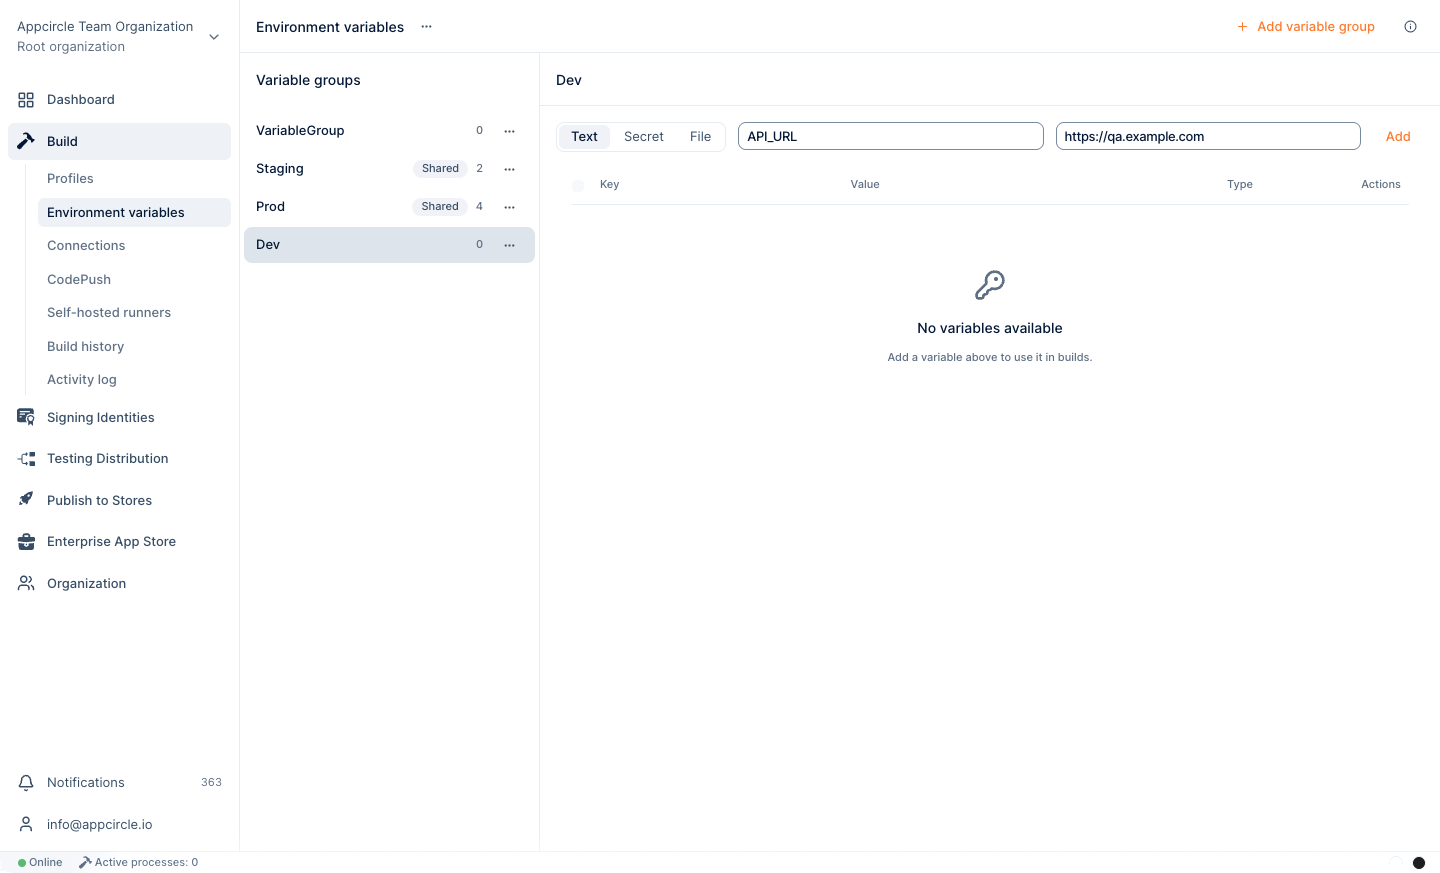
Appcircle also provides read-only AC_ variables, such as AC_REPOSITORY_DIR and AC_OUTPUT_DIR, to every build. To create a variable during the build and use it in later steps, write it to $AC_ENV_FILE_PATH:
echo "BUILD_NUMBER=$(date +%s)" >> $AC_ENV_FILE_PATH
Root organization users can share variable groups with sub-organizations. Shared groups are marked Shared in the root organization and Inherited in sub-organizations, where they cannot be edited.
For details, see Environment Variables.
Creating a Configuration
A configuration defines how a build runs: project details, signing, distribution, versioning, and environment variables. Use different configurations for different scenarios, for example one for development and one for release.
Click Configurations at the top right of the build profile, then click New. You can also upload a configuration as a YAML file, or clone an existing one.
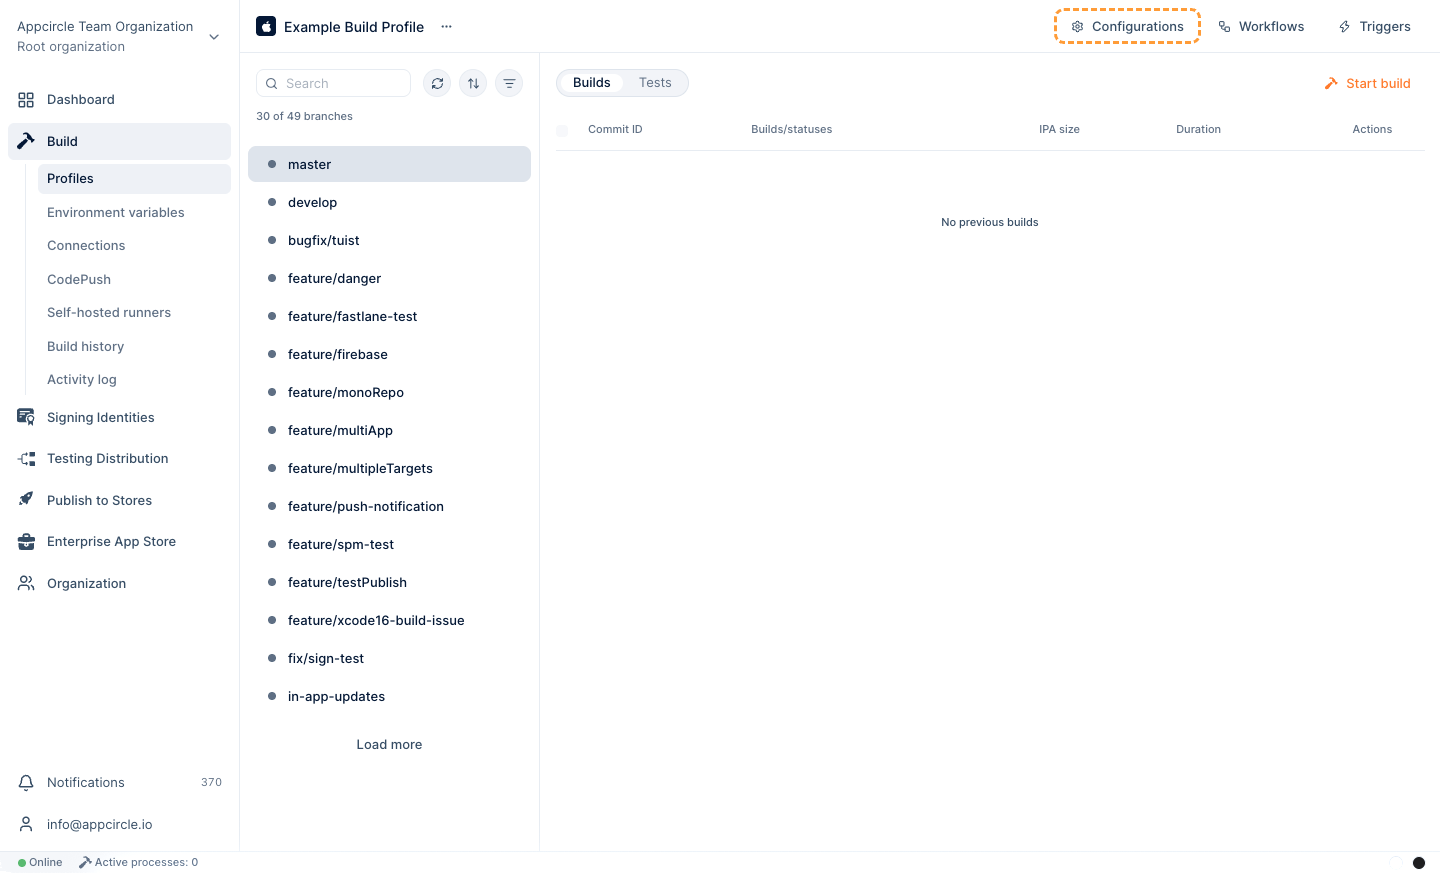
The configuration settings are grouped into the tabs described below.
Config
The Config tab holds the project details, such as the project path, scheme, or module. Click Autofill to let Appcircle read them from your repository.
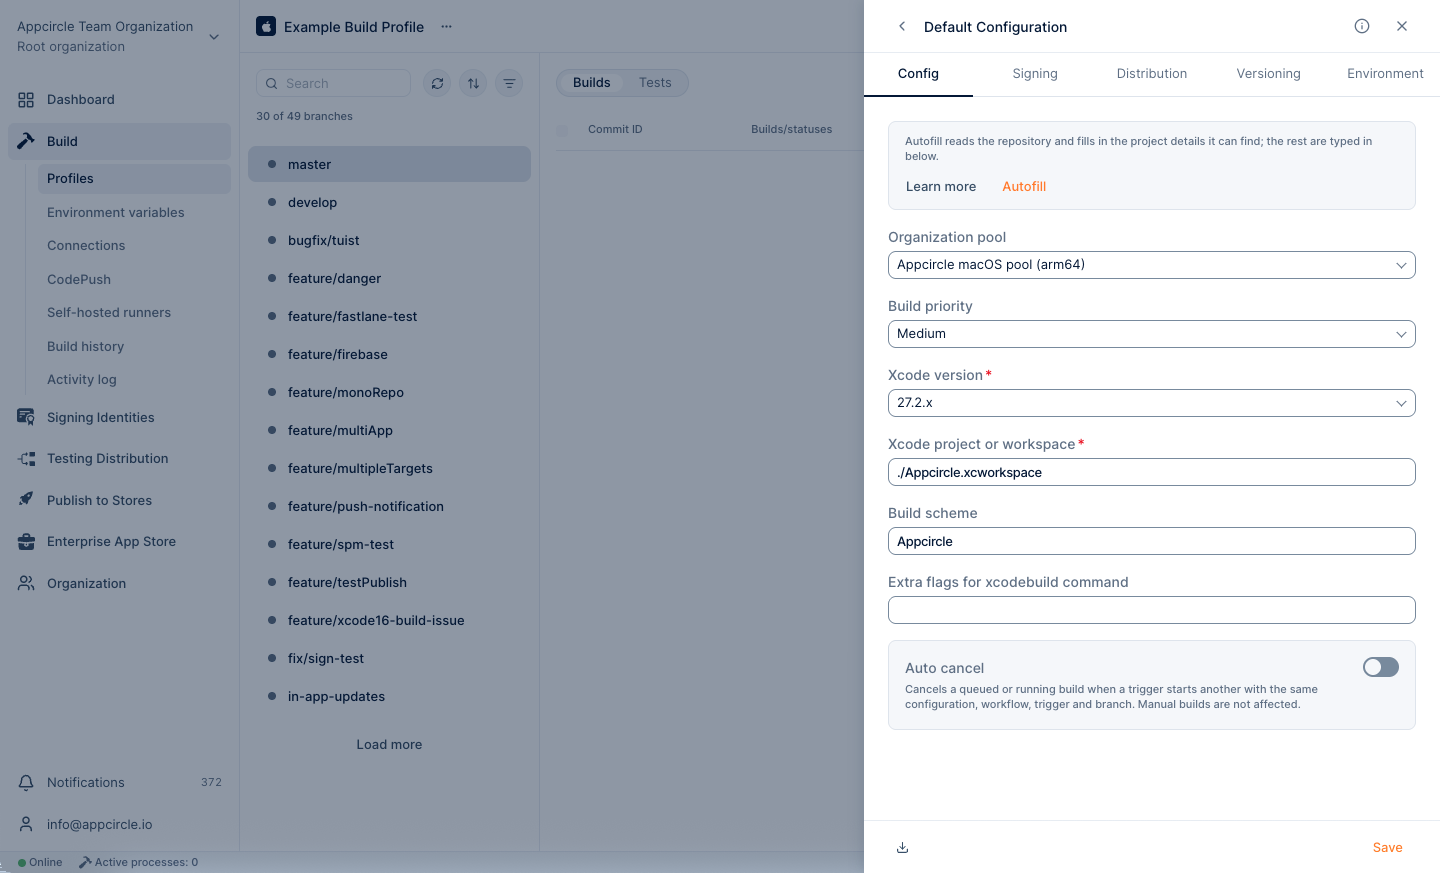
On this tab, you can also:
- Select a self-hosted runner pool in the Organization pool field. See Self-hosted Runners.
- Set the Build Priority (Low, Medium, or High) to decide which queued build starts first (Enterprise plans).
- Enable Auto cancel so that a new build cancels a running build with the same configuration, workflow, trigger type, and branch. See Auto Cancel Redundant Pipeline.
Signing
Select the signing identities for the build.
- iOS: Select the bundle identifier and the provisioning profile. For an app with more than one target, such as a widget or an extension, add a provisioning profile for each bundle identifier. You can also use Automatic Signing.
- Android: Select the keystore. If your Gradle file signs the app, disable the Android Sign step in the workflow.
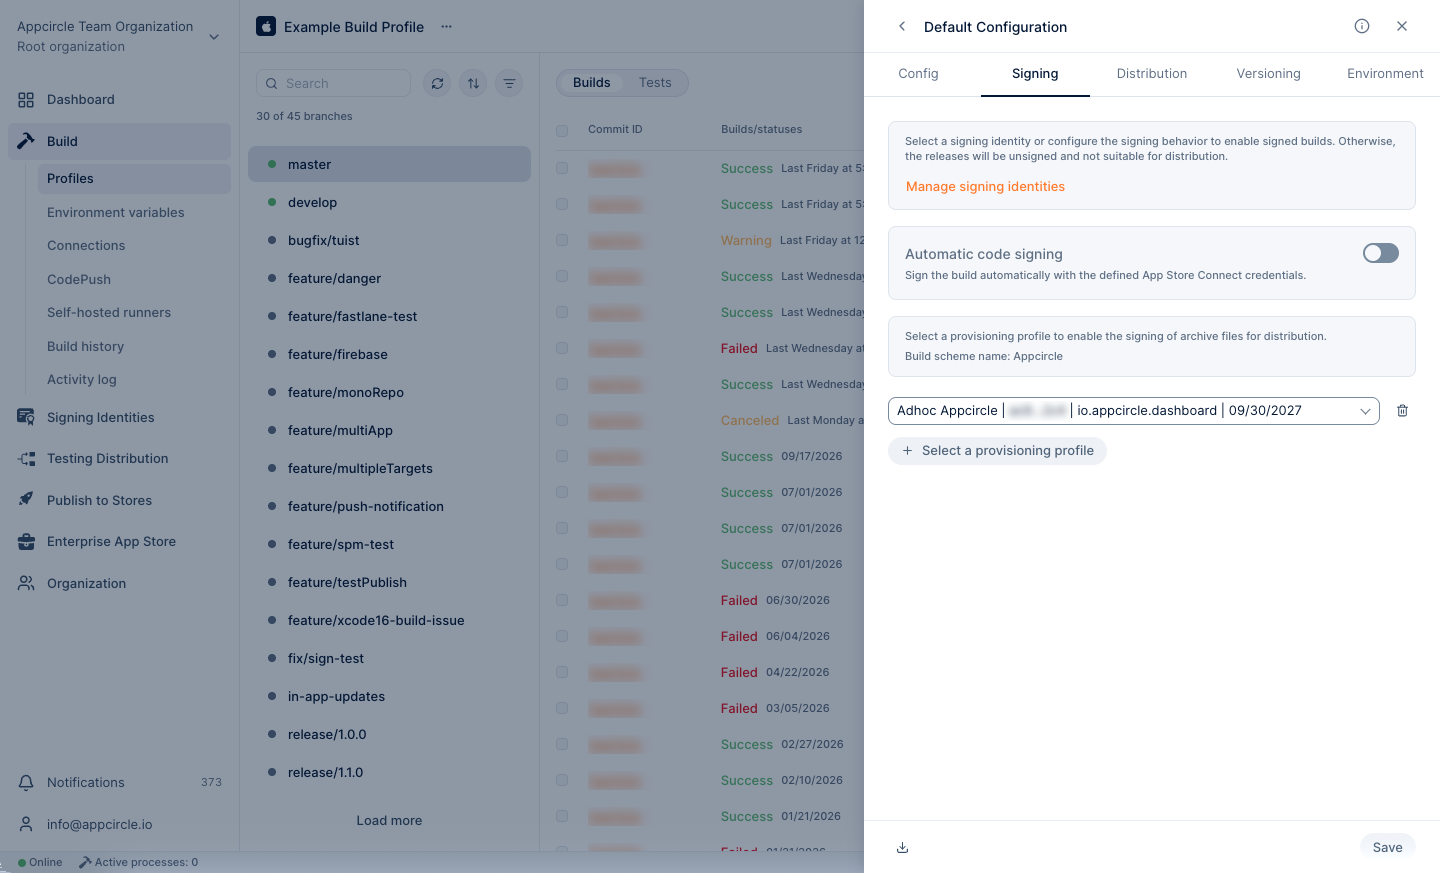
Distribution
Enable the modules that receive every new signed build automatically:
- Testing Distribution: Select one or more distribution profiles. See the Testing Distribution Walkthrough.
- Publish: Select one or more publish profiles. The publish profiles must exist before you select them. See Publish to Stores.
- Enterprise App Store: The first build creates an Enterprise App Store profile automatically. See the Enterprise App Store Walkthrough.
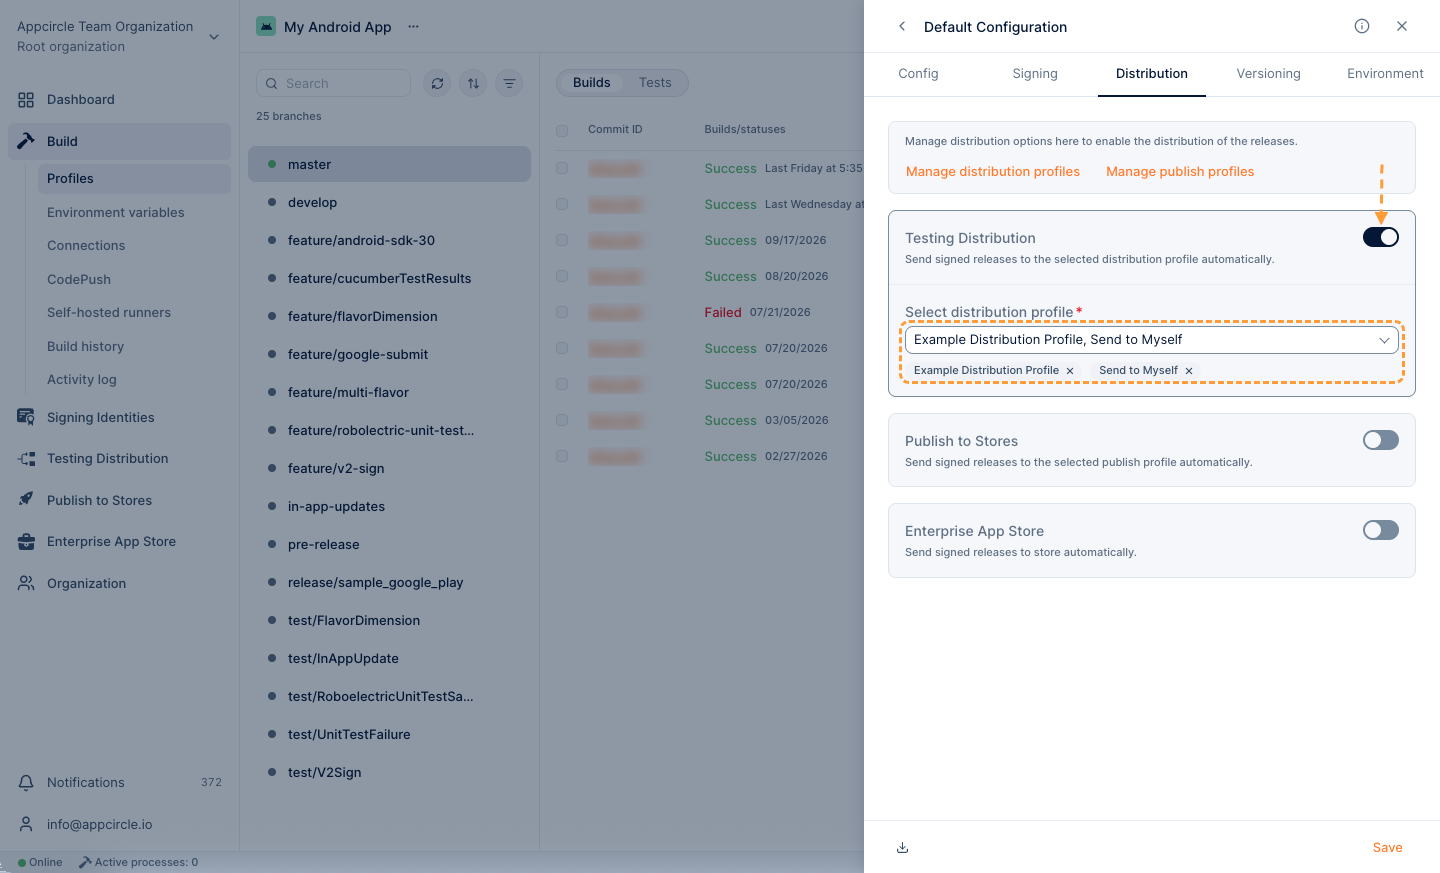
Only signed binaries are distributed. If Bundle/Package Identifier Validation is enabled on the Testing Distribution profile, a build whose identifier does not match is rejected.
.aab files are also sent to Testing Distribution, but they cannot be installed on a device directly. To give testers an installable .apk, enable Convert AAB to APK in the Testing Distribution profile's Auto Re-sign settings.
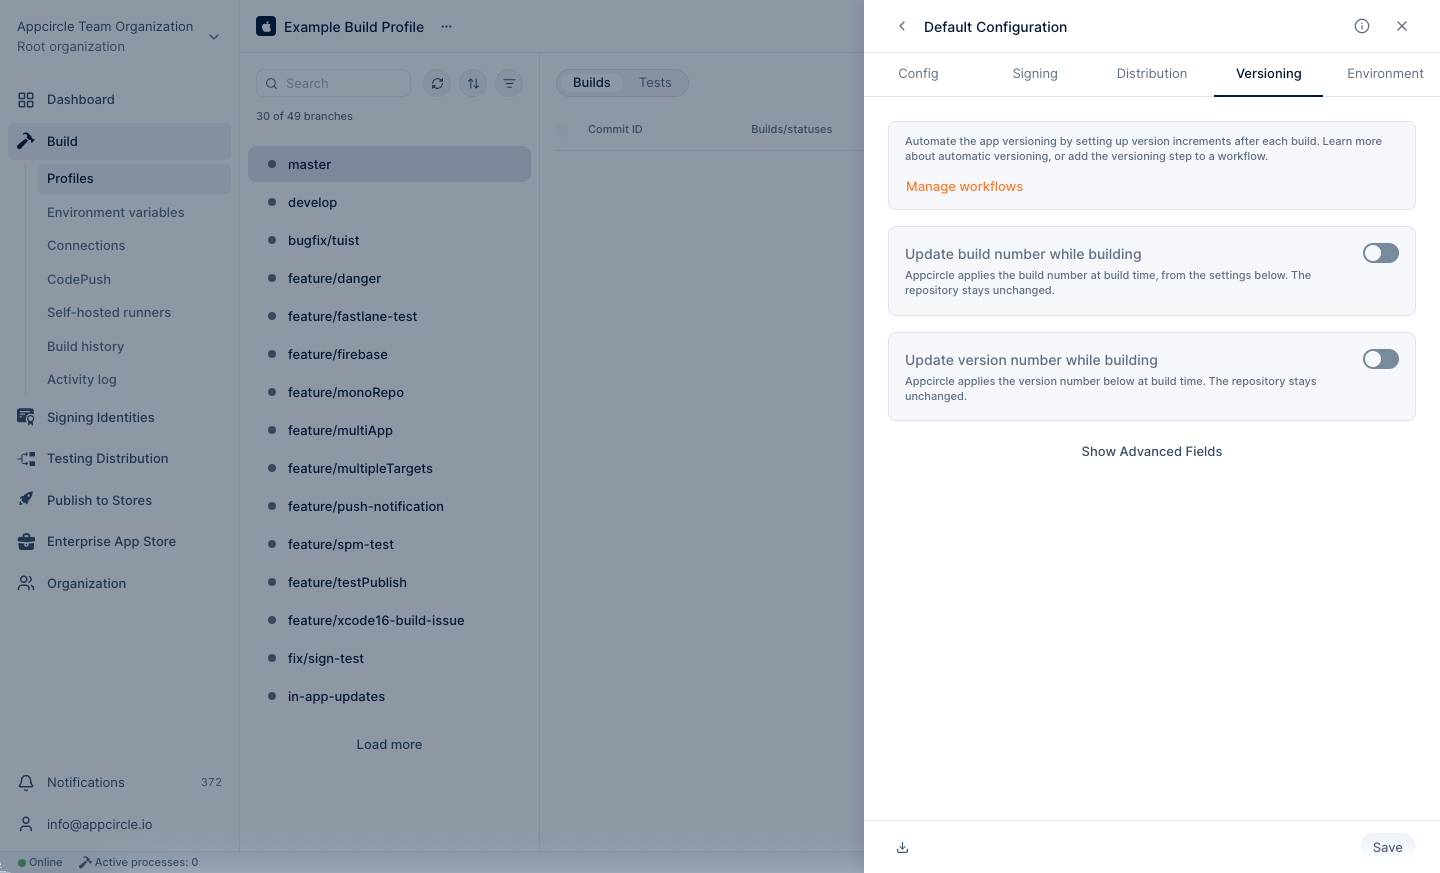
Versioning
Set rules to increase the build number and the version number automatically. See Versioning.
Environment
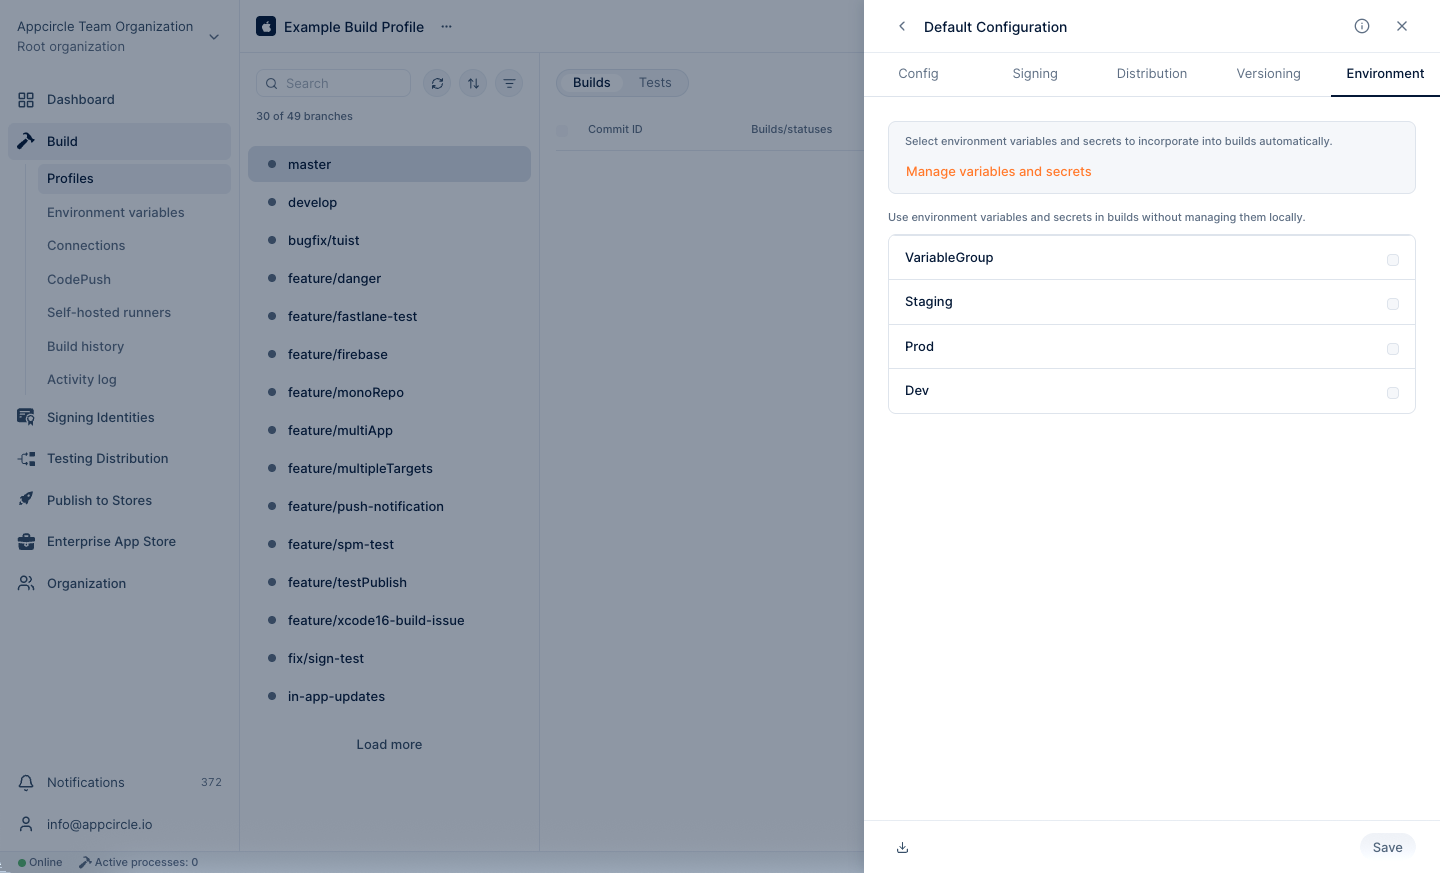
Select the environment variable groups that the build uses, and click Save. The variables in the selected groups are available to all workflow steps. See Creating Environment Variable Groups.
For all configuration options, see Configurations.
Setting Up Workflows
A workflow is the ordered list of steps that build your app. Each new build profile has default workflows for its platform.
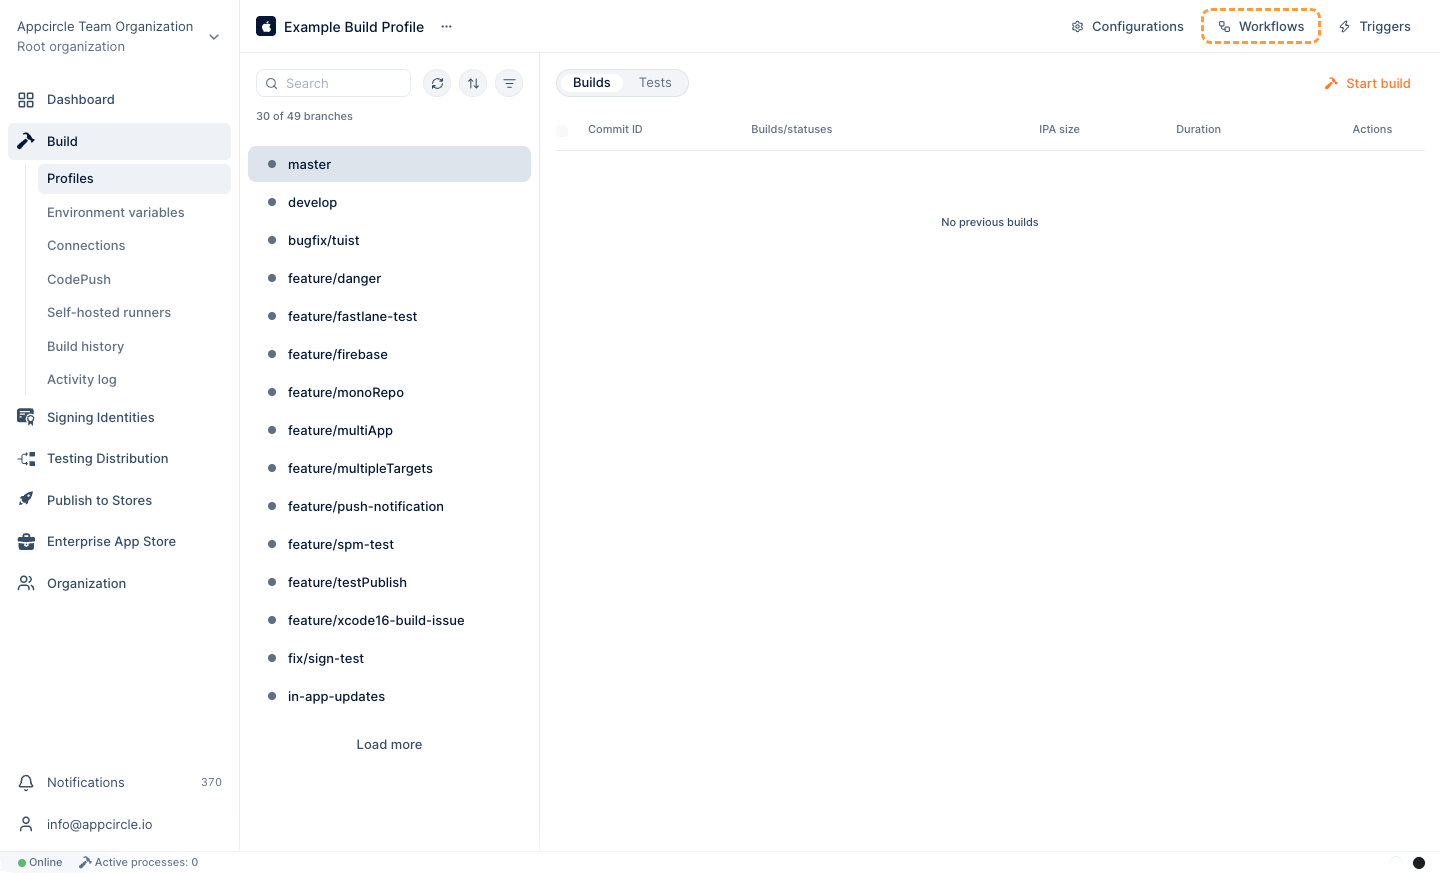
Click Workflows at the top right of the build profile and select a workflow to see its steps. To create a workflow, click New and select a template, or upload a YAML file. You can also clone an existing workflow, for example to keep separate workflows for development and production.
Adding and Editing Steps
Click Manage Workflow to open the Workflow Marketplace on the right. Drag steps into your workflow, reorder them, or remove the ones you do not need. Steps run from top to bottom.
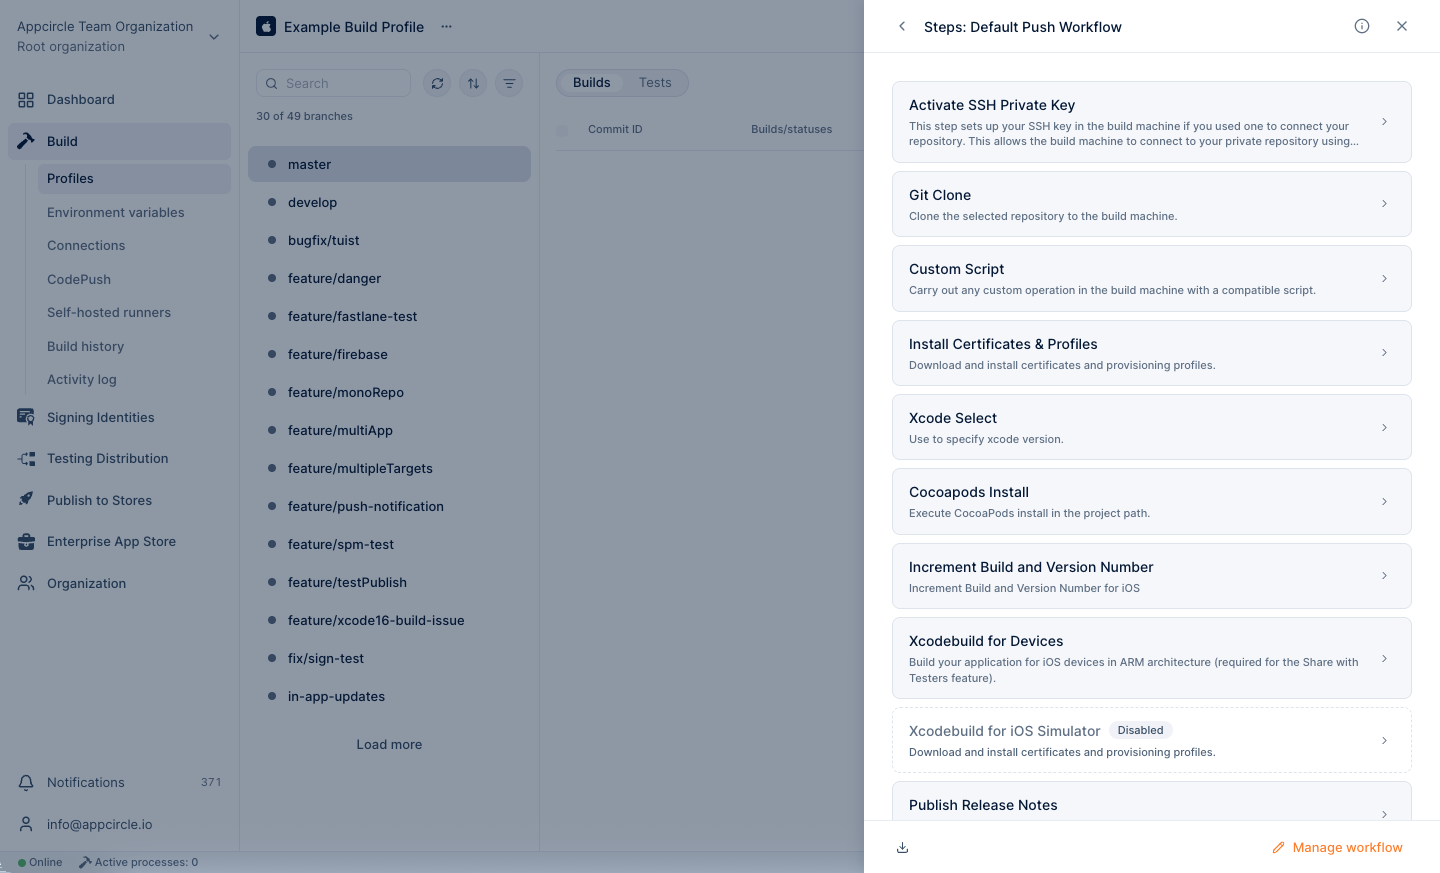
Select a step to edit its inputs and its common options:
- Step Execution Active: Enable or disable the step without removing it.
- Always run this step even if the previous step fails: Run the step after a failure, for example to send a notification.
- Continue with the next step even if this step fails: Do not fail the build if this step fails. The build then ends with the Warning status.
- Workflow Step Version: Select the step version. A version with an asterisk (
*) receives minor updates automatically.
A change in the workflow steps can cause builds to fail. Download a backup with Download YAML before a large change.
For details, see Workflows and the Workflow Steps documentation.
Running Builds
Starting a Manual Build
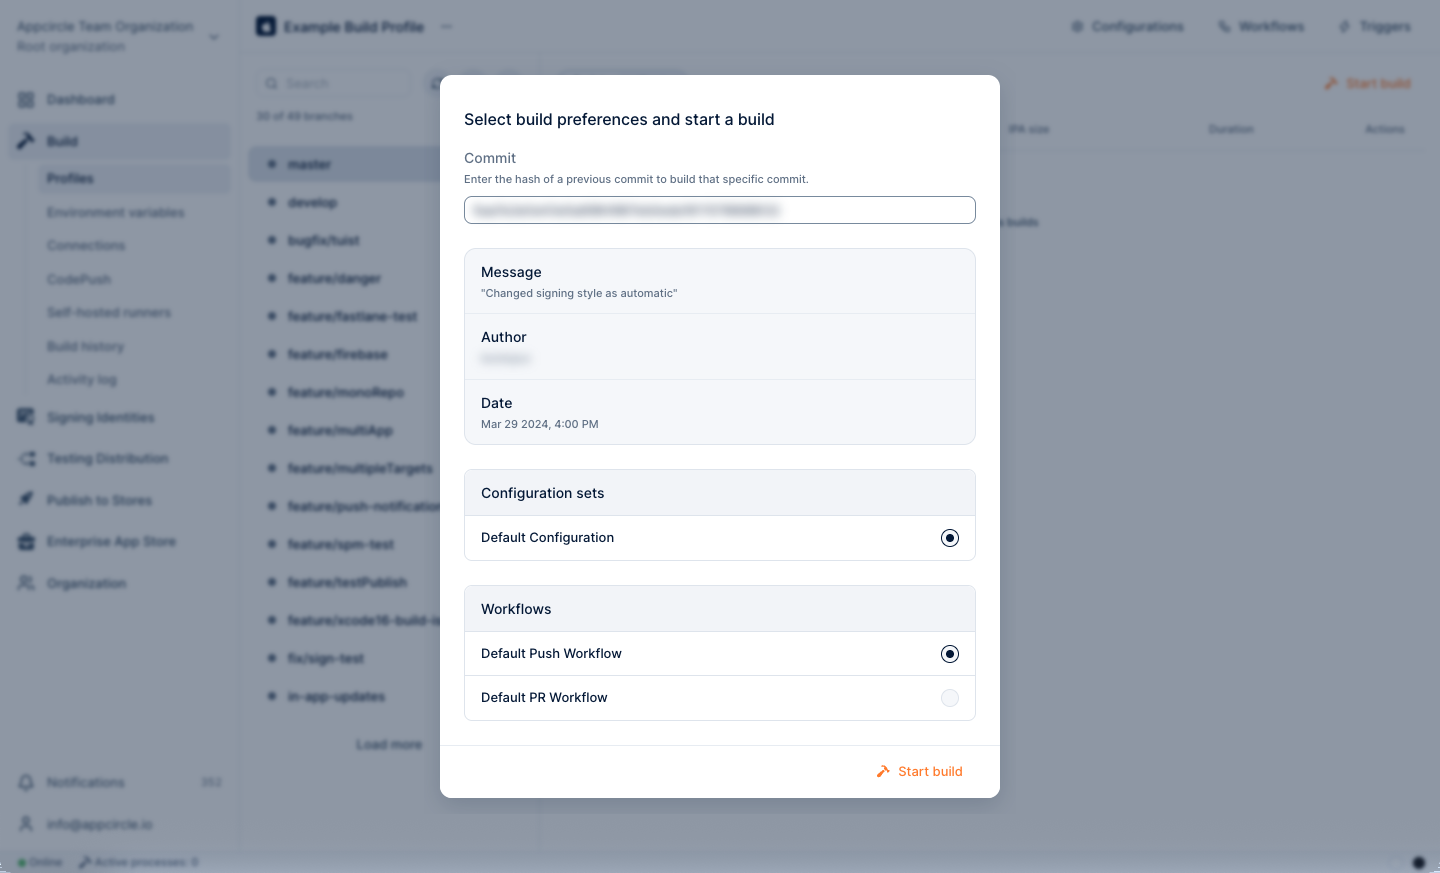
Select a branch and a commit, and click Start Build. Then select a configuration and a workflow, and click Start.
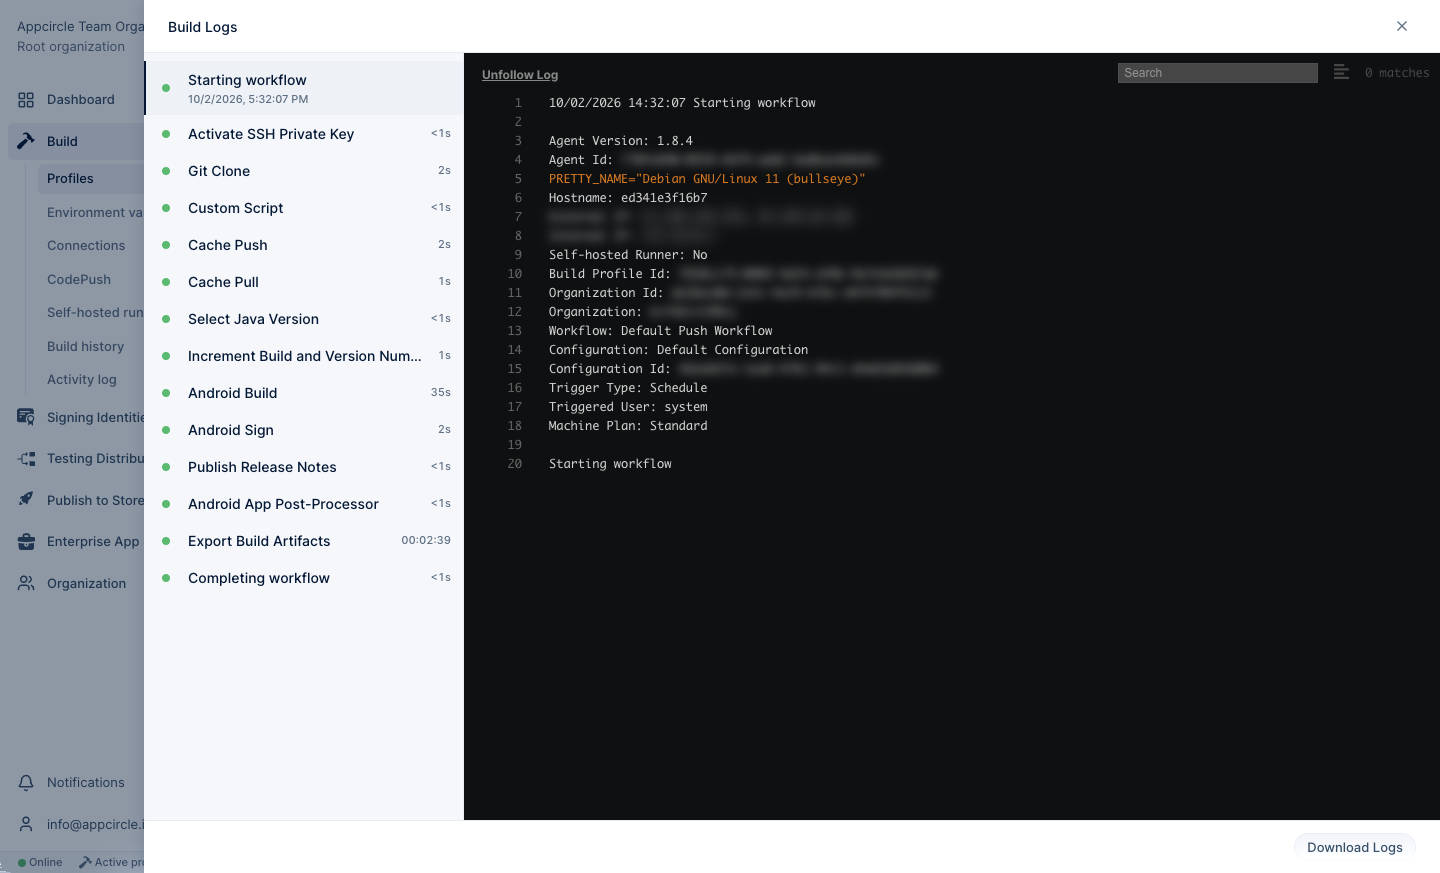
You can follow the progress and the logs of each step in real time.
Build Statuses
- Success: All workflow steps finished successfully.
- Failed: One or more workflow steps failed.
- Warning: A step that is allowed to fail failed, and all other steps succeeded.
- Timeout: The build exceeded the timeout limit.
- Canceled: The build was canceled by a user or by Auto Cancel Redundant Pipeline.
For details, see Manual Builds.
Automating Builds with Triggers
Click Triggers at the top right of the build profile. For each trigger, select the branch (or a wildcard pattern), the configuration, and the workflow.
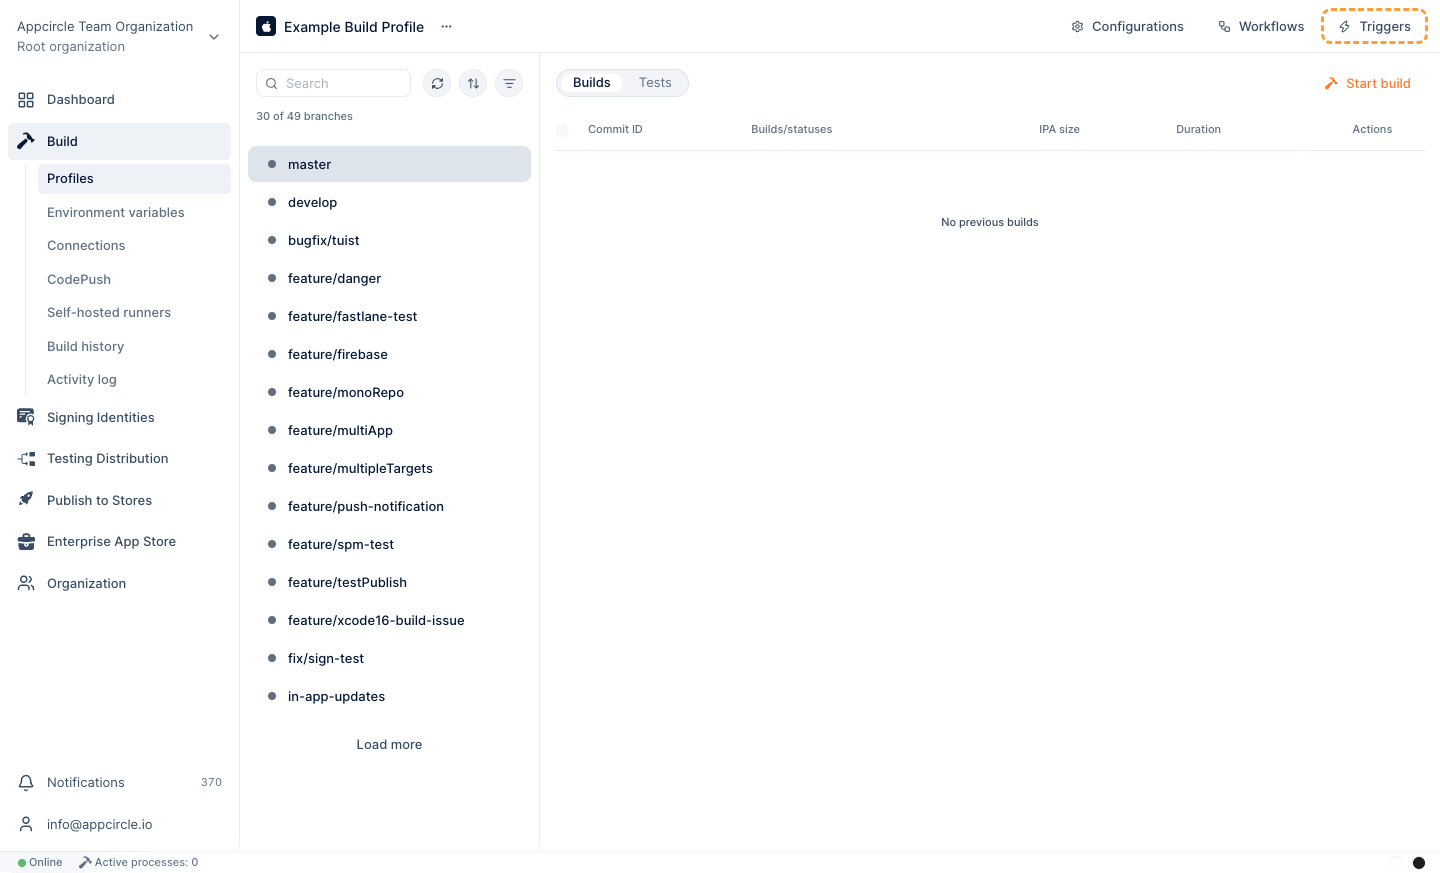
The Triggers panel has four tabs:
- On Every Push: Build every push to the selected branches.
- On Merge/Pull Request: Build the result of a pull/merge request from the source branch to the target branch, before it is merged.
- On Tag Push: Build only pushes with matching tags, for example
release*. - Scheduled (Beta): Build at fixed times with a cron expression and a time zone, for example
0 2 * * *for a nightly build. Scheduled builds do not need a webhook.
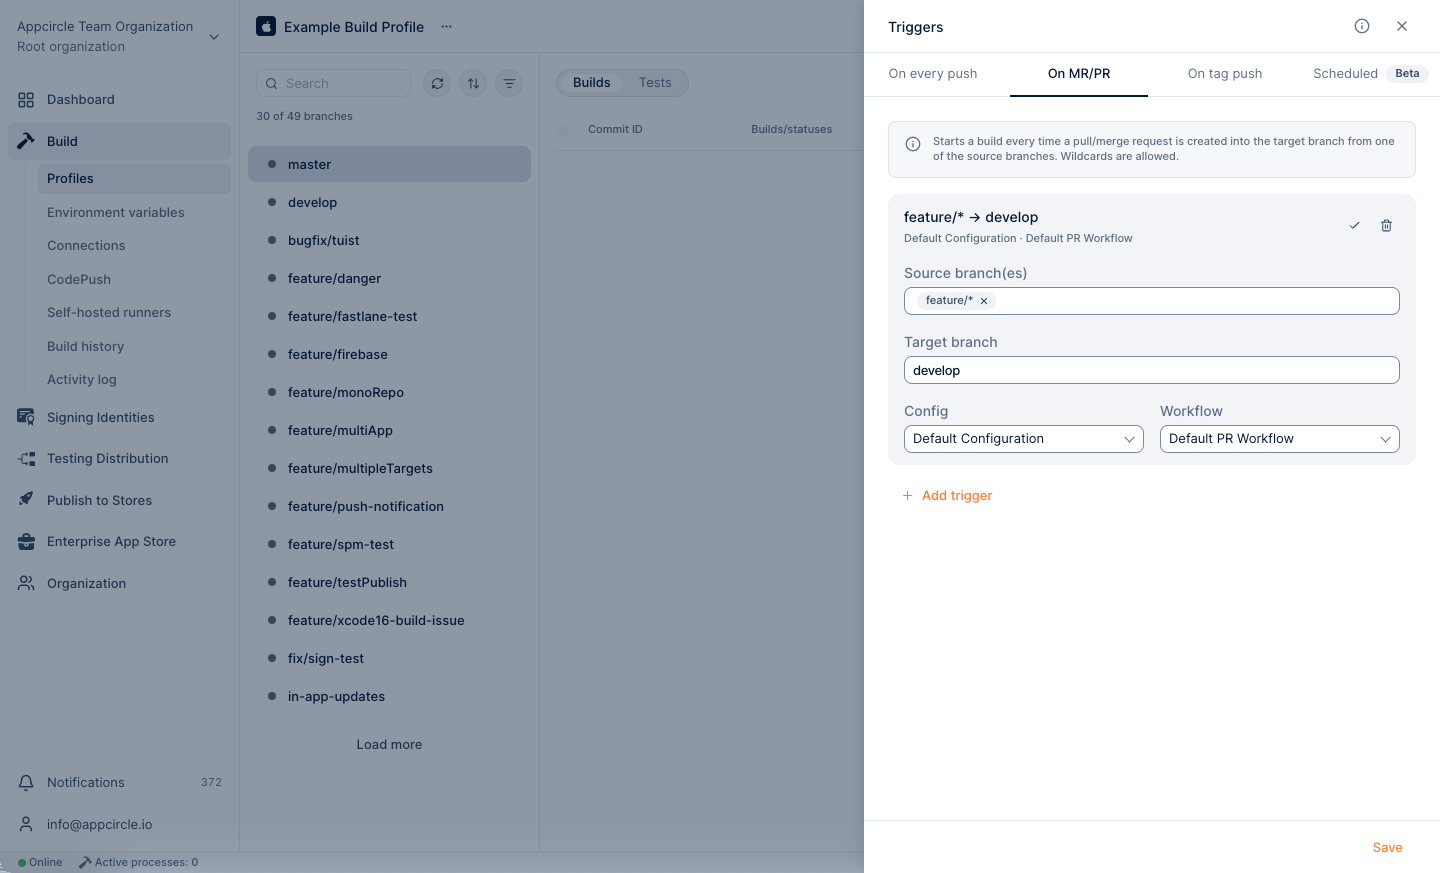
Use * in branch or tag names, for example feature-*. If more than one trigger matches an event, Appcircle starts one build for each matching trigger.
Webhooks
Event-based triggers need a webhook in your Git provider:
- GitHub App, OAuth, and PAT connections: Appcircle tries to create the webhook automatically. This needs webhook permissions for the connected user or token, for example repository admin access on GitHub or the Maintainer role on GitLab. If the user or token does not have these permissions (for example, a read-only PAT), add a manual webhook from the Webhooks dialog.
- SSH and public URL connections: Select Webhooks from the ... menu next to the profile name, copy the webhook URL, and add it to your repository settings.
To see the webhook events that Appcircle received and their payloads, click External webhooks on the Connections page. See External Webhooks.
Commit Message Directives
[skip ci]or[ci skip]in a commit message skips the build.[retry]in a pull/merge request comment runs the build again. For GitHub and Bitbucket, this needs a manual webhook with comment events.
For all trigger options, see Triggers.
Working with Build Results
Binary Actions
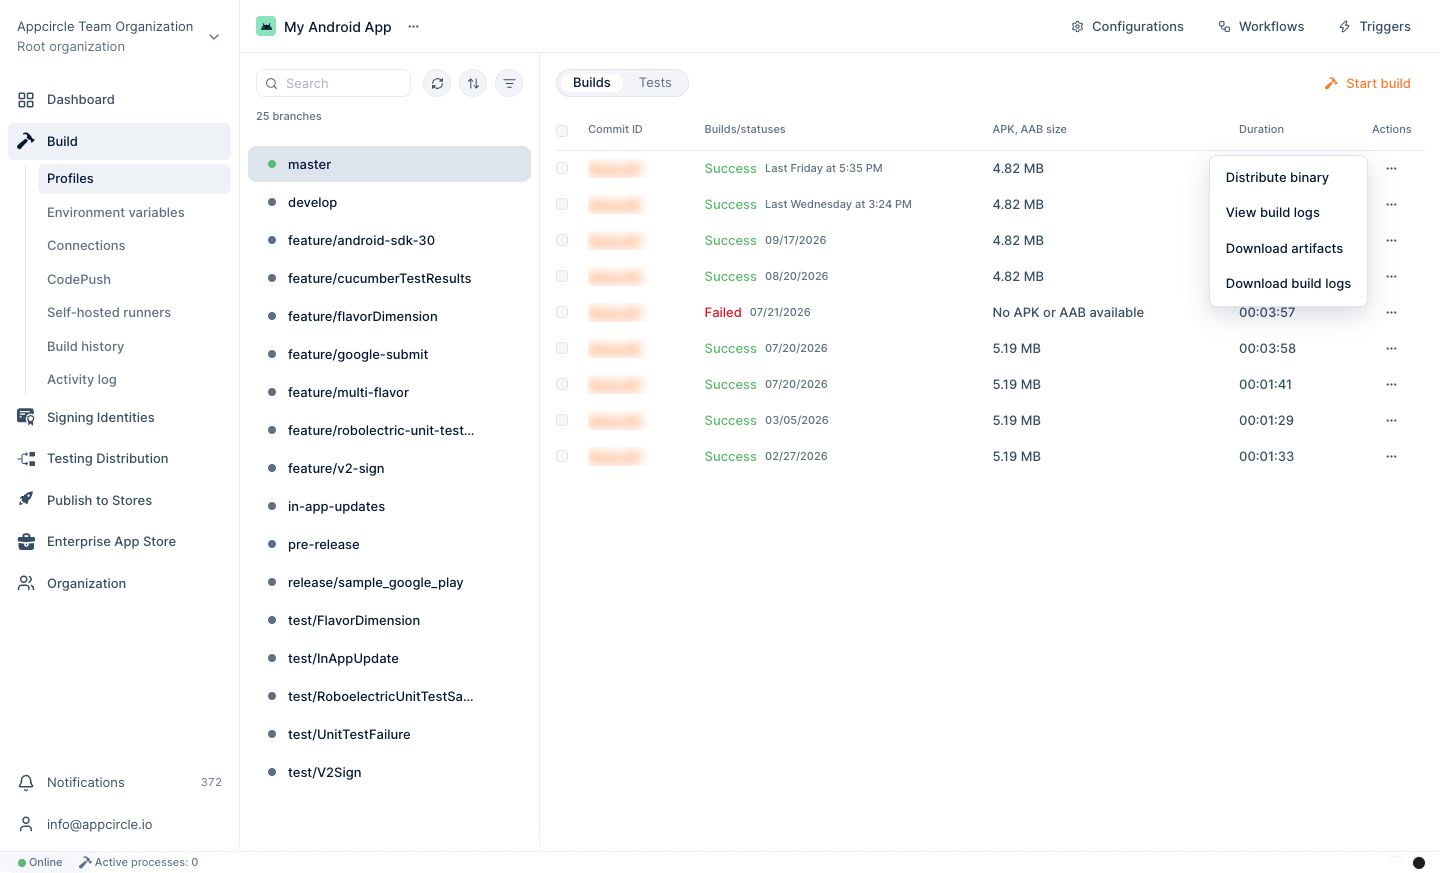
After a build is complete, open the ... menu of the build to:
- Distribute Binary: Send the binary to the modules selected in the configuration's Distribution tab.
- View Build Logs: Read the logs of each step.
- Download Artifacts: Download the
.ipa,.apk,.aab, log, and archive files. - Download Build Logs: Download all logs as one
.txtfile.
Build artifacts use your organization's artifact storage. To delete old artifacts automatically, go to Organization > Artifacts > Retention Period. Enterprise organizations can set a retention period for successful and failed build artifacts, and keep or delete artifacts by file extension, for example .ipa. Starter organizations use the default rule, which deletes artifacts every month. See Retention Period.
For details, see Binary Actions.
Notifications
Notify your team on Slack, Microsoft Teams, or email when a build succeeds or fails. See Notifications.
Tracking and Reporting
Build History
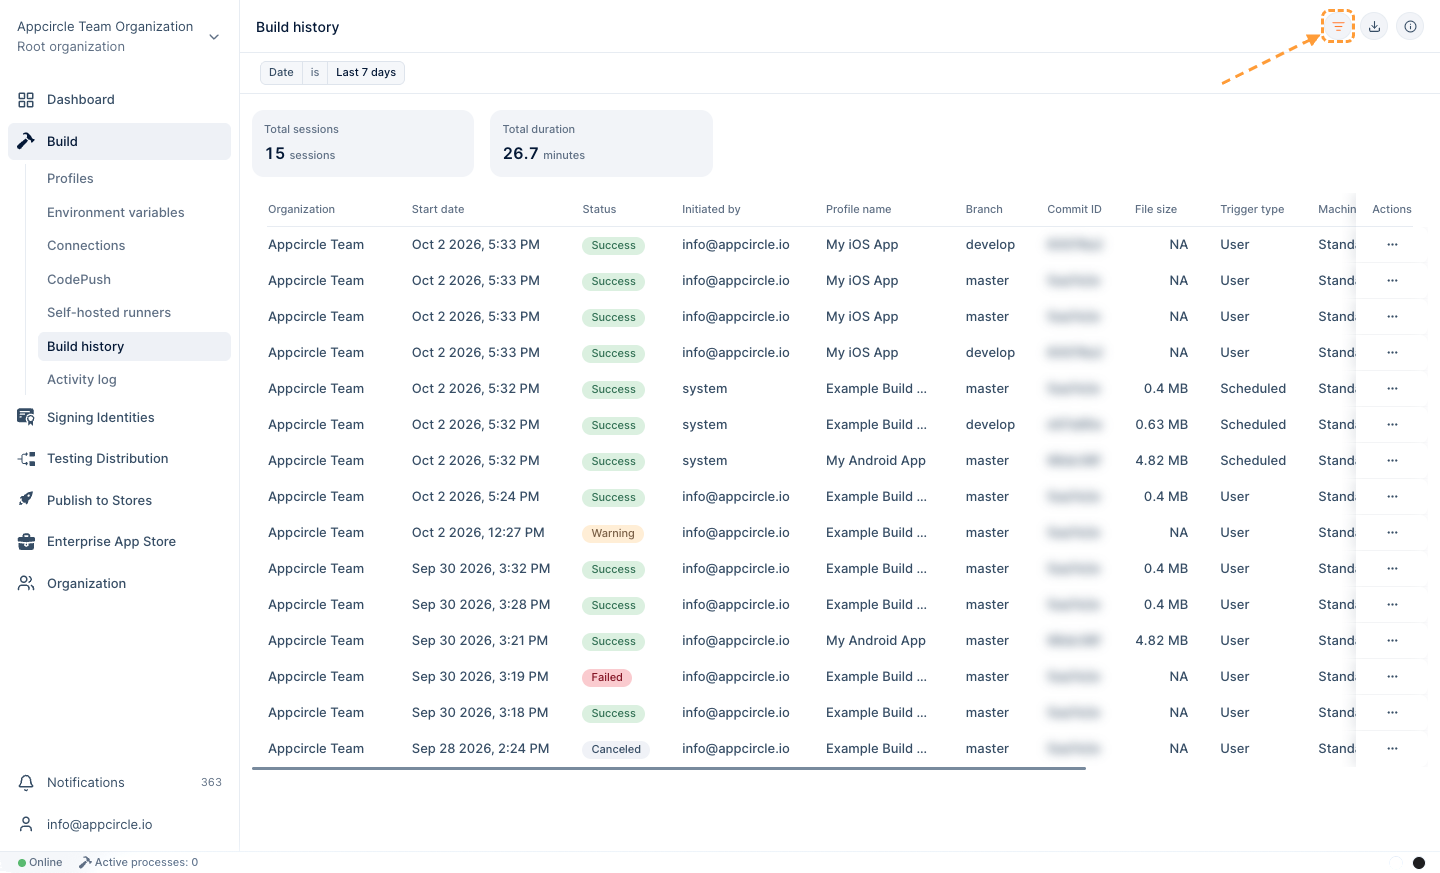
Go to Build > Build History to see all builds started in a selected time period, with their trigger type, status, and duration. Use the filters at the top of the report to select the time period and the organization, and export the results as CSV. See Build History.
Activity Log
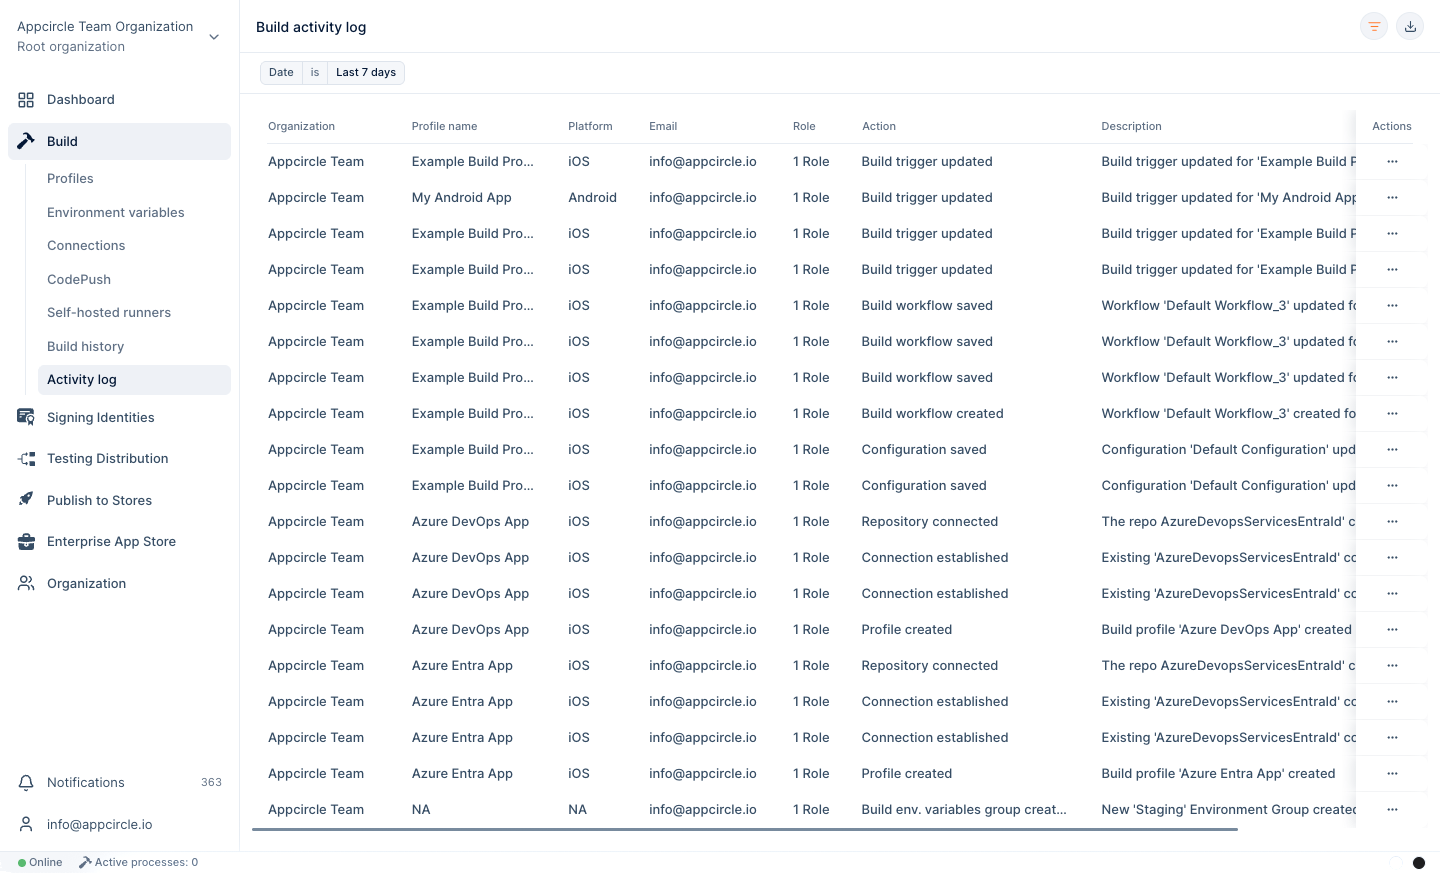
The Build Activity Log records build profile, configuration, workflow, trigger, connection, and environment variable changes for auditing.
Automating the Build Module with Appcircle CLI & API
Start builds and download their results from your existing CI or scripts with the Appcircle CLI.
npm install -g @appcircle/cli
appcircle login personal-access-key --secret "$AC_PERSONAL_ACCESS_KEY"

# Find the build profile and its workflows
appcircle build profile list
appcircle build profile workflow list --profile "My App iOS"

# Start a build, wait for it, and download the logs and artifacts
appcircle build start \
  --profile "My App iOS" \
  --branch "develop" \
  --workflow "Default Push Workflow" \
  --configuration "Default Configuration" \
  --download-logs \
  --download-artifacts \
  --path ./appcircle-output
The download options cannot be used with --no-wait, because the CLI must wait for the build to finish. To send environment variables that apply to a single build, start the build with the Appcircle API. See Starting a Manual Build via API. For direct REST access, see the Appcircle API.
FAQ
Why does my trigger not start a build?
Make sure that the trigger's branch, target branch, or tag pattern matches the event, and that the webhook exists in your Git provider. If Appcircle could not create the webhook because the connected user or token has no webhook permissions, add a manual webhook. Compare the delivery history in your Git provider with the External webhooks page in Appcircle. For response codes and other causes, see the Triggers FAQ.
Why is my iOS build output an .xcarchive instead of an .ipa?
The build was not signed. Select a certificate and a provisioning profile in the configuration's Signing tab, and make sure the signing step is active in the workflow.
Why does my build wait in the queue?
When the number of running builds reaches the concurrency limit of your plan, new builds wait in the queue and start when a slot is free. With an Enterprise license, set a higher Build Priority in the configuration so that critical builds start first. To remove outdated builds from the queue, enable Auto cancel.
Can I use the same configuration in an iOS and an Android build profile?
No. A configuration YAML file is specific to the project type. For example, a file downloaded from an iOS Swift profile cannot be uploaded to an Android React Native profile. Download and upload configurations only between profiles of the same type.
Why don't I see my latest commits or a new branch?
Appcircle updates branches and commits through webhooks. If a webhook event did not arrive, click the refresh button next to the branch list title to fetch the latest branches and commits manually.
Can I build the same branch with different workflows?
Yes. Add one trigger for each workflow with the same branch. For example, build develop with a development workflow on every push, and with a release workflow every night with a scheduled trigger. Each matching trigger starts its own build.
Further Support and Resources
Build Configurations Workflows TriggersNeed help?
Get help from Appcircle's support team, or see how others are using Appcircle by joining our Slack Channel.
