Firebase Test Lab for Android
Appcircle is integrated with the Firebase Test Lab for continuous testing. Your app can be built in Appcircle and directly deployed to the Firebase Test Lab to run automated tests.
Prerequisites
Before running the Firebase Test Lab for Android step, you must complete certain prerequisites, as detailed in the table below:
| Prerequisite Workflow Step | Description |
|---|---|
| Android Build for UI Testing | The Android Build for UI Testing step must be executed to obtain the necessary Android application outputs for processing. |
In addition to the steps you need to run on Appcircle, there are also adjustments you need to make on the Firebase Test Lab side. These adjustments can be made as follows:
1. Setting Up a Firebase Project and a Service Account
To begin with the Firebase Test Lab, you need to have an associated Firebase Project, which is created in the Firebase console. Go to the console, press the Add Project button, and specify the project name and other settings:
.png)
Once your project is created, go to the Google Cloud Platform console to create a service account. Press the Create Service Account button and follow the prompts to create a service account with the Editor role:
.png)
After the service account is created, click on the three-dot (⋮) menu next to the service account and press Create Key.
.png)
Select the key format as JSON and download the created key. This key will be used by Appcircle to deploy apps to the Firebase Test Lab.
.png)
As the final step, go to the Google Developers Console API Library page and find and enable the following APIs:
- Google Cloud Testing API
- Cloud Tool Results API.
.png)
2. Build Workflow Configuration for Firebase Test Lab
To utilize the Firebase Test Lab in your builds, open the workflow editor and add the Firebase Test Lab for Android step after the build or sign steps. If you want to run instrumentation tests, also add the Android Build for UI Testing step before the Firebase Test Lab for Android step.
If you want to run robo tests, it is highly recommended not to add the Android Build for UI Testing step.
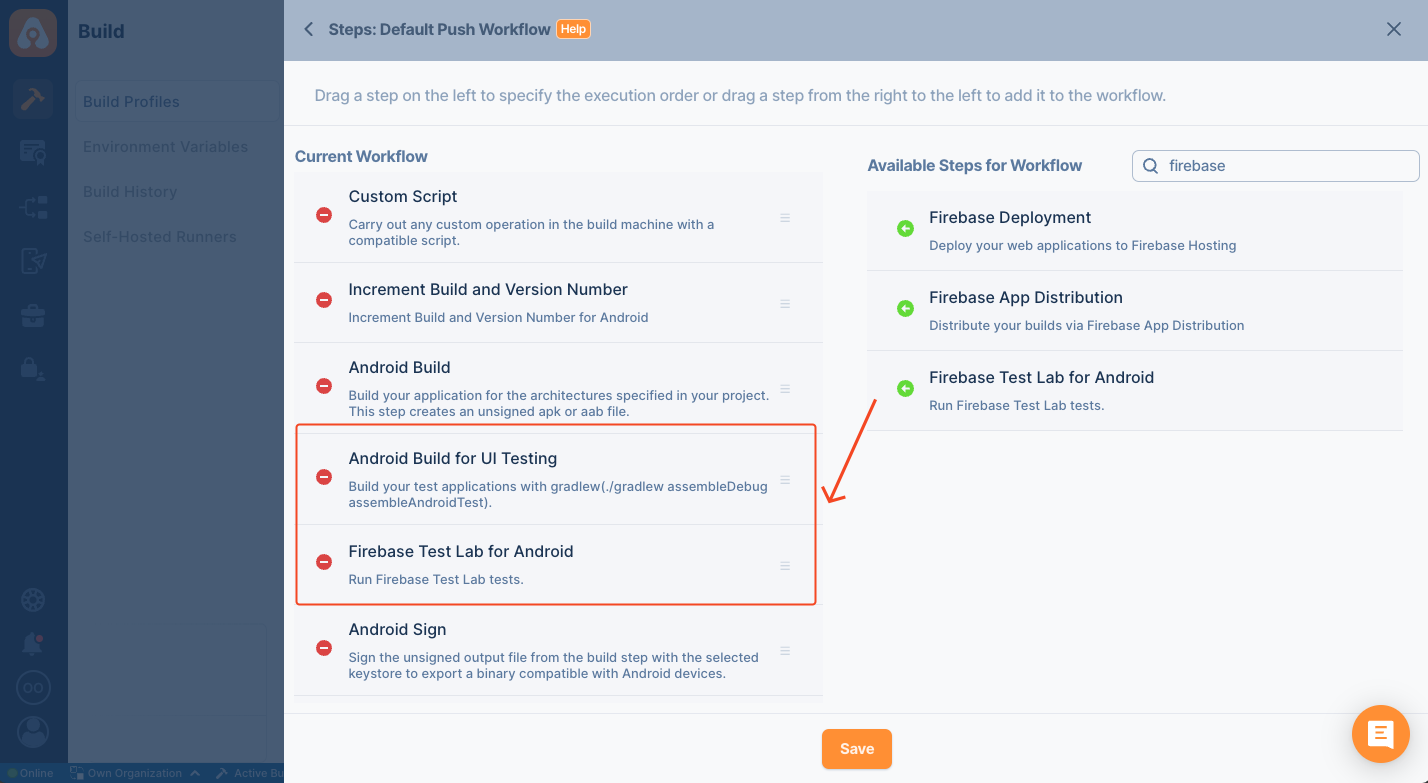
If you want to use the UI Test Build output or the Signed Build output in the Firebase Test Lab, add any of these steps before the Firebase Test Lab for Android step and take note of the output path of these steps. You will need this environment variable for testing configuration.
Input Variables
This step contains some input variable(s). It needs these variable(s) to work. The table below gives explanation for this variable(s).
Please do not use sensitive variables such as Username, Password, API Key, or Personal Access Key directly within the step.
We recommend using Environment Variables groups for such sensitive variables.
| Variable Name | Description | Status |
|---|---|---|
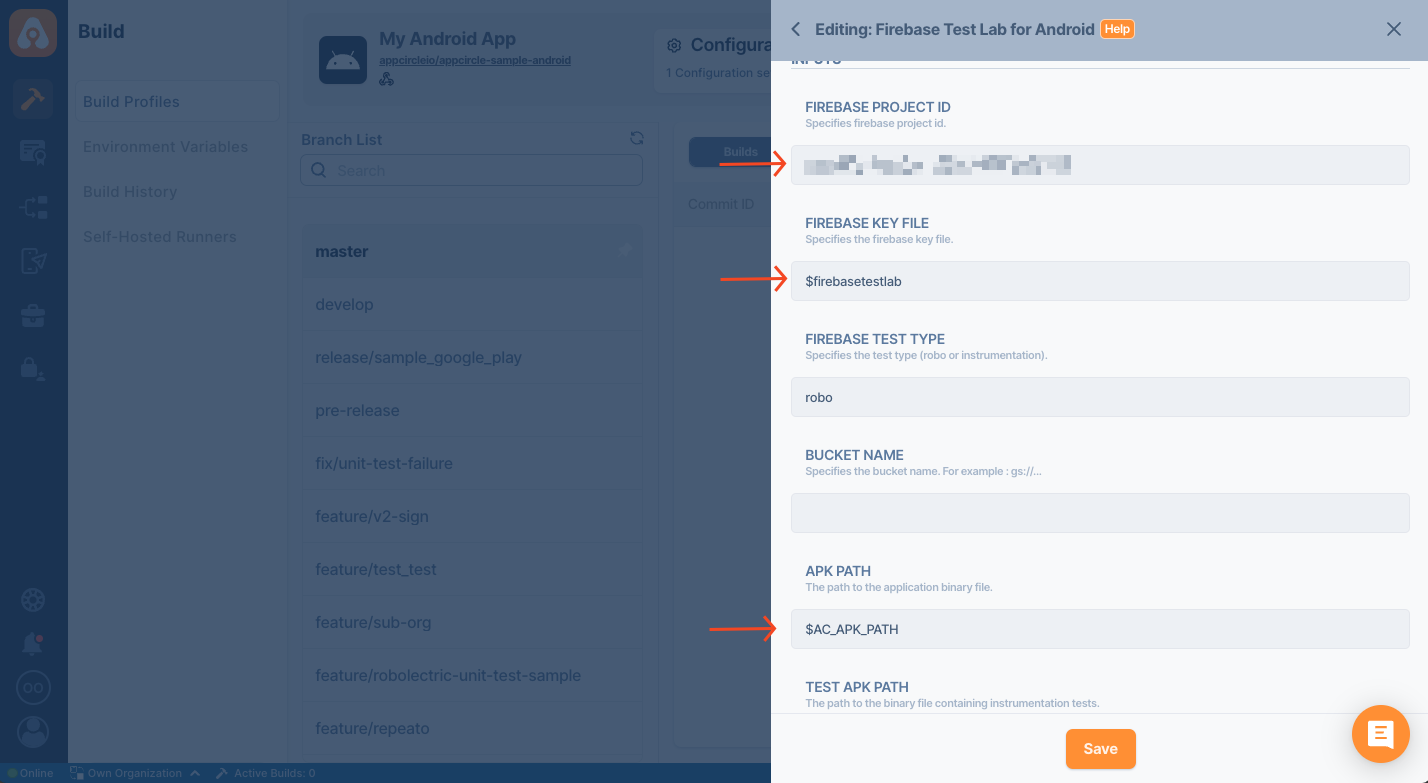
$AC_FIREBASE_PROJECT_ID | Specifies the name of the Firebase project created. | Optional |
$AC_FIREBASE_KEY_FILE | Specifies the name of the key file uploaded as an environment variable ($ is required before the key name). | Optional |
$AC_FIREBASE_TEST_TYPE | Specifies the test type. robo and instrumentation are supported. | Required |
$AC_FIREBASE_BUCKET_NAME | Specifies the bucket name to store the test results in a Google Cloud Storage bucket. | Optional |
$AC_APK_PATH | The default value is the APK produced by the Android Build or Android Build for UI Testing step. You can specify a different environment variable to use the APK files produced in other steps. | Optional |
$AC_TEST_APK_PATH | Specify the environment variable as the path of the APK build for UI testing. The default value is the APK produced by the Android Build for UI Testing step. | Optional |
$AC_FIREBASE_EXTRA_ARGS | Firebase Test Extra Arguments (e.g., --timeout=3m). For further configuration of the test run, please refer to the Google Cloud CLI documentation. | Optional |
Once everything is set up, press save to save your step configuration. Then you can configure and run your build just like any other app.
Output Variables
This step does not produce any output as a variable. However, after your build is done, you can view the results of the Firebase Test Lab for Android step in the build logs.
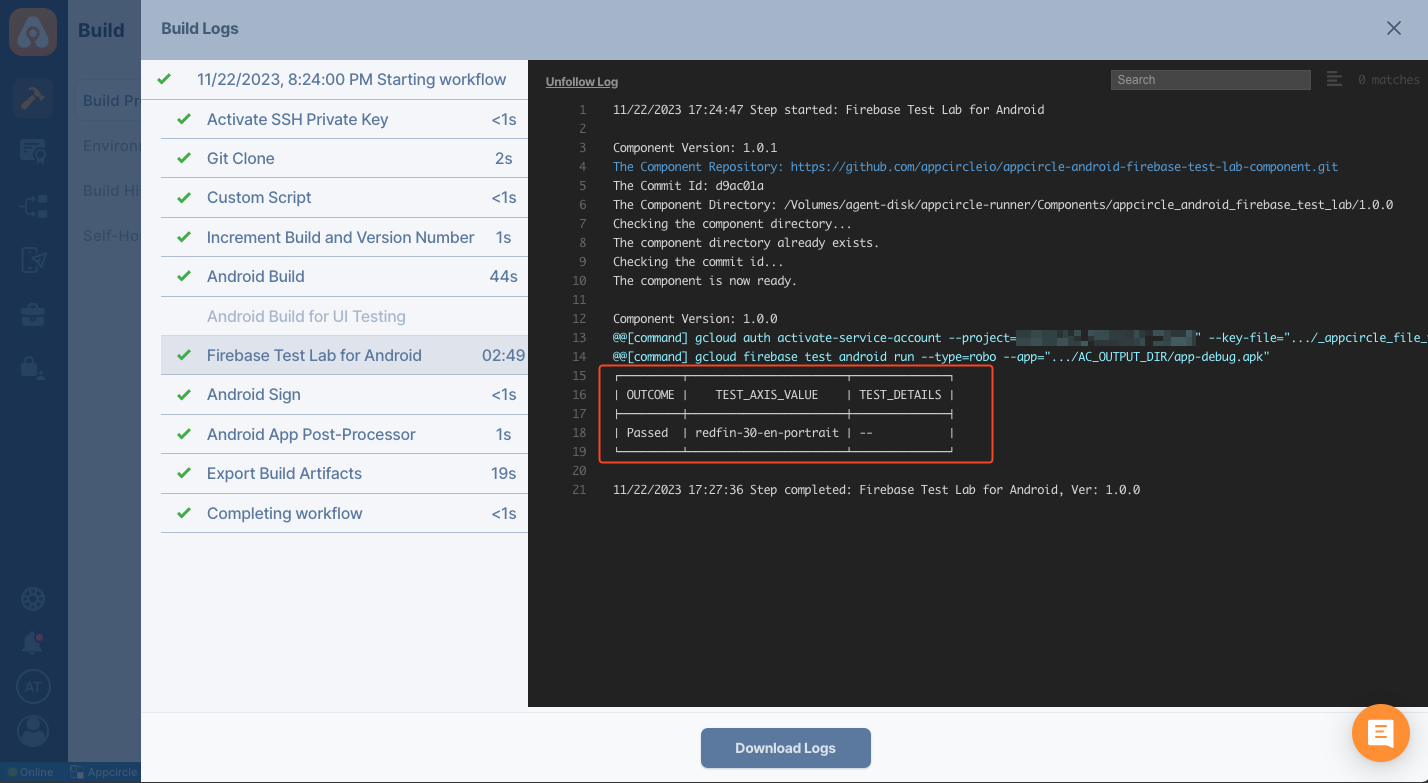
The full details of the tests are accessible in the Firebase console and in your Google Cloud Storage bucket for analysis.
.png)
To access the source code of this component, please use the following link: