Cache Push
Every single build at Appcircle runs in a clean state. It means that all files and folders that are not versioned in the Git repository are lost when the build pipeline is completed. For example, install dependencies or build artifacts. If you need to keep those files and folders, you can use the Appcircle Cache Push and Cache Pull components.
Please ensure you are using version 1.0.4 or later of the Cache Push component. Earlier versions are no longer compatible with Appcircle.
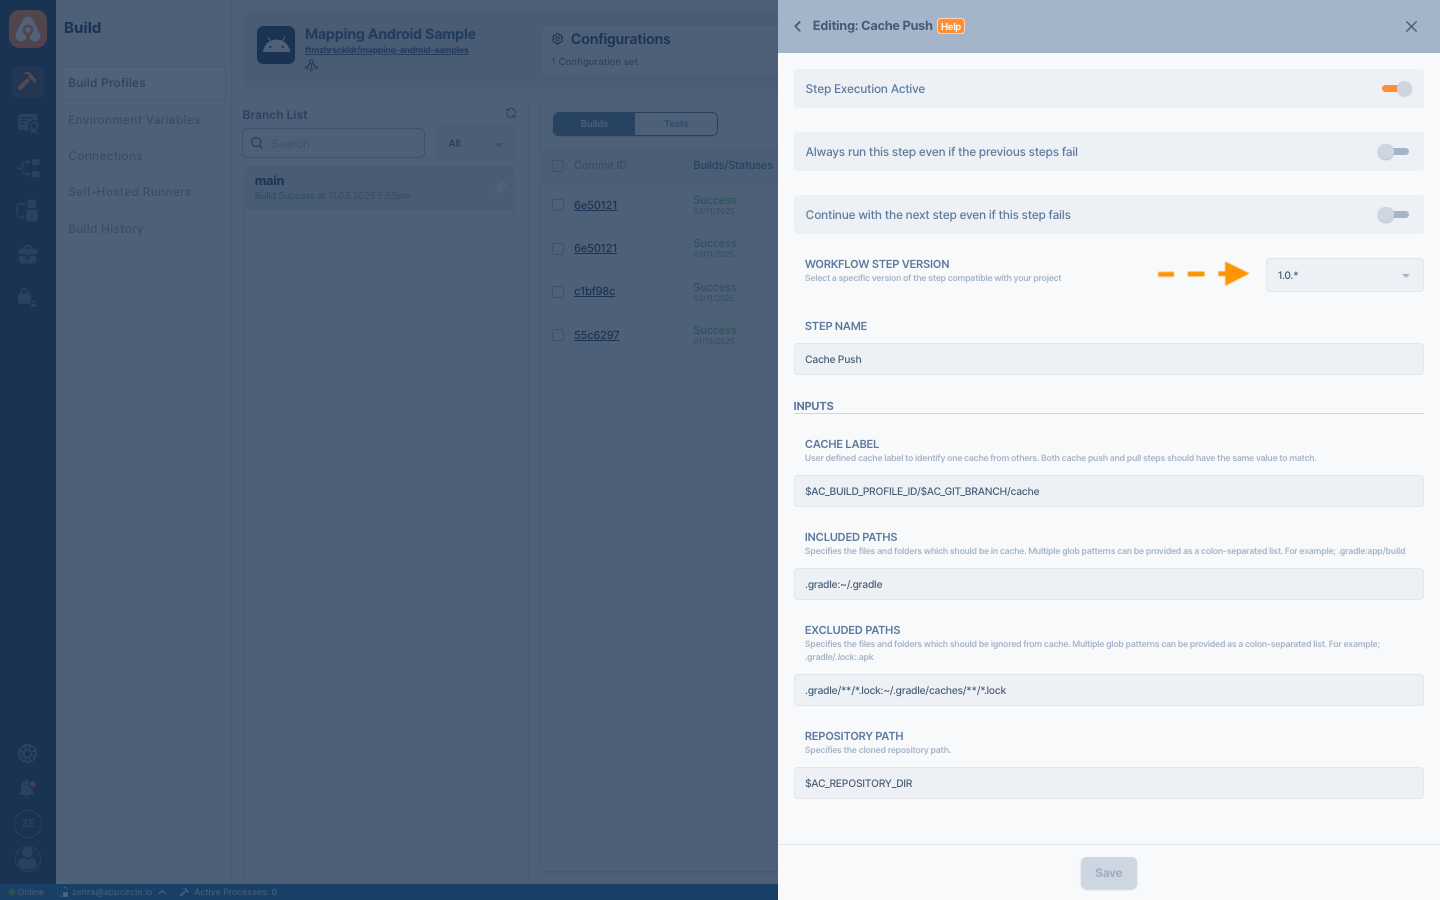
To make sure you always get the latest updates, it is recommended to use the latest wildcard version (e.g., 1.0.*):

Previously, the Cache Pull/Push steps used branch-based caching by default. This behavior has been deprecated, and branches now share the same cache by default.
If you prefer to continue using branch-based caching, you can manually add branch information to your cache label. For further information, please check out the following documentation:
With cache, you can persist any resource that is ignored by Git. So you can transfer files and folders between build pipelines. Sometimes it may speed up your build, or it may help if you have reliability issues with the original download location for dependencies. But keep in mind that the cache is uploaded to or downloaded from a remote location. It may help you in some cases, but it's not a guaranteed way to speed up builds. You should try and see the actual results of your project.
The cache is stored as a single archive file. Cache Push and Cache Pull components work in coordination on the same cache file defined with a label. Cache labeling helps you organize your caches. With custom labels, you can create separate cache chunks, share caches between build profiles, or isolate them per branch. For further information, please check out the following documentation:
Cache Push component enforces cache storage limits based on license tiers:
- Starter: 5 GB
- Developer: 10 GB
- Professional: 20 GB
- Enterprise: 30 GB
- Self-hosted: Customizable (see documentation)
These limits apply per build. Exceeding the limit will result in a failed cache upload.
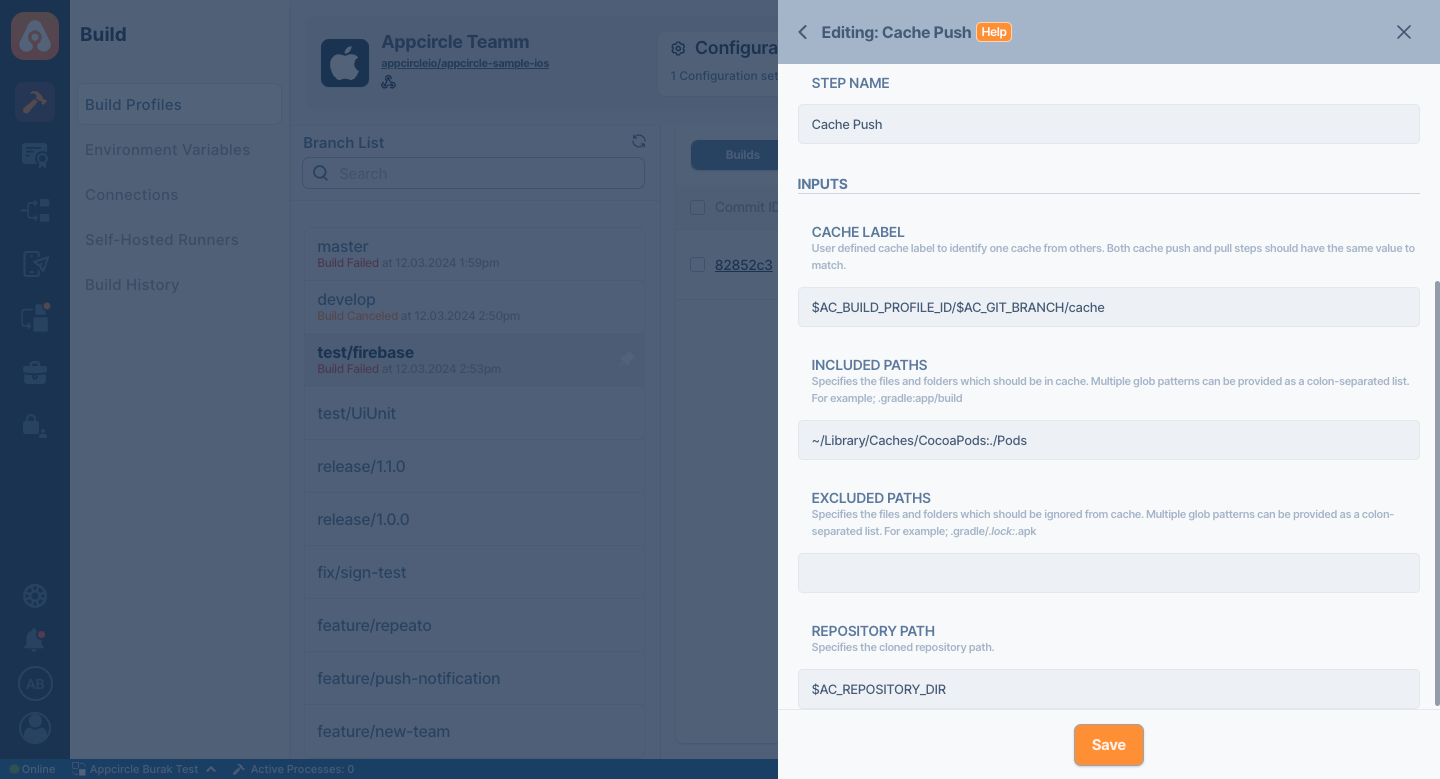
When you drag and drop the Cache Push component into your workflow, it comes with pre-defined values according to your project type. For example, in the case of Android projects, it comes with pre-defined Gradle cache paths, which should prove useful for most Android apps.
The build token ID, generated at the start of the build, expires after 3 hours. If the Cache Pull or Cache Push step starts beyond this time, caching will fail.
This may lead to a 404 Error in the Cache Pull step during the next build if the Cache Push step is not completed successfully.
If you need more paths to cache or need to change paths according to your project, you can customize included and excluded paths as you wish. All path updates will be reflected in the archived cache file on your next build.
You cannot delete a specific cache file from the UI, but if you have a problem with a cache file and need a fresh one, you can change your cache label to a new one to go on with a clean cache.
The system automatically cleans unreachable and obsolete cache files periodically. For this reason, it's not guaranteed to reach a previously used cache file by using the previous cache label in build. Also, it’s a good idea to build your workflow in such a way that your build won’t fail if the cache can’t be accessed.
Prerequisites
Before running the Cache Push step, you must complete certain prerequisites, as detailed in the table below:
| Prerequisite Workflow Step | Description |
|---|---|
| Git Clone | If the folders to be cached are in the repo directory, the Git Clone step must be used before. This step will generate the $AC_REPOSITORY_DIR path. |
Keep in mind that included paths and the Cache Push step's workflow order are closely related to each other. For example, if you include a path from a repository and you place the Cache Push step before the Git Clone step, Cache Push won't find that path since it's not Git cloned yet. Although that's not a fatal error for Cache Push, it will inform you about unreachable paths on build logs. You can review and resolve those kinds of issues from build logs.
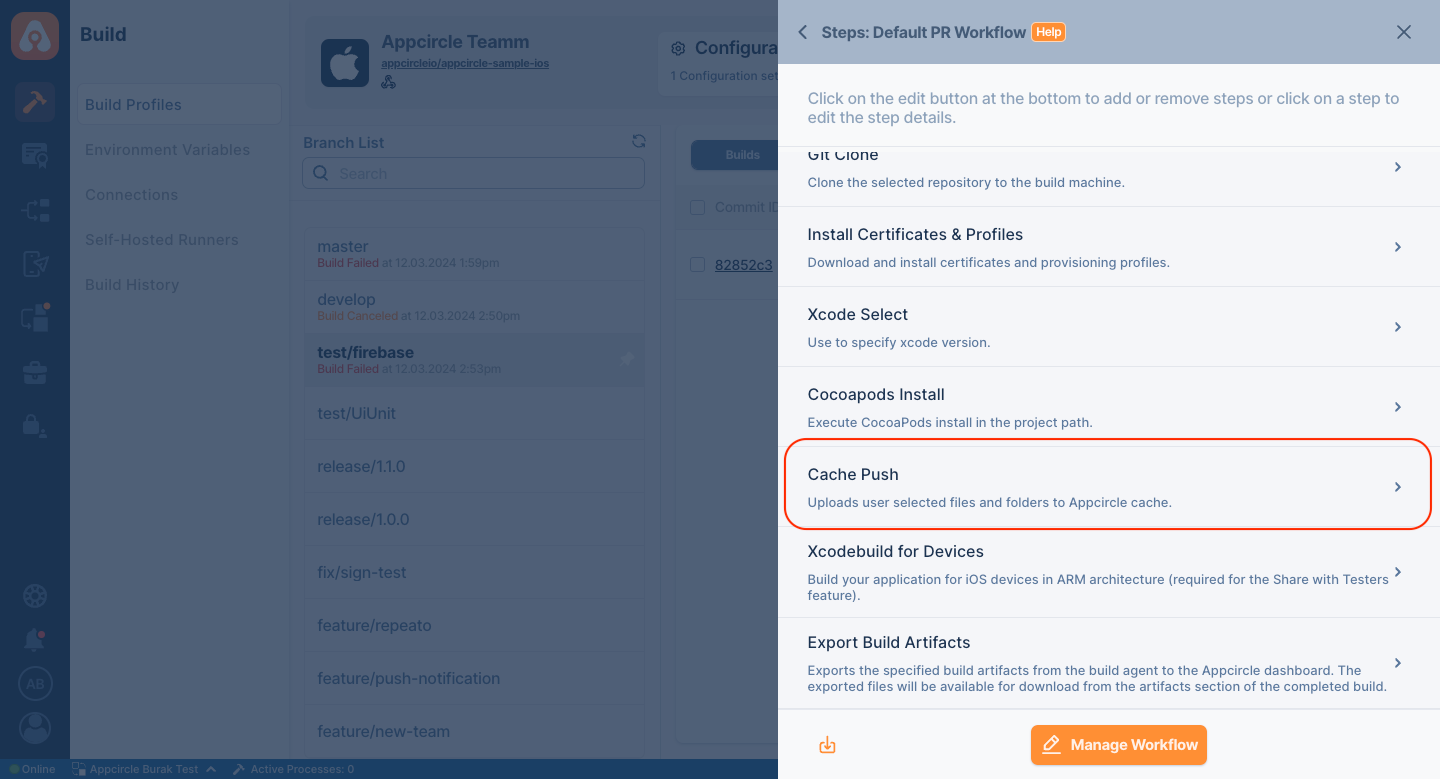
The other important prerequisite for this component to work is that it must be used after the step in which the generated artifact of the step is to be cached. For example, in the screen shot, to cache dependencies, the Cache Push step is used after the CocoaPods Install step.

Input Variables
This step contains some input variable(s). It needs these variable(s) to work. The table below gives explanation for this variable(s).

| Variable Name | Description | Status |
|---|---|---|
$AC_CACHE_LABEL | User defined cache label to identify one cache from others. Both Cache Push and Cache Pull steps should have the same value to match. | Required |
$AC_CACHE_INCLUDED_PATHS | Specifies the files and folders that should be in the cache. Multiple glob patterns can be provided as a colon-separated list. For example; .gradle:app/build or Pods:Podfile.lock. | Required |
$AC_CACHE_EXCLUDED_PATHS | Specifies the files and folders that should be ignored from the cache. Multiple glob patterns can be provided as a colon-separated list. For example, .gradle/*.lock:*.apk. | Optional |
$AC_REPOSITORY_DIR | Specifies the cloned repository path. This path will be generated after running the Git Clone step. | Optional |
Cache Push uses a pattern in order to select files and folders. Although the pattern is not a RegExp, it's closer to a shell glob. For example, ~/Library/Caches/CocoaPods and Pods will select the CocoaPods folder from home and the repository direction as a whole. Or for an Android project, you can cache the .gradle folder with ~/.gradle include path and exclude all .lock files from there with ~/.gradle/**/*.lock exclude path. Patterns that can be used in both included and excluded paths are explained in detail here.
Output Variables
You cannot reach the cache archive file directly by yourself. But you can see cache file updates and track changes to cache at the end of the build pipeline from 'Download Artifacts > ac_cache.zip'. Also, build logs have some useful information about the cache mechanism and how included and excluded paths are processed. You can see the produced cache file size from the build logs. (The size of the cache file affects upload and download durations.)
To view the generated artifacts on the Download Artifacts page, please ensure that the Export Build Artifacts step is included in the workflow after this step.
To access the source code of this component, please use the following link: